Irresistible Espresso Cake Filling
Have you ever found yourself in the midst of baking a cake but unsure about how to elevate it to the next level? Imagine taking a simple cake and transforming it into a delightful masterpiece with a rich, creamy filling that carries the bold flavor of espresso.
That’s precisely what the Espresso Cake Filling brings to your kitchen. This creamy concoction is not just an addition; it’s a revelation that will redefine your dessert experience. The stunning combination of strong coffee and smooth whipped cream creates a unique contrast that your taste buds will crave.
Why You Will Love This Recipe
- Rich Flavor: A deep, aromatic coffee taste that beautifully complements sweet desserts, offering a sophisticated twist.
- Simple Process: Easy-to-follow steps make this gourmet-style filling accessible even for beginner bakers, requiring minimal specialized equipment.
- Versatile Usage: Perfect for layer cakes, cupcakes, as a pastry cream filling, or even as a decadent dip for biscotti and cookies.
- Customizable: You can easily adjust the sweetness and intensity of the espresso to perfectly suit your personal preferences and the overall dessert.
- Impressive Presentation: The elegant combination of creamy custard and airy whipped cream creates a visually appealing filling that elevates any baked good.
- Crowd-Pleaser: This filling appeals to a wide range of palates, especially for those who enjoy the nuanced flavor of coffee in their desserts, making it a guaranteed hit at any gathering.
Ingredients You Need
The quality of your ingredients plays a pivotal role in achieving the perfect Espresso Cake Filling. Opting for freshly brewed, high-quality espresso or strong coffee will impart the most authentic and satisfying coffee notes into your filling. Similarly, using full-fat heavy cream ensures a luscious, stable, and rich texture that defines this decadent treat. Ensuring all your components are at the correct temperature before combining them is also key to a smooth and well-emulsified final product.
Espresso Cake Filling

A rich, creamy filling infused with espresso, perfect for cakes and cupcakes, offering a balance between bold coffee flavor and smooth creaminess.
- 1 cup espresso or strong coffee, cooled
- 2 cups heavy cream
- 1/2 cup sugar
- 4 egg yolks
- 2 tablespoons cornstarch
- 1 teaspoon vanilla extract
- 1 pinch salt
- 1Gather all ingredients together, making sure the espresso or strong coffee is brewed and cooled.
- 2In a medium-sized saucepan, heat the brewed espresso over medium heat until it’s just below boiling.
- 3In a separate bowl, whisk together the egg yolks, sugar, cornstarch, and pinch of salt.
- 4Slowly pour the hot espresso into the egg mixture while constantly whisking to temper the eggs.
- 5Return the mixture to the saucepan over medium heat and stir constantly until it thickens and bubbles gently (about 5-7 minutes). The final texture should be thick enough to coat the back of a spoon.
- 6Remove from heat and stir in vanilla extract.
- 7Let the custard cool for about 15 minutes before transferring it to a bowl and covering it with plastic wrap.
- 8Chill in the refrigerator for at least an hour or until set.
- 9Whip the heavy cream in a separate bowl until soft peaks form.
- 10Once the custard is chilled, gently fold it into the whipped cream until fully combined.
- 11Your Espresso Cake Filling is ready to be used. Fill cakes or cupcakes as desired.
Keywords: Cake Filling, coffee dessert, Dessert Recipes, Espresso Cake Filling, Whipped Cream Filling
- espresso or strong coffee, cooled: Use freshly brewed, high-quality espresso or very strong coffee for the best flavor.
- heavy cream: Full-fat cream is essential for achieving a rich and stable whipped texture.
- sugar: Granulated sugar sweetens the filling; adjust to your personal preference.
- egg yolks: These provide richness and help thicken the custard base.
- cornstarch: Acts as a primary thickening agent, ensuring a smooth, pudding-like consistency.
- vanilla extract: Enhances the other flavors and adds a classic dessert aroma.
- salt: A small pinch balances the sweetness and deepens the overall flavor profile.
The precise quantities for each ingredient are detailed within the provided recipe card for your convenience.
Variations
This Espresso Cake Filling is wonderfully adaptable, allowing for creative twists that cater to different tastes and dietary needs. One popular variation is the Chocolate Espresso Filling, where a measure of high-quality melted dark chocolate or cocoa powder is incorporated into the custard base as it cooks. This addition deepens the richness and creates a harmonious mocha-like flavor that is profoundly satisfying.
For those following a low-carb lifestyle, a Keto-friendly Espresso Filling can be achieved by substituting the granulated sugar with a suitable sugar-free alternative, such as erythritol or xylitol, ensuring it measures cup-for-cup like sugar. Heavy cream can be retained, or for a lighter option, a blend of heavy cream and unsweetened almond milk can be used. The espresso remains crucial for that signature flavor, and vanilla extract still plays its role in enhancing the overall profile. This modification allows for indulgence without straying from a low-carbohydrate eating plan.
Furthermore, a Vegan Espresso Cake Filling opens the door to plant-based deliciousness. This version typically utilizes full-fat coconut cream or a high-quality vegan heavy cream alternative. The egg yolks can be replaced with a blend of cornstarch and a small amount of silken tofu for richness and body, or simply rely more heavily on cornstarch for thickening. Unsweetened plant-based milk, like almond or oat milk, can be used to dilute the espresso slightly if needed, and vegan-friendly sweeteners such as maple syrup or agave nectar can replace traditional sugar. These adjustments ensure that everyone can enjoy the delightful taste of an espresso-infused dessert.
How to Prepare Espresso Cake Filling
Step 1: Gather and Prepare Your Ingredients
The foundation of any successful baking endeavor lies in meticulous preparation. Before you even think about turning on the stove, take the time to gather every single ingredient required for your Espresso Cake Filling. This includes brewing your espresso or strong coffee and allowing it to cool completely to room temperature, or even chilled. Warm liquid can negatively impact the delicate balance of the custard.
Precisely measure out your heavy cream, sugar, egg yolks, cornstarch, vanilla extract, and that crucial pinch of salt. Having everything measured and ready in separate bowls or containers, a technique often referred to as “mise en place” in professional kitchens, will make the subsequent steps flow seamlessly. This eliminates any last-minute scrambling and reduces the risk of errors, ensuring a smooth and enjoyable cooking experience. Remember, a well-prepared station is the first step towards a perfectly executed dish.
Step 2: Gently Heat the Espresso
In a medium-sized saucepan, carefully pour in your cooled, freshly brewed espresso or strong coffee. Place this saucepan over medium heat on your stovetop. The objective here is not to boil the coffee vigorously, but rather to bring it to a gentle simmer, where tiny bubbles just begin to form around the edges and steam begins to rise noticeably. This process concentrates the coffee flavor, making it more potent and robust, which is essential for the filling to have a discernible espresso essence.
Maintaining a consistent medium heat is vital. Overheating the espresso at this stage could lead to a bitter taste developing, which is undesirable for a dessert filling. You want to coax out the deep, aromatic qualities of the coffee without introducing any harshness. Watch for the visual cues: a gentle steaming and the occasional whisper of a bubble. This warm espresso will be crucial in the tempering process that follows, ensuring the egg yolks are gently warmed before being fully incorporated.
Step 3: Create the Rich Egg Base
While your espresso is gently warming, shift your attention to a separate, medium-sized mixing bowl. Into this bowl, carefully add your egg yolks, granulated sugar, cornstarch, and the pinch of salt. Begin whisking these ingredients together vigorously. Initially, the mixture will appear dense and somewhat coarse due to the sugar and cornstarch.
Continue whisking with persistent energy. You’ll observe a remarkable transformation as the mixture starts to become lighter in color, moving from a deep yellow towards a pale, straw-like hue. Simultaneously, its texture will evolve, becoming smoother and developing a glossy sheen. This stage is critically important; it ensures that the sugar and cornstarch are well dispersed among the egg yolks, creating a homogenous base that will contribute to the filling’s final silken texture and prevent any graininess.
Step 4: The Art of Tempering the Egg Yolks
This step is arguably the most crucial for achieving a smooth, lump-free custard, and it requires your full attention. Once your espresso in the saucepan has reached the desired steaming point (just below a boil), carefully remove it from the heat. Now, with one hand holding the saucepan and the other holding your whisk, begin to slowly and steadily drizzle the hot espresso into the egg yolk and sugar mixture in the mixing bowl.
It is absolutely imperative that you whisk the egg mixture continuously and vigorously throughout this entire drizzling process. This gradual introduction of heat to the egg yolks is called tempering. It gently raises their temperature without cooking them into scrambled eggs. The constant whisking ensures that the heat is distributed evenly, preventing any localized cooking and maintaining the smooth, liquid consistency of your base. If you stop whisking, or pour too quickly, you risk creating undesirable cooked egg bits.
Step 5: Thickening the Custard to Perfection
Once all the hot espresso has been incorporated into the egg mixture, resulting in a smooth, homogenous liquid, carefully pour this combined mixture back into the original saucepan. Place the saucepan back onto the stovetop over medium heat. Now, the real magic of custard making begins, but it requires your constant vigilance and effort. Using a heatproof spatula or a whisk, stir the mixture continuously and without pause.
You will begin to notice the mixture gradually becoming thicker as it heats up. Keep stirring, ensuring you scrape the bottom and sides of the pan to prevent any sticking or scorching, which can ruin the texture and flavor. Continue this process for approximately 5 to 7 minutes. The custard is ready when it has thickened considerably and coats the back of your spatula in a smooth, opaque layer. When you draw a line through the custard on the spatula with your finger, the line should hold its shape without immediately running back together.
Step 6: Infusing with Vanilla and Initial Cooling
As soon as the custard has reached the perfect thickness and consistency, immediately remove the saucepan from the heat. This is essential to stop the cooking process and prevent the custard from becoming too thick or developing a grainy texture. Now, add the pure vanilla extract directly into the warm custard. Stir it in gently but thoroughly, ensuring it’s evenly distributed throughout the mixture. The aroma that arises at this point is truly wonderful, blending the deep notes of espresso with the sweet fragrance of vanilla.
Allow the custard to rest in the saucepan for about 15 minutes. This initial cooling period is important to let the custard settle and begin its journey towards becoming a stable filling. Do not cover it at this stage, as trapped steam can create condensation that might affect the final texture. Just let it sit, releasing some of its heat gently before you proceed to the next crucial chilling step.
Step 7: Chilling the Custard Base
After the initial 15-minute cooling period in the saucepan, carefully transfer the warm custard into a clean, medium-sized mixing bowl. To prevent a skin from forming on the surface of the custard as it cools, which can create an unappealing texture, cover the surface of the custard directly with a piece of plastic wrap. Press the plastic wrap firmly against the custard so that there are no air gaps between them. This creates a barrier against the air, ensuring a perfectly smooth top surface.
Place the covered bowl into the refrigerator. Allow the custard to chill thoroughly for a minimum of one hour, or preferably longer, until it is completely cold and has set to a firm, pudding-like consistency. The chilling process is vital for the custard to firm up properly, which is necessary before it can be combined with whipped cream. A well-chilled custard is the backbone of a stable and luxurious cake filling.
Step 8: Whipping the Cream to Soft Peaks
While the custard is diligently chilling in the refrigerator, prepare to whip your heavy cream. In a separate, clean, and preferably chilled mixing bowl, pour in the measured quantity of cold heavy cream. Using either a hand mixer or the whisk attachment of a stand mixer, begin to whip the cream on medium speed.
Continue whipping until the cream begins to thicken and starts to hold soft peaks. This means that when you lift the beaters out of the cream, the cream will form a peak that gently curls over on itself, rather than standing stiffly upright. It is crucial not to over-whip the cream at this stage. Over-whipped cream can become grainy and may even start to turn into butter, which would compromise the light and airy texture of your final filling. Aim for a texture that is creamy, luscious, and just beginning to show its structure.
Step 9: The Gentle Fusion of Custard and Cream
Once your custard base is thoroughly chilled and has set to the desired firmness, and your heavy cream has been whipped to soft peaks, it’s time for the final, delicate combination. Carefully remove the plastic wrap from the chilled custard. You will notice it is now thick and holds its shape well.
Gently spoon about a third of the whipped cream into the bowl with the chilled custard. Using a rubber spatula, fold this portion of whipped cream into the custard very gently. The goal here is to lighten the custard’s texture without deflating the air from the whipped cream. Once this first addition is mostly incorporated, add the remaining whipped cream to the bowl. Continue to fold carefully until the two components are just combined and you no longer see streaks of custard or cream. You want the filling to be homogenous, light, and airy, not dense or heavy.
Step 10: Your Espresso Cake Filling is Ready!
Congratulations! You have successfully created a luscious and flavorful Espresso Cake Filling. The mixture should now be a beautiful, creamy consistency, holding its shape yet remaining wonderfully light and spoonable. The rich aroma of espresso combined with the subtle sweetness and vanilla notes will be delightfully enticing.
This versatile filling is now ready for its starring role in your dessert creations. Whether you plan to use it to fill the layers of a magnificent cake, pipe elegant swirls onto cupcakes, or even spoon it into individual dessert glasses for a simple yet sophisticated treat, it is prepared to impress. Ensure you handle it gently to maintain its airy texture as you incorporate it into your baked goods.
Pro Tips for Espresso Cake Filling
Tip: Use High-Quality Coffee for Maximum Flavor. The intensity and quality of your espresso or strong coffee directly translate into the final flavor of your cake filling. Opt for freshly ground beans and brew your coffee just before you plan to use it for the most vibrant taste. Avoid using instant coffee, as it often lacks the depth and complexity needed for a truly exceptional dessert filling.
Tip: Don’t Overheat the Custard. Cooking the custard over excessively high heat is a common pitfall that can lead to a grainy or even curdled texture. Always use medium heat and stir constantly, ensuring the mixture heats gradually. Patience is key here; a slowly cooked custard is a smooth custard.
Tip: Tempering is Non-Negotiable. Never skip the tempering step when adding hot liquid to egg yolks. Gradually introducing the hot espresso while whisking continuously prevents the eggs from scrambling, which would ruin the smooth texture of your filling. This step ensures a silky-smooth, professional-quality result every time.
Tip: Chill Thoroughly Before Combining. The custard base must be completely cold and set before being folded into the whipped cream. If the custard is still warm, it will melt the whipped cream, resulting in a runny and unstable filling. Allow ample time for chilling in the refrigerator.
Tip: Fold, Don’t Stir, the Whipped Cream. When combining the chilled custard with the whipped cream, use a gentle folding motion with a spatula. This technique incorporates the two mixtures without expelling the air from the whipped cream, preserving the light and airy texture that makes this filling so delightful. Aggressive stirring will deflate the cream, leading to a denser filling.
Serving Suggestions for Espresso Cake Filling
Decoration
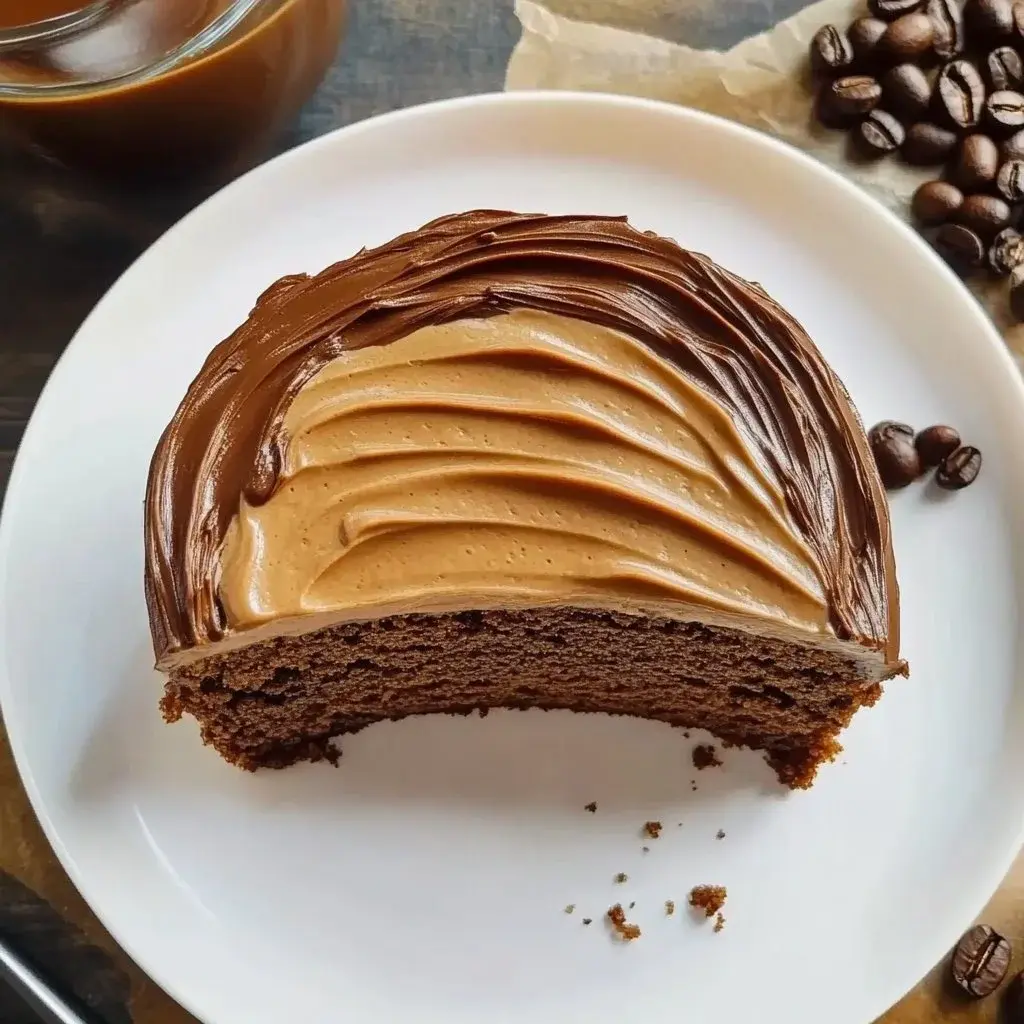
The Espresso Cake Filling itself is beautiful, with its creamy, light brown hue. You can use it as a luscious filling between cake layers, offering a delightful surprise with every slice. For cupcakes, pipe generous swirls of the filling on top, creating an elegant and inviting presentation that hints at the coffee goodness within. A simple dusting of cocoa powder or finely grated dark chocolate over the filling adds a touch of sophistication and visual contrast.
Consider using a star-shaped piping tip to create decorative rosettes or borders on cakes and cupcakes. This adds texture and visual interest, making your desserts look professionally decorated. For a more rustic charm, a simple spread of the filling with an offset spatula can be equally appealing, especially when adorned with a few coffee beans or a delicate chocolate shaving.
Side Dishes
While the Espresso Cake Filling is often the star, pairing it with complementary items can enhance the overall dessert experience. Light and airy vanilla or almond sponge cakes serve as a perfect canvas, allowing the espresso flavor to shine without being overpowered. Chocolate cakes, especially those with a slightly bitter or dark chocolate profile, create a classic mocha pairing that is always a hit among dessert lovers.
Fresh berries, such as raspberries or blueberries, offer a bright, tart contrast to the richness of the filling. They can be served alongside slices of cake or as a garnish. For a more traditional pairing, consider serving the filling with crispy biscotti or delicate butter cookies. These offer a textural contrast and a simple, satisfying crunch.
Creative Serving Ideas
Think beyond traditional cakes and cupcakes. This Espresso Cake Filling can be used to create elegant trifles layered with crumbled chocolate cookies, fresh berries, and a drizzle of espresso syrup. Spoon the filling into individual dessert glasses or small ramekins and top with a dollop of whipped cream and a chocolate curl for an easy, no-bake dessert that looks incredibly sophisticated.
It also makes a fantastic component for layered parfaits, alternating spoonfuls of the filling with crumbled granola, yogurt, or more fruit. For a unique brunch offering, consider using it as a filling for crepes or as a topping for pancakes and waffles, transforming a breakfast staple into a decadent treat. It can even be enjoyed as a rich dip for freshly baked scones or madeleines.
Preparation & Storage
Storing Leftovers
Should you be fortunate enough to have any Espresso Cake Filling leftover, proper storage is key to maintaining its freshness and delightful texture. Transfer any remaining filling into an airtight container. Ensure the container is sealed tightly to prevent the filling from drying out or absorbing unwanted odors from the refrigerator. Store it in the main compartment of your refrigerator, where temperatures are most consistent.
When stored correctly, the Espresso Cake Filling can remain delicious for up to 3 days. Before using any leftovers, give the filling a gentle whisk. Sometimes, chilling can cause it to firm up slightly more than desired, and a quick stir will help restore its original creamy consistency. This simple step ensures that every serving is as delightful as the first.
Freezing
This Espresso Cake Filling can also be frozen for longer-term storage, allowing you to have this delicious component on hand whenever a dessert craving strikes. Before you freeze it, ensure that the filling has completely cooled down to room temperature. Transfer the cooled filling into a freezer-safe airtight container or a heavy-duty freezer bag. Expelling as much air as possible from the container or bag will help prevent freezer burn.
When frozen properly, the Espresso Cake Filling can maintain its quality for up to 3 months. To use it, remove the container from the freezer and place it in the refrigerator. Allow it to thaw completely overnight. Once thawed, it’s highly recommended to give the filling a thorough whisk or a brief whip with a mixer to ensure its texture is smooth and uniform before incorporating it into your baked goods. This thawing and refreshing process is crucial for optimal results.
Reheating
Typically, Espresso Cake Filling is best served chilled or at room temperature, so reheating is usually not necessary for its intended use as a cake or cupcake filling. However, if you find that your thawed filling is too firm or you prefer a slightly warmer consistency for a specific application, gentle reheating is possible. Place the chilled or thawed filling in a heatproof bowl set over a pan of simmering water (a double boiler setup). Stir gently until it reaches your desired temperature.
Alternatively, you can reheat it very carefully in the microwave on low power for short intervals, stirring frequently. Be extremely cautious not to overheat it, as this can cause it to break down or become oily. Remember that the primary purpose of this filling is its creamy, cool texture, so only reheat if absolutely necessary for a particular creative dessert concept.
Frequently Asked Questions
-
How long can I store Espresso Cake Filling?
You can store Espresso Cake Filling in the refrigerator for up to 3 days in an airtight container. It’s advisable to give it a gentle whisk before using to restore its creamy texture, as it may firm up slightly when chilled. This ensures it remains perfectly spreadable and enjoyable for your culinary creations.
-
Can I freeze the Espresso Cake Filling?
Yes, this delightful filling freezes exceptionally well and can be stored in the freezer for up to 3 months. Ensure it is completely cooled before transferring it to a freezer-safe airtight container or bag. Thaw it gradually in the refrigerator overnight, and then whisk or whip it lightly to achieve its original smooth consistency before use.
-
What if I don’t have espresso?
If you lack espresso, strong brewed coffee can serve as an excellent substitute without significantly altering the flavor profile of the filling. Brew your coffee double-strength, or use slightly less water than you normally would for a standard cup. This ensures that the coffee flavor remains robust and present in your finished dessert, maintaining the essence of the Espresso Cake Filling.