No-Bake Chocolate Peanut Butter Pretzel Bars Easy Homemade Recipe with Salted Caramel
You really need to try these bars,” my friend texted me one evening, right when I was scraping the bottom of my snack stash and not feeling particularly creative. Honest to goodness, I was skeptical. A no-bake chocolate peanut butter pretzel bar with salted caramel? It sounded like a dessert mashup that might either be a total mess or a brilliant accident.
So when she showed up at my door the next day with a batch in hand, I was ready to be pleasantly surprised—or proven wrong. The first bite was, well, a bit of a revelation. The crunch of the pretzels, that rich peanut butter sweetness, the smooth, slightly bitter chocolate, and then that hit of salted caramel that kind of sneaks up and demands your attention—it was like my taste buds had been waiting for this combo without even knowing it. And the best part? No oven required, which, you know, makes it an absolute lifesaver when the kitchen feels like a sauna in summer or when you’re just not in the mood to turn on the stove.
Why You Will Love This Recipe
- Quick Preparation: You can have these bars ready in about 20 minutes of active prep time, perfect when you want something sweet without the fuss or heat from the oven.
- Simple Ingredients: No need for specialty stores or strange add-ins; the pantry staples you already have—peanut butter, pretzels, chocolate, and caramel—are the stars here, making it incredibly accessible for any home cook.
- Perfect for Any Occasion: Whether you’re hosting an impromptu get-together, need a contribution for a potluck, or just want a no-hassle dessert for the family, these bars fit the bill beautifully.
- Crowd-Pleaser: Kids love the sweet and salty crunch, adults appreciate the sophisticated balance of flavors, and everyone inevitably asks for seconds—every single time.
- Unbelievably Delicious: The irresistible mix of creamy peanut butter with the satisfying crunch of pretzels and smooth chocolate, all topped with a decadent salted caramel drizzle, is honestly next-level good.
Ingredients You Need
This recipe uses simple, wholesome ingredients to bring together bold flavor and a satisfying texture without any complicated steps or lengthy prep. Most are pantry staples, which means you can usually whip up a batch on a whim or customize it based on what you have readily available, making it an incredibly versatile treat.
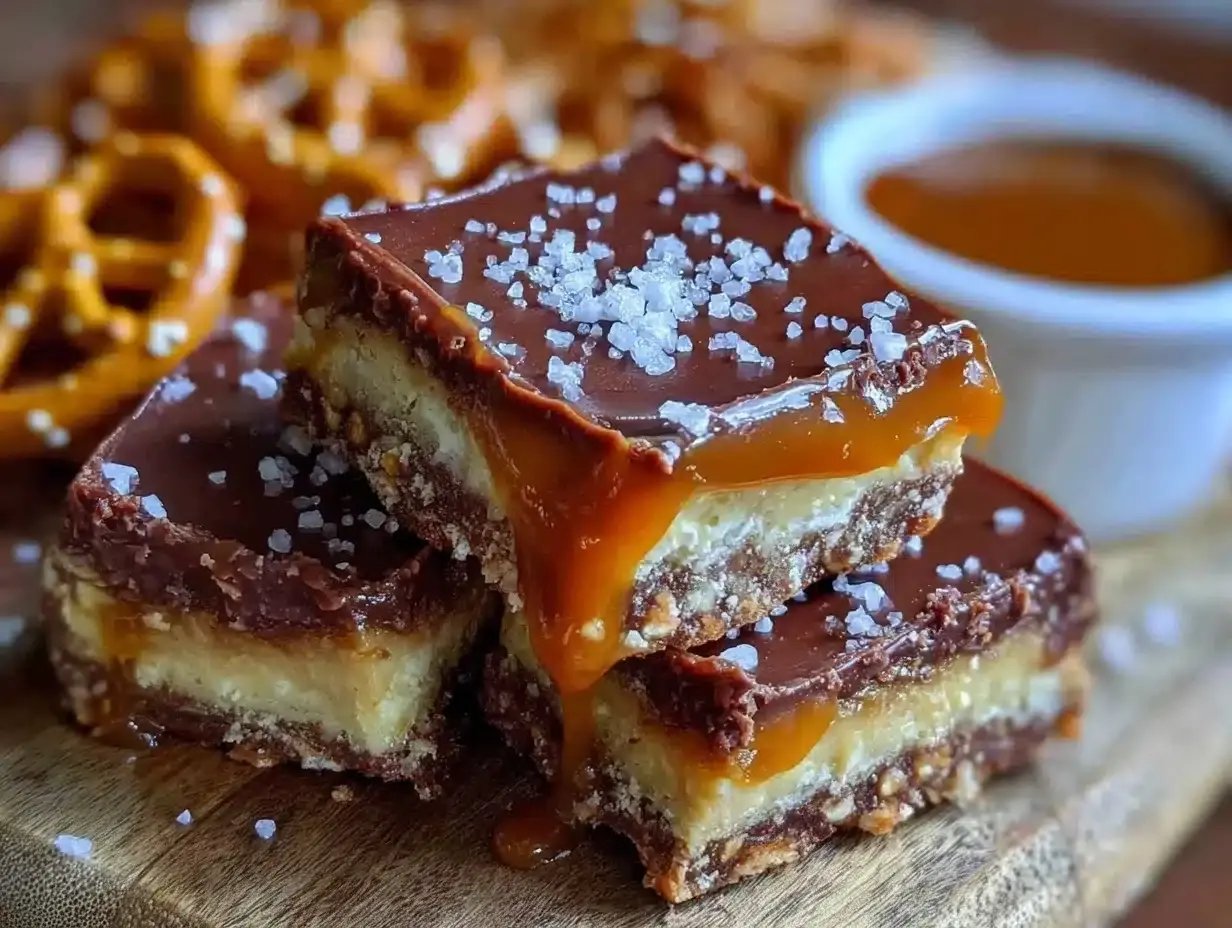
No-Bake Chocolate Peanut Butter Pretzel Bars with Salted Caramel
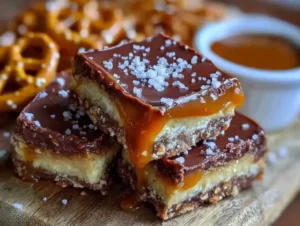
These no-bake bars combine crunchy pretzels, creamy peanut butter, smooth chocolate, and a salted caramel drizzle for a sweet-salty, crunchy-chewy treat that's quick and easy to make without an oven.
- 3 cups mini pretzels or crushed pretzel pieces
- 1 cup creamy peanut butter (natural or traditional)
- 1 cup powdered sugar
- 1 teaspoon vanilla extract
- 1 ½ cups semi-sweet or bittersweet chocolate chips
- Pinch of flaky sea salt (optional)
- 1Line a 9x9-inch baking pan with parchment paper, leaving overhang for easy removal.
- 2In a large mixing bowl, combine peanut butter, softened unsalted butter, powdered sugar, and vanilla extract. Mix until smooth and creamy, about 2-3 minutes.
- 3Gently fold in the mini pretzels or crushed pretzel pieces until evenly coated.
- 4Press the peanut butter and pretzel mixture firmly and evenly into the lined pan.
- 5In a microwave-safe bowl, combine chocolate chips and sweetened condensed milk. Microwave in 30-second bursts, stirring between each, until smooth and glossy.
- 6Pour the melted chocolate mixture evenly over the peanut butter base and smooth out quickly.
- 7Warm the salted caramel sauce slightly to make it pourable, then drizzle over the chocolate layer. Sprinkle flaky sea salt on top if desired.
- 8Refrigerate for at least 2 hours until bars are firm and chocolate is set. Alternatively, chill in the freezer for 1 hour, watching carefully.
- 9Use the parchment overhang to lift bars from the pan and cut into 12 squares with a sharp knife.
Keywords: no-bake, chocolate, peanut butter, pretzel bars, salted caramel, easy dessert, sweet and salty, snack bars
- mini pretzels or crushed pretzel pieces: about 3 cups, ideally small pretzels for even distribution of crunch and salt.
- creamy peanut butter: 1 cup, natural or traditional works, but creamy generally blends better for a smoother base.
- unsalted butter: ½ cup (1 stick), softened to room temperature for easy mixing.
- powdered sugar: 1 cup, to provide sweetness and contribute to the delightful texture.
- vanilla extract: 1 teaspoon, to deepen the overall flavor profile of the base.
- semi-sweet or bittersweet chocolate chips: 1 ½ cups, for a rich and satisfying chocolate topping.
- sweetened condensed milk: ¼ cup, which adds creaminess to the chocolate and helps it set beautifully.
- salted caramel sauce: about ½ cup for drizzling, look for a thick, rich sauce for the best effect.
- flaky sea salt: a pinch, optional, to sprinkle on top for an extra pop of saltiness and visual appeal.
Quantities for each ingredient are conveniently listed in the provided recipe card. Feel free to explore variations if certain ingredients aren’t readily available.
Variations
These bars are truly a versatile canvas for culinary creativity, allowing you to tailor them to various dietary needs and flavor preferences without sacrificing that signature deliciousness. You can easily adapt them to suit nearly any occasion or craving.
For those seeking a dessert that caters to a vegan lifestyle, the substitutions are straightforward and highly effective. Ensure you use dairy-free chocolate chips and a plant-based butter substitute, like a good quality vegan margarine. A coconut-based or other commercially available vegan caramel sauce will also seamlessly integrate into the recipe, maintaining that delightful gooey topping without any animal products.
If you’re watching your carbohydrate intake, a low-carb adaptation is also quite achievable. Consider using sugar-free chocolate chips and a sugar-free caramel sauce. For the base, you might experiment with almond flour or crushed nuts in place of pretzels, though you’ll lose some of the signature salty crunch, the creamy peanut butter still provides that beloved flavor. It’s a great way to enjoy a treat while adhering to specific dietary goals.
One of my favorite adjustments is a simple flavor swap. Instead of semi-sweet chocolate, try using milk chocolate for a sweeter profile or dark chocolate with a pinch of instant espresso powder mixed in for a more sophisticated, adult-oriented twist. This small change can dramatically alter the overall taste experience, offering a new dimension to an already beloved recipe. It’s a simple modification that yields impressive results, turning a classic into something uniquely yours.
How to Prepare no bake chocolate peanut butter pretzel bars
Step 1: Prepare Your Pan and Gather Ingredients
The initial step in creating these delightful no-bake bars involves preparing the vessel that will house your culinary creation. Take a 9×9-inch baking pan, which is the ideal size for achieving perfectly proportioned bars. Line it meticulously with parchment paper, ensuring that you leave a generous overhang on all sides. This overhang acts as a built-in handle, making the crucial step of lifting the finished bars out of the pan significantly easier and cleaner later on.
Once your pan is prepped and ready, it’s time to gather all the necessary ingredients and have them at the ready. This mise en place approach not only streamlines the process but also prevents any last-minute scrambling. Ensure your butter is softened to room temperature; this is crucial for achieving a smooth, well-combined peanut butter base. Having everything measured and within reach makes the assembly process feel less like a chore and more like a creative endeavor, allowing you to focus on the delicious outcome.
Step 2: Craft the Creamy Peanut Butter Base
In a generously sized mixing bowl, combine the softened unsalted butter, creamy peanut butter, powdered sugar, and pure vanilla extract. The key here is to achieve a uniformly smooth and creamy consistency. You can use a sturdy spoon, a spatula, or an electric mixer on a low setting for this task. Blend the ingredients together until they are thoroughly incorporated and no streaks of sugar or butter remain visible, which typically takes about 2-3 minutes of diligent mixing.
The resulting mixture should be dense yet spreadable, holding its shape without being too stiff or too runny. This perfect texture is vital for creating a solid foundation for your bars. Take your time during this stage; a well-mixed base ensures that the bars will hold together beautifully when cut and served, preventing them from crumbling into a mess of ingredients. A smooth base also contributes to a more pleasant mouthfeel, making each bite a delight.
Step 3: Incorporate the Crunchy Pretzels
Now, it’s time to introduce the star of the crunch factor: the pretzels. Gently fold the mini pretzels or crushed pretzel pieces into the peanut butter mixture you’ve just prepared. The goal here is to evenly coat the pretzels without crushing them into fine dust. You want those distinct, satisfying crunchy bits to remain intact throughout the bars, providing a delightful textural contrast to the smooth peanut butter layer. This careful folding ensures that each bite offers that perfect salty crunch.
Avoid overmixing at this stage, as aggressive stirring can break down the pretzels too much, diminishing their textural impact. The mixture should be a cohesive blend of creamy peanut butter and intact pretzel pieces. This step is crucial for achieving the characteristic sweet-salty, crunchy-chewy profile that makes these bars so irresistible. The pretzels add not just texture but also a welcome salty counterpoint to the sweetness of the other ingredients.
Step 4: Press the Base into the Pan
Transfer the entire peanut butter and pretzel mixture into the parchment-lined baking pan. Using the back of a spoon, a spatula, or even your clean fingertips, press the mixture down firmly and evenly across the entire bottom of the pan. This step is absolutely critical for ensuring the bars hold their shape once set and are easy to slice cleanly. A well-compacted base prevents the bars from falling apart, making them much more enjoyable to eat and handle.
Dedicate a few minutes to this pressing process, making sure the layer is uniform in thickness from edge to edge. A solid, tightly packed base will act like a sturdy foundation, supporting the subsequent layers and guaranteeing that your finished bars have that professional, cohesive look. This firm foundation is the secret to bars that are as beautiful as they are delicious, ready to impress at any gathering or be enjoyed as a personal treat.
Step 5: Create the Luscious Chocolate Layer
For the decadent chocolate layer, combine the semi-sweet chocolate chips and the sweetened condensed milk in a microwave-safe bowl. Heat this mixture in the microwave in short, 30-second intervals, stirring thoroughly between each burst. Continue this process until the chocolate is completely smooth, melted, and glossy, which typically takes about 1 to 2 minutes in total, depending on your microwave’s power. It is imperative to stir between each heating interval to prevent the chocolate from overheating and seizing, which would render it unusable.
Once the chocolate is perfectly melted and smooth, pour this luscious mixture evenly over the pressed peanut butter and pretzel base in the pan. Immediately use an offset spatula or the back of a spoon to spread the chocolate out quickly and smoothly, ensuring it covers the entire surface without any gaps. This layer should be thick enough to provide a substantial chocolate coating but not so thick that it becomes overwhelming. Work swiftly, as the melted chocolate will begin to set relatively fast upon contact with the cooler base.
Step 6: Drizzle with Salted Caramel and Chill
The final touch of indulgence comes with the salted caramel drizzle. Gently warm about ½ cup of your salted caramel sauce until it reaches a pourable, but not hot, consistency. This is best done in short bursts in the microwave or a small saucepan over low heat. Once warm and fluid, drizzle the caramel artfully over the chocolate layer in zigzags, swirls, or any pattern you desire. If you are using flaky sea salt, sprinkle a pinch over the caramel drizzle at this stage for that perfect sweet-salty finish and a touch of visual elegance.
After the caramel is artfully applied, carefully place the pan into the refrigerator. Allow the bars to chill for at least 2 hours, or until the chocolate and caramel layers are completely firm and set. For those experiencing impatience, an hour in the freezer can speed up the process, but keep a close eye on them to ensure they don’t freeze solid, which can affect the texture. Proper chilling is crucial for clean slicing and for the bars to hold their shape, transforming the soft mixture into a firm, sliceable treat.
Step 7: Slice and Serve Your Masterpiece
Once the bars have thoroughly chilled and set, it’s time for the satisfying reveal. Use the parchment paper overhang that you strategically left earlier to lift the entire slab of bars cleanly out of the baking pan. Transfer it to a cutting board, ready for slicing. Employ a sharp knife for this task, and for the neatest results, consider wiping the blade clean with a damp cloth between each cut. This prevents chocolate from smearing and ensures sharp, professional-looking edges on each bar.
Slice the slab into 12 equal squares, creating a serving size that is both satisfying and perfectly portioned. These bars are best served slightly chilled or at room temperature, allowing the flavors to meld and the textures to be appreciated fully. The visual appeal of the layered chocolate and caramel, combined with the visible pretzel pieces, makes them a delightful addition to any dessert spread or a perfect standalone treat after a meal or with a cup of coffee.
Pro Tips for no bake chocolate peanut butter pretzel bars
The Right Peanut Butter: While natural peanut butter is a great choice for its pure flavor, it can sometimes be a bit oily. For the best binding and a smoother base, a traditional, emulsified creamy peanut butter like Jif or Skippy often yields more consistent results. If you do opt for natural, ensure it’s stirred exceptionally well before use to incorporate all the oil.
Butter Consistency is Key: Make sure your butter is truly softened, not melted. It should yield to gentle pressure from your finger. This ensures it emulsifies beautifully with the peanut butter and powdered sugar, creating a cohesive and stable base that won’t be greasy or crumbly. Room temperature butter is your best friend here for a perfectly textured base.
Chocolate Melting Technique: When melting chocolate with sweetened condensed milk, always use short microwave bursts and stir frequently. Overheating can cause chocolate to seize, becoming stiff and grainy. If you don’t have a microwave, a double boiler works wonderfully for a gentler, more controlled melting process, ensuring a silky-smooth chocolate topping.
Caramel Consistency Matters: If your salted caramel sauce is too thick, it will be difficult to drizzle evenly and may pull the chocolate layer. Warm it gently until it flows smoothly. Conversely, if it’s too thin, it might spread out too much. Finding that perfect, thick-yet-pourable consistency is key for both aesthetics and taste.
Chill Time is Not Optional: Resist the urge to cut into the bars too soon. Proper chilling allows the layers to set firmly, which is essential for clean slicing and for the bars to hold their shape when handled. Rushing this step can lead to messy, crumbly bars that are difficult to serve elegantly, so patience truly pays off here.
Serving Suggestions for no bake chocolate peanut butter pretzel bars
Decoration
Elevate the visual appeal of your no-bake bars with simple yet impactful decorative touches. A final sprinkle of flaky sea salt over the still-wet caramel drizzle is a classic for a reason, adding a glint of sparkle and a burst of salinity that beautifully complements the sweetness. You can also use extra mini pretzels, gently pressed into the chocolate layer before it fully sets, to echo the texture within the bar. For a more festive look, consider a light dusting of edible glitter or even some chocolate shavings in a contrasting color.
Side Dishes
These bars are robust enough to stand alone as a decadent dessert, but they also pair wonderfully with a few simple accompaniments. A tall glass of cold milk is a timeless partner, its creamy coolness a perfect foil to the rich flavors. For adults, a strong cup of black coffee or an espresso can cut through the sweetness and enhance the chocolate notes, creating a sophisticated pairing. A scoop of good quality vanilla bean ice cream alongside a warm slice of the bar, allowing a slight melt, creates a luxurious dessert experience.
Creative Serving Ideas
Move beyond the simple square by getting creative with presentation. Cut the bars into smaller, bite-sized portions and arrange them on a tiered dessert stand for an elegant buffet presentation. You could also serve them with a dollop of whipped cream and a scattering of fresh berries, like raspberries or strawberries, to add a burst of freshness and color. For a truly unique twist, consider serving them alongside a light, tangy fruit salad, such as one featuring citrus segments and kiwi, which provides a refreshing counterpoint to the bars’ richness.
Preparation & Storage
Storing Leftovers
When it comes to storing any delightful leftovers of these no-bake chocolate peanut butter pretzel bars, an airtight container is your best friend. Place the cut bars inside, ensuring they are not squashed, and seal the container tightly. Store them in the refrigerator, where they will maintain their optimal texture and flavor for up to 5 days. In fact, many people find the flavors meld and deepen slightly after the first day, making them even more delicious.
Freezing
For longer-term storage, these bars freeze remarkably well, making them a perfect make-ahead treat. Arrange the cut bars in a single layer on a baking sheet lined with parchment paper. This initial freezing step prevents them from sticking together in a solid block. Once they are solid (this usually takes about 1-2 hours), transfer them to a freezer-safe airtight container or a heavy-duty freezer bag. They can be stored frozen for up to 2-3 months.
Reheating
When you’re ready to enjoy your frozen bars, the best method is slow thawing. Transfer the bars from the freezer to the refrigerator the night before you plan to serve them. This allows them to thaw gently and evenly, preserving their texture. Avoid using a microwave for reheating, as this can cause the chocolate to melt unevenly and the caramel to become overly gooey, potentially making the bars unpleasantly soft or messy. A few minutes at room temperature after refrigerating can also help soften them slightly if needed before slicing.
Frequently Asked Questions
- How long do these bars last in the fridge and are they freezer-friendly?
Stored properly in an airtight container, these no-bake chocolate peanut butter pretzel bars will maintain their delicious texture and flavor for up to 5 days when kept in the refrigerator. They are also an excellent candidate for freezing; for best results, freeze them in a single layer on a baking sheet until firm, then transfer to an airtight container or freezer bag. Frozen bars can be stored for up to 2-3 months and should be thawed overnight in the refrigerator for optimal texture.
- Can I substitute crunchy peanut butter or use a different type of pretzel for this recipe?
While you can technically use crunchy peanut butter, creamy peanut butter is generally recommended for this recipe because it blends more smoothly with the butter and powdered sugar, creating a more uniform and stable base layer. The smoother texture enhances the overall mouthfeel of the bars. As for pretzels, you can absolutely experiment with different types; however, mini pretzels or crushed pretzel sticks are preferred for their size and the balanced distribution of crunch they provide throughout the bar. Crushed pretzel rods or even large pretzel twists can also work if broken down into bite-sized pieces.
- What are the best ways to adapt this recipe for dietary restrictions like vegan or gluten-free?
Adapting these bars for a vegan diet is quite straightforward. You’ll want to use dairy-free chocolate chips, ensure your butter substitute is plant-based (like a vegan margarine), and opt for a vegan-friendly caramel sauce, such as a coconut caramel or a commercially produced vegan caramel. Many natural peanut butters are already vegan. For a gluten-free version, simply swap out the pretzels for a gluten-free pretzel alternative, or use crushed gluten-free cookies or crispy rice cereal as a crunchy base element. Always double-check the labels on your chocolate chips and caramel sauce to confirm they meet your specific dietary requirements.