Smoky Grilled Beer Can Chicken
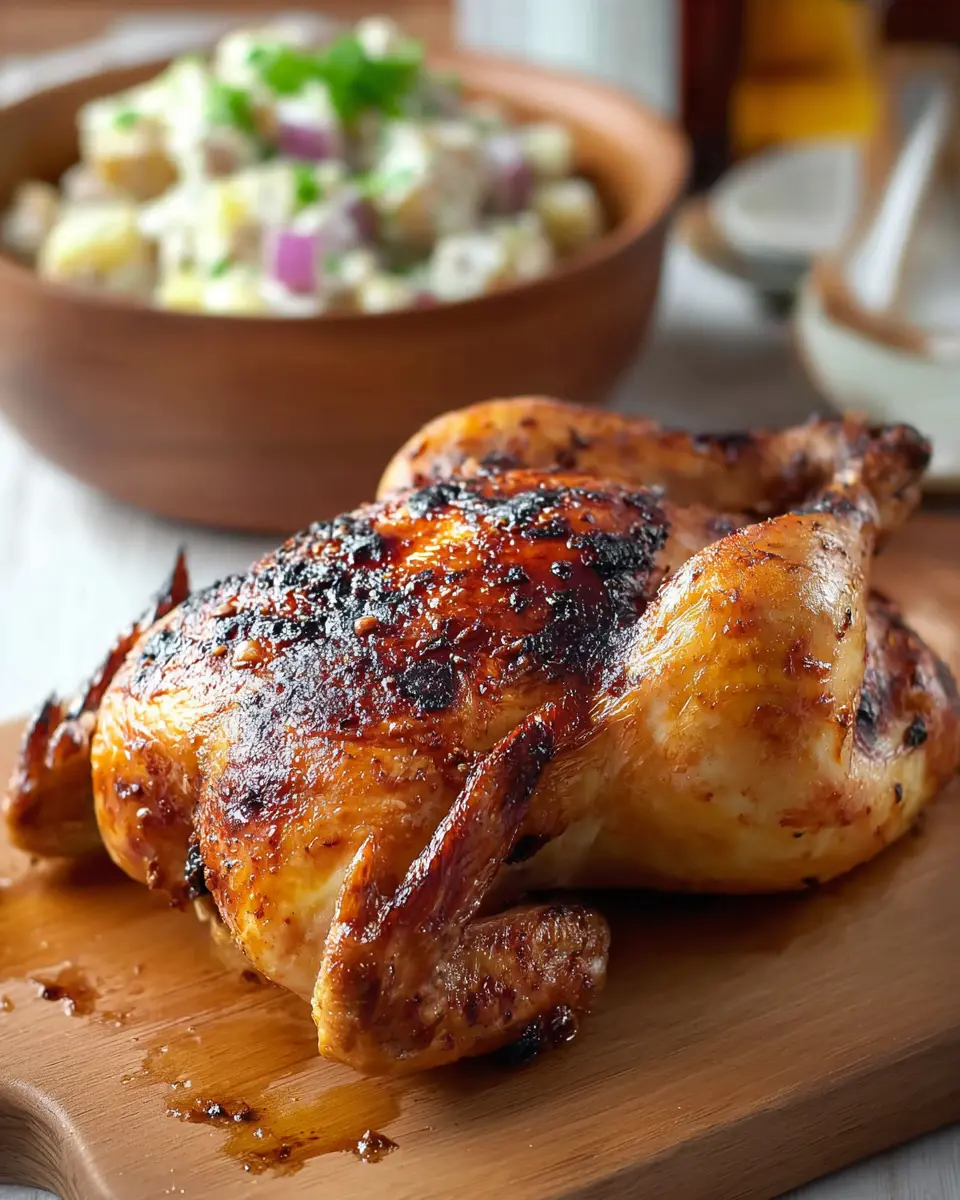
Grilled beer can chicken is a fantastic centerpiece for any gathering, promising juicy, tender meat and irresistibly crispy skin. This iconic method elevates backyard barbecues and casual weeknight dinners alike, delivering consistent, flavorful results with a touch of smoky magic. Its appeal lies in its simplicity and the unique way it cooks the chicken upright, allowing heat and flavor to circulate beautifully.
The preparation, while requiring a little foresight, is remarkably straightforward, making it an excellent choice for both novice grillers and seasoned pitmasters. The deep flavor development achieved through dry brining ensures every bite is packed with savory goodness, perfectly complemented by the subtle smokiness of the grill. It’s a dish that truly brings people together, offering comfort and deliciousness in every serving.
Why You Will Love This Recipe
- Exceptional Juiciness: The upright cooking position and gentle indirect heat ensure the chicken remains incredibly moist and tender throughout.
- Crispy, Golden Skin: The combination of dry brining and steady grilling creates a beautifully browned, delightfully crisp skin that’s a joy to bite into.
- Deep, Savory Flavor: A robust dry rub is applied well in advance, allowing the seasonings to deeply penetrate the meat for a rich, complex taste.
- Minimal Fuss Preparation: Once the initial rub and refrigeration are done, the grilling process is largely hands-off, freeing you up to enjoy your guests.
- Crowd-Pleasing Appeal: This classic dish is a guaranteed hit, offering a satisfying and familiar flavor profile that appeals to a wide range of palates.
Ingredients You Need
The success of this grilled beer can chicken hinges on using quality ingredients, especially for the chicken itself. Opting for a fresh, good-quality whole chicken ensures the best flavor and texture. The dry rub ingredients are simple pantry staples, but using freshly ground black pepper will always provide a brighter, more potent flavor. The beer, while iconic, primarily serves a structural purpose and helps add a subtle moisture, so the type of lager used is flexible, though a mild lager is often preferred to avoid overwhelming the chicken’s natural taste.
Grilled Beer Can Chicken
This grilled beer can chicken is seasoned with a robust dry rub, then cooked upright over indirect heat for exceptionally juicy meat and well-browned skin. A period of uncovered refrigeration allows the seasoning to deeply penetrate the chicken before it is slowly grilled until perfectly cooked.
- 1 whole chicken (about 4 pounds)
- 1 tablespoon packed dark brown sugar
- 2 teaspoons smoked paprika
- 1 teaspoon mustard powder
- 2 teaspoons chili powder
- 1/4 cup coarse salt
- 1 teaspoon garlic powder
- 2 teaspoons freshly ground black pepper
- 1 can (12 ounces) lager beer, such as Budweiser or Miller Lite
- BBQ sauce (optional, for serving)
- 1Remove the giblets from the cavity of the chicken 8 to 48 hours before grilling. Set the chicken breast-side up on a baking sheet fitted with a rack.
- 2Combine the coarse salt, black pepper, brown sugar, smoked paprika, chili powder, mustard powder, and garlic powder in a small bowl. Distribute the seasoning mixture over the entire chicken, including inside the cavity, pressing it into the skin with your fingers.
- 3Transfer the seasoned chicken to the refrigerator and leave it uncovered for at least 8 hours, though 24 to 48 hours will provide the fullest flavor.
- 4When ready to grill, take the chicken out of the refrigerator. Open the can of beer and discard about half of the contents.
- 5Lower the chicken carefully onto the beer can, pushing it down until it stands upright. Pull the legs slightly forward so the bird forms a steady tripod shape.
- 6Prepare the grill for two-zone cooking. Ignite one side of the burners, or light the charcoal. Once the charcoal is coated with ash, bank it to one side so the grill has both direct and indirect heat zones.
- 7Set the chicken on the unlit side of the grill so it cooks with indirect heat. Close the lid and grill until the internal temperature in the thickest part of the breast reaches 165°F, about 1 hour and 45 minutes.
- 8Lift the chicken from the grill with care and place it on a rimmed baking sheet to catch any juices released during resting. Let it stand for about 10 minutes.
- 9Move the rested chicken to a cutting board. Insert a knife into the top cavity and carefully push the beer can out through the bottom cavity. Carve the chicken into portions.
- 10Serve immediately, with BBQ sauce on the side if desired.
Keywords: Grilled Beer Can Chicken, BBQ, Backyard Cookout, Summer Gathering, Indirect Heat, Dry Rub, Juicy Chicken, Crispy Skin
The quantities for all these ingredients are detailed within the provided recipe card, ensuring you have everything you need for a perfectly seasoned and cooked chicken. A selection of side dishes and optional BBQ sauce for serving are also mentioned, offering flexibility for your meal.
Variations
While the classic beer can chicken is a triumph on its own, there are numerous ways to adapt this recipe to suit different dietary preferences and flavor profiles. Experimenting with these variations can open up a whole new world of delicious grilled chicken possibilities right in your backyard. Each modification aims to retain the core appeal of the original while offering a unique twist.
For a Vegan or Vegetarian Twist, one could adapt the concept by using a large cauliflower head as the central element. Roast the cauliflower upright on a can of vegetable broth or even a specially designed vegan chicken stand, coating it generously with a similar savory spice rub. The cooking time would be significantly less, and the result would be a deeply flavorful, tender vegetable centerpiece.
A Low-Carb or Keto-Friendly Version can be achieved by focusing on the dry rub. Ensure the brown sugar is either omitted entirely or replaced with a keto-friendly sweetener like erythritol or monk fruit, keeping the quantity very small. The rest of the spice blend, rich in herbs and spices, is naturally low in carbohydrates and ideal for these diets. Serving this version with a generous side of roasted Brussels sprouts or a fresh, leafy green salad would make for a complete meal.
To introduce an Asian-Inspired Flavor Profile, alter the dry rub significantly. Incorporate ingredients like five-spice powder, ginger powder, garlic powder, a pinch of cayenne for heat, and perhaps a touch of white pepper. Consider adding a tablespoon or two of soy sauce or tamari to the wet ingredients for the rub, though be mindful of how this might affect browning. For serving, a drizzle of sesame oil or a sprinkle of sesame seeds would enhance the thematic elements.
How to Prepare grilled beer can chicken
Step 1: Prepare the Chicken and Dry Rub
Begin by thoroughly patting the entire chicken dry with paper towels; this is a crucial step for achieving crispy skin later. Inspect the cavity and remove any giblets or the neck if they are still inside, as these can sometimes impart an off-flavor or unevenly cook. Setting the chicken on a rack placed over a baking sheet will make it easier to handle and keep your workspace clean during the initial preparation stages.
In a small bowl, meticulously combine all the dry rub ingredients: coarse salt, freshly ground black pepper, dark brown sugar, smoked paprika, chili powder, mustard powder, and garlic powder. Stir them together until they are thoroughly blended into a uniform mixture. This ensures that every application of the rub delivers a consistent flavor profile across the entire bird. The balance of these spices is key to the signature taste of this dish.
Once the rub is mixed, generously apply it all over the outside of the chicken. Don’t be shy; use your hands to press the rub firmly into the skin, ensuring it adheres well. Make sure to get some of the rub inside the cavity as well. This thorough application is what builds the foundation of flavor for the entire dish, allowing the spices to begin their work before grilling even commences. The slight sweetness from the brown sugar will also aid in achieving a beautiful caramelization during the cooking process.
Step 2: The Crucial Dry Brine
After the chicken has been thoroughly seasoned, the next step is the dry brine, which is paramount for developing deep flavor and enhancing skin crispiness. Place the seasoned chicken, uncovered, on the rack in the refrigerator. This uncovered resting period is essential; it allows the salt in the rub to draw out moisture from the chicken’s skin, and then reabsorb it, seasoning the meat from within. It also helps to dry out the skin.
Aim for a minimum of 8 hours for this dry brining process, but if your schedule allows, a full 24 to 48 hours will yield even more remarkable results. The longer the chicken rests uncovered, the more pronounced the seasoning will become, and the drier the skin will get, which is a direct contributor to that coveted crispy texture. This patient approach is what truly elevates beer can chicken from good to extraordinary. It’s a small step that makes a significant difference in the final outcome.
This extended period in the refrigerator also allows the other spices in the rub to meld and penetrate the meat more deeply. The sugars in the rub begin to work their magic, promising a beautiful color during the grilling phase. Resist the urge to cover the chicken; the exposure to the cool air is vital for achieving the ideal skin texture. Think of this as a flavor-building spa treatment for your chicken.
Step 3: Setting Up the Grill for Success
When you are ready to grill, it’s time to prepare your grill for indirect heat, which is the key to cooking the chicken evenly without burning the exterior. For gas grills, this means lighting only one side or a portion of the burners, leaving the other side unlit. This creates a hot zone and a cooler, indirect zone.
If you are using a charcoal grill, light your coals and allow them to burn until they are mostly covered in a gray ash. Then, bank the hot coals to one side of the grill. This concentration of coals provides the direct heat source, while the opposite side remains free of coals, serving as the indirect heat zone. Proper two-zone setup is fundamental for successfully cooking larger poultry items like a whole chicken.
Ensure your grill grates are clean and lightly oiled to prevent the chicken from sticking. Having your grilling tools, such as tongs and a reliable meat thermometer, within easy reach will also streamline the cooking process. A stable surface for placing the chicken after it’s cooked is also important for the resting period. The indirect heat allows the chicken to cook through gently and evenly, ensuring the breast meat doesn’t dry out before the thighs are cooked.
Step 4: Assembling the Beer Can Chicken
Now for the iconic part: preparing the beer can. Open the can of lager and carefully pour out approximately half of the beer. The remaining liquid will gently steam and add a subtle flavor to the chicken as it cooks. Discard the poured-out beer or save it for another use, though it’s best to use a fresh can for each chicken.
With the beer can ready, carefully lift the seasoned chicken and lower it onto the can. The opening of the can should fit snugly around the cavity of the chicken, causing the bird to stand upright. You may need to wiggle it a bit to ensure a secure fit. The goal is for the chicken to be stable and balanced on the can, resembling a tripod when its legs are slightly adjusted forward.
This upright positioning is ingenious; it allows hot air to circulate freely around the entire chicken, cooking it evenly from all sides. The moisture from the steaming beer helps keep the inner meat juicy. It’s important to make sure the chicken is stable before placing it on the grill, as a wobbly chicken can be difficult and dangerous to maneuver. Ensure the legs are spread slightly to create a solid base.
Step 5: Grilling to Perfection
Carefully place the assembled beer can chicken onto the indirect heat side of your prepared grill. Close the grill lid immediately. This is essential for maintaining a consistent temperature and allowing the chicken to cook through slowly and evenly. The indirect heat mimics an oven, providing a consistent cooking environment without the risk of burning the skin.
The cooking time can vary significantly depending on the size of your chicken and the exact temperature of your grill, but typically, it takes about 1 hour and 45 minutes. Resist the temptation to open the lid too frequently, as each time you do, you lose precious heat. Rely on the thermometer to gauge doneness rather than just the clock. The internal temperature in the thickest part of the breast should reach 165°F (74°C).
When the chicken reaches the target temperature, carefully remove it from the grill using sturdy heat-resistant gloves and tongs. Place the chicken on a clean rimmed baking sheet or a cutting board. This temporary resting period is critical; it allows the juices to redistribute throughout the meat, ensuring a more tender and flavorful final product. If you try to carve it too soon, all the delicious juices will run out, leaving you with drier chicken.
Step 6: Resting and Carving
Allow the beer can chicken to rest for at least 10 minutes after removing it from the grill. This resting phase is non-negotiable for optimal juiciness. During this time, the muscle fibers relax, and the accumulated juices can be reabsorbed back into the meat. Covering it loosely with foil during this period can help retain some warmth, but avoid sealing it tightly, as this can steam the skin and make it less crispy.
Once the chicken has rested sufficiently, it’s time to carefully remove the beer can. This can be a bit tricky, so use caution and sturdy mitts. Gently lift the chicken off the can, or if it’s easier, carefully push the can out from the bottom cavity. The chicken should now be free and ready for carving. Admire the beautiful golden-brown skin and imagine the juicy meat waiting inside.
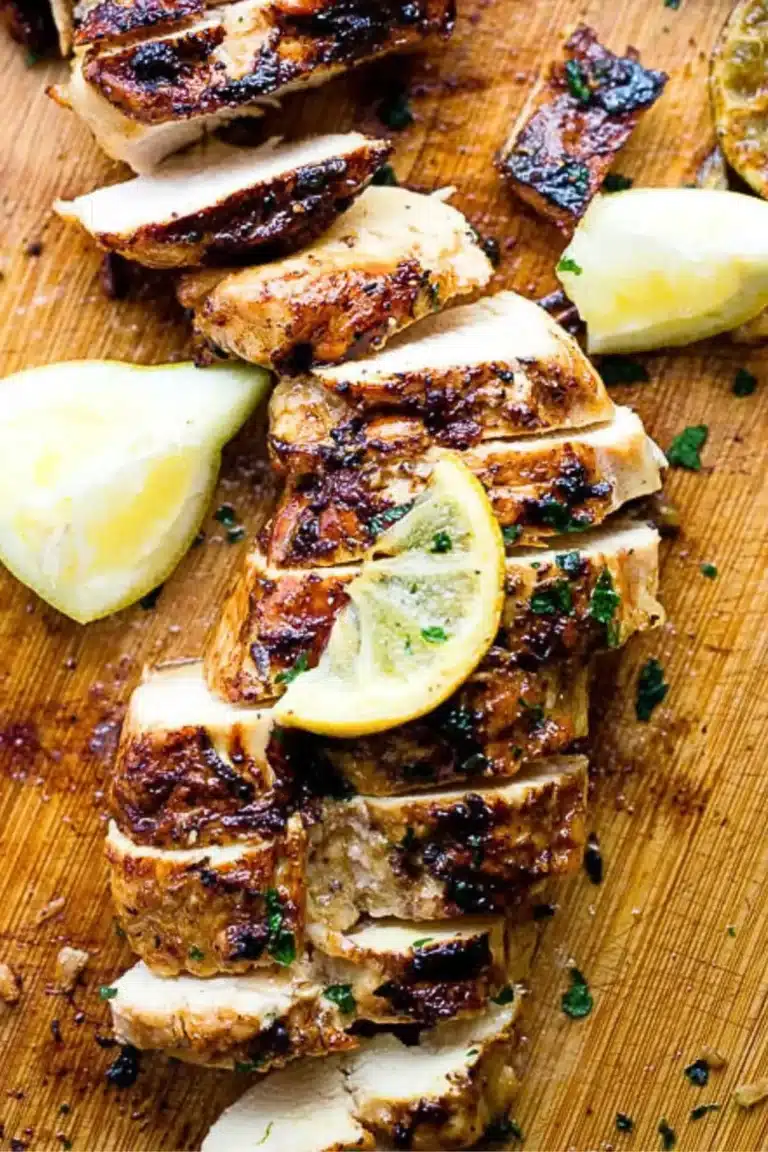
Carve the chicken into your preferred serving pieces: breasts, thighs, drumsticks, and wings. Arrange the carved portions on a platter. If you opted to serve BBQ sauce, now is the time to offer it on the side. This final step completes the visual appeal, and the aroma should be irresistible. The combination of the smoky rub and perfectly cooked chicken makes for a truly memorable meal.
Pro Tips for grilled beer can chicken
Allow Extra Refrigeration Time: For the absolute best flavor and crispiest skin, let your seasoned chicken chill uncovered in the refrigerator for a full 24 to 48 hours. This extended dry brining period is a game-changer.
Master the Indirect Heat: Always cook your beer can chicken over indirect heat. Placing it directly over the flames will likely burn the skin before the inside is cooked through. Two-zone grilling is your best friend here.
Use a Reliable Thermometer: Don’t guess when your chicken is done. An instant-read meat thermometer is the most accurate way to ensure the chicken is safely cooked to 165°F in the thickest part of the breast, without overcooking it.
Don’t Skip the Rest: Resting the chicken for at least 10-15 minutes after grilling is crucial. This allows the juices to settle back into the meat, resulting in a much juicier and more tender chicken.
Consider Beer Alternatives: While beer is traditional, you can use other liquids like chicken broth, apple cider, or even just water in the can for steaming. The primary function is moisture and the upright structure.
Serving Suggestions for grilled beer can chicken
Decoration
Elevate the presentation of your grilled beer can chicken by adding a few thoughtful decorative touches. A garnish of fresh, vibrant herbs like parsley, cilantro, or rosemary scattered around the platter adds a pop of color and freshness. You can also arrange lemon or lime wedges artistically around the chicken; their bright zestiness complements the smoky flavors wonderfully. If you have edible flowers available, a few strategically placed blooms can add an unexpected and elegant flair.
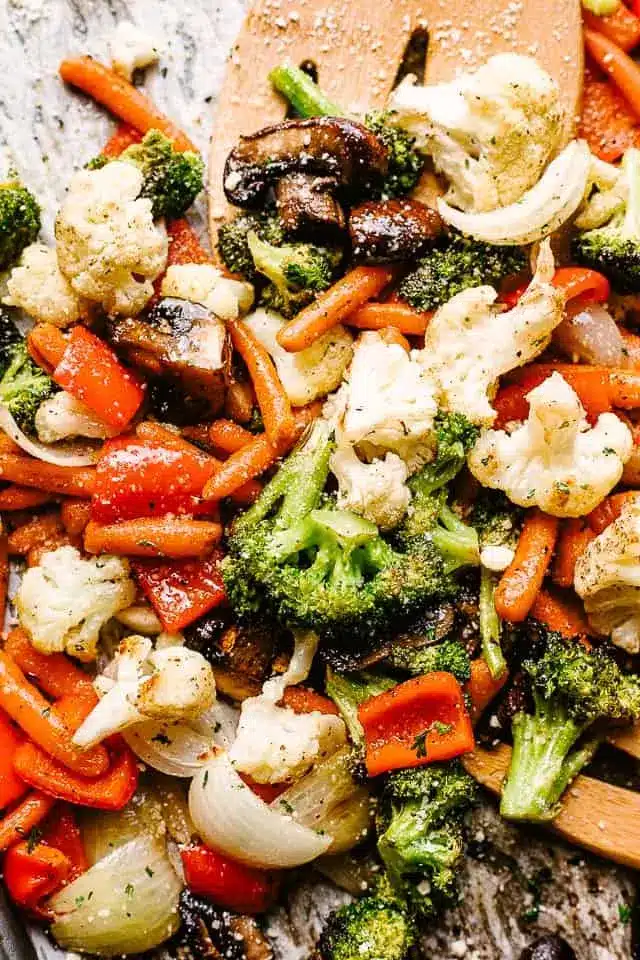
Side Dishes
This grilled beer can chicken pairs beautifully with a wide array of classic dinner side dishes. Consider a creamy, cool potato salad or a tangy coleslaw for a refreshing contrast to the warm, savory chicken. For hearty accompaniments, baked beans, grilled corn on the cob, or roasted sweet potato wedges are excellent choices. A simple green salad with a light vinaigrette can also provide a welcomed brightness to the meal, making it feel complete and balanced.
Creative Serving Ideas
Beyond the traditional platter, get creative with how you serve your beer can chicken. Consider carving it and serving it alongside a vibrant quinoa salad for a healthier, more modern meal. Another idea is to shred the meat and use it in tacos or wraps, offering a casual and fun dining experience. For a more elegant touch, serve the carved chicken atop a bed of creamy risotto or alongside a rich pasta dish. The versatility of this chicken allows it to shine in many different culinary contexts.
Preparation & Storage
Storing Leftovers
Properly storing leftover grilled beer can chicken is key to maintaining its deliciousness and ensuring food safety. Once the chicken has cooled to room temperature, which should happen within two hours of cooking, transfer any remaining pieces to an airtight container. You can also wrap individual portions tightly in plastic wrap followed by aluminum foil for an extra layer of protection against air exposure. Refrigerated leftovers are best consumed within 3 to 4 days for optimal taste and texture.
Freezing
For longer-term storage, freezing is an excellent option to preserve the quality of your leftover chicken. It is best to remove the meat from the bones before freezing, as this makes it more convenient to use in future recipes and helps prevent freezer burn. Place the deboned chicken meat into heavy-duty freezer bags or airtight containers. Squeeze out as much air as possible before sealing to minimize oxidation and ice crystal formation. Properly frozen chicken can maintain good quality for up to 3 months.
Reheating
When you’re ready to enjoy your leftover chicken, reheating it gently is important to prevent it from drying out. One effective method is to place the chicken in a covered baking dish and warm it in a preheated oven at a moderate temperature, around 325°F (160°C), until heated through. If you’re short on time, you can reheat small portions in the microwave using short bursts of power, stirring occasionally. Adding a splash of chicken broth, a spoonful of BBQ sauce, or even just a little water to the dish or microwave-safe container can help keep the meat moist during the reheating process.
Frequently Asked Questions
-
Can I season the chicken a day ahead?
Yes, absolutely, and it is highly recommended for this specific recipe. Letting the seasoned chicken rest uncovered in the refrigerator for 24 to 48 hours before grilling allows the salt and spices to penetrate the meat more deeply, leading to more intense flavor. This extended dry brining period also helps to dry out the chicken skin, which is crucial for achieving that sought-after crispiness during the grilling process. This preparation step is one of the secrets to a truly exceptional beer can chicken. -
Do I have to use beer for beer can chicken?
While the name suggests beer is essential, the primary role of the can and its contents is to provide moisture and act as a cooking support. The beer itself contributes only a subtle flavor, and its steam helps keep the chicken moist from the inside. If you prefer not to use beer, you can substitute it with chicken broth, apple cider, or even water. Some people even use a can filled with aromatic vegetables like onions and herbs for added flavor. The key is using a sturdy, food-safe can or a specialized beer can chicken stand that can support the bird upright on the grill. -
How do I know when grilled beer can chicken is done?
The most reliable way to determine if your grilled beer can chicken is cooked through is by using an instant-read meat thermometer. Insert the thermometer into the thickest part of the breast, avoiding the bone. The chicken is safely cooked when the internal temperature reaches 165°F (74°C). You can also check the juices; they should run clear when you pierce the thickest part of the thigh with a fork or knife. The meat should appear opaque and no longer pink. Visual cues alone can be deceiving, so a thermometer is your best tool.