Apple Cider Braised Pork Shoulder – A Beautiful Fall Dinner!
The aroma of slow-cooked goodness is an unparalleled comfort, especially as the cooler months arrive. Imagine a succulent roast, infused with the sweet tang of apples and a hint of savory herbs, falling apart at the touch of a fork. This braised pork shoulder recipe is designed to bring precisely that experience to your table, transforming a humble cut of meat into a culinary masterpiece.
It’s more than just a meal; it’s an invitation to gather, to savor, and to create lasting memories around a dish that speaks of warmth and generosity. Get ready to embark on a delightful journey of flavor that is both comforting and elegantly simple.
Why You Will Love This Recipe
- Incredible Tenderness: The magic of braising transforms pork shoulder into a melt-in-your-mouth delight.
- Rich, Layered Flavors: A symphony of apple cider, white wine, herbs, and aromatics creates an unforgettable taste profile.
- Effortless Elegance: While the cooking time is substantial, the hands-on preparation is minimal, allowing you to relax.
- Perfect for Any Occasion: Whether it’s a cozy family dinner or a festive gathering, this dish is sure to impress.
- Versatile Serving Options: Easily adaptable to various side dishes and dietary preferences, making it a crowd-pleaser.
Ingredients You Need
The success of any braised dish hinges on the quality of its components. For this recipe, we’ve chosen ingredients that complement the richness of the pork shoulder and create a harmonious balance of sweet, savory, and aromatic notes. Using fresh herbs and good quality apple cider will elevate the final dish significantly, making each bite a testament to the care taken in its preparation. Don’t hesitate to seek out the freshest produce you can find for the most vibrant flavors. The synergy of these elements is what truly makes this braised pork shoulder sing.
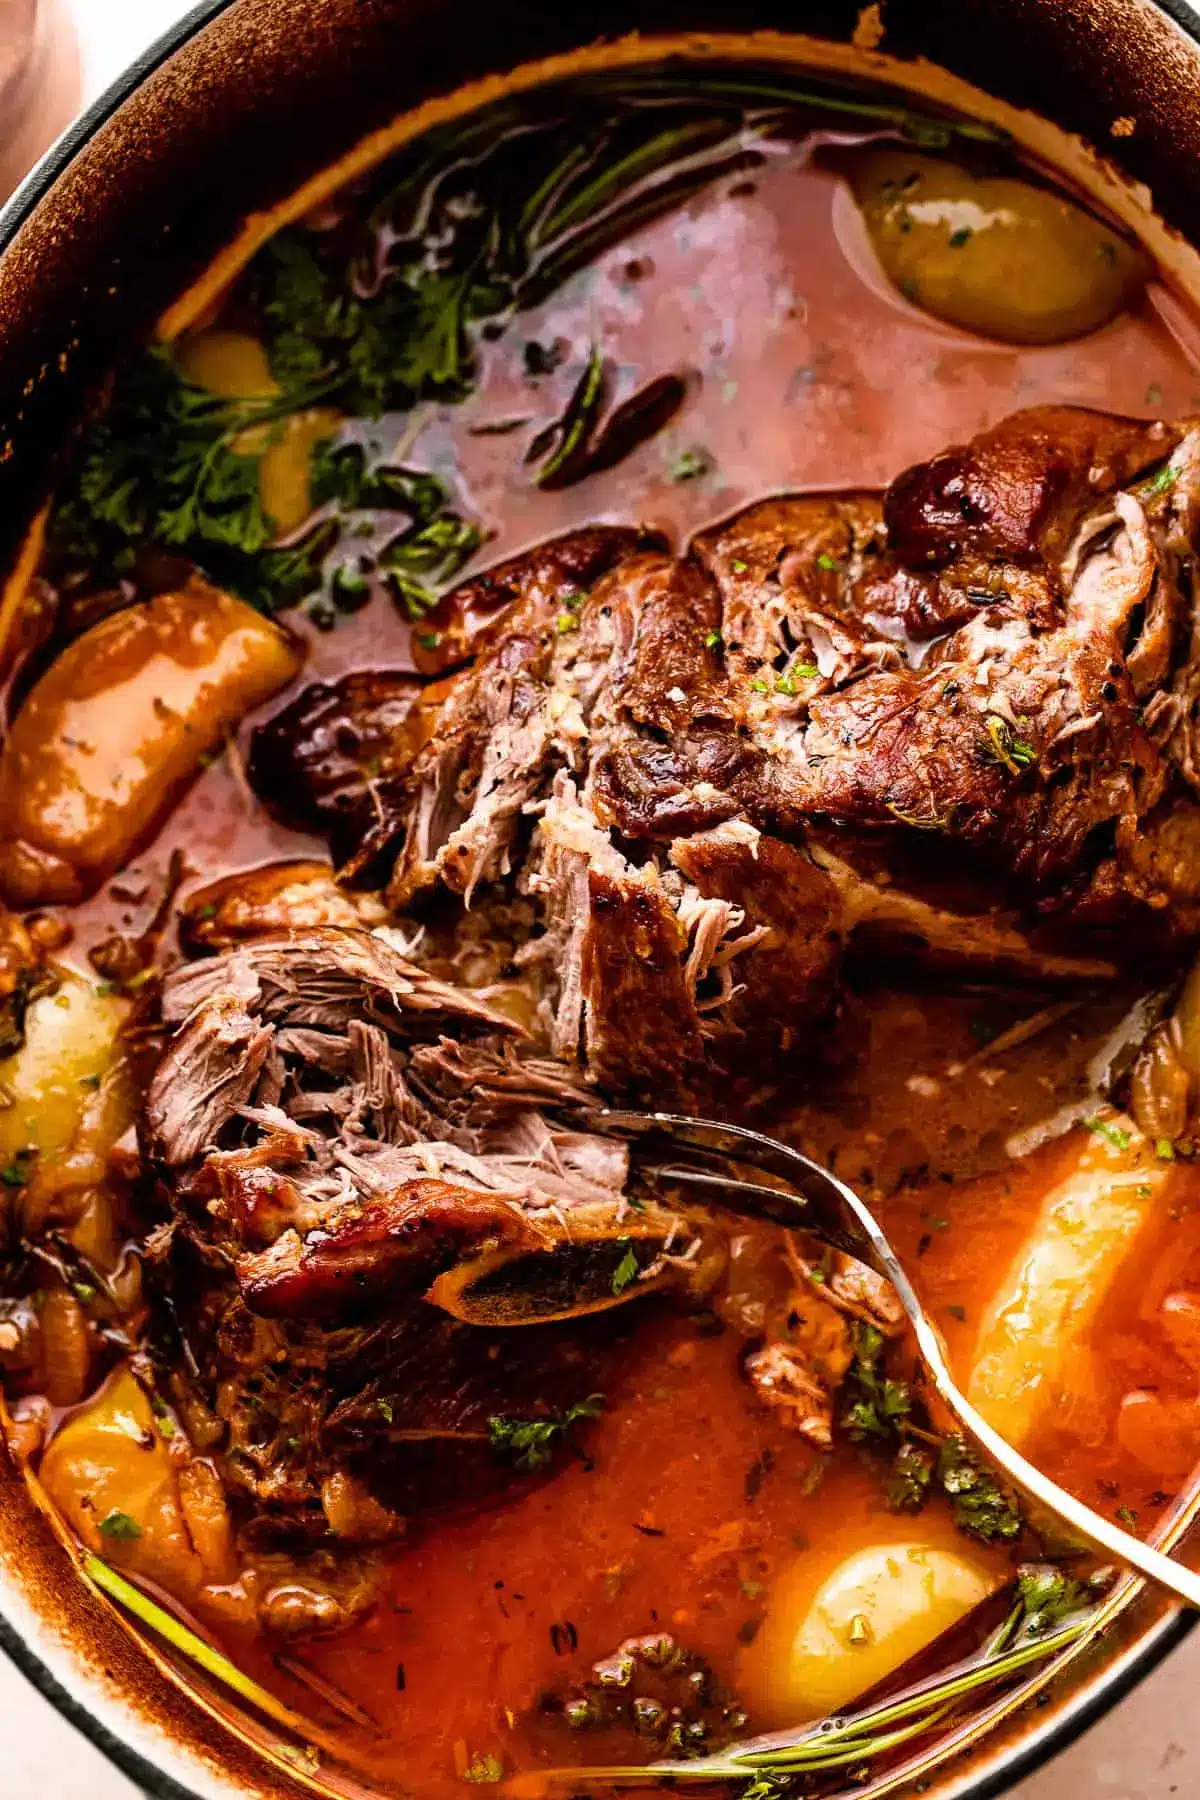
Braised Pork Shoulder with Apples and Cider
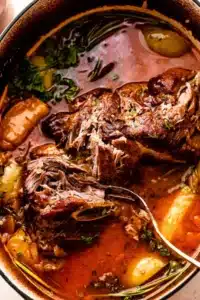
This braised pork shoulder recipe is a rich and flavorful dish slow-cooked to tender perfection with apple cider, tart Granny Smith apples, sweet onions, garlic, and a splash of white wine. It's an easy and beautiful autumn main course that's perfect for a special occasion or a cozy Sunday dinner.
- 3 pounds pork shoulder roast
- Kosher salt and fresh ground black pepper, to taste
- 2 tablespoons olive oil
- 4 yellow onions, thinly sliced
- 6 cloves garlic, minced
- 1/4 cup dry white wine
- 1 tablespoon fresh thyme, or 1 teaspoon dried thyme
- 1 tablespoon fresh chopped rosemary leaves, or 1 teaspoon crushed dried rosemary
- 1 teaspoon smoked paprika
- 1 1/2 cups Apple Cider (NOT Apple Cider Vinegar)
- 1 1/2 cups low sodium chicken broth
- 2 bay leaves
- 2 granny smith apples, cored and quartered
- 1Preheat the oven to 400˚F.
- 2Pat dry the pork with paper towels and season all over with kosher salt and black pepper.
- 3Heat the oil in a large oven-safe Dutch oven set over medium-high heat. To the heated oil, add the pork and brown it on all sides; about 5 minutes per side.
- 4Remove the pork from the pot and set it aside.
- 5Add onions to the pot and cook over medium heat for about 4 to 5 minutes, stirring often, until softened. Stir in the garlic and cook for 20 seconds.
- 6Deglaze the pot with the wine, scraping up all the browned bits from the bottom of the pot. Then, stir in the thyme, rosemary, and paprika.
- 7Add the pork back to the pot. Add in the apple cider, chicken broth, and bay leaves; bring the mixture to a boil.
- 8Cover the pot with a tight-fitting lid and transfer the pork to the oven.
- 9Reduce the oven temperature to 350˚F and cook for 2 hours.
- 10Remove the lid from the pot and drop in the apples. Cover and continue to cook in the oven for 30 minutes or until the internal temperature of the pork registers at least 145˚F and up to 200˚F.
- 11Remove from the oven and return the pot to the stovetop. Remove the pork from the pot and transfer it to a cutting board; let it rest for 10 minutes.
- 12In the meantime, set the pot over high heat and bring it to a boil; cook for a couple minutes or until sauce is slightly reduced and thickened.
- 13Cut the pork and serve it with the sauce, onions, and apples.
Keywords: braised pork, pork shoulder, apple cider, fall recipe, comfort food, German recipe, oven-baked
The quantities for these exquisite ingredients are detailed within the recipe card, ensuring you have everything you need for a flawless execution. From the robust pork shoulder to the crisp Granny Smith apples, each item plays a crucial role in building the depth of flavor that defines this dish.
Variations
While this classic braised pork shoulder recipe is undeniably spectacular, its inherent nature lends itself beautifully to creative adaptations. For those following a plant-based lifestyle, consider a hearty mushroom and root vegetable braise. Large portobello mushrooms, parsnips, carrots, and celery can be braised in a rich vegetable broth infused with similar aromatic herbs and a splash of balsamic vinegar for depth, offering a deeply satisfying vegan alternative that captures the spirit of slow cooking.
If you’re focusing on a lower-carbohydrate diet, you can achieve fantastic results by omitting the apples and focusing on the savory elements. Increase the quantities of onions and garlic, and perhaps add some sliced bell peppers or even cauliflower florets to the braising liquid. A splash of dry sherry or a more robust red wine can also add complexity without significantly increasing the carbohydrate count.
For a smoky, barbecue-inspired twist, introduce a tablespoon or two of your favorite barbecue sauce to the braising liquid along with the apple cider. A pinch of chipotle powder or a dash of liquid smoke can further enhance this profile. Serve this version shredded over coleslaw or alongside cornbread for a delicious, casual meal that still benefits from the tenderizing power of braising.
How to Prepare braised pork shoulder
The journey to incredibly tender and flavorful braised pork shoulder begins with meticulous preparation. This involves selecting the right cut of meat, seasoning it generously, and achieving a beautiful sear before it embarks on its slow, gentle cooking process. We’ll guide you through each step, ensuring that every element contributes to the final, succulent result. The Dutch oven is an indispensable tool here, allowing for stovetop searing and oven braising all in one vessel, minimizing cleanup and maximizing flavor retention.
Step 1: Preparing the Pork and Oven
Begin by preheating your oven to a robust 400°F (200°C). This initial high heat is crucial for kickstarting the browning process, which is key to developing deep flavor and a beautiful exterior crust on the pork. Thoroughly pat the pork shoulder dry with paper towels; moisture is the enemy of a good sear, so ensure it is as dry as possible. Seasoning is also paramount at this stage; don’t be shy with the kosher salt and freshly ground black pepper, coating all surfaces generously.
This initial seasoning not only enhances the natural flavor of the pork but also helps to create that desirable crust when it hits the hot pan. Think of this as the foundation of flavor for the entire dish. Once seasoned, the pork is ready for its transformation in the hot Dutch oven.
Step 2: Browning the Pork Shoulder
Heat two tablespoons of olive oil in your large, oven-safe Dutch oven over medium-high heat until it shimmers. Carefully place the seasoned pork shoulder into the hot oil, and allow it to sear undisturbed for approximately five minutes per side. You are looking for a deep, golden-brown crust to form. This Maillard reaction is where much of the foundational flavor of your braised pork shoulder will be built, adding richness and complexity that cannot be replicated by braising alone.
Take your time with this step; rushing the browning can lead to less intense flavor and a less appealing color. Once all sides of the pork shoulder have achieved a beautiful, even sear, remove it from the Dutch oven and set it aside on a plate. The rendered fat left in the pot is pure liquid gold and will be the base for your aromatic sauce.
Step 3: Sautéing Aromatics and Building the Sauce Base
Reduce the heat to medium and add the thinly sliced yellow onions to the same Dutch oven, using the rendered pork fat. Cook the onions, stirring frequently, for about four to five minutes, or until they begin to soften and become translucent. This gentle sautéing mellows their sharpness and draws out their natural sweetness, forming a delicious bed for the pork. Once the onions are softened, stir in the minced garlic and cook for an additional 20 seconds, just until fragrant, being careful not to burn it.
Now, it’s time to deglaze the pot. Pour in the ¼ cup of dry white wine and use a wooden spoon to scrape up all the browned bits (fond) from the bottom of the pot. This fond is packed with concentrated flavor and will enrich your braising liquid significantly. Stir in the fresh thyme, chopped rosemary leaves, and smoked paprika, allowing their aromas to bloom in the heat for about 30 seconds.
Step 4: Assembling for Braising
Carefully return the seared pork shoulder back into the Dutch oven, nestling it amongst the onions and garlic. Pour in the 1½ cups of apple cider and 1½ cups of low-sodium chicken broth. Ensure that the liquid comes about halfway up the sides of the pork shoulder; if it seems a bit low, you can add a touch more broth or cider, or even a splash of water. Add the two bay leaves to the liquid; they will impart a subtle, earthy note throughout the braising process. Bring the liquid to a boil over medium-high heat.
Once the liquid is boiling, cover the Dutch oven tightly with its lid. This is crucial for trapping steam and moisture, which are essential for the slow braising process. Transfer the covered pot to your preheated oven. You will then immediately reduce the oven temperature to 350°F (175°C). This lower temperature allows for a long, slow cooking period that will break down the connective tissues in the pork shoulder, rendering it incredibly tender.
Step 5: The Braising Period
Allow the pork shoulder to braise in the oven, covered, for two full hours. During this time, the low, slow heat will work its magic, transforming the tough cut of pork into something exceptionally tender. Resist the temptation to peek too often; each time you remove the lid, you release valuable heat and moisture. The goal is to allow the connective tissues to slowly break down, infusing the meat with the flavors of the braising liquid.
After two hours, carefully remove the Dutch oven from the oven. Uncover the pot and gently place the quartered Granny Smith apples into the braising liquid around the pork. The tartness of the apples will complement the richness of the pork beautifully, adding a layer of bright flavor. Replace the lid tightly and return the pot to the oven for an additional 30 minutes. This final half-hour allows the apples to soften and meld with the sauce, and ensures the pork is cooked through to perfection, ideally reaching an internal temperature of at least 145°F (63°C), though for true tenderness, aiming for 170-190°F (77-88°C) is beneficial.
Step 6: Resting and Reducing the Sauce
Once the pork has finished braising and the apples are tender, carefully remove the Dutch oven from the oven. Transfer the pork shoulder from the pot to a clean cutting board. Tent it loosely with aluminum foil and allow it to rest for at least 10 minutes. This resting period is vital, as it allows the juices within the meat to redistribute, ensuring a moist and tender final product. Cutting into it too soon will result in juices running out onto the board, leaving the meat drier.
While the pork rests, place the Dutch oven back on the stovetop over high heat. Bring the braising liquid and apples to a rolling boil. Cook for several minutes, stirring occasionally, until the sauce has reduced slightly and thickened to your desired consistency. This reduction concentrates the flavors of the cider, broth, and aromatics, creating a rich, luscious sauce that is perfect for spooning over the pork. Remove the bay leaves before serving.
Pro Tips for braised pork shoulder
Choosing the Right Cut: When selecting your pork shoulder, look for a piece with good marbling—those white flecks of fat interspersed within the muscle. This fat renders down during the long braising process, contributing immense flavor and ensuring the pork remains incredibly moist and tender. Avoid cuts that appear too lean, as they are more prone to drying out.
The Art of the Sear: Do not underestimate the importance of browning the pork shoulder properly. A deep, even sear on all sides creates a flavorful crust through the Maillard reaction. This step adds a depth of flavor and a beautiful color to the finished dish that cannot be achieved through braising alone. Ensure your pan is hot before adding the meat and don’t overcrowd it, which can lead to steaming rather than searing.
Embrace the Deglaze: After searing the pork, the browned bits stuck to the bottom of the Dutch oven are flavor treasures. Deglazing with wine or broth is essential to lift these bits and incorporate them into your sauce. This process adds a complexity and richness to the braising liquid that is fundamental to the dish’s overall taste profile.
Patience is Key: Braising is a slow and steady process. While the hands-on time may be minimal, the cooking time is significant. Trust the process and allow the pork ample time to cook until it is fork-tender. Overcooking is less of a concern here than undercooking, as the long, moist heat is what breaks down the tough connective tissues.
Sauce Consistency: The final reduction of the braising liquid is where you can fine-tune the sauce to your preference. Simmering it over high heat concentrates the flavors and thickens it naturally. If you prefer a smoother sauce, you can strain out the solids after reduction, though many enjoy the rustic charm of the softened onions and apples.
Serving Suggestions for braised pork shoulder
Decoration
A sprinkle of freshly chopped flat-leaf parsley adds a vibrant touch of green and a hint of fresh flavor that cuts through the richness of the pork. For a more autumnal aesthetic, consider garnishing with a few fresh thyme sprigs or a scattering of crispy fried sage leaves, which offer both visual appeal and an aromatic complement to the dish.
Side Dishes
This braised pork shoulder is a natural partner for creamy mashed potatoes or buttery mashed cauliflower, both of which are perfect for soaking up the luscious braising sauce. Another excellent choice is a side of tender, steamed green beans or roasted Brussels sprouts to provide a fresh, slightly bitter contrast to the savory pork. Consider also serving it alongside crusty bread for dipping into the flavorful sauce.
Creative Serving Ideas
For a more casual presentation, shred the rested pork shoulder and mix it with a generous amount of the reduced sauce. This pulled pork can then be served in soft slider buns for a delightful sandwich, or piled high on a platter for a barbecue-style meal. Another elegant option is to serve slices of the pork shoulder over a bed of wild rice pilaf or creamy polenta, allowing the rich sauce to generously coat the grain.
Preparation & Storage
Storing Leftovers
Once the braised pork shoulder has cooled slightly, transfer any leftovers into shallow, airtight containers. It’s best to include some of the braising liquid or sauce with the pork, as this helps to keep it moist during storage. Properly stored in the refrigerator, these delicious leftovers will maintain their quality for up to three days.
Freezing
For longer storage, braised pork shoulder freezes beautifully. Portion the pork and its accompanying sauce into freezer bags or sturdy, airtight storage containers. Ensure that as much air as possible is removed from the bags before sealing to prevent freezer burn. Frozen leftovers can be safely stored for up to two months.
Reheating
To reheat frozen braised pork shoulder, the best method is to thaw it overnight in the refrigerator first. This gradual thawing ensures even heating and helps preserve the texture of the meat. Once thawed, place the pork and sauce in a covered skillet or saucepan over low heat on the stovetop. Gently reheat until the pork is heated through, stirring occasionally to prevent sticking and ensure uniform warmth.
Frequently Asked Questions
- What is the best way to ensure my pork shoulder becomes fall-apart tender?
The key to achieving fall-apart tender pork shoulder lies in the combination of a tough cut of meat, low and slow cooking, and sufficient moisture. Pork shoulder contains a significant amount of connective tissue and fat, which, when subjected to prolonged moist heat, break down into gelatin. This gelatin is what gives braised meats their luxurious, melting texture. Ensure your oven temperature is consistently at 350°F (175°C) after the initial sear and browning, and that the pot is tightly covered to retain all the steam. Cooking until an internal temperature of around 170-190°F (77-88°C) is reached, or until a fork slides in with no resistance, is your best indicator of tenderness. Don’t rush this process; patience is truly rewarded with this cut.
- Can I make this braised pork shoulder recipe in a slow cooker or Instant Pot?
Absolutely! Both slow cookers and Instant Pots are excellent tools for braising pork shoulder, offering convenience and consistent results. For a slow cooker, you would typically brown the pork and sauté the aromatics on the stovetop first (or in the slow cooker if it has a sauté function), then transfer everything to the slow cooker, add the liquids, and cook on LOW for 8-10 hours, or on HIGH for 4-6 hours, adding the apples during the last 30 minutes of cooking. In an Instant Pot, you would use the sauté function to brown the pork and aromatics, deglaze, add the liquids, and then pressure cook on high for about 60-75 minutes, followed by a natural pressure release for 10-15 minutes before adding apples and cooking for another 5-10 minutes. Always adjust cooking times based on the specific appliance and the size of your pork shoulder.
- What kind of apples are best for braising with pork shoulder?
For braising with pork shoulder, tart apples are generally the preferred choice because their acidity provides a wonderful counterpoint to the richness of the pork and the sweetness of the cider. Granny Smith apples, as used in this recipe, are an excellent option due to their firm texture that holds up well during cooking and their pronounced tartness. Other good choices include Honeycrisp, Fuji, or Gala apples, especially if you prefer a slightly sweeter flavor profile. Avoid overly soft apples like Red Delicious, as they tend to disintegrate into mush rather than holding their shape and offering a pleasant textural contrast.