Fresh Berry Tart – Light and Easy Berry Dessert!
This easy berry tart is the epitome of a stress-free yet impressive dessert. With minimal ingredients and preparation time, it delivers a delightful combination of flaky pastry, sweet jam, and vibrant, juicy berries. It’s the perfect solution when you crave something homemade and delicious without the fuss of traditional pies.
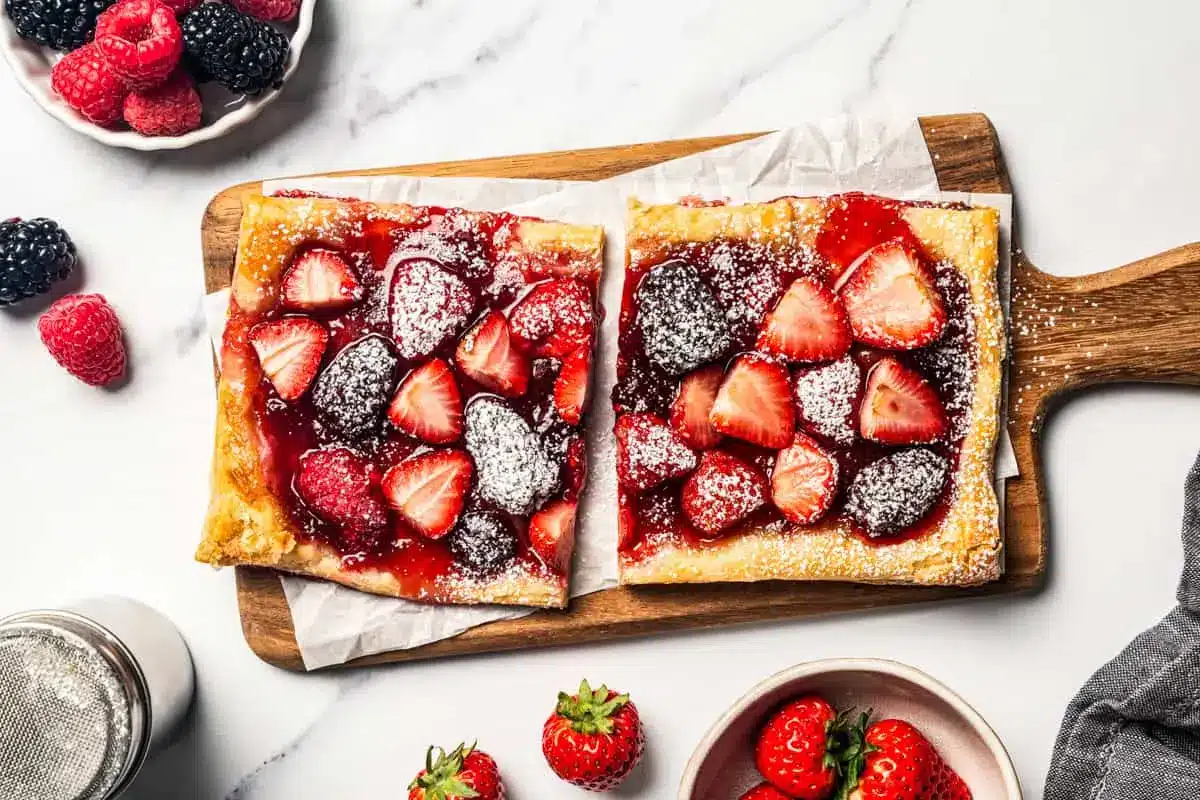
Imagine a beautiful, golden-brown puff pastry base, cradling a generous swirl of ruby-red strawberry jam, all topped with a colorful medley of fresh berries. This tart is not only a feast for the eyes but also a joy to the palate, making it a welcome addition to any gathering, from casual brunches to festive celebrations.
Why You Will Love This Recipe
- Effortless Preparation: This tart comes together in a remarkable 10 minutes of prep time, making it ideal for busy schedules or spontaneous baking.
- Minimal Ingredients: Requiring only 5 core ingredients, this recipe simplifies grocery shopping and ensures you likely have most items on hand.
- Versatile Berries: You have the freedom to use any combination of fresh berries you prefer, allowing for endless flavor possibilities and seasonal adaptations.
- Crisp, Buttery Crust: The use of puff pastry guarantees a delightfully flaky and rich crust that perfectly complements the sweet berry filling.
- Visually Stunning: Despite its ease, this berry tart boasts an elegant presentation, making it a showstopper for brunches, picnics, or any special occasion.
Ingredients You Need
The beauty of this easy berry tart lies in its simplicity, which starts with selecting high-quality ingredients. Opting for fresh, ripe berries will ensure the best flavor and texture, while a good quality puff pastry is key to achieving that signature flaky crust. Even the strawberry jam can elevate the final taste if you choose a flavorful variety.
Easy Berry Tart

This easy berry tart needs only 5 ingredients and takes 10 minutes to prepare for the oven. It has a crisp, buttery puff pastry crust covered with strawberry jam and sugar-coated berries.
- 1 sheet puff pastry, thawed, cut in half
- 2 cups mixed fresh berries
- 4 tablespoons strawberry jam, divided
- powdered sugar
- 1Preheat oven to 400ºF. Line a baking sheet with parchment paper.
- 2Combine the berries and sugar in a mixing bowl; lightly stir, then let stand for 5 minutes.
- 3Place the puff pastry dough on the prepared baking sheet and cut it in half.
- 4Spread 2 tablespoons of strawberry jam down the middle of each pastry sheet.
- 5Evenly divide the berries and arrange them over the strawberry jam, down the middle of each pastry sheet.
- 6Bake for 18 to 20 minutes, or until golden brown.
- 7Remove and let the tart stand for a few minutes. Dust with powdered sugar, cut, and serve.
Keywords: berry tart, puff pastry, easy dessert, fruit tart, quick dessert
- puff pastry: one sheet, thawed and cut in half, forms the delightful base of our tart.
- fresh berries: approximately two cups of a colorful mix like strawberries, raspberries, and blueberries, providing juicy sweetness.
- granulated sugar: about a quarter cup, used to gently macerate the berries and enhance their natural sugars.
- strawberry jam: four tablespoons, spread as a luscious layer beneath the berries for an extra burst of flavor.
- powdered sugar: for a delicate dusting over the finished tart, adding a touch of elegance.
Exact quantities for all these essential components can be found within the recipe card.
Variations
To truly make this easy berry tart your own, consider a few delightful variations that cater to different tastes and dietary preferences. These adjustments are simple and can significantly alter the tart’s profile, offering something for everyone.
For a delightful vegan twist, ensure your puff pastry is made without butter or eggs, as many commercial brands are surprisingly vegan-friendly. You can then follow the rest of the recipe as usual, enjoying the naturally vegan fruits and jam.
If you’re aiming for a low-carb option, a few thoughtful substitutions will be necessary. Instead of traditional puff pastry, explore almond flour or coconut flour crust recipes. For the jam layer, a sugar-free berry preserve or a homemade reduction using a low-carb sweetener like erythritol or stevia would work beautifully, maintaining the berry essence without the added sugars.
Another exciting variation involves infusing the jam layer with complementary flavors. Consider swirling in a tablespoon of lemon curd for a tangy contrast, or adding a hint of orange zest to the berry mixture to brighten their natural sweetness. A light drizzle of melted chocolate over the top after baking also adds a touch of decadence.
How to Prepare easy berry tart
Step 1: Prepare to Bake
The initial step in creating this delightful easy berry tart involves preheating your oven to a moderately high temperature. Set your oven to 400ºF (200ºC) to ensure the puff pastry bakes up beautifully golden and crisp. Meanwhile, prepare a baking sheet by lining it with parchment paper. This prevents sticking and makes for an easy cleanup after baking.
Having the oven at the correct temperature from the start is crucial for puff pastry. It needs that initial burst of heat to create steam within the layers, causing it to rise and become wonderfully flaky. The parchment paper not only stops any potential jam overflow from adhering to the sheet but also ensures the pastry doesn’t stick, allowing for a clean transfer to your serving platter.
This preparatory phase is short but vital for the success of the tart. It sets the stage for the baking process, ensuring that the pastry achieves its optimal texture and appearance. Taking these few minutes to get the oven and baking sheet ready will pay dividends when you pull out a perfectly baked, delicious berry tart.
Step 2: Coat the Berries
In a medium-sized mixing bowl, gently combine your chosen fresh berries with the granulated sugar. Stir them together lightly, ensuring each berry gets a delicate coating. Allow this mixture to stand for approximately 5 minutes. This brief resting period is known as maceration, where the sugar draws out the natural juices from the berries.
The maceration process is key to developing a richer berry flavor and creating a slightly syrupy consistency that mingles beautifully with the jam. It also helps to soften the berries just slightly, making them more tender when baked. Avoid over-stirring, as this can bruise the delicate fruits and release too much juice prematurely.
The sugar not only enhances the inherent sweetness of the berries but also acts as a catalyst for releasing their flavorful liquids. This creates a more intense, concentrated berry flavor that permeates the entire tart. The 5-minute wait is just enough time to achieve this transformation without the berries becoming overly mushy. This step is fundamental to the tart’s overall deliciousness.
Step 3: Prepare the Crust
Take your thawed puff pastry and place it directly onto the parchment-lined baking sheet you prepared earlier. Since you’re making two individual tarts or one larger one cut in half, gently cut the puff pastry sheet in half widthwise or lengthwise, depending on your desired shape. This creates the foundation for your berry creations.
When working with puff pastry, it’s important to handle it gently to preserve its delicate layers. If it’s too cold, it can be brittle, and if it’s too warm, it can become sticky and difficult to manage. The goal here is simply to prepare the pastry sheets to receive their toppings. Don’t overwork the dough at this stage; the magic happens in the oven.
Once the pastry is divided, you are ready to move on to the assembly stage. Each half will serve as a canvas for the delicious jam and berry topping. The ease of using pre-made puff pastry cannot be overstated, as it significantly cuts down on prep time while still delivering that sought-after flaky texture. This step is where the tart truly begins to take shape.
Step 4: Assemble the Tart
Now, take your strawberry jam and spread approximately 2 tablespoons evenly down the center of each puff pastry half. Leave a border around the edges to allow the pastry to puff up without the jam overflowing too much. After the jam is spread, evenly divide the macerated berries between the two pastry sheets, arranging them carefully over the jam layer.
The jam acts as a delicious adhesive and flavor base for the berries. Using homemade jam will lend an extra depth of flavor, but a good quality store-bought version is perfectly acceptable. Ensure the berries are distributed relatively evenly across the jam to guarantee a consistent taste in every bite. The goal is to create a beautiful, abundant topping.
As you arrange the berries, think about creating an appealing visual. The colors of the different berries will naturally create a vibrant mosaic. This step is where the tart truly becomes a work of art, ready for its transformation in the oven. The combination of the sweet jam and the fresh, slightly tart berries is the heart of this dessert.
Step 5: Bake to Golden Perfection
Carefully place the baking sheet with the assembled berry tarts into the preheated 400ºF (200ºC) oven. Bake for approximately 18 to 20 minutes. You are looking for the puff pastry to become beautifully golden brown and puffed, and the berries to become tender and slightly bubbly.
Keep a close eye on the tarts during the final minutes of baking, as ovens can vary. If one side of the puff pastry begins to puff up more dramatically than the other, you can gently prick the puffed area with a fork to even it out. This is a simple trick to ensure an attractive final presentation and prevent any overly inflated sections.
Once baked to perfection, remove the tarts from the oven. The aroma alone will be intoxicating! Let them rest on the baking sheet for a few minutes before carefully transferring them to a wire rack to cool further. This resting period is essential for the pastry to set and for the filling to stabilize slightly, preventing it from running out when served.
Step 6: Rest and Serve
After removing the easy berry tart from the oven, allow it to rest on the baking sheet for a few minutes. This brief period helps the puff pastry to firm up slightly and prevents the berries and jam from being too runny. Once it has cooled slightly, carefully transfer the tart to a wire rack to cool completely.
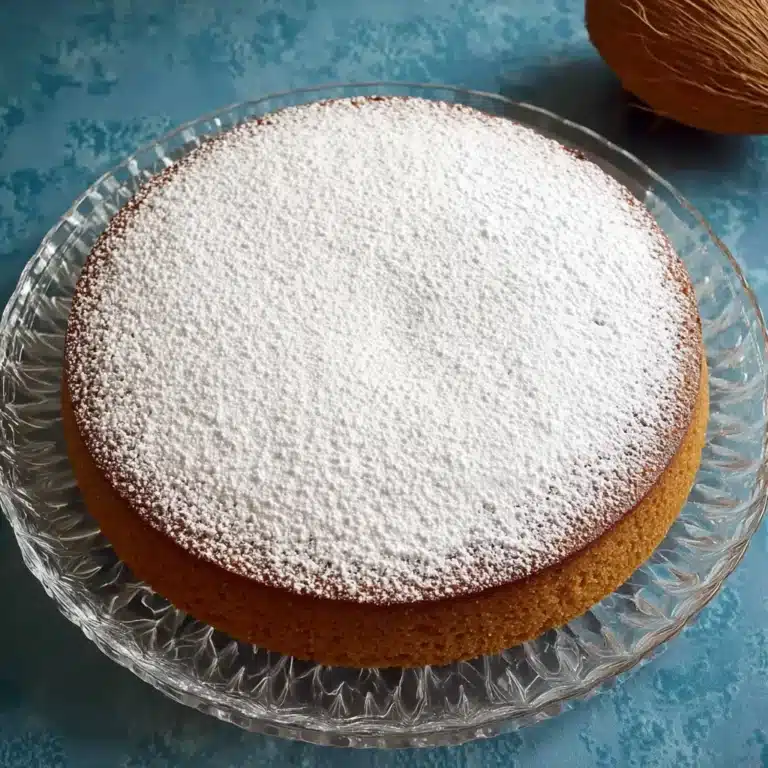
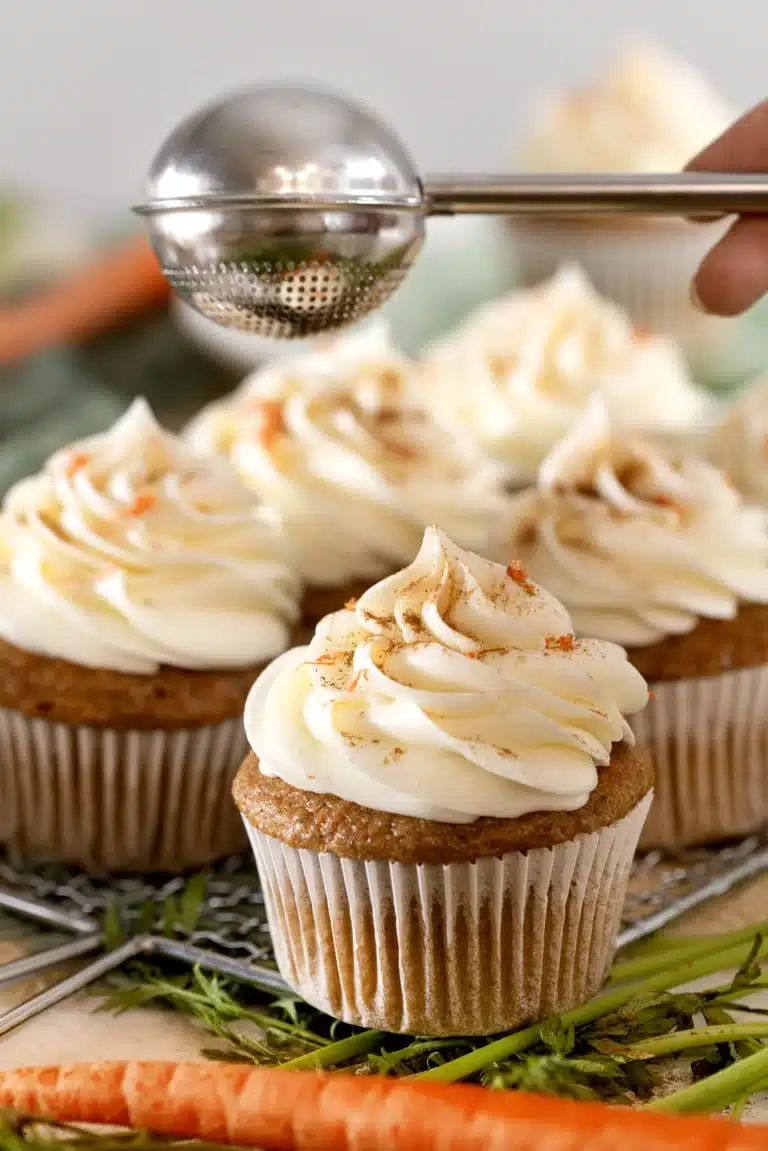
Once the tart is completely cool, it’s time for the final flourish. Take your powdered sugar and lightly dust it over the top of the berry tart. This adds a delicate sweetness and a beautiful, snowy finish that enhances its visual appeal. You can use a fine-mesh sieve for an even, professional-looking dusting.
Finally, cut the tart into desired portions and serve. This easy berry tart is best enjoyed fresh, showcasing the crispness of the pastry and the vibrant flavor of the berries. It’s a simple yet elegant dessert that is sure to impress with its minimal effort and maximum deliciousness.
Pro Tips for easy berry tart
Embrace the Puff Pastry Hack: Using store-bought, thawed puff pastry is the secret weapon for this incredibly easy tart. It eliminates the need for time-consuming dough preparation while still delivering that signature flaky, buttery texture that home bakers adore. Simply ensure it’s properly thawed according to package directions before you begin assembly.
Berry Selection is Key: While the recipe calls for mixed berries, don’t be afraid to experiment. A combination of sweet and slightly tart berries, like raspberries and blueberries alongside strawberries, creates a more complex flavor profile. Ensure your berries are fresh and ripe for the best taste; frozen berries can be used, but they must be thoroughly thawed and drained to prevent a soggy crust, as detailed in the ingredient notes.
Jam Layer Matters: The jam acts as a delightful barrier between the pastry and the berries, adding a concentrated burst of flavor. Strawberry jam is classic, but consider other berry jams like raspberry or even a mixed berry jam for variety. If you’re feeling adventurous, a thin layer of lemon curd beneath the berries adds a wonderful zesty contrast to their sweetness.
Watch the Baking Time: Puff pastry can bake quite quickly, and ovens vary. Keep a close eye on the tart during the last 5-10 minutes of baking. You want the pastry to be deeply golden brown and puffed, and the berries to be soft and slightly jammy. If any areas puff up unevenly, a gentle poke with a fork can help to deflate them and ensure even baking.
Cooling is Crucial for Presentation: While the temptation to dive in immediately is strong, allowing the tart to cool on a wire rack is important. This helps the pastry to crisp up further and allows the jam and berry juices to set slightly. Dusting with powdered sugar once it’s mostly cool prevents the sugar from melting into a sticky mess. This simple step ensures a beautiful final presentation.
Serving Suggestions for easy berry tart
Decoration
The simplest and most effective decoration for this easy berry tart is a light dusting of powdered sugar. This creates a beautiful, snowy finish that contrasts wonderfully with the vibrant berries and golden crust. For an extra touch of elegance, you can also add a few fresh mint leaves scattered artistically around the edge of the tart or tucked amongst the berries. A very light drizzle of melted white or dark chocolate over the top after it has cooled can also add a sophisticated visual appeal and a complementary flavor.
Side Dishes
This berry tart pairs wonderfully with a dollop of fresh whipped cream or a scoop of vanilla bean ice cream. The cool, creamy contrast enhances the tart’s fruitiness and flaky texture. For a lighter accompaniment, a simple side of fresh fruit salad can complement the berry theme without overpowering the main dessert. Consider a small bowl of mixed berries or melon to offer a refreshing palate cleanser.
Creative Serving Ideas
To elevate the serving experience, consider cutting the tart into smaller, individual portions and serving them on elegant dessert plates. Each mini tart can be garnished with a single perfect berry and a small mint sprig. For a more rustic presentation, place the entire tart on a wooden board and let guests serve themselves. This encourages a communal and relaxed dining atmosphere.
Another creative idea is to serve this easy berry tart as part of a dessert tasting platter. Alongside other small treats like funfetti cookies or mini brownies, it offers a lighter, fruit-forward option. This allows guests to sample a variety of flavors and textures, making your dessert spread truly memorable.
For a special occasion, you can even arrange small dollops of different flavored yogurts or crème fraîche around the tart on a platter. This adds a creamy counterpoint and allows guests to customize their tart experience. The versatility of this tart means it can be adapted to suit any style of entertaining, from casual picnics to formal dinner parties.
Preparation & Storage
Storing Leftovers
If you happen to have any leftover easy berry tart, it’s best to store it in an airtight container at room temperature for the first day. This helps to maintain some of the pastry’s crispness. However, for longer storage, refrigerating the tart is recommended. Place it in a suitable container in the refrigerator, and it should remain palatable for up to 3 days.
It’s important to note that the puff pastry will inevitably lose some of its crisp texture when stored, especially in the refrigerator. The moisture from the berries and jam can soften it over time. Therefore, while it will still be delicious, the texture will be different from when it’s freshly baked. The goal is to preserve its flavor and edibility for as long as possible.
When you’re ready to enjoy the leftovers, it’s a good idea to take the tart out of the refrigerator about 30-60 minutes before serving. Allowing it to come back to room temperature will significantly improve its overall texture and flavor. This simple step helps to revive it from its chilled state.
Freezing
Freezing this easy berry tart is possible, though it’s generally not the preferred method due to the nature of puff pastry. If you choose to freeze it, it’s best to do so before baking. Prepare the tart as usual, but skip the baking step. Wrap the unbaked tart tightly in plastic wrap, then in a layer of aluminum foil, or place it in a freezer-safe container. It can be frozen for up to 1 month.
When you’re ready to bake the frozen tart, do not thaw it completely. Remove it from the freezer and bake it directly from frozen. You will likely need to increase the baking time by an additional 5-10 minutes to ensure it cooks through properly. Keep an eye on the pastry to ensure it browns evenly without burning.
Alternatively, you can freeze individual baked slices. Ensure the tart is completely cooled before wrapping each slice individually and then placing them in a freezer bag or container. This method is better for portion control but may still result in a slightly softer crust upon reheating compared to a freshly baked tart.
Reheating
Reheating leftover easy berry tart is straightforward, and it’s the best way to enjoy it again if it has been refrigerated. The most effective method is to use your oven or toaster oven. Place the slice or slices of tart on a baking sheet lined with parchment paper. Reheat at a moderate temperature, around 300-325ºF (150-160ºC), for about 5-10 minutes, or until warmed through and the pastry is slightly crisped up again.
Avoid using the microwave for reheating, as it tends to make puff pastry soggy and chewy. The microwave heats food using moisture, which is the enemy of crisp pastry. While it will warm the tart, the texture will suffer significantly. Opting for a dry heat method like the oven is crucial for restoring some of the pastry’s original texture.
If you notice the berries have released a bit too much liquid during storage, the gentle heat of the oven will also help to re-thicken the jam slightly. This reheating process aims to bring the tart as close as possible to its freshly baked state, making it enjoyable once more. The aroma that fills your kitchen as it reheats is a delightful bonus.
Frequently Asked Questions
-
Can I use frozen berries instead of fresh for this easy berry tart?
Yes, you can absolutely use frozen berries for this easy berry tart, but it requires an extra step to prevent a soggy crust. You’ll need to thaw the frozen berries completely and drain off any excess liquid. For best results, I even recommend patting the thawed berries dry with paper towels to remove as much moisture as possible. If the berries are still too wet, they can compromise the crispness of the puff pastry. When using frozen berries, it’s also advisable to skip the initial maceration step with sugar and stir the sugar directly into the drained berries just before adding them to the tart.
-
What are some alternative jam or fruit fillings I can use in this tart?
This easy berry tart is quite versatile, and you can certainly experiment with different jam and fruit fillings. While strawberry jam is classic, raspberry jam, blueberry jam, or even apricot preserves would work wonderfully. For a tangier profile, consider using lemon curd as the base instead of jam; it pairs beautifully with berries. You can also mix and match fruits; perhaps a combination of berries with sliced peaches or plums for a seasonal twist. If you use fruits that are less juicy, you might want to add a tablespoon or two of water or juice to the fruit mixture before assembling to ensure adequate moisture for baking.
-
How can I ensure my puff pastry crust doesn’t become soggy?
To ensure your puff pastry crust remains delightfully crisp, several techniques can be employed. Firstly, using fresh, high-quality puff pastry is essential; ensure it’s thawed properly without becoming overheated. Secondly, the jam layer acts as a protective barrier, so spreading it evenly and not too thinly is important. As mentioned earlier, thoroughly draining and drying any frozen berries is crucial. Another tip is to pre-bake the puff pastry slightly before adding the filling, a technique known as blind baking, although for this specific quick recipe, it’s often omitted for simplicity. If you notice uneven puffing during baking, gently pricking the puffed areas with a fork can help deflate them, ensuring more even cooking and less chance of moisture pooling.