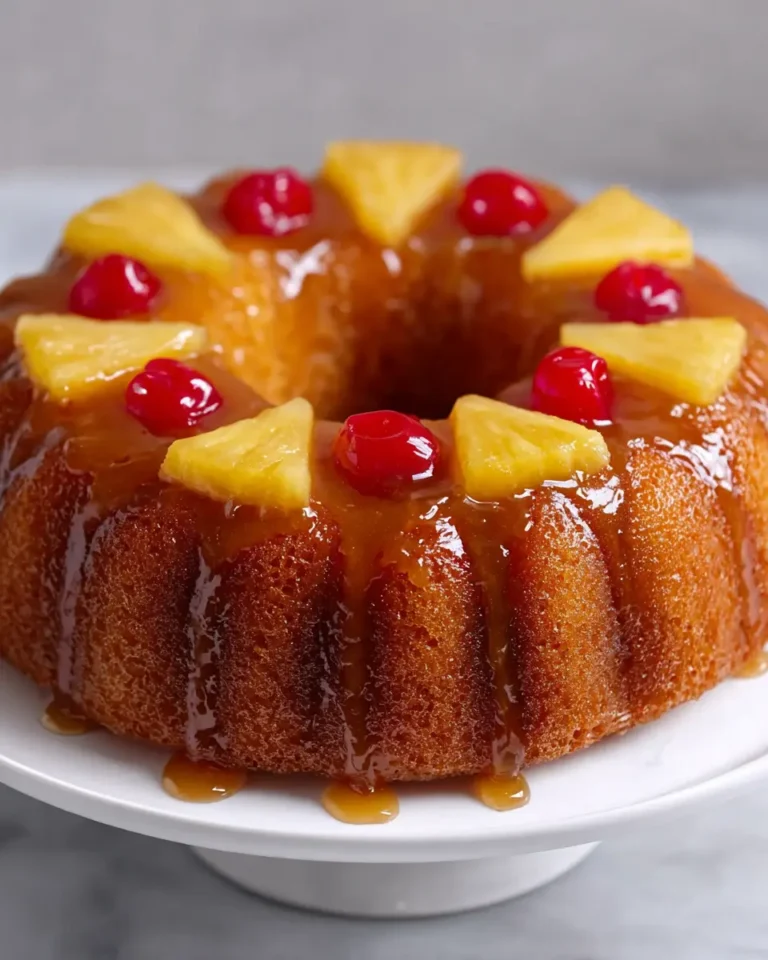
Pineapple Coconut Layer Cake
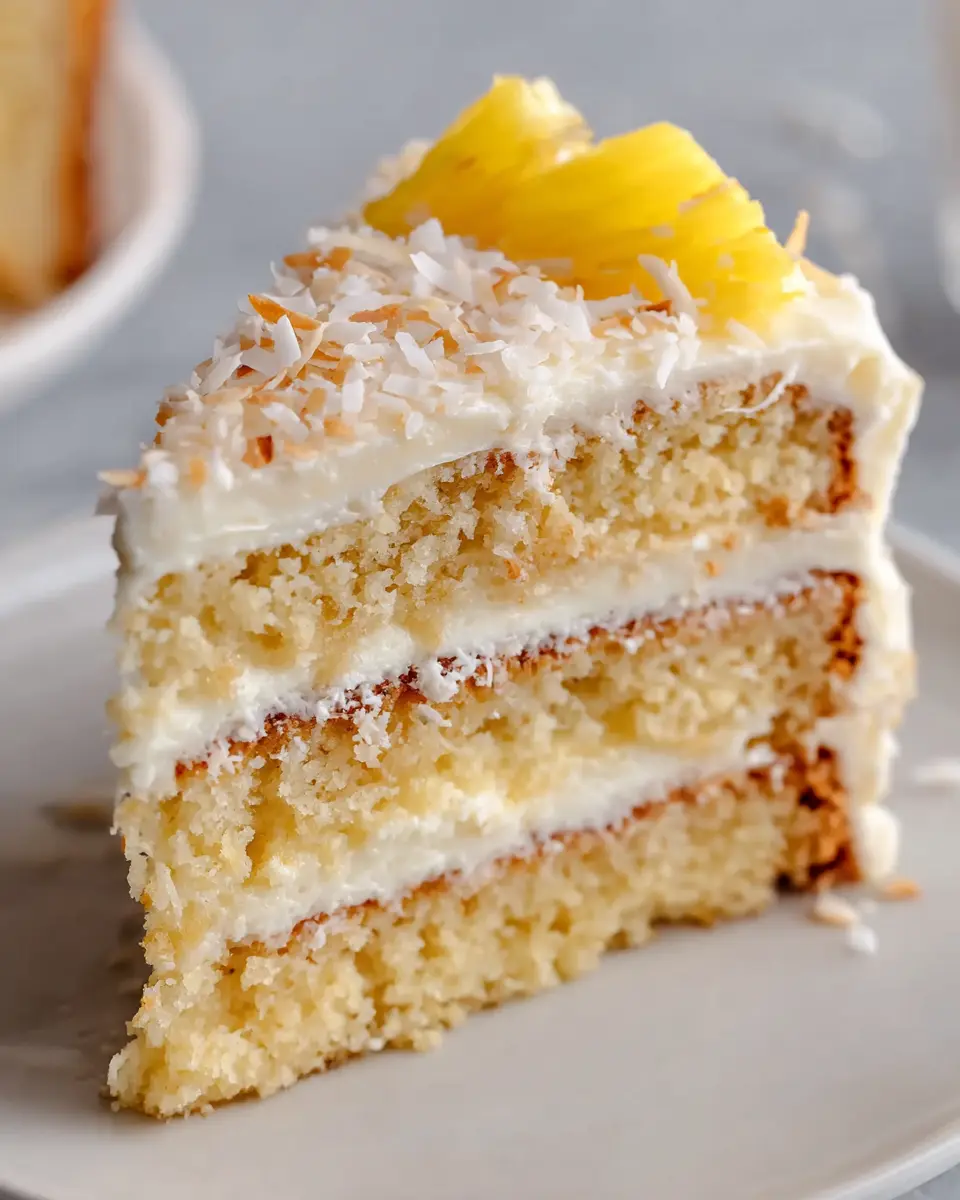
Imagine a tropical escape on a plate, a symphony of sweet pineapple and fragrant coconut that transports you straight to sun-drenched beaches with every bite. This Pineapple Coconut Cake is precisely that escape, a beautifully crafted dessert that balances richness with bright, fruity notes.
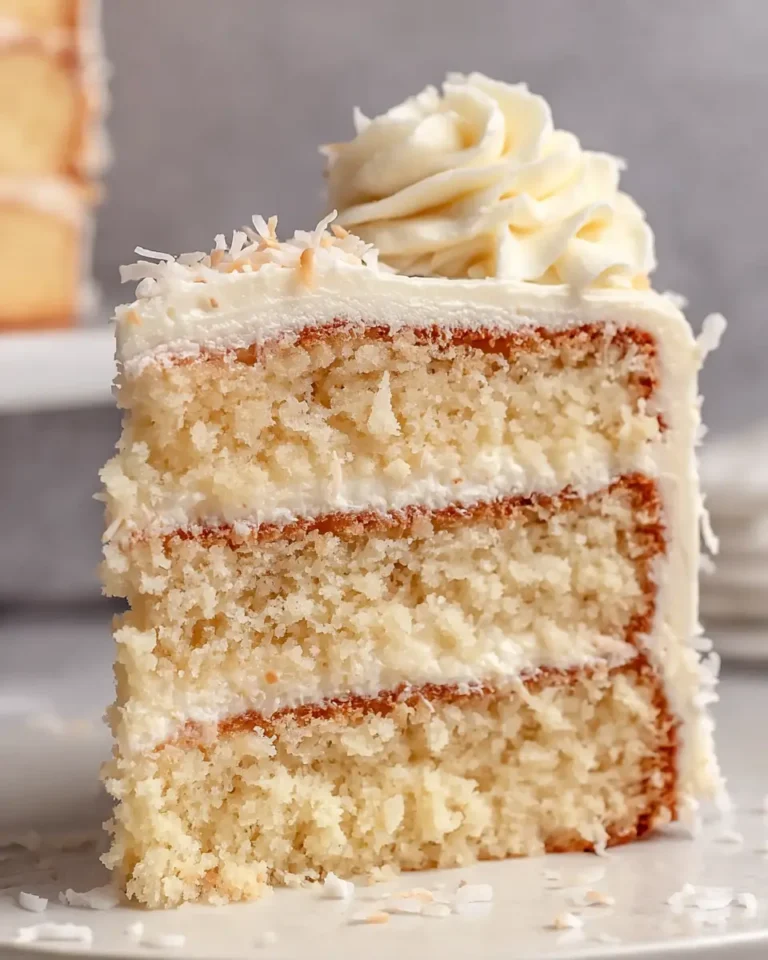
It’s a cake that looks as stunning as it tastes, perfect for celebrations big and small, or simply for those moments when you crave a slice of pure, unadulterated joy. The layers are incredibly tender, infused with the subtle warmth of coconut, and married with a vibrant, tangy pineapple curd that cuts through the sweetness beautifully. The creamy frosting ties it all together, creating a truly unforgettable dessert experience.
Why You Will Love This Recipe
- Tropical Paradise: Experience the irresistible combination of sweet pineapple and creamy coconut in every single bite, evoking a delightful tropical vacation.
- Moist & Tender Crumb: The cake layers are exceptionally soft and moist, thanks to the inclusion of coconut milk and sour cream, ensuring a delightful texture that melts in your mouth.
- Silky Pineapple Curd: A luscious, homemade pineapple curd provides a burst of tangy fruitiness, perfectly complementing the coconut cake and adding a sophisticated layer of flavor.
- Dreamy Cream Cheese Frosting: The rich, tangy cream cheese frosting is the ideal counterpart to the cake and curd, offering a smooth and luxurious finish that is both decadent and balanced.
- Visually Stunning: With its beautiful layers and potential for creative decoration, this cake is a showstopper that will impress your guests and make any occasion feel extra special.
Ingredients You Need
The key to an exceptional Pineapple Coconut Cake lies in the quality and freshness of its ingredients. Opting for full-fat coconut milk will lend a superior richness to both the cake and the frosting, while ripe pineapples will ensure the most vibrant flavor in the curd. Using cake flour is also essential for achieving that signature tender, delicate crumb that distinguishes this cake.
Pineapple Coconut Cake

A rich yet bright layer cake with tender coconut-scented layers, silky pineapple curd, and creamy frosting. This cake offers a tropical flavor that slices neatly and feels special, perfect for birthdays, gatherings, or any occasion.
- For the cake: 1 cup pineapple pieces, 2 teaspoons baking powder, 1 teaspoon coconut extract, 3/4 cup full-fat coconut milk (brought to room temperature), 1 1/2 cups granulated sugar, 1 teaspoon fine salt, 1 cup sweetened shredded coconut, 2 tablespoons pineapple juice, 1/2 cup sour cream, 2 1/2 cups cake flour, 3/4 cup unsalted butter (softened), 4 large egg whites (at room temperature), 1/2 teaspoon baking soda, 2 teaspoons vanilla extract
- For the pineapple curd: 1/3 cup granulated sugar, 2 large egg yolks, 1/3 cup pineapple juice, 1 1/2 teaspoons cornstarch, 1/8 teaspoon salt, 1 large egg, 1/4 cup unsalted butter (softened)
- For the frosting: 4 cups powdered sugar, 1/4 teaspoon salt, 1/2 cup unsalted butter (softened), 2 teaspoons vanilla extract, 1/4 cup coconut milk, 8 ounces full-fat cream cheese (softened)
- 1Preheat the oven to 350°F (177°C). Grease three 8-inch cake pans, line the bottoms with parchment rounds, and grease the parchment as well.
- 2Whisk together cake flour, baking powder, baking soda, and salt. Set aside.
- 3In a large bowl, beat softened butter and granulated sugar until pale and creamy.
- 4Add egg whites, sour cream, vanilla extract, and coconut extract. Beat until incorporated.
- 5With the mixer on low, add dry ingredients in portions, alternating with coconut milk and pineapple juice, until combined. Fold in shredded coconut and pineapple chunks.
- 6Divide batter evenly among pans and bake for 22-24 minutes, or until a toothpick comes out clean. Let cool completely.
- 7For the curd, whisk egg, yolks, sugar, cornstarch, pineapple juice, and salt in a double boiler over simmering water until thickened (about 10 minutes). Whisk in butter until smooth. Cool with plastic wrap pressed on the surface.
- 8For the frosting, beat cream cheese and butter until smooth. Add powdered sugar, coconut milk, vanilla, and salt. Beat until fluffy.
- 9Level cake layers if needed. Stack layers with frosting and curd between each.
- 10Apply a thin crumb coat of frosting and refrigerate for 30-60 minutes.
- 11Cover cake with remaining frosting. Garnish as desired. Refrigerate for at least 20 minutes before slicing.
Keywords: Pineapple Coconut Cake, Tropical Cake, Layer Cake, Fruit Cake, Cream Cheese Frosting, Make-Ahead Dessert
The precise quantities for each element are detailed within the recipe card for your convenience.
Variations
This Pineapple Coconut Cake is a canvas for creativity, offering delightful avenues for personalization. Consider a vegan adaptation by substituting the butter with a high-quality vegan butter alternative and using a flax egg or commercial egg replacer in the cake batter. For the curd, a plant-based milk and a vegan butter can be employed, and the frosting can be transformed using vegan cream cheese and butter substitutes, ensuring everyone can enjoy this tropical delight.
For those seeking a lower-carbohydrate option, almond flour or a blend of almond and coconut flour can replace the cake flour, though this will alter the texture slightly, perhaps making it a touch denser. Sugar substitutes, like erythritol or xylitol, can be used in place of granulated and powdered sugar, adjusting quantities as needed for sweetness. Be mindful that these substitutions might require slight adjustments to baking times and liquid ratios.
Another exciting variation involves infusing additional tropical flavors. A hint of lime zest added to the cake batter or frosting can provide a zesty counterpoint to the sweetness. You could also introduce a touch of rum extract into the frosting or macerate the pineapple pieces in a splash of rum before folding them into the batter for an adult-friendly twist on this beloved cake.
How to Prepare Pineapple Coconut Cake
Step 1: Preparing the Cake Pans and Preheating the Oven
The foundation of any successful cake begins with proper pan preparation, and this Pineapple Coconut Cake is no exception. Begin by thoroughly greasing three 8-inch round cake pans. This ensures that the delicate cake layers will release cleanly after baking, preventing any frustrating tears or sticking.
Next, line the bottom of each greased pan with a round of parchment paper. Lightly grease the parchment paper as well; this creates a reliable barrier that guarantees an easy lift-off for your beautifully baked cake layers. As you prepare your pans, it’s crucial to preheat your oven to 350°F (177°C). This allows the oven to reach the optimal temperature before the batter is ready, ensuring consistent and even baking from the moment the pans enter the oven.
Step 2: Mixing the Dry and Wet Ingredients for the Cake Batter
In a medium bowl, combine all the dry ingredients for the cake: cake flour, baking powder, baking soda, and fine salt. Whisk them together thoroughly. This step is vital for ensuring that the leavening agents are evenly distributed throughout the flour, which is key to achieving a light and airy cake structure. It also ensures the salt is well dispersed, enhancing the overall flavor balance.
In a separate, large mixing bowl, cream together the softened unsalted butter and granulated sugar. Beat them on medium-high speed for about two minutes, or until the mixture transforms into a pale, creamy, and fluffy consistency. This creaming process incorporates air, which contributes significantly to the cake’s tender texture. After achieving this creamy base, gradually incorporate the room-temperature egg whites, sour cream, vanilla extract, and coconut extract. Mix until everything is just combined; it’s perfectly normal for the batter to appear slightly curdled at this stage.
Step 3: Combining Wet and Dry Mixtures and Folding in Additions
Now, it’s time to bring the cake batter together. With your mixer running on low speed, begin adding the whisked dry ingredients to the wet ingredients in batches. Alternate this addition with the full-fat coconut milk and pineapple juice. Start and end with the dry ingredients, ensuring that you don’t overmix the batter. This method helps to develop the gluten just enough for structure without making the cake tough.
Once the batter is almost smooth and well incorporated, gently fold in the sweetened shredded coconut and the pineapple pieces. Use a spatula for this step to avoid crushing the fruit and to ensure the additions are evenly distributed throughout the batter. A final, gentle stir by hand can help ensure that no dry pockets remain and that the coconut and pineapple are scattered throughout the cake layers for bursts of tropical flavor in every bite. The batter should be thick and rich at this point.
Step 4: Baking the Cake Layers
Carefully divide the prepared batter evenly among the three greased and parchment-lined 8-inch cake pans. Use a spatula to spread the batter gently and evenly in each pan, ensuring the layers will be of similar thickness for even baking and a level final cake. The aroma that fills your kitchen as these bake is truly heavenly, a prelude to the tropical delight to come.
Place the pans in the preheated 350°F (177°C) oven and bake for approximately 22 to 24 minutes. The exact baking time can vary slightly depending on your oven, so it’s important to check for doneness. A tester, such as a toothpick or a thin skewer, inserted into the center of the cake should come out clean with no wet batter clinging to it. The tops should be set and spring back slightly when gently pressed.
Once baked to perfection, remove the cake pans from the oven and place them on a wire cooling rack. Allow the cake layers to cool in their pans for about 10 to 15 minutes before attempting to invert them. This initial cooling period in the pan helps the cakes to firm up slightly, making them easier to remove without breaking. After this initial cooling, carefully invert each cake layer onto the wire rack, remove the parchment paper, and allow them to cool completely. This is a critical step; assembling a warm cake will cause the frosting and curd to melt, leading to a messy and unstable cake.
Step 5: Preparing the Silky Pineapple Curd
The pineapple curd is a vital component that adds a vibrant burst of fruity tang and a luxuriously smooth texture to the cake. To prepare it, you’ll need a double boiler setup. Fill the bottom portion of your double boiler with about 1 to 2 inches of water and bring it to a gentle simmer over medium-low heat. This gentle, indirect heat is essential for cooking the eggs and thickening the curd without scrambling them.
In the top portion of the double boiler, which will sit snugly over the simmering water, whisk together the whole egg, the two egg yolks, granulated sugar, cornstarch, pineapple juice, and a pinch of salt. Begin whisking these ingredients until they are thoroughly combined and there are no lumps of cornstarch visible. Once combined, place the top of the double boiler over the simmering water and start cooking. You must whisk this mixture constantly throughout the cooking process. This continuous whisking is crucial for preventing scorching and ensuring an even, smooth thickening.
Continue to cook and whisk for approximately 10 to 15 minutes, or until the mixture has thickened to a consistency similar to that of a thick hollandaise sauce or a rich pudding. It should be thick enough to coat the back of a spoon. Once the curd has reached the desired thickness, carefully remove the top of the double boiler from the heat. Now, add the softened butter to the hot curd. Whisk vigorously until the butter is completely melted and fully incorporated, lending the curd a beautiful sheen and extra richness.
Transfer the finished pineapple curd to a clean container. To prevent a skin from forming as it cools, press a piece of plastic wrap directly onto the surface of the curd, ensuring it makes contact with the entire surface. Allow the curd to cool completely at room temperature, and then refrigerate it. As the curd chills, it will thicken considerably further, achieving the perfect spreadable consistency for layering your cake. It’s often best to make this curd a day in advance to allow it ample time to chill and set.
Step 6: Crafting the Creamy Coconut Cream Cheese Frosting
This luscious frosting is the perfect complement to the tropical flavors of the cake and pineapple curd. In a large mixing bowl, begin by beating together the softened cream cheese and softened unsalted butter. Use an electric mixer on medium speed for about two minutes, or until the mixture is completely smooth and creamy, with no lumps of cream cheese remaining. This smooth base is crucial for a lump-free frosting.
Next, gradually add the powdered sugar to the cream cheese and butter mixture. It’s best to add this in stages, mixing on low speed at first to prevent a cloud of sugar from escaping the bowl. Once all the powdered sugar has been added, incorporate the coconut milk, vanilla extract, and a pinch of salt. Increase the mixer speed to high and beat for an additional two minutes until the frosting is light, fluffy, and beautifully spreadable. If your kitchen is particularly warm, or if you prefer a firmer frosting that is easier to pipe or spread without melting, you can mix in an additional 1/4 cup of powdered sugar.
Step 7: Assembling and Crumb Coating the Cake
Before you begin assembling, check your cooled cake layers. If any of the layers have developed a domed top during baking, you’ll want to level them. Use a long, serrated knife to carefully slice off the dome, creating a flat surface. This ensures that your cake layers stack evenly and that the final cake is stable and visually appealing. Don’t discard the scraps; they make for delicious snacking!
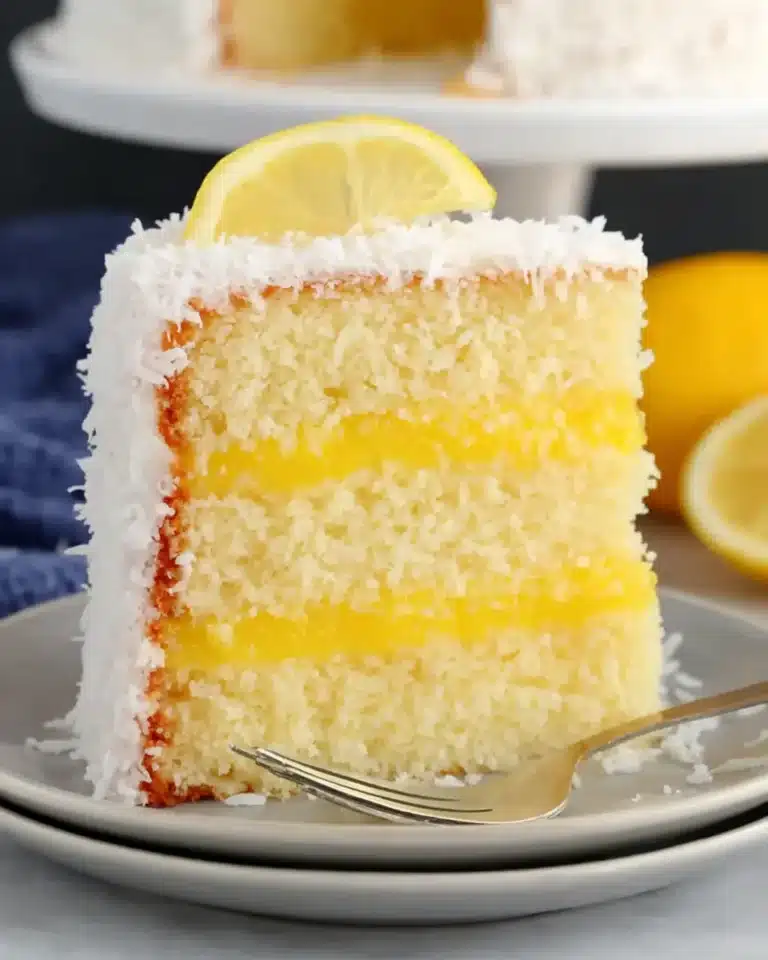
Place the first leveled cake layer onto your serving plate or cake stand. Spread a thin, even layer of the coconut cream cheese frosting over the top of this first layer, using an offset spatula. Follow this with a generous spoonful of the chilled pineapple curd, spreading it gently over the frosting, leaving a small border to prevent it from oozing out when the next layer is added. Carefully position the second cake layer on top of the curd and frosting, again ensuring it is level.
Repeat the layering process with the second cake layer: a thin layer of frosting, followed by a layer of pineapple curd. Then, carefully place the third and final cake layer on top. Now comes the “crumb coat.” Apply a very thin, even layer of frosting all over the outside of the cake – the top and the sides. This initial thin layer traps any loose crumbs, creating a clean surface for your final frosting application. Once the crumb coat is applied, place the entire cake in the refrigerator for 30 to 60 minutes. This chilling period is essential as it allows the crumb coat to firm up, making it much easier to apply the final, thicker layer of frosting smoothly.
Step 8: Final Frosting and Presentation
After the crumb coat has chilled and firmed up, it’s time for the final frosting. Remove the cake from the refrigerator and generously apply the remaining coconut cream cheese frosting over the entire cake. Use your offset spatula to spread the frosting evenly over the top and sides, aiming for a smooth and professional finish. You can create swirls and texture with the spatula or leave it smooth, depending on your preference.
For an extra touch of tropical flair, consider decorating the cake. You can artfully arrange fresh pineapple chunks on top, or gently press extra sweetened shredded coconut onto the sides of the cake, pressing it lightly into the frosting. These garnishes not only enhance the visual appeal but also reinforce the delicious flavors within. Once decorated, it’s highly recommended to chill the finished cake again for at least 20 minutes before slicing. This brief chilling period helps the frosting set slightly, ensuring that each slice holds its shape beautifully and showcases the distinct layers of cake, curd, and frosting.
Pro Tips for Pineapple Coconut Cake
Room Temperature is Key: For the most emulsified and evenly baked cake, ensure your butter, egg whites, sour cream, and coconut milk are all at room temperature. This allows them to blend together smoothly, creating a homogenous batter that bakes evenly and results in a tender crumb.
Drain Pineapple Well: When using canned pineapple pieces, ensure they are very well drained. Excess moisture can weigh down the cake layers and potentially make them too dense or even gummy. Patting them dry with paper towels is a good practice.
Chill for Neat Slices: Don’t underestimate the power of chilling. A chilled cake, especially after the crumb coat and again before slicing, will result in much cleaner, neater slices. The frosting and curd will be firmer, preventing the cake from sliding or crumbling when cut.
Adjust Frosting Consistency: If your frosting seems too soft to work with, particularly in a warm environment, don’t hesitate to add a bit more powdered sugar, a tablespoon at a time, until it reaches a spreadable but firm consistency. Conversely, if it’s too stiff, a tiny splash of coconut milk can help loosen it.
Don’t Overmix: While it’s important to mix the batter until just combined, be careful not to overmix once the flour is added. Overmixing develops the gluten in the flour, which can lead to a tough cake. Gentle folding is your friend here.
Serving Suggestions for Pineapple Coconut Cake
Decoration
Elevate the visual appeal of your Pineapple Coconut Cake with thoughtful decorations that enhance its tropical theme. Consider topping the cake with a medley of fresh pineapple wedges or small, perfectly diced chunks arranged artfully. A generous dusting of sweetened shredded coconut around the edges or over the entire top can create a beautiful snowy effect. For a touch of elegance, candied pineapple slices or delicate edible flowers can add a sophisticated flair.
Side Dishes
This cake is a star on its own, but it pairs wonderfully with simple accompaniments that complement its tropical flavors without overpowering them. A small scoop of lightly sweetened whipped cream can offer a cloud-like softness and a subtle contrast to the cake’s richness. Freshly sliced pineapple, served alongside a slice of cake, amplifies the fruit’s natural brightness and adds a refreshing element. A simple berry compote, perhaps made with mango or passionfruit, can introduce another layer of delightful fruitiness.
Creative Serving Ideas
Think beyond the standard slice for a truly memorable experience. Serve individual portions in clear glasses or jars, layering crumbled cake, pineapple curd, and a dollop of frosting for a “parfait” style presentation that showcases the cake’s components. Warm the cake slightly before serving and pair it with a scoop of creamy coconut ice cream or a refreshing sorbet for a delightful hot-and-cold contrast. For a fun brunch idea, crumble leftover cake and serve it over yogurt with fresh fruit, transforming it into a delicious tropically-inspired parfait.
Preparation & Storage
Storing Leftovers
Due to the presence of cream cheese frosting and the pineapple curd, this cake must be stored in the refrigerator. Ensure it is covered tightly to prevent it from drying out or absorbing any unwanted odors from other foods. A cake dome with a tight-fitting lid is ideal, or you can wrap the entire cake snugly in plastic wrap, followed by a layer of aluminum foil. Stored properly, leftover Pineapple Coconut Cake can remain delicious for up to 4 to 5 days.
Freezing
For longer-term storage, individual slices of this cake freeze exceptionally well. Make sure the cake is thoroughly chilled before slicing. Wrap each slice tightly in plastic wrap, then in aluminum foil, or place them in an airtight freezer-safe container. This double layer of protection helps prevent freezer burn. Frozen slices can be stored for up to 1 to 2 months. Thaw frozen slices overnight in the refrigerator for the best results.
Reheating
This cake is best served at room temperature or slightly chilled. Reheating is generally not necessary or recommended, as it can affect the texture of the frosting and curd. However, if you prefer a slightly warmer cake, you can gently warm individual slices for a few seconds in a microwave on a very low power setting, or place them in a warm oven for a minute or two. It’s more beneficial to let the cake sit at room temperature for about 15-20 minutes before serving. This allows the flavors to meld and the frosting to soften slightly, enhancing the overall taste and texture experience.
Frequently Asked Questions
-
Can I make the pineapple curd ahead of time?
Absolutely! The pineapple curd is an ideal component to prepare in advance, as its flavor and texture actually improve with chilling. You can easily make the curd a day or even two days before you plan to assemble the cake. Store it in an airtight container in the refrigerator, ensuring the plastic wrap is pressed directly onto the surface to prevent a skin from forming. It will thicken further as it cools, making it perfectly spreadable when you’re ready to build your cake.
-
Why does the cake batter look slightly curdled after mixing the wet ingredients?
This is a completely normal occurrence when combining the egg whites, sour cream, and extracts with the butter and sugar mixture. The fat in the butter can sometimes react with the proteins and acids in these ingredients, causing a slightly separated or curdled appearance. As long as you proceed with properly adding the dry ingredients and liquids in the next step, the batter will come together into a smooth, cohesive mixture before baking. The key is to not overmix at this stage, and the dry ingredients will help to emulsify everything beautifully.
-
Will the frosting be firm enough to hold the cake layers, especially in warmer weather?
Generally, yes, this cream cheese frosting is designed to be firm enough for layering, especially after the cake has been chilled during the crumb-coating stage. The combination of cream cheese and butter, along with the powdered sugar, creates a stable structure. However, if you find your frosting is too soft for your liking, particularly in a warm kitchen environment, don’t hesitate to add a little extra powdered sugar, about a tablespoon at a time, until you achieve a firmer, more workable consistency. Refrigerating the cake after the crumb coat is also crucial for ensuring the frosting is set enough to handle the final application without sliding.