The Best Orange Cake Recipe
Before we dive into my awesome orange cake recipe, in case you haven’t read about my love affair with cake, I’ll link my Chocolate Cannoli Cake recipe so you can check it out there. You will then understand why I feel so strongly that it’s a must to eat cake on your birthday!
I don’t care how old you are; in my family, if you have a birthday, I am asking you what flavor of cake you want to eat on your special day. I get pretty excited about baking the cake, even if it’s my own birthday cake. I make myself a cake as well!
Why You Will Love This Recipe
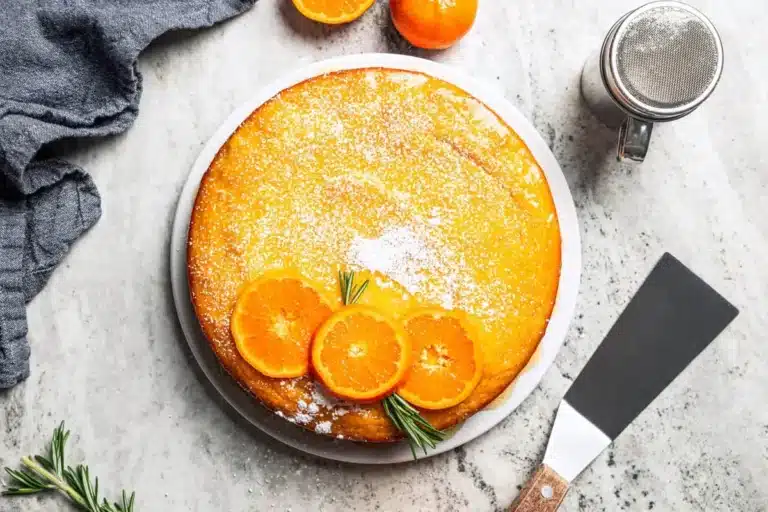
- Incredibly Moist Texture: The secret to this cake’s divine moistness lies in the simple yet effective orange syrup that is generously brushed onto the cake after baking. This syrup infuses the cake with an extra layer of citrusy goodness and ensures a tender crumb.
- Vibrant Orange Flavor: This isn’t a cake that merely hints at orange; it bursts with it. Freshly squeezed orange juice and zest are the stars, providing a bright, authentic citrus punch that is both refreshing and satisfying.
- Simple Elegance: While its flavor is sophisticated, this cake is surprisingly straightforward to prepare, making it perfect for both novice bakers and experienced pros. The beautiful bundt shape adds an elegant touch without requiring intricate decorating skills.
- Versatile Appeal: Whether for a birthday celebration, a holiday gathering, or just a delightful afternoon treat, this orange cake is a crowd-pleaser. Its comforting yet bright profile makes it suitable for any occasion.
- Easy to Adapt: The recipe is forgiving and adaptable, allowing for creative twists. You can easily adjust the sweetness, add spices, or even incorporate different citrus notes to make it your own signature dessert.
Ingredients You Need
The quality of your ingredients plays a significant role in the final taste and texture of this delightful orange cake. Opting for fresh, vibrant oranges will elevate the citrus flavor, while using good quality butter and eggs will contribute to a rich and tender crumb. Pay attention to the freshness of your baking powder and soda to ensure a proper rise.
The Best Orange Cake Recipe

What I love about this orange cake recipe is that it’s super moist thanks to the added orange syrup which is brushed on after the cake is baked. This orange cake is full of flavor, moist and just heavenly delicious.
- 1 1/3 cup all - purpose flour
- 3 Tbsp cornstarch
- 1 ½ tsp baking powder
- 1 tsp lemon zest
- 2 tsp orange zest
- 2 large eggs at room temperature
- 1 tsp vanilla extract
- For Orange Syrup:
- 2 tbsps freshly squeezed orange juice
- 1 1/2 tbsps sugar
- For the Cream Cheese Glaze:
- 2 tbsps cream cheese softened
- 3/4 cup powdered sugar
- 1-2 tbsps milk
- 1Preheat oven to 350F.
- 2Prepare a 6 cup bundt pan by spraying with non-stick cooking spray or greasing and flouring it. Set aside.
- 3In a medium bowl, stir together the flour, cornstarch, baking powder, baking soda and salt. Set aside.
- 4Using a stand mixer or a handheld mixer in a larger bowl beat the butter on medium speed until creamy, about 1 – 2 minutes.
- 5With the mixer running on med-low speed, gradually add in sugar, orange and lemon zest. Now increase the speed to med-high for another 4-5 minutes until the color turns very pale and the texture turns fluffy.
- 6Add eggs one at a time to the mixture.
- 7Add in the vanilla, sour cream and mix until it’s well incorporated.
- 8Reduce the mixer speed to low and add a few scoops of the flour mixture until well combined. Then add in some of the orange juice. Keep alternating between the flour and orange juice until the batter gets smooth. Try not to over mix.
- 9Using a rubber spatula give the batter one final turn to make sure that the batter is nice and smooth, then transfer the batter into the prepared bundt pan.
- 10Bake for 30 minutes or until the center of the cake bounces back when lightly touched or when a wooden skewer inset comes out clean.
- 11Let the cake cool slightly and in the meantime make the orange syrup.
- 12Orange Syrup: In a small saucepan over low heat, combine orange juice and sugar and bring to a simmer, just until the sugar dissolves. Remove from heat.
- 13Using a skewer, poke tiny holes all over the top of the bundt cake while still in the baking pan.
- 14Brush the surface of the cake with about 1/3 of the syrup.
- 15Once the cake is completely cooled, transfer it to a serving platter and brush on top and sides of the cake with the remaining orange syrup.
- 16Cream Cheese Glaze: In a med bowl using a mixer beat the cream cheese until smooth. Add in the powdered sugar and milk until the mixture is thick yet pourable.
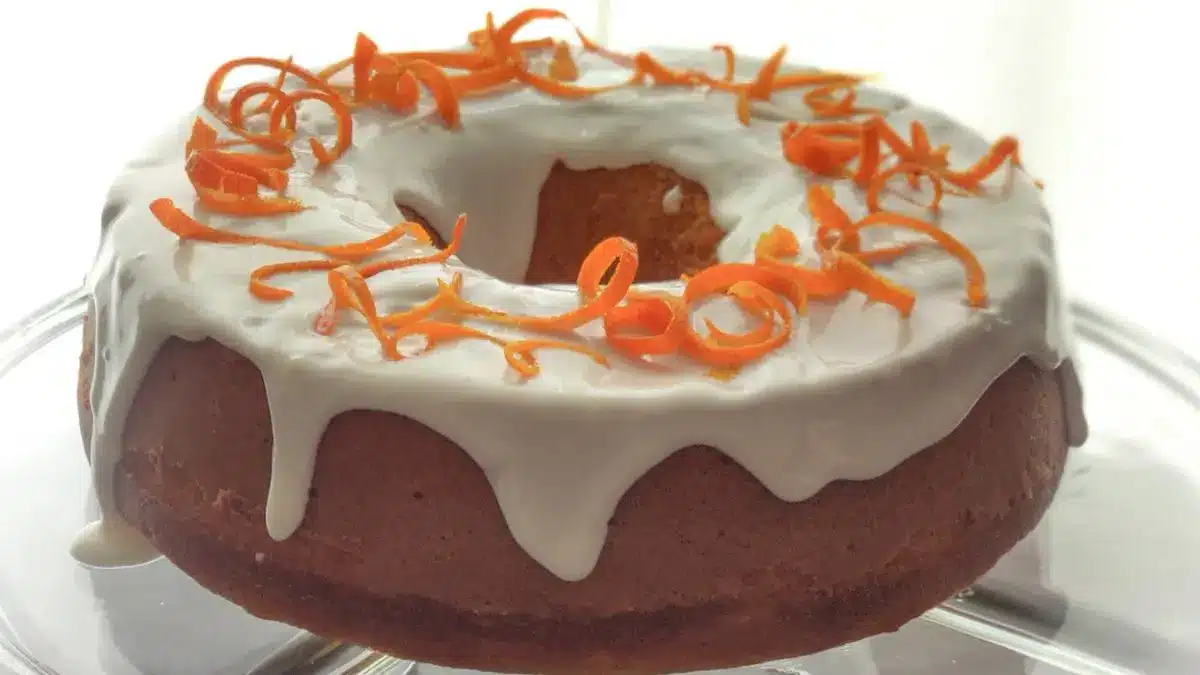
- 17Pour glaze over the cake and garnish with strands of orange peel.
Keywords: orange cake, bundt cake, citrus cake, dessert, baking, cake recipe
The specific quantities for all ingredients are detailed within the provided recipe card.
Variations
Elevating this already delightful orange cake is a breeze with a few creative twists. Consider transforming it into a vegan delight by substituting the butter with a good quality vegan butter or coconut oil, and using a plant-based yogurt or applesauce for the sour cream. For the eggs, a flax egg or a commercial egg replacer will work beautifully, ensuring the cake remains wonderfully moist and tender without any animal products.
For those following a low-carb lifestyle, this orange cake can be adapted with a few smart swaps. Replace the all-purpose flour with an almond flour and coconut flour blend. For the sugar, a granulated erythritol or a monk fruit sweetener blend would be an excellent substitute. You might need to adjust the liquid content slightly by adding a touch more orange juice or a splash of milk to achieve the right batter consistency, but the zesty orange flavor will still shine through.
Another exciting variation involves infusing the cake with complementary flavors, perhaps a touch of cardamom or a hint of ginger for warmth, especially during the cooler months. You could also introduce a subtle herbal note by adding a teaspoon of finely chopped fresh rosemary to the batter, which pairs surprisingly well with citrus. This would add an unexpected yet delicious complexity to the cake, making it truly memorable.
How to Prepare orange cake
Step 1: Preparing the Dry Ingredients
Begin by preheating your oven to a moderate 350°F (175°C). This consistent temperature is crucial for even baking and achieving that perfect golden-brown crust. Simultaneously, prepare your chosen baking vessel, whether it’s a 6-cup bundt pan or a standard cake pan, by generously coating it with non-stick cooking spray or by greasing and flouring it meticulously.
In a medium-sized bowl, combine the all-purpose flour, cornstarch, baking powder, baking soda, and salt. Whisk these dry ingredients together thoroughly until they are well incorporated. This ensures that the leavening agents and salt are evenly distributed throughout the flour, which is essential for a uniform rise and balanced flavor in the final cake. Set this mixture aside as you move on to the wet ingredients.
The cornstarch in this mixture plays a vital role; it helps to create a finer crumb and contributes to the cake’s tender texture, making it melt-in-your-mouth delicious. By sifting these dry ingredients, you also introduce air, which further aids in the cake’s lightness and prevents any pockets of unincorporated flour.
Step 2: Creaming Butter and Sugar
In a larger bowl, or the bowl of your stand mixer, place the softened unsalted butter. Beat the butter on medium speed until it becomes wonderfully creamy and smooth, which typically takes about 1 to 2 minutes. Softened butter is key here, as it incorporates air more effectively, which is vital for the cake’s structure and texture.
Gradually add the granulated sugar and the finely grated orange and lemon zest to the butter while the mixer is running on a medium-low speed. Continue to mix these ingredients together, then increase the mixer’s speed to medium-high and beat for an additional 4 to 5 minutes. You are looking for the mixture to turn a very pale yellow color and achieve a fluffy, cloud-like texture.
The zesting of the oranges and lemons at this stage is paramount; it releases the essential oils that impart the cake’s signature bright, aromatic, and deeply satisfying citrus flavor. Ensure you only zest the colored part of the peel, avoiding the bitter white pith underneath. This creaming process is a cornerstone of cake baking, as it effectively aerates the batter, contributing significantly to the cake’s light and tender crumb.
Step 3: Incorporating Eggs and Wet Ingredients
Now, it’s time to add the eggs one at a time to the creamed butter and sugar mixture. It is important to beat well after each egg is added, ensuring each one is fully incorporated before adding the next. This gradual addition helps to emulsify the batter, preventing it from separating and contributing to a smoother final texture.
Following the eggs, add the vanilla extract, sour cream, and mix until everything is thoroughly combined. The sour cream adds moisture and a slight tang, enhancing the overall flavor profile and contributing to that signature moistness. Ensure that the mixer speed is kept at a moderate setting to avoid overworking the batter at this stage.
The vanilla extract provides a warm, sweet undertone that beautifully complements the bright citrus notes, adding another layer of complexity to the overall flavor. Make sure your sour cream and eggs are at room temperature for the best incorporation, preventing the batter from becoming dense or oily.
Step 4: Alternating Dry and Wet Ingredients
Reduce the mixer speed to low. Begin adding the flour mixture in three additions, alternating with the freshly squeezed orange juice in two additions. Start by adding about one-third of the flour mixture and mixing until just combined. Then, add about half of the orange juice and mix until incorporated.
Continue this process, adding another third of the flour mixture, then the remaining orange juice, and finally the last portion of the flour mixture. It is crucial to avoid overmixing the batter during this stage, as overmixing can develop the gluten in the flour, leading to a tougher, denser cake. Mix only until the ingredients are just combined and the batter is smooth.
The alternating addition of dry and wet ingredients helps to create a stable emulsion and ensures that the gluten development is minimized. This technique is a classic baking method designed to yield a tender and light cake texture, making every bite a delightful experience.
Step 5: Finishing and Baking the Cake
Once all the ingredients have been added and the batter is smooth, use a rubber spatula to give the batter one final, gentle turn. This ensures that any flour that might have clung to the sides or bottom of the bowl is incorporated, resulting in a homogenous batter. Carefully transfer this smooth, luscious batter into your prepared bundt pan or cake pan, spreading it evenly.
Place the pan in the preheated oven and bake for approximately 30 minutes. The exact baking time can vary depending on your oven and the type of pan used. You will know the cake is done when the center springs back lightly when touched, or when a wooden skewer or toothpick inserted into the center comes out clean, with no wet batter attached.
Allow the cake to cool in the pan for about 10-15 minutes before attempting to invert it onto a wire rack. This initial cooling period helps the cake to set slightly, making it easier to remove without breaking. Patience at this stage ensures the cake maintains its beautiful shape.
Step 6: Preparing the Orange Syrup and Glaze
While the cake is cooling slightly in its pan, prepare the vibrant orange syrup. In a small saucepan over low heat, combine 2 tablespoons of freshly squeezed orange juice with 1.5 tablespoons of sugar. Gently heat this mixture, stirring constantly, until the sugar has completely dissolved. Do not boil it, just bring it to a gentle simmer to ensure the sugar dissolves fully.
Remove the saucepan from the heat. While the cake is still warm and in its baking pan, use a skewer or a thin wooden dowel to poke tiny, numerous holes all over the top surface of the cake. This creates channels for the syrup to penetrate deep into the cake, infusing it with moisture and flavor.
Using a pastry brush, generously brush about one-third of the warm orange syrup over the top of the cake. This initial syrupping is crucial for immediate moisture. Once the cake has completely cooled on a wire rack, carefully transfer it to a serving platter. Then, brush the remaining orange syrup over the entire top and sides of the cake, allowing it to soak in and create a wonderfully moist and flavorful finish.
Next, prepare the cream cheese glaze. In a medium bowl, beat the softened cream cheese until it’s perfectly smooth and free of lumps. Gradually add the powdered sugar and 1 to 2 tablespoons of milk, mixing until you achieve a thick yet pourable consistency. The amount of milk needed might vary, so add it gradually until the desired texture is reached.
Once the glaze is ready, generously pour it over the cooled cake, allowing it to cascade down the sides naturally. For a final touch of elegance and visual appeal, garnish the cake with delicate strands of orange peel. This not only adds a beautiful aesthetic but also enhances the orange aroma and flavor of the finished dessert. The contrast of the tangy glaze with the sweet, moist cake is absolutely divine.
Pro Tips for orange cake
Zest Wisely: When zesting your oranges and lemons, be sure to only grate the colored outer peel. The white pith underneath is bitter and can impart an unpleasant taste to your cake, so avoid it altogether. A microplane zester is ideal for achieving fine, fragrant zest without going too deep.
Room Temperature is Key: For the creamiest batter and best incorporation of ingredients, ensure your butter, eggs, and sour cream are at room temperature. This allows them to emulsify more easily, creating a smoother batter and a lighter, more tender cake. Cold ingredients can lead to a dense or oily texture.
Don’t Overmix: Overmixing the batter, especially after adding the flour, can lead to a tough cake. Mix only until the ingredients are just combined. A few small streaks of flour are better than overmixing. The final turn with a spatula helps to ensure everything is incorporated without developing too much gluten.
Syrup Penetration: The key to an incredibly moist cake is the syrup. Don’t shy away from poking plenty of holes into the warm cake. The more channels you create, the more syrup the cake can absorb, resulting in a lusciously moist and flavorful crumb throughout. Apply the syrup generously to both the top and sides.
Cooling is Crucial: Allow the cake to cool sufficiently in the pan before inverting it. Then, let it cool completely on a wire rack before glazing. Attempting to glaze a warm cake can cause the glaze to melt and slide off, ruining the presentation. Patience here ensures a perfect finish.
Serving Suggestions for orange cake
Decoration
For a simple yet elegant garnish, consider scattering a few fresh orange segments or candied orange peel over the top of the glazed cake. A light dusting of powdered sugar can also add a touch of sophistication, especially if you’ve opted out of the cream cheese glaze. Fresh mint sprigs can provide a lovely color contrast and a hint of freshness.
Side Dishes
This orange cake pairs beautifully with a dollop of fresh whipped cream or a spoonful of crème fraîche, adding an extra layer of richness. For a more decadent pairing, serve it with a scoop of vanilla bean ice cream or a complementary citrus sorbet. A light fruit salad featuring berries or other seasonal fruits also complements the cake’s bright flavors wonderfully.
Creative Serving Ideas
Consider serving individual slices of this orange cake as part of a dessert platter, alongside other small treats like macarons or mini tarts. You could also elevate it by transforming it into a trifle, layering crumbled cake with orange-flavored custard and fresh whipped cream. For a brunch setting, a smaller, individual bundt version or even cupcakes would be delightful.
Preparation & Storage
Storing Leftovers
To keep your orange cake fresh and delicious, store any leftovers in an airtight container at room temperature for up to 2-3 days. If your kitchen is particularly warm, or if the cake has a cream cheese glaze, it’s best to refrigerate it to prevent spoilage.
Freezing
This orange cake freezes exceptionally well, making it a great make-ahead option. Wrap the cooled, unfrosted cake tightly in plastic wrap, then in a layer of aluminum foil or place it in a freezer-safe container. It can be stored in the freezer for up to 4 months, retaining most of its moisture and flavor.
Reheating
When you’re ready to enjoy frozen cake, allow it to thaw completely in the refrigerator overnight. If the cake was unfrosted, you can gently reheat individual slices in a microwave for about 10-15 seconds to warm them up and restore a bit of its original moistness. If it has a glaze, it’s best to let it thaw at room temperature to avoid a soggy texture.
Frequently Asked Questions
-
Can I make this orange cake without a bundt pan?
Absolutely! If you don’t have a bundt pan, you can easily adapt this recipe to a standard cake pan. A 6-cup bundt pan is roughly equivalent to a 9-inch round cake pan. You can also use a loaf pan or even muffin tins. Adjust the baking time accordingly, as different pan shapes and sizes can affect how quickly the cake bakes. Start checking for doneness around the 25-30 minute mark for cake pans, and potentially longer for loaf pans, using the skewer test to ensure it’s fully cooked through.
-
Why is my orange cake dense or dry?
A dense or dry orange cake is often the result of overmixing the batter, particularly after the flour has been added. Overmixing develops the gluten in the flour, leading to a tougher texture. Another common cause is using ingredients that are too cold, which can prevent proper emulsification and aeration. Ensure your butter, eggs, and sour cream are at room temperature for optimal results. Incorrect leavening agents or an oven that runs too hot can also contribute to a dry cake.
-
How can I intensify the orange flavor in my cake?
To maximize the orange flavor, use freshly squeezed orange juice and freshly grated orange zest. Avoid bottled juices, as they often lack the vibrant flavor of fresh oranges. Consider adding a touch more orange zest than the recipe calls for, or even incorporating a tablespoon or two of orange extract for an even more pronounced citrus punch. The orange syrup, applied generously after baking, also plays a critical role in infusing the cake with a deep orange essence.