Salbeibutter selber machen – Muma’s Kitchen
Salbeibutter, often referred to as ‘Salbei-Butter’ in its native German, is a culinary marvel that transforms simple dishes into gourmet experiences. The fusion of creamy butter with the distinct, aromatic notes of fresh sage and the subtle warmth of garlic creates a flavour profile that is both comforting and sophisticated. This herb butter is remarkably versatile, acting as a flavour enhancer for everything from delicate pasta dishes and hearty gnocchi to perfectly grilled meats and roasted vegetables.
Crafting your own Salbeibutter is surprisingly straightforward, requiring minimal ingredients and a short investment of your time. This makes it an ideal accompaniment for busy weeknights or a delightful addition to more elaborate dinner parties. The ability to control the intensity of each ingredient ensures a personalised flavour that often surpasses store-bought alternatives, making the effort of making it yourself truly worthwhile.
Why You Will Love This Recipe
- Intense Flavour: Experience the true aromatic essence of fresh sage, perfectly melded with rich butter and a hint of garlic, elevating any dish it graces.
- Incredibly Versatile: From a simple spread on crusty bread to a luxurious topping for steak or a flavour boost for vegetables, this butter complements a wide array of culinary creations.
- Quick Preparation: With just a few simple steps, you can have this flavourful butter ready to use in under 20 minutes, making it perfect for spontaneous culinary inspiration.
- Customisable: Easily adjust the ratio of sage to garlic, or incorporate other herbs and spices, to tailor the flavour profile precisely to your taste preferences.
- Excellent for Meal Prep: Make a larger batch and store it in the refrigerator or freezer, ensuring you always have this delicious homemade condiment on hand.
Ingredients You Need
The success of homemade Salbeibutter hinges on the quality of its core components, ensuring a vibrant and authentic flavour. Opting for the freshest ingredients will yield the most delightful results. The butter should be unsalted to allow for precise seasoning, and the sage leaves should be plump and fragrant, free from any blemishes.
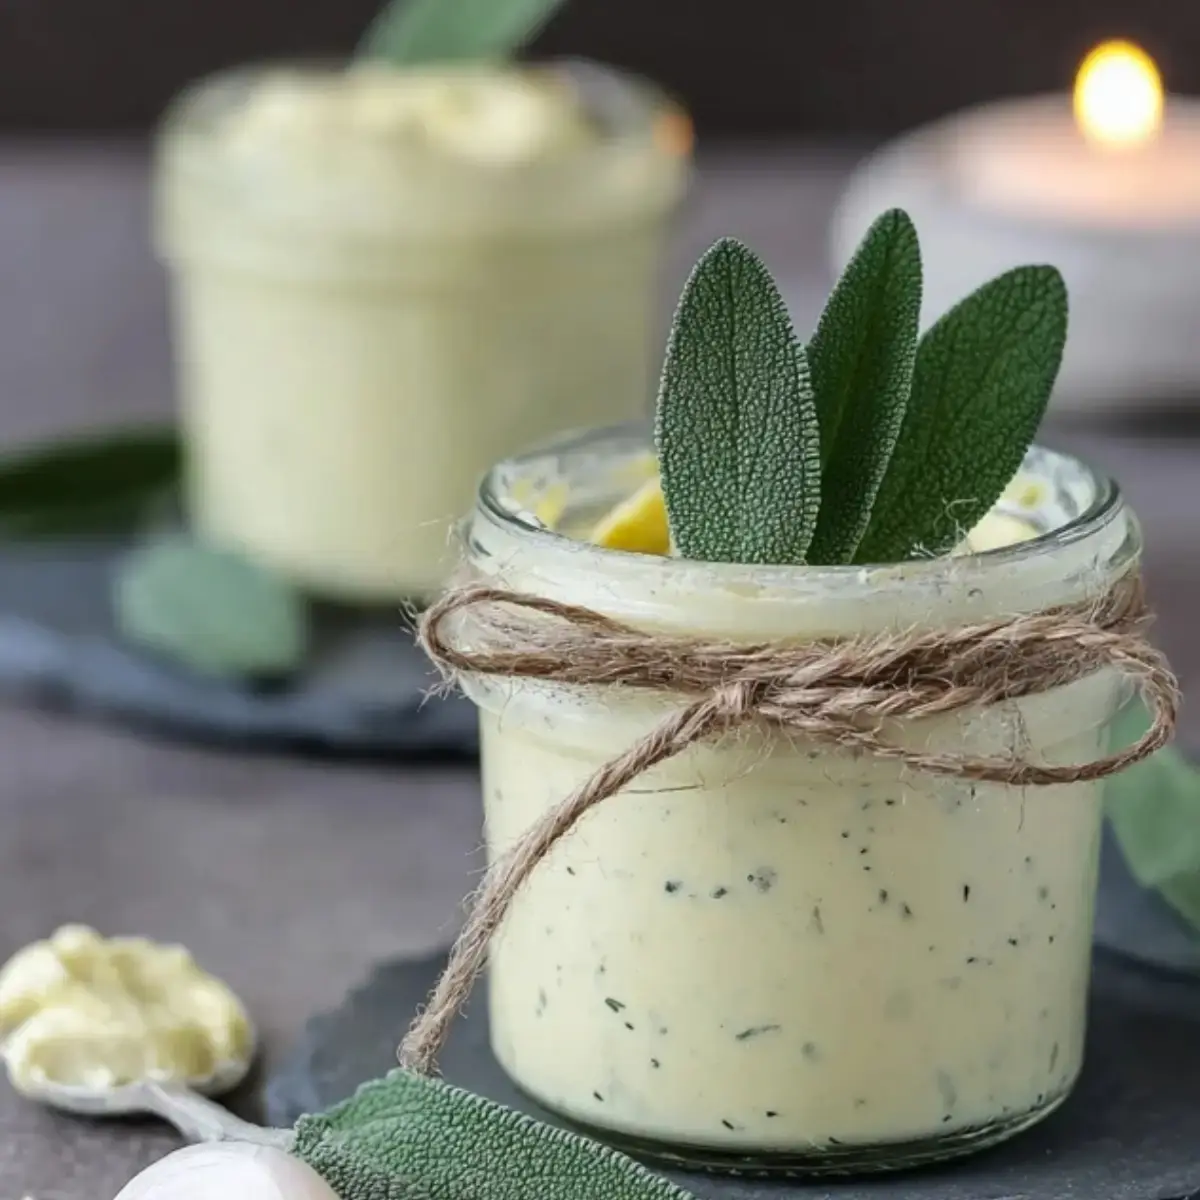
Homemade Sage Butter

Making your own sage butter is one of the easiest ways to give your dishes an intense, aromatic upgrade. The combination of creamy butter, savory sage, and fine garlic creates an unmistakable flavor experience that is perfect for pasta, meat, or vegetables. If you want to make sage butter yourself, you only need a few ingredients and little time – ideal for everyday life or special occasions.
- 250 g Butter
- 10 fresh sage leaves
- 1 clove garlic
- 1/2 tsp salt
- 1Take the butter out of the refrigerator and let it soften to room temperature.
- 2Put one tablespoon of the softened butter into a small pot.
- 3Roughly chop the sage leaves and then finely chop them.
- 4Peel the garlic and finely chop or press it.
- 5Melt the butter in the pot over medium heat and sauté the sage and garlic in it for about 5 minutes.
- 6Remove the mixture from the heat and let it cool completely.
- 7Add the flavored butter along with the remaining butter and the salt to a bowl.
- 8Whip everything with a hand mixer or a stand mixer for 2-3 minutes until a creamy mass forms.
- 9Fill the finished sage butter into a screw-top jar and let it firm up in the refrigerator.
Keywords: sage butter, homemade butter, herb butter, garlic butter, quick recipe, side dish, sauce, spread
- butter: the creamy foundation that carries and emulsifies all the other flavours, providing a smooth texture.
- fresh sage leaves: the star ingredient, offering a distinct herbal, slightly peppery, and earthy aroma.
- garlic: adds a pungent depth and a subtle warmth that harmonises beautifully with the sage.
- salt: crucial for enhancing and balancing all the flavours, bringing out the best in the butter and herbs.
Quantities for these essential ingredients can be found within the provided recipe card.
Variations
Elevating your homemade Salbeibutter can involve incorporating a range of delightful additions, allowing for endless culinary exploration. Consider infusing it with a touch of citrus; finely grated lemon zest can impart a bright, fresh note that beautifully cuts through the richness of the butter and complements the sage’s earthiness. This addition is particularly effective when serving the butter with fish or lighter poultry dishes, adding an unexpected layer of complexity.
For those seeking a richer, more umami-driven flavour, finely grated Parmesan cheese can be whisked into the softened butter. The salty, nutty notes of the cheese create a deeply savoury profile that is exceptional when paired with pasta or gnocchi. Ensure the cheese is very finely grated to ensure it integrates smoothly into the butter without creating a gritty texture, maintaining a luxurious consistency.
Another exciting avenue is to introduce a subtle heat. A pinch of red pepper flakes, or even a finely minced small chili, can add a gentle warmth that awakens the palate. This spicy twist is wonderful for those who enjoy a little kick and pairs exceptionally well with grilled red meats or robust vegetable dishes, offering a contrast that makes each bite more engaging.
How to Prepare Salbeibutter selber machen
Step 1: Preparing the Butter
The initial step in creating exceptional Salbeibutter involves ensuring your butter is at the optimal temperature for mixing. This means taking it out of the refrigerator well in advance of when you plan to start the preparation process. Aim for a consistency that is soft and pliable, but not melted; it should yield easily to gentle pressure from your finger.
This softened state is crucial for incorporating the other ingredients evenly. If the butter is too cold and hard, you’ll struggle to blend the sage and garlic effectively, resulting in a lumpy and uneven texture. Conversely, if it becomes too warm and liquid, it will be difficult to achieve the desired creamy consistency later on.
A good rule of thumb is to leave the butter on your kitchen counter for at least an hour, depending on the ambient temperature of your room. If you are in a hurry, you can carefully cut the butter into smaller cubes, which will help it soften more quickly. This patient approach to softening the butter lays the groundwork for a smooth and perfectly emulsified herb butter.
Step 2: Infusing the Aromatics
Next, you will gently heat a small portion of the softened butter in a saucepan to bloom the aromatic ingredients. This method allows the sage and garlic to release their essential oils and flavours into the butter, creating a more intense and integrated taste profile. It’s important to use only a tablespoon or so of the butter for this initial infusion, as the goal is not to melt all the butter at this stage.
While the small amount of butter is warming, prepare your fresh sage leaves. Gently rinse them if necessary and pat them thoroughly dry. Then, finely chop the sage leaves. The finer the chop, the more evenly the sage flavour will distribute throughout the entire batch of butter, ensuring you get that delightful herbal note in every bite.
Simultaneously, prepare your garlic. Peel the clove and then mince it very finely, or use a garlic press for a more paste-like consistency. The goal here is to break down the garlic’s structure so its flavour can meld seamlessly with the butter and sage without leaving large, overpowering chunks.
Step 3: Gently Roasting the Sage and Garlic
Place the saucepan with the tablespoon of butter over medium-low heat. Once the butter has melted and begins to shimmer, add your finely chopped sage leaves and minced garlic. It is crucial to keep the heat gentle; you are looking to coax out the flavours, not to fry or burn the ingredients.
Allow the sage and garlic to sauté gently in the butter for approximately five minutes. You will notice the sage leaves becoming slightly more fragrant and perhaps a shade darker, while the garlic will become fragrant but should not turn golden brown. This controlled heating process is what unlocks the full potential of the sage’s volatile oils and the garlic’s aromatic compounds.
The aroma that fills your kitchen at this stage is incredibly enticing and is a strong indicator that the flavours are developing beautifully. Be mindful not to overcook, as burnt sage can develop a bitter taste, which would negatively impact the final Salbeibutter. The aim is a gentle infusion, creating a fragrant, herb-infused oil.
Step 4: Cooling and Combining
Once the sage and garlic have been gently infused for their allotted time, remove the saucepan from the heat. It is absolutely vital that this infused butter mixture cools down completely to room temperature before you proceed to the next step. Adding a warm mixture to the remaining cold butter can cause the butter to melt unevenly and prevent you from achieving a smooth, emulsified texture.
Patience here is key. You can speed up the cooling process slightly by placing the saucepan in a bowl of ice water, stirring occasionally, but ensure it reaches a state where it is no longer warm to the touch. This cooling phase allows the flavours to meld further and prepares the mixture for the final blending stage.
Meanwhile, ensure the rest of your unsalted butter is also at the perfect soft, workable consistency. If it’s still too firm, you can gently warm it slightly, or cut it into smaller pieces to expedite softening. The goal is to have all butter components at a similar, pliable temperature for seamless integration.
Step 5: Emulsifying the Butter
In a mixing bowl, combine the completely cooled, sage and garlic infused butter with the remaining softened butter. Add your salt at this stage. The amount of salt will depend on your personal preference and whether you are using salted or unsalted butter, but a good starting point is about half a teaspoon.
Using an electric hand mixer or a stand mixer fitted with the paddle attachment, begin to whip the butter mixture. Start on a low speed and gradually increase to medium-high. Beat the butter for at least two to three minutes, or until it becomes visibly lighter in colour and significantly creamier and fluffier. This process is called emulsification, where the fats in the butter combine with the water content and the infused flavours to create a stable, smooth mixture.
During this whipping stage, you can also add any other desired flavourings, such as a pinch of black pepper or a small amount of lemon zest, if you are exploring variations. Scrape down the sides of the bowl periodically to ensure all the butter is incorporated and evenly whipped, resulting in a perfectly homogenous and luxuriously smooth Salbeibutter.
Step 6: Shaping and Storing
Once the Salbeibutter has reached a wonderfully creamy and homogenous consistency, it’s time to prepare it for storage. You can transfer the butter directly into a clean, airtight container, such as a small glass jar with a lid, or you can shape it into logs or decorative shapes if you prefer.
To shape the butter, you can lay out a piece of parchment paper or plastic wrap. Spoon the whipped butter onto the paper and then roll it tightly into a log shape, twisting the ends to seal it. This method is excellent for easy slicing later. Alternatively, you can press the butter into small silicone molds for individual portions.
Once shaped or containerized, refrigerate the Salbeibutter. It will firm up considerably as it chills, achieving that characteristic spreadable consistency. Ensure the container is well-sealed to prevent the butter from absorbing any unwanted odors from the refrigerator, and to maintain its fresh, herbaceous aroma.
Pro Tips for Salbeibutter selber machen
For the most vibrant and authentic flavour, always prioritise using fresh sage leaves over dried. Fresh sage contains more potent volatile oils, which translate to a more intense aroma and taste in your butter. Ensure the leaves are plump and a rich green colour, free from any wilting or discolouration, as this indicates peak freshness and flavour potential.
When infusing the sage and garlic in butter, maintain a low to medium-low heat. Overheating can scorch the garlic and make the sage bitter, compromising the delicate balance of flavours. A gentle, slow infusion is key to extracting the best aromatic compounds without introducing any unpleasant notes.
Achieving the perfect texture is paramount. Make sure your butter is truly softened to room temperature before you begin whipping. This ensures a smooth, homogenous emulsion. If the butter is too cold, it will be difficult to incorporate everything evenly. If it’s too warm, it might become greasy.
Consider the salt content carefully. If you are using salted butter, you might want to reduce or even omit the added salt until you have whipped the butter and can taste it. This allows you to control the seasoning precisely and avoid an overly salty final product.
For an extra-smooth and airy texture, you can re-whip the butter after it has chilled for about 30 minutes. This second whipping can incorporate more air, making the butter lighter and fluffier, perfect for dolloping onto hot dishes or spreading generously.
Serving Suggestions for Salbeibutter selber machen
Decoration
When presenting your homemade Salbeibutter, consider a few decorative touches to enhance its visual appeal. You can garnish the top of the butter in its serving dish with a few whole, fresh sage leaves, which not only look beautiful but also signal the primary flavour. Tiny, edible flowers can also add a touch of elegance and colour, especially for special occasions.
If you’ve shaped the butter into a log, you can press a small piece of fresh sage or a single edible flower into the centre before it fully hardens. A light dusting of finely chopped chives or parsley can also provide a subtle contrast in colour and a hint of freshness. The goal is to create a visually appealing first impression that hints at the deliciousness within.
Side Dishes
Salbeibutter truly shines as a complement to a wide array of side dishes, transforming simple accompaniments into something extraordinary. It is particularly magnificent melted over roasted potatoes or boiled new potatoes, their earthy flavour pairing perfectly with the herbaceous butter. Smothering steamed asparagus or tender green beans with a generous dollop is another simple yet effective way to elevate these vegetables.
Melted Salbeibutter is also superb drizzled over grilled or roasted mushrooms, intensifying their natural umami flavours. For a more substantial side, consider serving it alongside a crusty loaf of artisanal bread, allowing guests to spread it liberally. The warmth of the bread will gently melt the butter, releasing its intoxicating aroma.
Even simple rice or quinoa can be made more interesting with a spoonful of Salbeibutter stirred in. It provides a rich, savoury depth that can elevate grains from a mere filler to a flavourful component of the meal. Experimentation with different vegetable preparations will reveal just how versatile this herb butter can be.
Creative Serving Ideas
Beyond its direct use as a spread or topping, Salbeibutter can be a secret ingredient in more complex dishes. Consider using it to sauté your pasta or gnocchi; instead of a traditional sauce, simply toss the cooked pasta directly in a pan with melted Salbeibutter for an incredibly flavourful and quick meal. A little of the pasta’s cooking water can help emulsify the butter into a light sauce.
For meat lovers, placing a coin-sized pat of Salbeibutter atop a hot steak, lamb chop, or grilled chicken breast just before serving allows it to melt luxuriously over the meat. This creates a built-in sauce that is both flavourful and visually appealing, demonstrating a sophisticated approach to simple cooking. The melted butter bastes the meat, infusing it with the aromatic notes of sage and garlic.
It can also be incorporated into stuffings for poultry or pork, adding moisture and a burst of herbal flavour. Imagine a stuffing for a roast chicken made with breadcrumbs, onions, and generous amounts of your homemade Salbeibutter – the aroma alone would be divine. Furthermore, it can be blended into mashed potatoes for an intensely flavourful and creamy side dish that guests will rave about.
Preparation & Storage
Storing Leftovers
To ensure your leftover Salbeibutter maintains its fresh flavour and quality, proper storage is essential. The best way to store it is in an airtight container, such as a glass jar with a tight-fitting lid, or by wrapping it securely in plastic wrap or parchment paper if it has been shaped into a log. This prevents it from drying out and, crucially, stops it from absorbing any odours from other foods in the refrigerator.
When stored correctly in the refrigerator, homemade Salbeibutter will typically stay fresh and flavourful for approximately 5 to 7 days. It’s a good idea to label the container with the date it was made, so you can keep track of its freshness. Always check for any off-smells or visual changes before using it, though if stored properly, this is unlikely to be an issue.
The firm texture it develops in the cold is ideal for slicing or scooping. If you find it too hard to work with immediately after taking it from the fridge, allow it to sit at room temperature for about 10-15 minutes. This brief period will soften it just enough to be easily spreadable or melted without compromising its overall structure.
Freezing
For longer-term storage, freezing is an excellent option for Salbeibutter. This allows you to prepare larger batches when you have the time and have this delightful condiment readily available whenever the craving strikes. The key to successful freezing is to portion the butter appropriately before freezing.
One of the most convenient methods is to shape the butter into a log using parchment paper or plastic wrap, then slice this log into individual rounds or coins. These can then be frozen on a small baking sheet until solid, and then transferred into a freezer-safe bag or container. This way, you can easily take out just one or two portions at a time as needed.
Alternatively, you can spoon small dollops of the butter onto a parchment-lined baking sheet and freeze them until firm, then transfer these frozen dollops into a freezer bag. This offers even more flexibility for portion control. Properly wrapped and frozen, Salbeibutter can maintain its quality for up to 2-3 months.
Reheating
When you are ready to use frozen Salbeibutter, it’s best to thaw it gradually to preserve its texture and flavour. The most recommended method is to transfer the desired portion from the freezer to the refrigerator and let it thaw overnight. This slow thawing process helps the butter re-emulsify correctly and avoids any sudden temperature shock that could degrade its quality.
If you are in a hurry, you can thaw smaller portions by placing them on a small plate at room temperature. This will take significantly less time, perhaps 30 minutes to an hour, depending on the size of the portion and the ambient temperature. Avoid using a microwave for thawing, as this can lead to uneven melting and a potentially greasy texture.
Once thawed and brought back to a workable consistency (it should be soft but not melted), the Salbeibutter is ready to be used. If it seems to have separated slightly after thawing, a quick stir with a fork or a brief re-whipping with a small mixer can often restore its smooth texture. It’s now ready to be melted over your favourite dishes.
Frequently Asked Questions
-
How long can homemade Salbeibutter be stored, and are there any specific tips to maximise its shelf life?
Homemade Salbeibutter, when stored correctly in an airtight container in the refrigerator, generally maintains its optimal freshness and flavour for about 5 to 7 days. To maximise its shelf life, it’s crucial to ensure the container is indeed airtight to prevent oxidation and absorption of other kitchen odours, which can quickly diminish its delightful aroma and taste. If you notice any slight separation of the butter or liquid after a few days, a quick stir with a fork can often restore its smooth, homogenous consistency. For longer preservation, freezing is an excellent strategy; portions can be frozen for up to 2-3 months, retaining their flavour remarkably well.
-
Is it possible to make Salbeibutter without garlic, and if so, what are the best alternatives to maintain flavour complexity?
Absolutely, you can create delicious Salbeibutter without garlic, especially if you or someone you are cooking for has an aversion to it. The fresh sage itself provides a robust and distinct flavour profile that can stand beautifully on its own. If you wish to add complexity, consider incorporating other aromatics or complementary herbs. Finely minced fresh thyme or a hint of rosemary can add different herbal notes, while a small amount of finely grated lemon zest can introduce a bright, fresh counterpoint to the sage’s earthiness. A pinch of mild chilli flakes can also add a pleasant warmth without the pungency of garlic.
-
What are the most popular and versatile dishes that benefit from the addition of Salbeibutter, and how can it be prepared for optimal flavour release?
Salbeibutter is incredibly versatile and significantly enhances a wide range of dishes. It is a classic accompaniment for pasta and gnocchi, where simply tossing the warm pasta with melted Salbeibutter creates an instant, flavourful sauce. For meat dishes, placing a pat of Salbeibutter on top of grilled steaks, lamb chops, or roasted chicken allows it to melt and baste the meat, infusing it with herbaceous richness. It’s also fantastic on roasted vegetables like potatoes, asparagus, or Brussels sprouts, adding a decadent, savoury layer. To optimise flavour release, gently melt the butter over low heat or add it directly to hot dishes, allowing the heat to fully activate the sage and garlic aromas before serving.