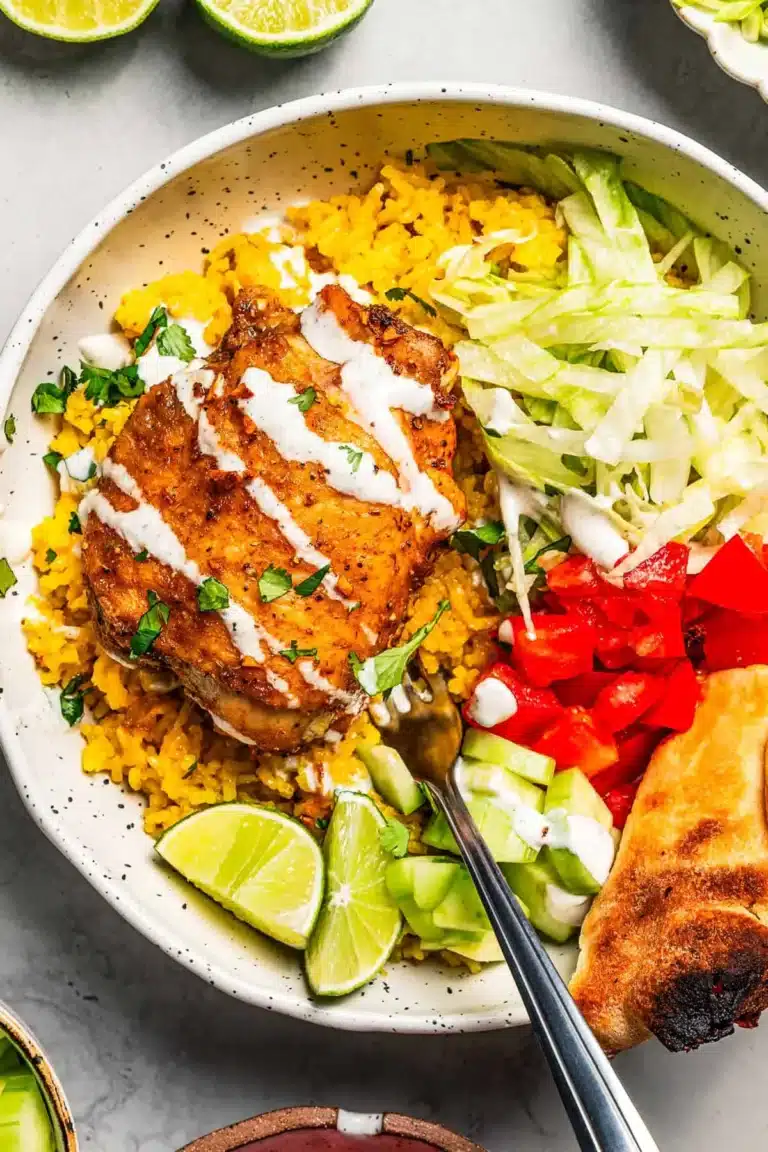
Pulled Chicken Tacos – Easy Slow Cooker Recipe!
Embark on a culinary adventure with these incredibly flavorful and satisfying pulled chicken tacos. This recipe transforms simple ingredients into a Tex-Mex masterpiece, perfect for busy weeknights or weekend gatherings. The slow-cooked chicken is impossibly tender and infused with a zesty salsa, making every bite a delight.
Get ready to impress your family and friends with tacos that are as easy to make as they are delicious to eat. From the succulent shredded chicken to the vibrant toppings and creamy avocado sauce, these pulled chicken tacos are destined to become a household favorite, bringing a taste of authentic Mexican flair right to your table.
Why You Will Love This Recipe
- Effortless Preparation: The majority of the work is done by your slow cooker, allowing for a hands-off cooking process that simplifies meal preparation significantly.
- Explosion of Flavors: Slow-simmered in a rich, seasoned salsa, the chicken absorbs deep Tex-Mex aromas and tastes, requiring no additional sauces.
- Juicy and Tender: The chicken is cooked to perfection, resulting in a moist, fall-apart texture that is utterly irresistible in every taco.
- Incredibly Versatile: Beyond tacos, the perfectly cooked pulled chicken can be repurposed into a variety of other dishes, offering flexibility for future meals.
- Customizable Appeal: Easily adapt the spice level and toppings to suit your personal preferences, ensuring a tailored taco experience for everyone.
Ingredients You Need
The magic of these pulled chicken tacos lies in the quality and simplicity of the ingredients used. By choosing fresh produce and your favorite salsa, you can elevate the already outstanding flavors. Each component plays a crucial role in creating a harmonious and delicious taco experience.
Pulled Chicken Tacos

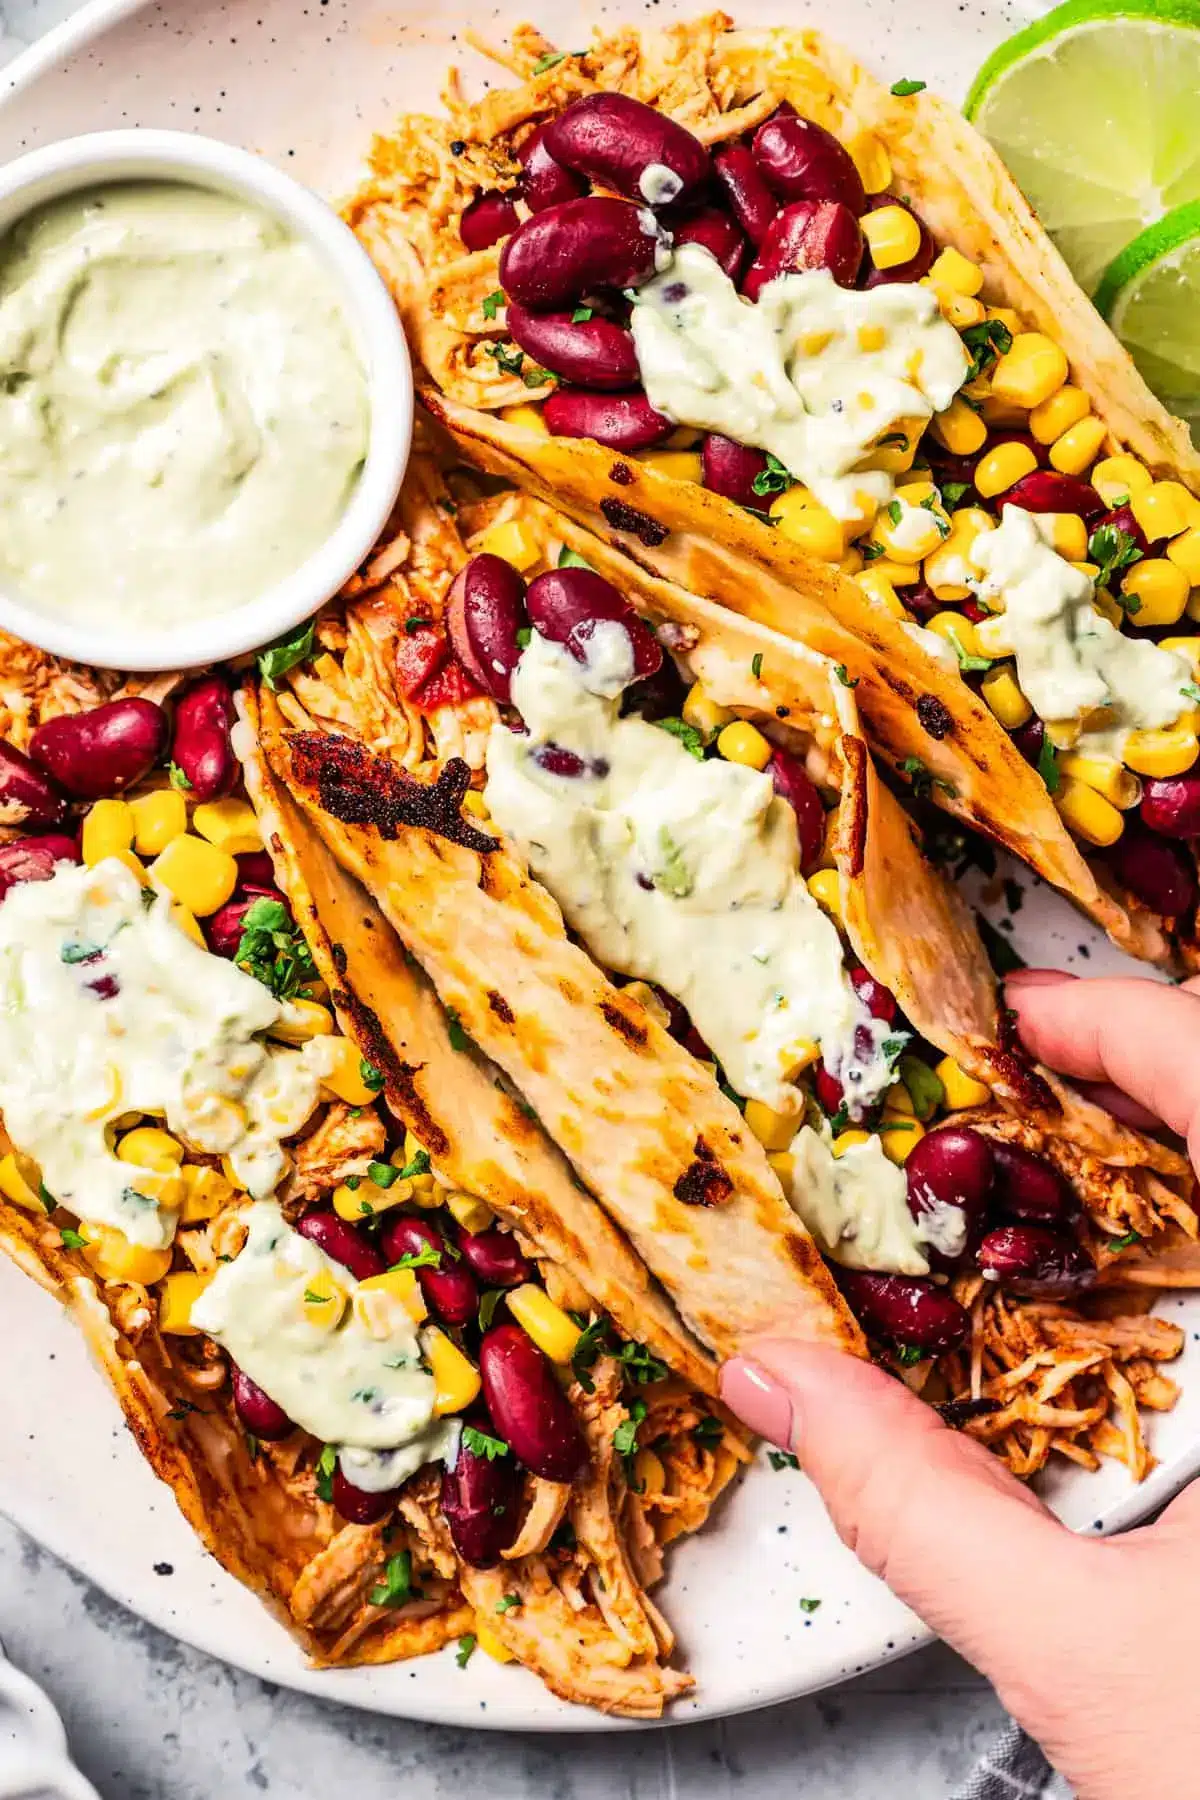
These pulled chicken tacos are the ultimate Tex-Mex weeknight dinner! Made with juicy slow cooker pulled chicken cooked in zesty salsa sauce, then tucked into a soft tortilla and pan-fried with all the fixings.
- For the chicken:
- 1¼ pounds chicken breasts, skinless and boneless
- 1¾ cup salsa
- 2 tablespoons dark brown sugar
- 1 tablespoon smoked paprika
- 2 teaspoon cumin powder
- 1 teaspoon chili powder
- salt and freshly ground black pepper, to taste
- For the tacos:
- 1 tablespoon olive oil
- 8 flour or corn tortillas
- 1 cup canned red kidney beans, rinsed and drained
- 2 cups finely shredded mozzarella cheese
- fresh cilantro or parsley, for garnish
- For the avocado sauce:
- 1 large avocado, peeled, pitted, chopped
- 2 tablespoons lime juice
- salt and freshly ground black pepper, to taste
- 1Prepare the chicken: Combine the ingredients. In the slow cooker, add salsa, brown sugar, smoked paprika, onion powder, garlic powder, cumin powder, chili powder, and salt and pepper to taste. Add the chicken.
- 2Cook the chicken on a HIGH setting for 3 hours or on LOW for 5-6 hours.
- 3Shred the chicken. Remove the chicken from the slow cooker. Shred the chicken using two forks, and add ¼ cup of the cooking/salsa sauce to the shredded chicken.
- 4Make the avocado sauce. While the chicken is cooking, prepare the avocado sauce. Add avocado, Greek yogurt, lime juice, and salt and pepper to taste in a food blender. Blend until smooth. You can also use an immersion blender.
- 5Assemble the tacos: Coat the tortillas. Brush a large skillet with oil. Generously brush the flour tortillas with the cooking/salsa sauce from the slow cooker. (optional step)
- 6Assemble the tacos. Place the tortilla, salsa side up, in the heated skillet. Add 1/8 of the cheese, 1/8 of the chicken, 1/8 of the red beans, and 1/8 of the corn on top of the tortillas.
- 7Fry it. Fold the tortilla in half and cook for 3-4 minutes. Gently lift and flip the tortilla and cook for another 3 minutes. Repeat with the remaining ingredients.
- 8Serve. Serve the warm chicken tacos with the avocado sauce and chopped cilantro or parsley.
Keywords: Pulled Chicken Tacos, Slow Cooker Chicken Tacos, Tex-Mex, Salsa Chicken, Weeknight Dinner, Easy Tacos
Quantities for each ingredient are detailed in the recipe card at the end of this article, ensuring you have everything you need for perfect pulled chicken tacos.
Variations
To cater to different dietary needs and flavor preferences, these pulled chicken tacos can be wonderfully adapted. Think about introducing vibrant new textures and tastes to make each serving uniquely yours.
For a vegan twist, swap the chicken for seasoned jackfruit or crumbled firm tofu. Sauté these plant-based alternatives with the same salsa and spices until tender and slightly shredded. Use your favorite vegan cheese and a cashew-based crema for a dairy-free delight.
To embrace a low-carb lifestyle, serve the pulled chicken in lettuce cups or sturdy bell pepper halves instead of tortillas. Load them up with your favorite low-carb taco toppings like avocado, salsa, and extra cheese. This approach keeps the delicious flavors intact while adhering to a carb-conscious diet.
Consider a spicy kick by adding finely diced jalapeños or a dash of hot sauce to the salsa mixture during the slow cooking process. Alternatively, offer a variety of hot sauces at the table for guests to customize their own heat level. For a touch of sweetness, a hint of honey could be added to the salsa, balancing the savory notes beautifully.
Experiment with different types of beans; black beans or pinto beans can offer a slightly different texture and flavor profile compared to kidney beans. The choice of cheese also presents an opportunity for variation, with Monterey Jack, Pepper Jack, or even a sharp cheddar adding distinct creamy or tangy notes.
Don’t forget the power of herbs and garnishes. Fresh cilantro is classic, but a sprinkle of thinly sliced green onions or a dollop of pickled red onions can add a refreshing crunch and a burst of acidity that cuts through the richness of the chicken. This adaptability ensures that these pulled chicken tacos can be enjoyed in countless delicious ways.
For those who love to explore global flavors, consider infusing elements from other cuisines. A touch of soy sauce or tamari in the slow cooker can add an umami depth, bridging the gap towards Asian-inspired flavors. Similarly, a spoonful of smoked paprika can be heightened with a pinch of chipotle powder for an even smokier, deeper taste profile.
The beauty of these tacos lies in their adaptability, making them a canvas for your culinary creativity. Whether you are aiming for a healthier option, a more robust flavor, or simply want to try something new, the core of this recipe provides a fantastic foundation to build upon. The slow-cooked chicken is inherently forgiving and incredibly flavorful, making it a joy to work with for any variation you might envision.
Exploring different salsa varieties can also dramatically change the final taste. A smoky roasted salsa will impart a different character than a vibrant, fresh pico de gallo-style salsa. Consider using a salsa verde for a tangier, brighter flavor profile that can really awaken the palate. The key is to find a salsa that complements the richness of the shredded chicken.
For those who enjoy a bit of texture, consider adding some crunchy elements as toppings. Toasted pepitas (pumpkin seeds) can offer a delightful nutty crunch, or finely chopped celery can provide a refreshing crispness. These additions enhance the sensory experience of the tacos, making them even more enjoyable.
The slow cooking method itself is a marvel, breaking down the chicken fibers and allowing them to soak up the surrounding flavors. This process is key to achieving that signature tender, shreddable texture that defines pulled chicken tacos. It’s a testament to how simple techniques can yield incredibly complex and delicious results with minimal effort.
How to Prepare pulled chicken tacos
Step 1: Prepare the Chicken
Begin by gathering all the necessary ingredients for the pulled chicken. The foundation of this dish is built in the slow cooker, where time and gentle heat work their magic. Ensure your chicken is boneless and skinless, whether you opt for breasts or thighs, as this will ensure even cooking and easy shredding later on.
In the generous basin of your slow cooker, combine the salsa, brown sugar, smoked paprika, onion powder, garlic powder, cumin powder, chili powder, and a good pinch of salt and freshly ground black pepper to taste. Stir these ingredients together until they form a beautifully fragrant and cohesive mixture. This seasoned salsa base is what will infuse the chicken with its signature zesty and savory notes throughout the slow cooking process.
Carefully place the chicken breasts or thighs directly into the slow cooker, ensuring they are nestled within the seasoned salsa. Try to arrange them in a single layer as much as possible to promote even cooking. The liquid from the salsa, combined with the moisture released from the chicken, will create a flavorful broth as it cooks. This step is crucial for developing the rich, succulent texture that defines these pulled chicken tacos, setting the stage for a truly delightful meal.
Once the chicken is submerged in the flavorful salsa mixture, secure the lid onto the slow cooker. It’s important to ensure the lid is sealed tightly to trap the steam and heat, allowing the chicken to cook gently and thoroughly. The slow cooking method is designed to break down the connective tissues in the chicken, resulting in an exceptionally tender and moist final product.
This initial preparation is remarkably straightforward, emphasizing the ‘dump-and-go’ nature of this recipe. You can prepare this step the night before and simply turn on the slow cooker in the morning, or do it just before heading out for the day. The aroma that will fill your home as the chicken cooks is an absolute delight, promising a delicious meal to come.
The selection of salsa can significantly impact the final flavor. A good quality, store-bought salsa works wonderfully, but a homemade salsa will elevate the dish even further. Consider the heat level of your salsa; if you prefer a milder taco, opt for a mild salsa. For those who enjoy a bit of a kick, a medium or hot salsa will add an extra dimension of flavor.
The addition of brown sugar, while seemingly simple, plays a vital role in balancing the acidity of the salsa and enhancing the overall flavor profile. It adds a subtle sweetness that complements the savory spices, creating a more complex and rounded taste. This touch of sweetness helps to caramelize the salsa slightly as it cooks, contributing to the depth of the dish.
The combination of spices – paprika, onion powder, garlic powder, cumin, and chili powder – creates the quintessential Tex-Mex flavor base. These spices are aromatic and robust, working in synergy to create a deeply savory and slightly smoky profile. Adjusting the quantities of these spices can allow for further personalization, catering to your specific taste preferences.
Step 2: Cook the Chicken
Now, it’s time to let the slow cooker work its magic. Set your slow cooker to cook the chicken on a HIGH setting for approximately 3 hours, or on a LOW setting for 5 to 6 hours. The exact cooking time will depend on the size of your chicken pieces and the specific model of your slow cooker, so it’s always best to check for doneness.
The goal is for the chicken to become incredibly tender, easily falling apart with the gentle pressure of a fork. You want the internal temperature to reach at least 165°F (74°C) for food safety, but continuing to cook it a bit longer on low will ensure maximum tenderness. The chicken should be so soft that it almost disintegrates.
Throughout the cooking process, the salsa mixture will bubble and reduce, thickening slightly and coating the chicken in a rich, flavorful sauce. This slow, gentle cooking method allows the chicken to absorb all the wonderful flavors of the salsa and spices, ensuring that every shred is packed with taste. The low and slow approach is key to achieving that signature succulent texture.
When the chicken is cooked through and incredibly tender, carefully remove it from the slow cooker. It’s best to use tongs or a slotted spoon to lift the chicken pieces out of the cooking liquid, setting them aside in a clean bowl or on a cutting board. Reserve the remaining cooking liquid; this flavorful sauce is a treasure trove of taste and will be used later to moisten the shredded chicken and even to brush onto the tortillas.
Ensure that the chicken has reached the desired tenderness by testing it with a fork. If it still feels firm or resistant, allow it to cook for a little longer, checking every 30 minutes. Overcooking on high can sometimes lead to dry chicken, so the low and slow method is often preferred for optimal results, though both can yield delicious outcomes with careful monitoring.
The aroma emanating from the slow cooker during this stage is truly enticing, filling your kitchen with the promise of a delicious meal. The combination of the spices, salsa, and slowly cooking chicken creates an irresistible scent that will have everyone eagerly anticipating dinner.
It’s important to note the difference between cooking on high and low. Cooking on high will expedite the process but requires more vigilance to prevent the chicken from drying out. Cooking on low is more forgiving and generally results in a more consistently tender and moist outcome, though it requires a longer time commitment.
For optimal flavor infusion, ensure the chicken is fully submerged in the salsa mixture. If your slow cooker is particularly large, you might need to add a little extra salsa to ensure complete coverage. This ensures that every part of the chicken benefits from the cooking liquid’s flavor.
Consider using an instant-read thermometer to confirm the chicken has reached a safe internal temperature of 165°F (74°C). While tenderness is a primary indicator, temperature ensures food safety. Once this temperature is reached and the chicken is tender, it’s ready for the next step.
Step 3: Shred the Chicken
Once the chicken is cooked to perfection and removed from the slow cooker, it’s time to transform those tender pieces into delicious pulled chicken. This is where the texture really comes alive, creating the perfect vehicle for all those amazing flavors.
Place the cooked chicken into a large bowl. Using two forks, begin to shred the chicken. You can do this by inserting one fork into the chicken and using the other fork to pull against it, or by pressing the forks together and pulling them apart. The chicken should be so tender that it shreds easily, with minimal effort required.
As you shred the chicken, discard any excess fat or gristle you might find. The goal is to create uniform strands of chicken that will hold the sauce beautifully. Don’t worry if some pieces are smaller or larger than others; this rustic texture adds to the charm of the pulled chicken tacos.
After you’ve shredded all the chicken, it’s time to reintroduce some of that delicious cooking liquid. Ladle about ¼ cup of the reserved salsa/cooking sauce from the slow cooker into the bowl with the shredded chicken. Toss everything together gently until the chicken is evenly coated in the sauce. This step is crucial for adding moisture and intensifying the flavor of the shredded chicken.
The amount of sauce you add is a matter of personal preference. Some people like their pulled chicken very saucy, while others prefer it just lightly moistened. Start with ¼ cup and add more if desired, ensuring the chicken is tender and flavorful but not swimming in liquid.
This saucing step ensures that the shredded chicken remains incredibly moist and flavorful, preventing it from becoming dry. The residual heat from the chicken will also help to further meld the flavors of the sauce with the meat. It’s this step that truly elevates the pulled chicken from simply cooked chicken to the star of your tacos.
You can also use this time to further break down any larger chunks of chicken if you prefer a finer shred. Continue pulling and shredding until you achieve your desired consistency. Some people like larger, chunkier shreds, while others prefer a finer, more uniform texture.
The reserved cooking sauce is incredibly flavorful, so don’t be shy about using it to coat the chicken. It’s been simmering with all the spices and salsa, concentrating those delicious flavors. This sauce is what makes the chicken so irresistible and helps it bind together nicely within the taco.
For an extra boost of flavor, you can even add a small pinch of extra chili powder or cumin to the shredded chicken at this stage, if you feel it needs it. Taste the chicken and adjust seasonings as needed before proceeding to assemble the tacos.
The act of shredding can also be done by hand if you’re careful, or even with a stand mixer fitted with a paddle attachment for a super-fast shredding process. However, the two-fork method is traditional and provides a satisfying tactile experience.
Step 4: Make the Avocado Sauce
While the chicken is slowly cooking, or after it has been shredded and is resting, it’s the perfect time to prepare the vibrant and creamy avocado sauce. This sauce adds a refreshing contrast to the rich pulled chicken and is incredibly simple to make.
In a food processor or the cup of an immersion blender, combine one large ripe avocado, peeled and pitted. Add ¼ cup of Greek yogurt (or sour cream for a richer flavor), and 2 tablespoons of fresh lime juice. The lime juice not only adds a tangy zest but also helps to prevent the avocado from browning too quickly.
Season this mixture generously with salt and freshly ground black pepper to taste. Start with a small amount and then add more as needed, ensuring the flavors are well-balanced. The salt will bring out the natural sweetness of the avocado and the tartness of the lime.
Blend the ingredients until the sauce is completely smooth and creamy. You’re aiming for a luscious, spoonable consistency that can be drizzled or spread easily. If the sauce seems too thick, you can add a tiny bit more lime juice or even a splash of water to thin it out to your desired texture.
The Greek yogurt provides a wonderful creaminess without adding too much fat, and its slight tang complements the avocado beautifully. If you don’t have Greek yogurt, full-fat sour cream is an excellent substitute, offering a richer flavor profile. For an even more decadent sauce, consider using Mexican crema.
This avocado sauce is a key component that elevates these tacos from good to extraordinary. Its bright, fresh flavor cuts through the richness of the chicken and cheese, providing a delightful balance. It’s also a fantastic way to incorporate healthy fats into your meal.
Taste the sauce and adjust the seasonings as needed. Some avocados are naturally sweeter than others, and the tartness of limes can vary. A final taste test will ensure that the sauce is perfectly seasoned and ready to be served with your pulled chicken tacos. It’s important that the seasoning is just right to complement the other components.
If you don’t have a food processor or immersion blender, you can also mash the avocado very well with a fork in a bowl, then vigorously whisk in the yogurt, lime juice, salt, and pepper until as smooth as possible. While it might not be as perfectly smooth, it will still be delicious.
Consider adding a clove of minced garlic or a pinch of chili powder to the avocado sauce for an extra layer of flavor. These additions can provide a subtle warmth and complexity that enhances the overall taste experience of the tacos.
The freshness of the lime juice is paramount here. Ensure you are using fresh limes rather than bottled lime juice, as the flavor difference is significant and crucial for a bright, zesty sauce.
Step 5: Assemble the Tacos
With the chicken shredded, the avocado sauce ready, and your favorite toppings at the ready, it’s time to bring these delicious pulled chicken tacos to life by assembling them. This is where all the individual components come together to create a harmonious and satisfying meal.
Heat a large skillet over medium heat. Add about 1 tablespoon of olive oil to the skillet. Swirl the oil to coat the bottom evenly. This oil will help to crisp up the tortillas and give them a lovely golden-brown color.
Now, take your tortillas, whether they are flour or corn, and brush them generously on both sides with some of the reserved cooking/salsa sauce from the slow cooker. This is an optional but highly recommended step that adds an incredible depth of flavor and a slightly chewy texture to the tortillas. The sauce infuses them with the savory essence of the pulled chicken.
Carefully place the prepared tortillas, salsa side up, into the hot skillet. You might want to work in batches to avoid overcrowding the pan, ensuring each tortilla gets properly heated and slightly crisped. Allow them to cook for about 1-2 minutes per side, until they are warm and pliable, perhaps with a few lightly browned spots.
Once the tortillas are warmed and lightly toasted, begin assembling your tacos. Place about 1/8 of the shredded mozzarella cheese onto one half of each tortilla. The cheese will begin to melt from the residual heat of the tortilla and the skillet, creating a gooey base for the fillings.
Next, spoon about 1/8 of the saucy pulled chicken mixture over the cheese on each tortilla. Follow this with a portion of the rinsed and drained red kidney beans and the rinsed and drained canned corn. Distribute the toppings evenly among the tacos.
Once filled, carefully fold the tortilla in half to create a taco shape. Press down gently with a spatula to help seal the edges. Allow the tacos to cook for 3-4 minutes on the first side, until the cheese is melted and the tortilla is golden brown and slightly crispy. Gently lift and flip the folded taco to cook the other side for another 3 minutes, or until it’s also golden brown and delightfully crisp.
Repeat this process with the remaining tortillas, chicken, beans, and corn, adding more oil to the skillet if needed between batches. The goal is to achieve a perfectly toasted tortilla with melted cheese and warm, flavorful fillings. This pan-frying method adds a wonderful textural contrast to the soft chicken.
If you prefer a softer taco, you can skip the pan-frying step altogether and simply warm the tortillas and fill them. However, the crispiness achieved through pan-frying adds a significant dimension to the overall experience of these pulled chicken tacos, making them truly exceptional.
Ensure that the heat is not too high, as you want the tortillas to crisp up without burning. Medium heat allows for even cooking and optimal browning. Patience is key to achieving perfectly assembled and cooked tacos.
Don’t be afraid to add extra cheese if you love it gooey! The melted cheese acts as a binder, holding all the delicious ingredients together within the tortilla. It’s the perfect foundation for the savory pulled chicken.
The order of assembly can also be slightly varied based on preference. Some might prefer to place the chicken and beans first, then the cheese on top to ensure maximum meltiness. Experiment to find your perfect taco construction!
Step 6: Serve the Tacos
The moment of truth has arrived! Your delicious pulled chicken tacos are now ready to be served and enjoyed. Present them hot off the skillet, brimming with flavor and ready to be devoured.
Transfer the freshly cooked and golden-brown tacos to a serving platter or individual plates. As they are served warm, the melted cheese will be at its most gooey and the chicken and beans will be perfectly heated through. This ensures the best possible taste and texture experience for your guests.
Generously top each taco with a dollop of the creamy avocado sauce you prepared earlier. The cool, tangy sauce provides a beautiful contrast to the warm, savory fillings, adding a refreshing burst of flavor. Its vibrant green hue also adds a lovely visual appeal to the finished tacos.
Garnish with freshly chopped cilantro or parsley for a pop of fresh flavor and color. The bright, herbaceous notes of cilantro are a classic pairing with Mexican-inspired dishes and cut through the richness of the tacos wonderfully.
Offer any additional taco fixings you have on hand for guests to customize their tacos further. This could include shredded lettuce, diced tomatoes, chopped onions, a sprinkle of extra cheese, or your favorite salsa. Providing these options allows everyone to tailor their tacos to their exact liking, making the meal a truly personalized experience.
Serve the tacos immediately while they are at their best. The combination of the crispy tortilla, the tender, flavorful pulled chicken, the melty cheese, and the creamy avocado sauce is truly a culinary delight. Each bite offers a symphony of textures and tastes.
For a complete meal, consider pairing these pulled chicken tacos with some complementary side dishes. Street corn (elote) or a simple side salad can round out the meal beautifully. These additions enhance the dining experience, offering a variety of flavors and textures to enjoy alongside the tacos.
Don’t forget a refreshing beverage to wash it all down! A cold Mexican beer, a sparkling agua fresca, or even a classic margarita would be the perfect accompaniment to these flavorful tacos. The right drink can truly enhance the entire dining experience.
This final step is about presentation and enjoyment. Take a moment to appreciate the visual appeal of the colorful toppings and the perfectly cooked tacos before diving in. The satisfaction of creating such a delicious meal from scratch is immense, and sharing it with loved ones makes it even more special.
Enjoy every savory, creamy, and slightly crispy bite of these sensational pulled chicken tacos. They are a testament to how simple ingredients and a little bit of time can create a truly memorable and satisfying meal that will have everyone asking for seconds.
Pro Tips for pulled chicken tacos
Elevate your salsa choice: The type of salsa you use in the slow cooker significantly impacts the final flavor. Opt for a good quality salsa that you genuinely enjoy, perhaps one with a smoky chipotle flavor or a vibrant roasted tomato base, to imbue the chicken with deeper complexity.
Don’t skip the sauce for the tortillas: Brushing the tortillas with the reserved cooking liquid before pan-frying is a game-changer. This simple step adds an incredible layer of flavor and a slightly chewy texture that makes the tacos infinitely more delicious.
Achieve perfect shredding: For the easiest shredding, ensure the chicken is cooked until it is extremely tender and falling apart. If you’re struggling to shred with forks, consider using a stand mixer with a paddle attachment on low speed for a quick and efficient method.
Mind the heat during pan-frying: When pan-frying the assembled tacos, maintain a medium heat. This allows the tortillas to crisp up beautifully and the cheese to melt thoroughly without burning the outside before the inside is heated through.
Balance the richness: The creamy avocado sauce is essential for cutting through the richness of the chicken and cheese. Ensure it’s bright and tangy with sufficient lime juice and seasoning to provide a refreshing counterpoint.
Embrace the leftovers: Pulled chicken is incredibly versatile. If you have any leftovers, repurpose them into chicken enchiladas, taco bowls, or even a hearty chicken soup for future delicious meals. The flavor only gets better as it sits.
Experiment with cheese: While mozzarella is great for melting, consider adding a sharper cheese like cheddar or Monterey Jack for more flavor. A sprinkle of crumbly Cotija cheese on top just before serving adds a salty, authentic touch.
Spice customization is key: Adjust the chili powder and other spices in the slow cooker to your heat preference. You can also add a pinch of cayenne pepper or a diced jalapeño to the salsa mixture for an extra kick.
Don’t overfill your tacos: While it’s tempting to load up your tacos, overfilling can make them difficult to fold and eat. Aim for a balanced amount of chicken, beans, and corn to ensure a delightful eating experience.
Prep your toppings ahead: Chop all your desired toppings like cilantro, onions, and tomatoes in advance. This makes the final assembly process quick and seamless, allowing you to serve your tacos promptly.
Serving Suggestions for pulled chicken tacos
Decoration
Garnish is key to making your pulled chicken tacos visually appealing and adding a final flourish of freshness. A generous sprinkle of freshly chopped cilantro is the classic choice, offering bright green flecks and a refreshing herbaceous aroma. For a bit of zest and texture, consider adding thinly sliced green onions or finely minced red onion.
A dollop of the creamy avocado sauce acts as both a delicious topping and a beautiful visual element. Its vibrant green color provides a lovely contrast against the rich colors of the chicken and tortillas. If you have access to edible flowers, a few delicate petals can add an unexpected touch of elegance to your taco presentation.
For those who enjoy a bit of heat, a scattering of finely diced fresh jalapeños or pickled jalapeño slices can add a pop of vibrant green and a fiery kick. A drizzle of colorful salsa or hot sauce over the top can also enhance the visual appeal and offer guests a choice of spice levels.
Think about contrasting colors when selecting your garnishes. A sprinkle of crumbled Cotija cheese can add a rustic white texture, while finely diced red bell peppers can offer a sweet crunch and a touch of crimson. The goal is to create a visually inviting taco that promises a burst of flavor with every bite.
Side Dishes
To complement the savory richness of pulled chicken tacos, consider serving them with classic Tex-Mex sides that enhance the meal without overpowering the main star. A vibrant dinner side of Mexican street corn, also known as Elote, is an absolute showstopper. Its creamy, cheesy, and slightly spicy profile is a perfect textural and flavorful counterpoint.
A fresh and zesty lunch accompaniment like a southwest salad, packed with corn, black beans, avocado, and a lime vinaigrette, offers a lighter, healthier option. Alternatively, a simple pico de gallo or a refreshing cucumber and jicama salad provides a crisp, palate-cleansing element.
For something a bit more substantial, consider serving these tacos alongside a bowl of hearty black beans or refried beans. These traditional accompaniments add a satisfying depth and protein boost to the meal, making it even more filling. A side of Mexican rice, whether plain or flavored with tomato and spices, is another excellent choice for soaking up any extra delicious taco sauce.
Southwest egg rolls, filled with chicken, black beans, corn, and cheese, make for an exciting and delicious appetizer or side dish that perfectly fits the theme. Stuffed poblano peppers, roasted and filled with a flavorful mixture, offer a unique and satisfying side that adds a touch of elegance to the meal. These hearty sides create a complete and memorable dining experience.
Consider the textures as well. Crunchy corn tortilla chips served with a side of guacamole or salsa offer a delightful textural contrast to the soft fillings of the tacos. This simple addition allows guests to enjoy a familiar snack while they await their tacos, or simply provides an alternative way to enjoy the dips.
Creative Serving Ideas
Transform your pulled chicken tacos into a delightful dinner experience by presenting them in unique and engaging ways. Instead of traditional plates, consider serving them on a rustic wooden board, allowing guests to easily access all the components and assemble their own perfect taco.
For a more interactive approach, set up a “taco bar” with all the fillings and toppings laid out. This allows everyone to customize their tacos according to their personal preferences, fostering a fun and communal dining atmosphere. This is especially effective for larger gatherings or family meals.
Serve the pulled chicken in a warm crockpot or chafing dish, keeping it perfectly heated throughout the meal. This allows guests to refill their tacos as needed and ensures the chicken remains moist and delicious. Alongside, present the warm tortillas and an array of vibrant toppings in separate bowls for easy self-service.
Consider serving the pulled chicken tacos alongside a refreshing pineapple margarita or a classic horchata for an authentic Mexican beverage experience. The sweetness of the horchata or the tartness of the margarita perfectly complements the savory flavors of the tacos, creating a truly immersive culinary journey.
For a fun, kid-friendly twist, create mini tacos using smaller tortillas or even small, crisp lettuce cups. This makes them easier for little hands to manage and enjoy. You could also offer a selection of milder toppings for younger palates.
Instead of individual tacos, consider layering the pulled chicken, beans, corn, and cheese into a casserole dish and baking it until bubbly. This creates a delicious pulled chicken taco bake, perfect for serving family-style with a side of dessert. This method offers a comforting, baked variation of the classic taco flavors.
For a lighter meal, serve the pulled chicken as a topping for a large, vibrant salad. Combine crisp lettuce, corn, black beans, avocado, and a zesty lime dressing, then crown it with a generous portion of the flavorful pulled chicken for a satisfying and healthy taco salad.
Another creative idea is to use the pulled chicken as a filling for quesadillas. Layer cheese and pulled chicken between two tortillas and grill until golden and melty. Serve with salsa and sour cream for a delightful twist on a classic favorite.
The possibilities are truly endless when it comes to serving these versatile pulled chicken tacos. Whether you opt for a traditional presentation or explore more creative avenues, the deliciousness of the chicken itself will shine through, making any serving style a resounding success.
Preparation & Storage
Storing Leftovers
Properly storing any leftover pulled chicken is essential to maintain its delicious flavor and texture. Once the chicken has cooled down to room temperature, transfer it to an airtight container. This will prevent it from drying out and protect it from absorbing any unwanted odors from other foods in the refrigerator.
Refrigerate the container promptly. Leftover slow cooker pulled chicken can be safely stored in the refrigerator for up to 4 days. Ensure the container is sealed tightly before placing it in the fridge. This will help maintain its freshness and prevent spoilage.
If you have leftover assembled tacos, it’s best to store the fillings separately from the tortillas. The chicken mixture can be stored in an airtight container, while any uneaten toppings should be kept in their own separate containers to maintain their freshness and prevent sogginess. This allows you to reheat and reassemble fresh tacos later.
When storing leftover pulled chicken, it’s a good idea to keep any remaining cooking sauce separate as well. This sauce can be reincorporated when reheating the chicken to add back moisture and flavor, ensuring it stays as succulent as when it was first made.
Avoid storing assembled tacos with all the toppings, as the tortillas will become soggy. If you anticipate having leftovers, it’s best to only assemble what you plan to eat immediately. The pulled chicken itself, however, stores wonderfully and can be used in many other dishes.
Check for any signs of spoilage before consuming leftovers. If the chicken has an off smell, an unusual color, or a slimy texture, it’s best to discard it to avoid any risk of foodborne illness. Always err on the side of caution when it comes to food safety.
The flexibility of these leftovers is one of the recipe’s greatest strengths. You can enjoy the pulled chicken in tacos for a few days, then transform it into a completely different meal, extending the enjoyment of this delicious dish.
Make sure the container you use is food-grade and has a secure lid. This is crucial for maintaining the quality of the stored food. Even a small amount of air exposure can degrade the texture and flavor over time.
Consider the size of your leftovers. If you have a very large batch of pulled chicken, it might be more practical to divide it into smaller portions in multiple containers. This makes it easier to reheat only what you need, reducing the number of times the chicken is subjected to temperature changes.
The cool, moist environment of the refrigerator is ideal for preserving the pulled chicken. Ensure your refrigerator is set to a temperature of 40°F (4°C) or below for optimal food safety and preservation.
Freezing
Pulled chicken freezes exceptionally well, making it a fantastic candidate for meal prepping or saving for future delicious meals. Once the chicken has been cooked and cooled completely, transfer it to a freezer-safe airtight container or a heavy-duty freezer bag. Ensure all air is removed from the bag to prevent freezer burn.
If using a freezer bag, you can also wrap the bag in a layer of aluminum foil for extra protection against freezer burn. This extra step helps to maintain the quality of the chicken during its time in the freezer. Consider portioning the pulled chicken into meal-sized bags for convenience when thawing and reheating.
The pulled chicken can be frozen for up to 3 to 4 months without a significant loss in quality. Beyond that, while it might still be safe to eat, the texture and flavor could begin to degrade. For the best results, aim to consume it within this timeframe.
Label each container or bag with the date it was frozen and the contents. This helps you keep track of your frozen inventory and ensures you use older items first. It’s a simple step that greatly improves organization in your freezer.
When you’re ready to use the frozen pulled chicken, it’s best to thaw it in the refrigerator overnight. This slow thawing process helps to maintain the chicken’s moisture and texture. Avoid thawing at room temperature, as this can promote bacterial growth.
If you’re in a hurry, you can thaw the pulled chicken under cold running water in a sealed bag. This is a faster method than refrigerator thawing but still requires careful attention to food safety. Ensure the water is constantly running and the chicken is fully submerged.
Once thawed, the pulled chicken can be reheated and used in tacos, sandwiches, casseroles, or any other dish where cooked chicken is called for. The flavor and texture will remain remarkably similar to freshly cooked chicken, making it a convenient and versatile ingredient.
Consider freezing the pulled chicken with a small amount of the reserved cooking sauce. This will help to keep it extra moist and flavorful when reheated. If you freeze it without sauce, you can always add some back in during the reheating process.
Ensure that the pulled chicken is completely cool before freezing. Freezing warm food can raise the temperature inside the freezer, potentially thawing other frozen items and compromising their quality. Always allow hot foods to cool down before sealing and freezing.
Freezing is an excellent way to ensure you always have a delicious protein option on hand for quick and easy meals. It significantly reduces food waste and makes busy weeknights much more manageable.
Reheating
Reheating pulled chicken is a straightforward process that ensures you can enjoy its delicious flavor and tender texture again. The best method for reheating depends on how much chicken you have and how quickly you need it ready.
Stovetop Method: For the most even and moist reheating, the stovetop method is highly recommended. Place the desired amount of pulled chicken in a saucepan. Add a tablespoon or two of the reserved cooking sauce, or a splash of water or broth, to help keep the chicken moist. Heat over medium-low heat, stirring occasionally, until the chicken is heated through. This method allows you to control the temperature and prevent drying out.
Microwave Method: The microwave is the quickest option for reheating. Place the pulled chicken in a microwave-safe dish. Add a tablespoon of cooking sauce, water, or broth to prevent it from drying out. Cover the dish loosely with a microwave-safe lid or plastic wrap, leaving a small vent for steam. Heat on medium power for 30-60 second intervals, stirring in between, until the chicken is heated through. Be careful not to overcook, as this can make the chicken tough.
Oven Method: If reheating a larger batch or if you prefer a more gentle reheating, the oven can be a good option. Place the pulled chicken in an oven-safe dish. Add a splash of cooking sauce or broth. Cover the dish tightly with aluminum foil to trap moisture. Reheat in a preheated oven at 325°F (160°C) for about 15-20 minutes, or until heated through. This method helps to maintain moisture and evenly warm the chicken.
No matter which method you choose, the key is to ensure the chicken is heated evenly to a safe internal temperature of 165°F (74°C). Adding a little extra liquid during reheating is crucial for maintaining the succulence of the pulled chicken, as it tends to lose some moisture during the initial cooking and subsequent storage.
If you’ve frozen the pulled chicken, be sure to thaw it in the refrigerator overnight before reheating. Reheating directly from frozen can lead to uneven cooking and a less desirable texture. The thawing process is a critical step in ensuring successful reheating.
For tacos, you’ll want to reheat the chicken just before assembling and serving. This ensures the chicken is warm and the tortillas are fresh and crisp. The combination of warm chicken and fresh components is what makes for the best taco experience.
You can also use the reheated pulled chicken in other dishes, such as topping a baked potato, mixing into a pasta salad, or filling sandwiches. Its versatility means that a little effort in reheating yields a delicious and convenient meal component.
When reheating, always check the chicken for doneness and moisture. If it seems a bit dry, add a little more sauce or liquid and continue heating gently. The goal is to bring it back to its original moist and tender state.
Avoid reheating pulled chicken multiple times, as this can degrade its quality and texture. It’s best to reheat only the amount you plan to consume to maintain the best possible flavor and consistency.
Frequently Asked Questions
- Can I make the pulled chicken ahead of time?
Absolutely! The beauty of this pulled chicken recipe is its make-ahead potential. You can prepare the slow cooker portion a day in advance and store the cooked chicken in the refrigerator. Alternatively, you can cook the chicken entirely, shred it, and then store it in an airtight container in the refrigerator for up to 4 days. This makes it incredibly convenient for busy weeknights, as you can then quickly assemble tacos or use the chicken in other dishes. Freezing is also an excellent option for longer-term storage, preserving its quality for several months.
- What kind of salsa is best for pulled chicken tacos?
The type of salsa you use will significantly influence the final flavor of your pulled chicken tacos. For a classic Tex-Mex taste, a medium or mild chunky salsa made with tomatoes, onions, cilantro, and jalapeños works wonderfully. If you prefer a smokier flavor, a roasted tomato salsa or a salsa with chipotle peppers in adobo sauce would be an excellent choice. For a brighter, tangier profile, consider using a salsa verde. Ultimately, the best salsa is one that you enjoy eating on its own, as its flavors will be concentrated during the slow cooking process. Experimenting with different varieties can lead to delightful discoveries.
- Can I use chicken thighs instead of chicken breasts?
Yes, you can definitely use chicken thighs instead of chicken breasts for this pulled chicken taco recipe. Chicken thighs are naturally more flavorful and forgiving, as they contain more fat, which helps them stay moist and tender during the slow cooking process. If you opt for chicken thighs, you might find they require a slightly longer cooking time to reach optimal tenderness compared to chicken breasts. The shredded chicken thighs will also have a richer, more succulent texture that many people prefer in pulled chicken dishes. Both options will yield delicious results, so choose whichever you have on hand or prefer.