Phyllo Raspberry Pop Tarts with Vanilla Glaze | Homemade Pop Tarts
Embark on a delightful culinary journey with these exceptionally easy phyllo Pop Tarts, a recipe that promises to bring a touch of homemade magic to your table. Forget the fuss of traditional pastry dough; we’re diving into the wonderful world of flaky, golden phyllo for a quicker, yet equally impressive, treat.
This recipe transforms a beloved childhood classic into an elegant, yet remarkably simple, creation perfect for breakfast, brunch, or a sweet afternoon snack. Prepare to be amazed by how effortlessly these beautiful tarts come together, offering a satisfying crunch and a burst of fruity flavor in every bite.
Why You Will Love This Recipe
- Effortless Assembly: These tarts are designed for speed and simplicity, layering pre-made phyllo sheets with minimal effort.
- Incredible Flakiness: The magic of phyllo dough creates an ultra-light and shatteringly crisp crust that’s incredibly satisfying.
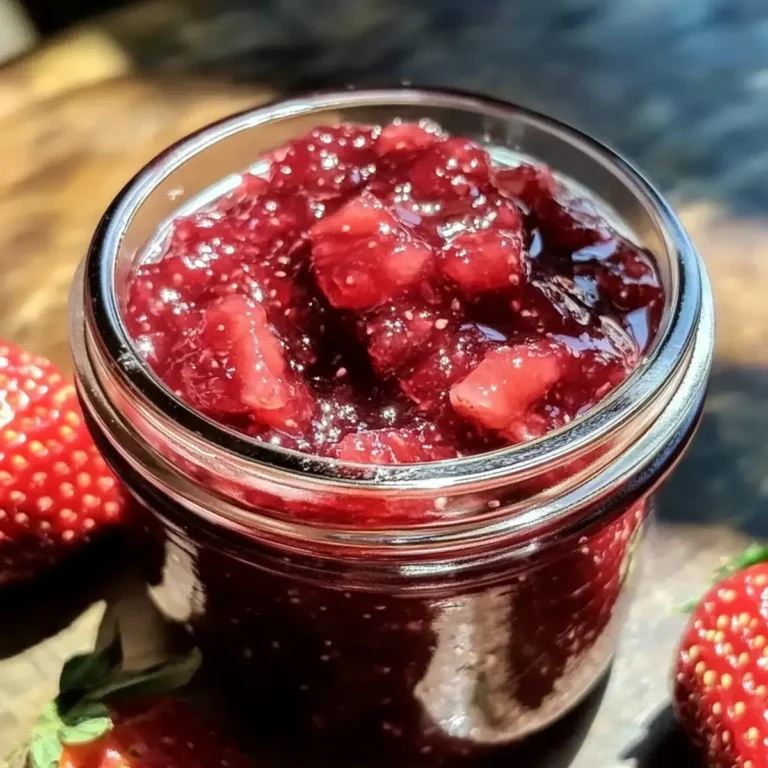
- Customizable Filling: While raspberry jam is featured, you can easily swap it for your favorite fruit preserves to create endless flavor combinations.
- Quick Preparation: With a prep time of just 10 minutes, these tarts are perfect for busy mornings or last-minute sweet cravings.
- Elegant Presentation: The simple drizzle of vanilla glaze elevates these homemade treats, making them look as good as they taste.
Ingredients You Need
The beauty of these phyllo Pop Tarts lies in their straightforward ingredient list, allowing the quality of each component to shine. We recommend using good quality raspberry jam for the best flavor, and fresh vanilla extract will provide a more aromatic glaze. Ensure your phyllo dough is thawed according to package directions, as frozen phyllo can be difficult to work with.
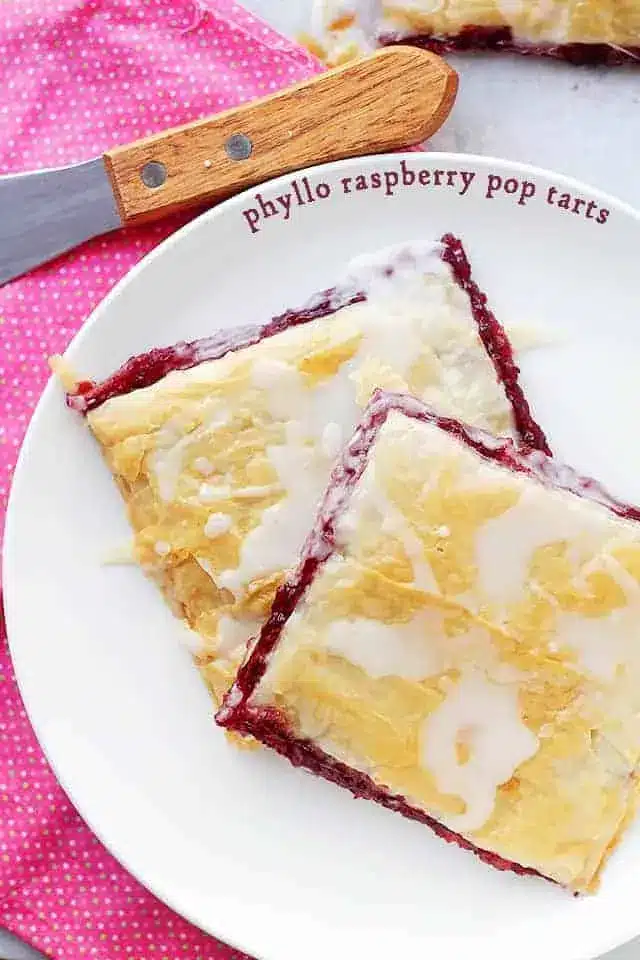
Phyllo Raspberry Pop Tarts
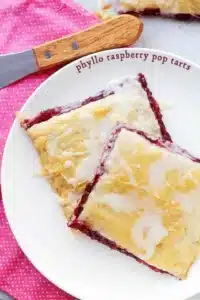
These Phyllo Raspberry Pop Tarts are the easiest homemade pop tart recipe ever! Layers of phyllo sheets filled with raspberry jam and topped with a sweet vanilla glaze.
- 4 tablespoons butter, melted
- 10 phyllo sheets, divided
- 1 cup powdered sugar
- 1 teaspoon pure vanilla extract
- 2 to 3 tablespoons water
- 1Preheat oven to 400°F. Line a baking sheet with foil.
- 2Layer 5 pieces of Phyllo sheets on the prepared baking sheet, brushing each sheet with the melted butter before adding the next.
- 3Brush the 5th sheet with butter and spread the raspberry jam, leaving a 1-inch empty border around the edges.
- 4Layer the remaining 5 Phyllo sheets, brushing each sheet with butter before adding the next.
- 5Brush the top layer with butter and cut the pastry into 8 rectangles. A pizza-cutter works best.
- 6DO NOT remove or separate the pastries, yet.
- 7Bake for 12 to 15 minutes, or until golden brown. Remove from oven and let slightly cool.
- 8Make the glaze. Meanwhile, in a small mixing bowl whisk together powdered sugar, vanilla and 2 tablespoons water; whisk until smooth and thoroughly combined. If the glaze is too thick for your liking, add 1 more tablespoon water and whisk until smooth.
- 9Drizzle each pop tart with vanilla glaze. Glaze will harden as it stands.
- 10Serve.
Keywords: Pop Tarts, Phyllo, Raspberry, Dessert, Pastry, Homemade
Quantities for these ingredients are detailed within the recipe card above, ensuring you have the perfect balance for delicious results every time.
Variations
The versatility of these phyllo Pop Tarts is one of their greatest assets, allowing for creative twists that cater to various dietary preferences and flavor profiles. Imagine a delightful berry tart reimagined in this easy format; the possibilities are truly endless.
For a delightful vegan option, simply substitute the butter with a plant-based alternative like melted vegan butter or coconut oil. Ensure your jam is also vegan-friendly, and many brands are readily available. The powdered sugar and water for the glaze are naturally vegan.
Craving a low-carb indulgence? While phyllo is traditionally made with flour, you can explore using almond flour-based pastry sheets if available, or adapt a low-carb crepe recipe for the outer layers. Focus on a sugar-free jam or a berry puree sweetened with a sugar substitute for the filling.
Consider a savory twist by omitting the glaze and filling these with a blend of cream cheese and herbs, or perhaps a spoonful of ricotta and a hint of lemon zest. These would make an unexpected and delightful appetizer or brunch item.
How to Prepare phyllo pop tarts
Step 1: Preparing Your Baking Station
Begin by preheating your oven to a moderate 400°F (200°C). This temperature is crucial for achieving that signature golden-brown crispness in the phyllo layers. Simultaneously, line a large baking sheet with aluminum foil; this not only makes for easier cleanup but also helps to distribute heat evenly during the baking process.
Having your baking sheet ready and the oven preheated ensures that once you start assembling the tart layers, you can move directly into baking without any delays. This seamless transition is key to preventing the delicate phyllo sheets from drying out prematurely, which can compromise their flaky texture.
Step 2: Building the Phyllo Foundation
Carefully unroll your thawed phyllo sheets. On the prepared baking sheet, arrange five of these delicate sheets, one on top of the other. After placing each sheet, lightly brush its surface with melted butter using a pastry brush. This butter acts as a glue, holding the layers together, and more importantly, it’s what will render the phyllo wonderfully crisp and golden as it bakes.
Don’t be alarmed if the phyllo sheets are larger than your baking sheet; simply fold the excess edges inwards to create a neater, more contained base. The goal is to build a sturdy yet incredibly light foundation for your jam filling. Ensure each layer receives a delicate coating of butter to maximize the crisping potential of each delicate sheet.
Step 3: Adding the Luscious Jam Filling
Once you have your five buttered phyllo layers stacked and ready, spread the raspberry jam evenly over the topmost sheet. Leave about a one-inch border clear around all the edges of the phyllo. This border is essential; it acts as a seal, preventing the jam from bubbling out and making a mess during baking.
The amount of jam can be adjusted slightly to your preference, but avoid overfilling, as this can lead to a soggy tart. A generous, even spread ensures that every bite will have that delightful fruity burst. If you’re using a jam that’s particularly thick, you can warm it slightly to make it easier to spread thinly and evenly across the phyllo surface.
Step 4: Creating the Phyllo Casing
Now, it’s time to encase the jam filling with more layers of phyllo. Carefully place the remaining five phyllo sheets on top of the jam-covered layer. Just as you did with the bottom layers, brush each of these new sheets lightly with melted butter as you stack them. This creates the top crust of your pop tarts.
Ensure the top sheet is also brushed with butter, paying particular attention to the edges. This final buttery layer will become beautifully golden and slightly crisp, providing a delightful contrast to the soft jam filling. The gentle layering and buttering technique is fundamental to achieving the characteristic flaky texture of phyllo pastries, similar to what you might find in delicate baklava.
Step 5: Shaping and Preparing for the Oven
With your entire phyllo stack assembled and buttered, it’s time to shape the individual pop tarts. Using a pizza cutter or a sharp knife, carefully cut the layered pastry into eight equal rectangles. It’s important that you do not separate these rectangles yet; keep them intact on the baking sheet for now. This makes the cutting process cleaner and prevents the delicate layers from shifting before baking.
The scoring lines created by the cutter will help you easily separate the tarts after they’ve been baked and have cooled slightly. Aim for consistent sizing to ensure even baking across all the pastries. A ruler can be helpful here for achieving perfectly uniform rectangles, much like the precision needed for intricate dessert plating.
Step 6: Baking to Golden Perfection
Place the baking sheet with the scored phyllo rectangles into the preheated 400°F (200°C) oven. Bake for approximately 12 to 15 minutes, or until the phyllo is beautifully golden brown and visibly crisp. Keep a close eye on them during the last few minutes, as phyllo can brown quite quickly due to its thinness and butter content.
Once they reach that perfect golden hue, carefully remove the baking sheet from the oven. Allow the pastries to cool on the baking sheet for a few minutes before attempting to separate them. This slight cooling period helps them firm up, making them easier to handle and preventing them from falling apart. The aroma filling your kitchen at this stage is simply divine, a testament to the simple ingredients transforming into something special.
Step 7: Crafting the Sweet Vanilla Glaze
While the tarts are cooling slightly, prepare the simple yet delicious vanilla glaze. In a small mixing bowl, whisk together the powdered sugar and pure vanilla extract. Gradually add 2 tablespoons of water, whisking continuously until you achieve a smooth, pourable consistency. If the glaze seems too thick, add another tablespoon of water, a little at a time, until it’s just right for drizzling.
The quality of your vanilla extract will significantly impact the glaze’s flavor, so using a pure extract is highly recommended. This simple glaze adds a touch of sweetness and a beautiful finish to the rustic phyllo tarts, reminiscent of the icing on a classic cookie. The goal is a glaze that’s not too thin to run off, but not too thick to spread easily.
Step 8: Glazing and Finishing Touches
Once the phyllo pop tarts have cooled enough to handle but are still slightly warm, it’s time to apply the glaze. Drizzle the prepared vanilla glaze generously over the top of each tart, allowing it to cascade down the sides. The residual warmth of the tarts will help the glaze set and harden slightly as it stands.
For a more decorative finish, you can use a piping bag with a fine tip or even a Ziploc bag with a corner snipped off to create more intricate patterns. Once the glaze has set, your delightful homemade phyllo Pop Tarts are ready to be enjoyed. They offer a wonderfully flaky texture and a sweet, fruity filling that’s sure to impress.
Pro Tips for phyllo pop tarts
Work Quickly with Phyllo: Phyllo dough dries out very fast once exposed to air, so have all your ingredients pre-measured and ready to go before you start unrolling the dough. Keep the sheets you’re not immediately using covered with a slightly damp, clean kitchen towel to prevent them from becoming brittle.
Butter is Your Friend: Don’t skimp on the melted butter between the phyllo layers. It is the key to achieving that incredible flakiness and golden-brown color. Ensure each sheet is lightly but thoroughly coated for the best results.
Jam Consistency Matters: Use a jam that is not too runny. If your jam is on the looser side, you can simmer it gently for a few minutes to thicken it before spreading it on the phyllo. Alternatively, you can add a teaspoon of cornstarch to help it set up during baking.
Uniform Cutting is Key: When cutting the phyllo into rectangles, try to make them as uniform in size as possible. This will ensure that all your pop tarts bake evenly, so you don’t have some that are overcooked and others that are undercooked. A ruler and a sharp pizza cutter or knife are your best tools here.
Glaze Application: For a smooth, even glaze, whisk your powdered sugar and liquid thoroughly. If you find lumps, pushing the mixture through a fine-mesh sieve can help create a perfectly smooth topping. Apply the glaze once the tarts have cooled slightly, allowing it to set but still maintain a bit of softness.
Serving Suggestions for phyllo pop tarts
Decoration
The simple vanilla glaze drizzled over the top provides a beautiful, classic finish that highlights the golden phyllo. For an extra touch of elegance, consider adding a sprinkle of finely chopped toasted nuts, such as almonds or pistachios, onto the wet glaze for added texture and visual appeal. Edible glitter or a dusting of powdered sugar can also offer a festive sparkle.
Side Dishes
These phyllo Pop Tarts are delicious served on their own, but they also pair wonderfully with a variety of complementary items. A fresh fruit salad, featuring berries and melon, offers a refreshing contrast to the sweetness of the tarts. A small scoop of vanilla bean ice cream or a dollop of whipped cream makes them feel even more like a special dessert.
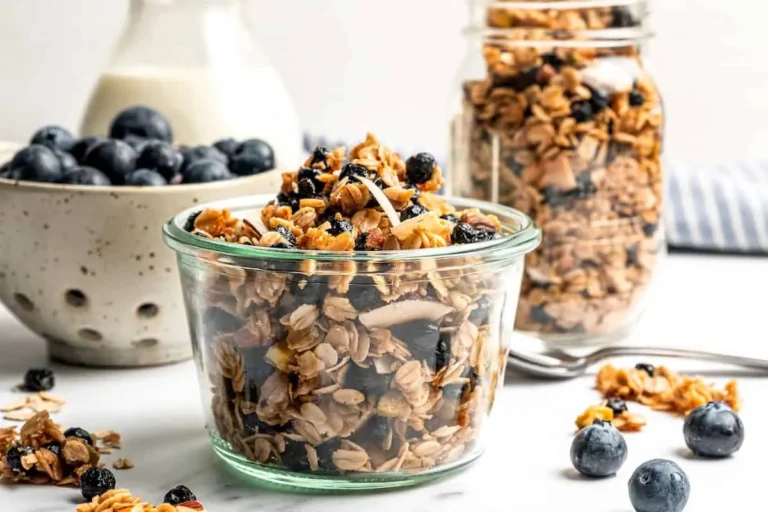
For a brunch setting, consider serving them alongside a light yogurt parfait or a simple bowl of granola. They also pair beautifully with a warm beverage, making them a perfect accompaniment to a morning cup of coffee or an afternoon tea. The flaky pastry is a delightful base for many accompanying flavors.
Creative Serving Ideas
Instead of a traditional drizzle, use the vanilla glaze to create intricate patterns or even write short messages on the tarts, adding a personalized touch. You could also create a “deconstructed” version, serving the flaky phyllo layers separately with small bowls of jam and glaze for dipping and custom topping. For a fun twist, consider a “build-your-own” pop tart station at a party, offering various jams, glazes, and sprinkles.
These tarts can also be a delightful addition to a dessert charcuterie board, nestled amongst other small sweet bites. Their unique shape and flaky texture will make them stand out. Imagine them alongside mini tarts, cookies, and perhaps some fruit dips for a truly decadent spread.
Preparation & Storage
Storing Leftovers
Once cooled completely, leftover phyllo Pop Tarts can be stored in an airtight container at room temperature for up to 2 days. It is important to ensure they are fully cooled before sealing them away, as residual warmth can create condensation, making the phyllo soggy. While they are best enjoyed fresh, this storage method will help maintain some of their crispness.
If you find they have lost some of their crispness after a day, a brief stint in a toaster oven or a low-temperature oven can help revive them. However, be cautious not to overheat them, as the glaze might melt or the phyllo could burn quickly. Storing them without any direct contact with moisture is paramount for preservation.
Freezing
To freeze these phyllo Pop Tarts, allow them to cool completely after baking and glazing. Once cool, place them in a single layer on a baking sheet and freeze until solid, which usually takes about 1-2 hours. This pre-freezing step prevents them from sticking together in a clump.
After they are solid, transfer the frozen pop tarts to a freezer-safe airtight container or a heavy-duty freezer bag, layering them with parchment paper in between to prevent sticking. They can be stored in the freezer for up to 1 month. Ensure the container is well-sealed to protect them from freezer burn.
Reheating
The best way to reheat these phyllo Pop Tarts is in a toaster oven or a conventional oven. Preheat your oven to around 300°F (150°C). Place the tarts on a baking sheet and warm them for 5-10 minutes, or until they are heated through and the phyllo has regained some of its crispness. Keep a close watch to prevent them from burning.
Avoid reheating them in a microwave, as this will make the phyllo dough soft and chewy, completely losing its delightful flaky texture. If reheating from frozen, you may need to extend the reheating time by a few minutes, ensuring they are thoroughly warmed.
Frequently Asked Questions
-
Can I use a different type of jam or fruit filling?
Absolutely! While raspberry jam is traditional for a classic pop tart flavor, you can use any fruit jam or preserves you like. Strawberry, blueberry, apricot, or cherry jams all work wonderfully. For a more gourmet feel, consider using a fruit compote or a homemade fruit filling. You can even experiment with savory fillings, like a cream cheese and herb mixture or a dollop of apple butter for a fall-themed treat. The key is to ensure your filling isn’t too watery, as excess moisture can make the phyllo soggy.
-
My phyllo dough is tearing, what should I do?
Working with phyllo dough requires a gentle touch and a bit of patience. If your phyllo sheets are tearing, it often means they have dried out. Ensure you keep the unused sheets covered with a damp (not wet) kitchen towel while you work. If a sheet tears slightly, don’t worry; you can usually patch it with another piece of phyllo or simply press the torn edges together gently. Layering multiple sheets helps mask minor tears, and the butter brushed between layers will help seal them during baking. Sometimes, a slightly warmer oven temperature can help the dough seal more quickly, but be mindful of over-browning.
-
How can I make the glaze thicker or thinner?
Adjusting the consistency of the vanilla glaze is quite simple and relies on the ratio of powdered sugar to liquid. To make the glaze thicker, gradually add more powdered sugar, a teaspoon at a time, whisking thoroughly after each addition until you reach your desired consistency. To make the glaze thinner, add more liquid, typically water or milk, a tablespoon at a time. Whisk well after each addition until the glaze flows smoothly but is still thick enough to coat the back of a spoon. You can also experiment with using milk instead of water for a richer flavor and slightly creamier texture.