Lemon Pepper Chicken Recipe – One Skillet and 30 Minutes!

Embark on a culinary journey that promises a burst of vibrant flavor with minimal effort. This Lemon Pepper Chicken recipe is a testament to how simple ingredients and a few well-executed steps can result in an extraordinarily delicious and satisfying meal.
Designed for the busy home cook, this dish delivers a restaurant-quality experience right in your own kitchen, proving that exceptional taste doesn’t require hours of preparation. Prepare to impress yourself and your loved ones with this bright, zesty, and wonderfully tender chicken.
Why You Will Love This Recipe
- Quick Preparation: This entire meal comes together in approximately 30 minutes, making it ideal for weeknight dinners when time is of the essence.
- Pantry Staples: You’ll find that most of the ingredients needed are likely already in your pantry or refrigerator, reducing last-minute grocery store runs.
- Juicy and Flavorful: The chicken is cooked to perfection, resulting in incredibly juicy pieces with wonderfully flavorful, slightly crispy edges that are coated in a delicious lemon pepper seasoning.
- One-Skillet Simplicity: The beauty of this recipe lies in its one-skillet approach, which means less cleanup and more enjoyment of the cooking process.
- Versatile Pairing: This dish is incredibly adaptable and pairs beautifully with a wide array of side dishes, from simple salads and steamed vegetables to creamy mashed potatoes or fluffy rice, allowing for endless meal planning possibilities.
Ingredients You Need
The success of any dish hinges on the quality of its ingredients, and this Lemon Pepper Chicken is no exception. Opting for fresh, high-quality components will elevate the final taste and texture, transforming a simple meal into a memorable culinary experience. Don’t hesitate to select the freshest chicken breasts and vibrant lemons for the most authentic and delightful flavor profile.
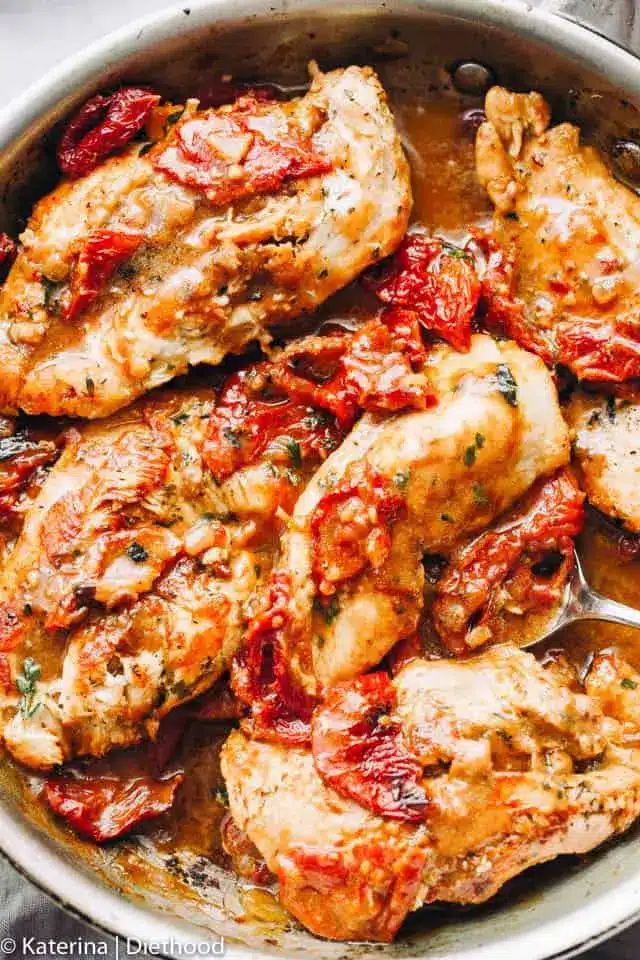
Lemon Pepper Chicken

Juicy Lemon Pepper Chicken cooked in one skillet and finished with a buttery garlic and lemon sauce. A quick 30-minute chicken dinner.
- 1 to 1.5 pounds boneless, skinless chicken breasts
- 1 tablespoon lemon pepper seasoning
- 2 tablespoons vegetable oil
- 2 tablespoons butter, divided
- 2 cloves garlic, minced
- 2 teaspoons lemon juice
- freshly chopped parsley, for garnish
- lemon slices, for garnish
- 1In a shallow plate, combine coconut flour, lemon pepper seasoning, lemon zest, and salt.
- 2Place the chicken breasts on a cutting board and, using a chef’s knife, cut the chicken breasts in half, longwise. You should have a total of 8 chicken pieces that are about a 1/4-inch-thick. Toss the chicken breasts in the flour mixture until coated on both sides.
- 3Heat the cooking oil in a large skillet over medium-high heat. Add the chicken breasts to the hot oil in a single layer, and cook for 3 to 4 minutes per side, or until cooked through. Depending on the skillet's size, you may need to cook the chicken in batches. Cooking time will also depend on the size of the chicken breasts. Remove the cooked chicken from the skillet and set it aside on a plate.
- 4Add 1 tablespoon of butter to the skillet, along with the minced garlic, and cook for 30 seconds. Slowly pour in the chicken broth and stir, scraping up the browned bits from the bottom of the skillet. Then stir in the lemon juice and cook for 3 to 4 minutes, or until the sauce has slightly reduced. Add the remaining butter and let it melt through.
- 5Return the chicken breasts to the skillet and cook for 1 minute, or until heated through.
- 6Remove from heat. Serve the lemon pepper chicken garnished with parsley and lemon slices.
Keywords: Lemon Pepper Chicken, Skillet Chicken, Quick Dinner, 30-minute meal
The specific quantities for each ingredient are detailed within the provided recipe card, ensuring you have all the necessary measurements for a perfectly balanced dish.
Variations
For those seeking a plant-based alternative, consider transforming this recipe into a delightful vegan dish. You can achieve this by substituting the chicken with firm tofu or thick slices of cauliflower. Ensure these substitutes are thoroughly pressed and dried before coating them in the lemon pepper flour mixture and pan-frying until golden brown and tender. The garlic butter sauce can be recreated using vegan butter and vegetable broth, while a touch of nutritional yeast can add a subtle cheesy depth.
If you’re following a low-carbohydrate lifestyle, this recipe offers an excellent opportunity for adaptation. Instead of coconut flour or all-purpose flour for coating the chicken, use almond flour or a blend of almond and coconut flour to significantly reduce the carbohydrate count. Ensure the sauce remains low in sugar by carefully measuring the chicken broth and avoiding any added sweeteners. This modification ensures you can enjoy the zesty, peppery flavors without deviating from your dietary goals.
Another creative twist involves infusing the dish with Mediterranean influences. After cooking the chicken and while preparing the sauce, consider adding a handful of Kalamata olives and chopped sun-dried tomatoes to the skillet. A sprinkle of dried oregano or fresh dill towards the end of the sauce reduction can further enhance the Mediterranean character. This variation brings a new dimension of savory and briny notes to the classic lemon pepper profile, creating a truly unique and flavorful experience that is both familiar and excitingly different.
How to Prepare Lemon Pepper Chicken
Step 1: Preparing the Coating Mixture
Begin by gathering a shallow dish or plate. Into this dish, you will combine the dry ingredients that will form the flavorful coating for your chicken. This initial step is crucial for ensuring each piece of chicken is evenly seasoned and develops a delightful crust during cooking. Precision here sets the stage for the success of the entire dish.
Measure out the coconut flour, or all-purpose flour if you prefer, into the dish. To this, add the star of the show: the lemon pepper seasoning. Ensure you use a good quality seasoning blend for the best citrus and peppery notes. Following that, incorporate the lemon zest; fresh lemon zest provides a more vibrant and aromatic citrus punch than just the juice alone. Finally, add the salt, adjusting the amount to your personal preference, as lemon pepper seasoning can sometimes contain salt already. Whisk these ingredients together gently with a fork until they are thoroughly combined, creating a pale yellow, aromatic mixture.
Once the coating mixture is ready, set it aside in a convenient location. This ensures it’s easily accessible when it’s time to coat the chicken. A well-prepared coating mixture is key to achieving that beautiful, golden-brown exterior on the chicken that is both visually appealing and texturally satisfying. The scent of the lemon and pepper at this stage is already a tantalizing preview of the deliciousness to come.
Step 2: Preparing the Chicken
Now it’s time to get the chicken ready for its flavor transformation. Take your boneless, skinless chicken breasts and place them on a clean cutting board. It’s essential to ensure the chicken is at a comfortable temperature for slicing, not overly frozen or excessively warm. A good chef’s knife is your best tool for this part of the preparation.
Carefully slice each chicken breast in half horizontally, lengthwise. This technique, known as butterflying, effectively turns one thick chicken breast into two thinner, more uniform pieces. The goal is to achieve a thickness of approximately 1/4-inch for all the chicken pieces. This uniform thickness is critical for ensuring that all pieces cook evenly and quickly, preventing some from becoming overcooked while others remain underdone. Aim for consistency across all the pieces you prepare.
Once all the chicken breasts have been butterflied, you should have a total of eight pieces of chicken, each roughly 1/4-inch thick. Take these prepared chicken pieces and gently toss them into the shallow dish containing the lemon pepper flour mixture. Ensure each piece is thoroughly coated on both sides, pressing lightly to help the coating adhere. Shake off any excess flour mixture. This coating not only adds flavor but also helps to create a lovely crust when the chicken is seared in the hot skillet.
Step 3: Cooking the Chicken
With the chicken prepped and coated, it’s time to introduce it to the heat. Place a large skillet over medium-high heat. Add the vegetable oil to the skillet. Allow the oil to heat up sufficiently; you’ll know it’s ready when it shimmers slightly or a drop of water flicked into it sizzles immediately. Proper oil temperature is crucial for achieving a good sear without the chicken sticking to the pan.
Carefully place the coated chicken breasts into the hot skillet. Do not overcrowd the pan; if necessary, cook the chicken in batches to ensure each piece has adequate space. Overcrowding will steam the chicken rather than sear it, compromising the desired crispy texture. Arrange the chicken pieces in a single layer, ensuring they are not touching one another for optimal browning.
Cook the chicken for approximately 3 to 4 minutes per side. The exact cooking time will vary depending on the thickness of your chicken pieces and the exact heat of your stove. You are looking for a beautiful golden-brown crust on each side and for the chicken to be cooked through. The internal temperature should reach 165°F (74°C). Once cooked, remove the chicken from the skillet and transfer it to a clean plate, setting it aside while you prepare the sauce. This resting period allows the juices to redistribute, ensuring the chicken remains tender and moist.
Step 4: Crafting the Lemon Butter Sauce
After removing the chicken, the same skillet, with any residual oil, is used to create a luscious sauce that will tie the entire dish together. Reduce the heat slightly if needed, and add the first tablespoon of butter to the skillet. Let the butter melt and begin to foam.
Once the butter has melted, add the minced garlic to the skillet. Sauté the garlic for about 30 seconds, stirring constantly, until it becomes fragrant. Be careful not to burn the garlic, as this can impart a bitter taste to the sauce. The aroma of garlic sizzling in butter is one of the most comforting scents in the kitchen.
Immediately after the garlic has softened, carefully pour in the chicken broth. Use a wooden spoon or spatula to scrape up any browned bits that are stuck to the bottom of the skillet; these bits, known as fond, are packed with flavor and will enrich your sauce. Bring the broth to a gentle simmer and stir in the fresh lemon juice. Allow the sauce to cook and reduce for about 3 to 4 minutes, or until it has thickened slightly and its consistency is more syrupy. This reduction concentrates the flavors, creating a more intense and delicious sauce.
Finally, add the remaining tablespoon of butter to the skillet. Stir it into the sauce until it is completely melted and incorporated. This final addition of butter helps to emulsify the sauce, giving it a beautiful sheen and a richer, creamier texture without adding any cream. Taste the sauce and adjust seasoning with salt and pepper if needed. The balance of tangy lemon, savory broth, and rich butter should be perfect.
Step 5: Finishing and Serving
Now that the flavorful sauce is ready, it’s time to bring the chicken back into the picture. Gently return the cooked chicken breasts to the skillet, nestling them into the warm lemon butter sauce. Ensure each piece is coated with the luscious sauce.
Allow the chicken to simmer in the sauce for about 1 minute. This brief period allows the chicken to heat through completely and absorb some of the delightful flavors from the sauce. It also ensures the chicken is perfectly integrated with the sauce, creating a cohesive and harmonious dish. Avoid overcooking at this stage, as the chicken is already cooked.
Remove the skillet from the heat. At this point, the Lemon Pepper Chicken is ready to be served. Garnish generously with freshly chopped parsley for a burst of color and freshness. Add a few thin lemon slices to the plate for an extra visual appeal and an optional squeeze of fresh lemon juice for those who desire an even brighter citrus note. The dish is now ready to be enjoyed.
Pro Tips for Lemon Pepper Chicken
Achieving a Perfect Sear: Ensure your skillet is adequately hot before adding the chicken. A properly preheated pan with hot oil is essential for creating a beautiful golden-brown crust and preventing the chicken from sticking. If you hear a satisfying sizzle the moment the chicken hits the pan, you’re on the right track.
Don’t Overcrowd the Pan: Cooking the chicken in batches is crucial, especially if you have a smaller skillet. Overcrowding leads to steaming instead of searing, resulting in pale, soggy chicken. Give each piece ample space to brown properly, ensuring a delightful texture.
Butterflying Technique: For the most even cooking and tender results, consistently aim for 1/4-inch thick chicken pieces. This uniformity ensures that all pieces cook at the same rate, preventing some from becoming dry while others remain undercooked. A sharp knife and a steady hand are your best allies here.
Building Flavor in the Sauce: Never skip scraping up the browned bits (fond) from the bottom of the skillet after cooking the chicken. These flavorful morsels are the foundation of your sauce and contribute significantly to its depth and richness. Deglazing with chicken broth releases these delicious remnants.
Freshness is Key: While dried lemon pepper seasoning is convenient, consider adding a bit of fresh lemon zest directly into the flour coating and using freshly squeezed lemon juice for the sauce. The brightness from fresh lemon will truly elevate the dish. If you can find a high-quality lemon pepper spice blend with visible flecks of lemon peel, even better.
Serving Suggestions for Lemon Pepper Chicken
Decoration
To elevate the presentation of your Lemon Pepper Chicken, start with a generous sprinkle of freshly chopped parsley. Its vibrant green hue adds a pop of color and a hint of freshness that visually enhances the dish. For an extra touch of elegance and an intensified citrus aroma, arrange a few thin, bright yellow lemon slices artistically around the chicken or on the edge of the plate. These simple garnishes not only make the dish more appealing to the eye but also signal the zesty flavors within.
Side Dishes
This versatile Lemon Pepper Chicken pairs beautifully with a variety of classic comfort foods and lighter options alike. For a hearty and satisfying meal, serve it alongside creamy mashed potatoes, which are perfect for soaking up the delectable lemon butter sauce. Fluffy white rice or a simple pilaf also make excellent bases. If you prefer a lighter accompaniment, consider steamed broccoli or asparagus, which offer a fresh counterpoint to the rich sauce. A simple side salad, perhaps a crisp Caesar salad or a refreshing cucumber salad, provides a delightful contrast in textures and flavors.
Creative Serving Ideas
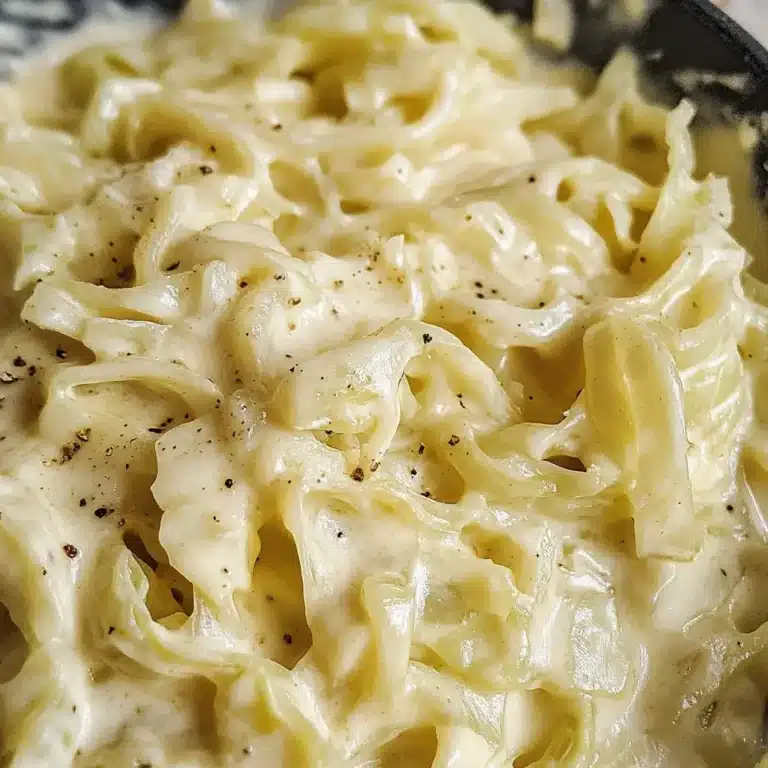
Transform your Lemon Pepper Chicken into a more elaborate dish by serving it over a bed of delicate angel hair pasta or rigatoni. The pasta will beautifully capture the savory sauce, making every bite a delight. For a lower-carb option that is equally satisfying, try serving the chicken over cauliflower rice, which absorbs the flavors wonderfully. Another imaginative approach is to incorporate the chicken into a vibrant grain bowl, pairing it with quinoa, roasted vegetables like bell peppers and zucchini, and a sprinkle of toasted almonds for added crunch. This creates a well-rounded and visually appealing meal that is both healthy and delicious.
Preparation & Storage
Storing Leftovers
Should you be fortunate enough to have any Lemon Pepper Chicken remaining, proper storage is key to maintaining its deliciousness. Ensure the chicken has cooled down to room temperature before attempting to store it. Place the leftovers in an airtight container; this is crucial for preventing the chicken from drying out and protecting it from absorbing other odors in the refrigerator.
Store the container in the refrigerator. Properly stored, this Lemon Pepper Chicken should remain fresh and safe to consume for up to 2 to 3 days. Always check for any signs of spoilage before reheating and consuming, such as off smells or unusual textures.
Freezing
While Lemon Pepper Chicken is best enjoyed fresh, it can be frozen for longer-term storage if needed. Allow the cooked chicken to cool completely. Then, portion it into freezer-safe containers or heavy-duty freezer bags, ensuring minimal air is trapped inside. You might consider freezing the chicken without the sauce to better preserve its texture upon thawing, or freeze both together if convenience is prioritized.
Label the containers with the date and contents. Frozen Lemon Pepper Chicken can typically be stored for up to 2 to 3 months. Remember that freezing and reheating can slightly alter the texture of the chicken, so managing expectations is helpful. It’s advisable to consume it within this timeframe for the best quality.
Reheating
To reheat your Lemon Pepper Chicken, the best method is often on the stovetop to help restore some of its original tenderness and flavor. If you stored the chicken with the sauce, gently warm it in a skillet over low to medium heat, stirring occasionally, until heated through. If you froze the chicken separately from the sauce, you can reheat the chicken and then prepare a quick fresh sauce or gently warm up any leftover sauce you might have saved.
Alternatively, you can reheat the chicken in the oven. Place the chicken in an oven-safe dish, perhaps with a tablespoon or two of water or broth to help keep it moist, and cover it with foil. Reheat at a moderate temperature, around 325°F (160°C), until the chicken is warmed through. Microwaving is also an option for a quick reheat, but be mindful that it can sometimes lead to less consistent heating and a slightly tougher texture. Always ensure the chicken is heated to an internal temperature of 165°F (74°C) before serving.
Frequently Asked Questions
-
Can I use chicken thighs instead of chicken breasts for this recipe?
Absolutely, boneless, skinless chicken thighs are a fantastic alternative to chicken breasts and often result in an even juicier and more forgiving dish due to their higher fat content. You will need to adjust the cooking time slightly, as chicken thighs typically require a few minutes longer to cook through completely. Ensure that the internal temperature of the thighs reaches 165°F (74°C) before removing them from the heat, and always use a meat thermometer for accuracy. The flavor profile remains compatible, and the slight difference in texture can be a delightful variation.
-
What exactly is lemon pepper seasoning made of, and can I make my own?
Lemon pepper seasoning is typically a dried spice blend that combines the bright zestiness of lemon peel with the pungent warmth of black pepper. Most commercial blends also include salt, garlic powder, and onion powder to enhance the overall flavor profile. While store-bought versions are convenient, crafting your own allows for complete control over the ingredients and proportions. To make your own, simply combine finely grated dried lemon peel (or zest from lemons you’ve dehydrated), freshly ground black pepper, salt, garlic powder, and onion powder in your desired ratio. Experiment with different amounts of lemon to pepper to find your perfect balance; some prefer a more pronounced citrus note, while others favor a bolder peppery kick. Store your homemade blend in an airtight container to maintain its freshness.
-
My chicken seems a bit dry. What could I have done differently to ensure it stays moist?
If your chicken turned out drier than you’d prefer, there are several key factors to consider for future attempts. Firstly, ensure you are not overcooking the chicken; a meat thermometer is invaluable here, as removing the chicken from the heat as soon as it reaches an internal temperature of 165°F (74°C) prevents it from drying out. The butterflying technique, aiming for uniform 1/4-inch thickness, is also critical for even cooking. Furthermore, don’t skip the step of letting the chicken rest for a few minutes after cooking before slicing or returning it to the sauce; this allows the juices to redistribute throughout the meat. Finally, ensuring the sauce is well-developed and coating the chicken adequately during the final minute of cooking can also help to seal in moisture and add richness.