Grilled Lemon Chicken Recipe – The Best Lemon Marinade!
This juicy grilled lemon chicken has always been a family favorite, perfect for those sunny summer days when the grill is calling. It’s marinated in a vibrant, garlicky blend of fresh lemon and herbs, making it incredibly quick and easy to prepare.
Imagine the aroma filling your backyard as this chicken sizzles; it’s reminiscent of cherished holiday picnics and outdoor gatherings. This recipe is a direct translation of those happy memories into a delicious, approachable meal for your own family.
Why You Will Love This Recipe
- Effortless Marinade: The simple yet potent lemon and garlic marinade comes together in minutes, requiring just a few staple ingredients.
- Versatile Grilling: Whether you’re using an outdoor grill or a stovetop grill pan, this recipe delivers beautifully charred and tender chicken.
- Bright, Fresh Flavors: The zest and juice of fresh lemons, combined with aromatic garlic and parsley, create a taste that is both refreshing and deeply satisfying.
- Quick Preparation: With minimal prep time and straightforward cooking steps, you can have a restaurant-quality meal ready in under an hour, including marinating time.
- Family Approved: This is a tried-and-true recipe that has been a hit for generations, ensuring happy eaters all around your table.
Ingredients You Need
The beauty of this grilled lemon chicken lies in its simplicity, relying on high-quality, fresh ingredients to let the natural flavors shine through. Using fresh lemons, especially their zest, infuses a depth of citrus flavor that bottled juice can’t replicate. Good olive oil forms the base of the marinade, carrying all those wonderful aromatics beautifully to the chicken.
Grilled Lemon Chicken

This juicy grilled lemon chicken is a family-favorite, featuring a quick and easy garlicky lemon marinade bursting with fresh flavor. Perfect for summer picnics and weeknight dinners, it can be grilled outdoors or prepared on a stovetop grill pan.
- 2 pounds boneless, skinless chicken breasts
- zest of 2 lemons
- 4 cloves garlic, minced
- salt and fresh ground pepper, to taste
- 1 whole lemon, cut into slices
- 1Marinate the chicken: In a large ziploc bag, combine chicken, olive oil, lemon zest, lemon juice, garlic, parsley, salt, and pepper. Seal the bag and shake until well combined. Place in the refrigerator and marinate for about 4 hours or overnight.
- 2Prepare the grill: Preheat the grill to about 375°F to 400°F. Brush the grill grates with olive oil.
- 3Grill the chicken: Remove chicken breasts from the marinade. Place them on the hot grill; cook without touching until grill marks appear, about 5 minutes.
- 4Flip and finish: Turn the chicken breasts over, cover the grill, and let them finish cooking, about 7 more minutes, or until a meat thermometer registers 165°F.
- 5Rest the chicken: Remove chicken from grill; cover and let rest for 5 minutes before cutting and serving.
- 6Grill Pan Instructions: Preheat oven to 350°F. Grease a grill pan with cooking spray and set over medium-high heat. Sear chicken for 4 minutes, flip, and cook for 2 more minutes. Place grill pan in the oven and cook for 18 to 20 minutes until cooked through. Remove from oven and let rest 5 to 8 minutes before cutting and serving.
Keywords: grilled chicken, lemon chicken, summer recipe, easy dinner, quick meal, chicken marinade, grill pan recipe
- olive oil: a good quality extra virgin olive oil provides a rich flavor base for the marinade, helping to tenderize the chicken and distribute the citrus and garlic notes.
- lemons: fresh lemons are paramount, providing both zest for intense aromatic oils and juice for a bright, tangy marinade that tenderizes the meat.
- garlic: freshly minced garlic offers a pungent depth and classic savory element that is essential to the marinade’s robust flavor profile.
- parsley: fresh parsley adds a vibrant, herbaceous freshness that cuts through the richness of the olive oil and garlic, brightening the overall taste.
- salt and pepper: essential for seasoning, these enhance all the other flavors in the marinade and ensure the chicken is perfectly seasoned from within.
- whole lemon, cut into slices: these are optional but wonderful for grilling alongside the chicken, infusing an extra layer of caramelized lemon flavor.
The exact quantities for these fantastic ingredients can be found in the recipe card below, ensuring perfect results every time.
Variations
This grilled lemon chicken is wonderfully adaptable, allowing you to tailor it to various dietary needs and flavor preferences. For instance, if you’re seeking a vegan option, you could adapt the marinade and apply it to hearty vegetables like cauliflower steaks, large portobello mushrooms, or even firm tofu. Marinate them for a similar duration, and grill or roast them until tender and slightly charred, creating a satisfying plant-based main course.
For those following a low-carb lifestyle, this chicken is already a fantastic base. Simply pair it with non-starchy vegetables like grilled asparagus, a fresh green salad with a light vinaigrette, or sautéed zucchini and bell peppers instead of rice or pasta. The zesty marinade complements these lighter sides beautifully.
To introduce a different flavor dimension, consider adding a touch of heat by incorporating red pepper flakes into the marinade for a spicy kick, or a hint of sweetness with a drizzle of honey or maple syrup for a sweet and tangy profile. You could also experiment with other herbs like thyme, rosemary, or even a hint of dried oregano to complement the lemon and garlic.
How to Prepare Grilled Lemon Chicken
Step 1: Marinate the Chicken
The journey to incredibly flavorful grilled lemon chicken begins with the marinade. Gather a large resealable bag or a non-reactive bowl, as the lemon juice can affect some metals over time. Into this vessel, combine the boneless, skinless chicken pieces – breasts or thighs work equally well, though breasts will cook slightly faster.
Next, pour in the liquid gold: a generous amount of olive oil. This fat is crucial for carrying the flavors of the marinade to the chicken and helping to achieve a beautiful sear on the grill. Following that, add the zest of two fresh lemons, ensuring you only get the yellow part and avoid the bitter white pith. This zest is packed with aromatic oils.
Then, squeeze in the juice from those same lemons; this provides the essential tanginess and works to tenderize the chicken. Add finely minced fresh garlic for that indispensable pungent kick, and a good amount of freshly chopped parsley for a burst of herbaceous brightness. Finally, season generously with salt and freshly ground black pepper to taste, as this forms the foundational seasoning for the entire dish.
Once all the marinade ingredients are in with the chicken, seal the bag tightly, expelling as much air as possible. If using a bowl, cover it tightly with plastic wrap. Gently shake the bag or toss the chicken in the bowl to ensure every piece is thoroughly coated in the vibrant marinade. Place the prepared chicken in the refrigerator to marinate. For optimal flavor infusion, aim for at least 4 hours, but allowing it to marinate overnight will yield an even more intensely flavored and tender result. The longer it marinates, the more the flavors will penetrate the meat, creating a truly delicious experience.
Step 2: Prepare the Grill
As your chicken reaches its marinating peak, it’s time to get your grill ready for action. Whether you’re using a charcoal grill or a gas grill, the goal is to preheat it to a medium-high temperature. This generally falls within the range of 375°F to 400°F. A properly preheated grill is key to achieving those coveted grill marks and preventing the chicken from sticking.
If you’re using a gas grill, simply turn the burners to the desired heat setting and let it preheat with the lid closed for about 10-15 minutes. For a charcoal grill, arrange your coals for direct heat and allow them to ash over until they reach that optimal glowing red stage. This ensures consistent, high heat for searing.
Once the grill is hot, it’s absolutely crucial to clean the grates thoroughly. Use a stiff wire grill brush to scrape away any residue from previous cooking sessions. This prevents sticking and ensures a clean surface for your chicken to cook on. After brushing, and while the grates are still hot, lightly brush them with a high-heat cooking oil, such as canola or vegetable oil, using a folded paper towel held with tongs. This extra step of oiling the grates creates a non-stick surface, further minimizing the risk of the chicken adhering to the grill.
Ensuring your grill is clean and properly oiled at this stage will make the entire grilling process smoother and contribute significantly to the final presentation and texture of your lemon chicken. A well-prepped grill is the silent hero of perfect grilled foods, setting the stage for delicious success.
Step 3: Grill the Chicken
With the grill perfectly preheated and the grates meticulously prepared, it’s time to introduce the star of the show: your marinated lemon chicken. Carefully remove the chicken pieces from the marinade bag or bowl, allowing any excess marinade to drip back. It’s important not to scrape off all the marinade, as it contains the flavorful zest, garlic, and herbs that will contribute to the chicken’s delicious crust. Discard the remaining marinade; it should not be reused due to the raw chicken.
Place the chicken pieces directly onto the hot grill grates. Now, for one of the most critical steps to achieving perfect grill marks and a beautiful sear: resist the urge to move or press down on the chicken immediately. Let it cook undisturbed for approximately 5 minutes. During this time, the heat will begin to caramelize the sugars in the marinade and the natural juices of the chicken, forming those desirable grill marks and a flavorful crust. You should start to see the edges of the chicken firm up and release from the grates naturally as they cook.
After those initial 5 minutes, it’s time to flip. Using a sturdy pair of tongs or a spatula, carefully turn each piece of chicken over. Continue to cook the second side, this time with the grill lid closed. Closing the lid helps to trap the heat and cook the chicken through evenly and more quickly, much like an oven. This second cooking phase typically takes about 7 to 8 minutes, but this can vary depending on the thickness of your chicken pieces. Thicker breasts may require a bit longer, while thinner pieces will cook faster.
The key to knowing when your chicken is perfectly done is to check its internal temperature. Use an instant-read meat thermometer inserted into the thickest part of the chicken, avoiding any bone if present. The chicken is safely cooked and ready to be removed from the grill when it registers an internal temperature of 165°F (74°C).
Step 4: Rest the Chicken
Once your grilled lemon chicken has reached the perfect internal temperature of 165°F (74°C), it’s time to remove it from the heat. Using your tongs, carefully transfer the beautifully seared and cooked chicken breasts from the grill grates onto a clean plate or a cutting board. The temptation to slice into it immediately will be strong, but this next step is absolutely vital for achieving that incredibly juicy and tender chicken that everyone loves.
This crucial step is called “resting.” It allows the juices within the chicken, which have been driven to the center during the high-heat cooking process, to redistribute back throughout the meat. If you were to cut into the chicken immediately, all those delicious, savory juices would simply run out onto the plate, leaving you with drier, less flavorful chicken.
To rest the chicken properly, cover it loosely with a piece of aluminum foil. This creates a gentle, warm environment that allows the juices to settle without steaming the chicken and losing the crispness of the sear. Let the chicken rest for a minimum of 5 minutes, but ideally 7 to 10 minutes. This short waiting period makes a significant difference in the final texture and moisture content of the chicken.
After the resting period, the chicken will be incredibly moist and flavorful. It’s now ready to be sliced, diced, or served whole, ready to be enjoyed as part of a delicious meal. This simple resting technique elevates a good grilled chicken dish into an exceptional one, ensuring every bite is as succulent as the last.
Step 5: Grill Pan Instructions (Alternative Method)
For those days when outdoor grilling isn’t an option, or if you prefer the convenience of stovetop cooking, using a grill pan is an excellent alternative. The process begins by preheating your oven to 350°F (175°C). This dual-heat approach ensures the chicken is cooked through evenly after achieving a lovely char on the stovetop.
Next, prepare your oven-safe grill pan. Lightly grease it with cooking spray or a little oil. Place the pan over medium-high heat on your stovetop. The key here is to ensure the pan is sufficiently hot before adding the chicken; you want to hear a satisfying sizzle the moment the chicken hits the surface. If it doesn’t sizzle, the pan isn’t hot enough, and you risk the chicken steaming rather than searing.
Once the pan is screaming hot, carefully add the marinated chicken pieces. Sear the chicken for approximately 4 minutes on the first side. This initial searing is what creates those attractive grill marks and a flavorful crust. After 4 minutes, use tongs to flip the chicken pieces over.
Continue to cook the second side on the stovetop for another 2 minutes. This brief period on the stovetop will further develop the char and browning. Now, it’s time to transfer the heat. Carefully place the entire grill pan, with the chicken still in it, into the preheated oven. Allow the chicken to finish cooking in the oven for about 18 to 20 minutes, or until an instant-read thermometer registers an internal temperature of 165°F (74°C).
Once cooked, remove the grill pan from the oven. As with outdoor grilling, allow the chicken to rest for 5 to 8 minutes before slicing or serving. This resting period is just as crucial when using a grill pan to ensure maximum juiciness. The combination of stovetop searing and oven finishing provides a wonderful grilled texture and perfectly cooked chicken, making this a versatile method for enjoying this delicious recipe year-round.
Step 6: Serving and Final Touches
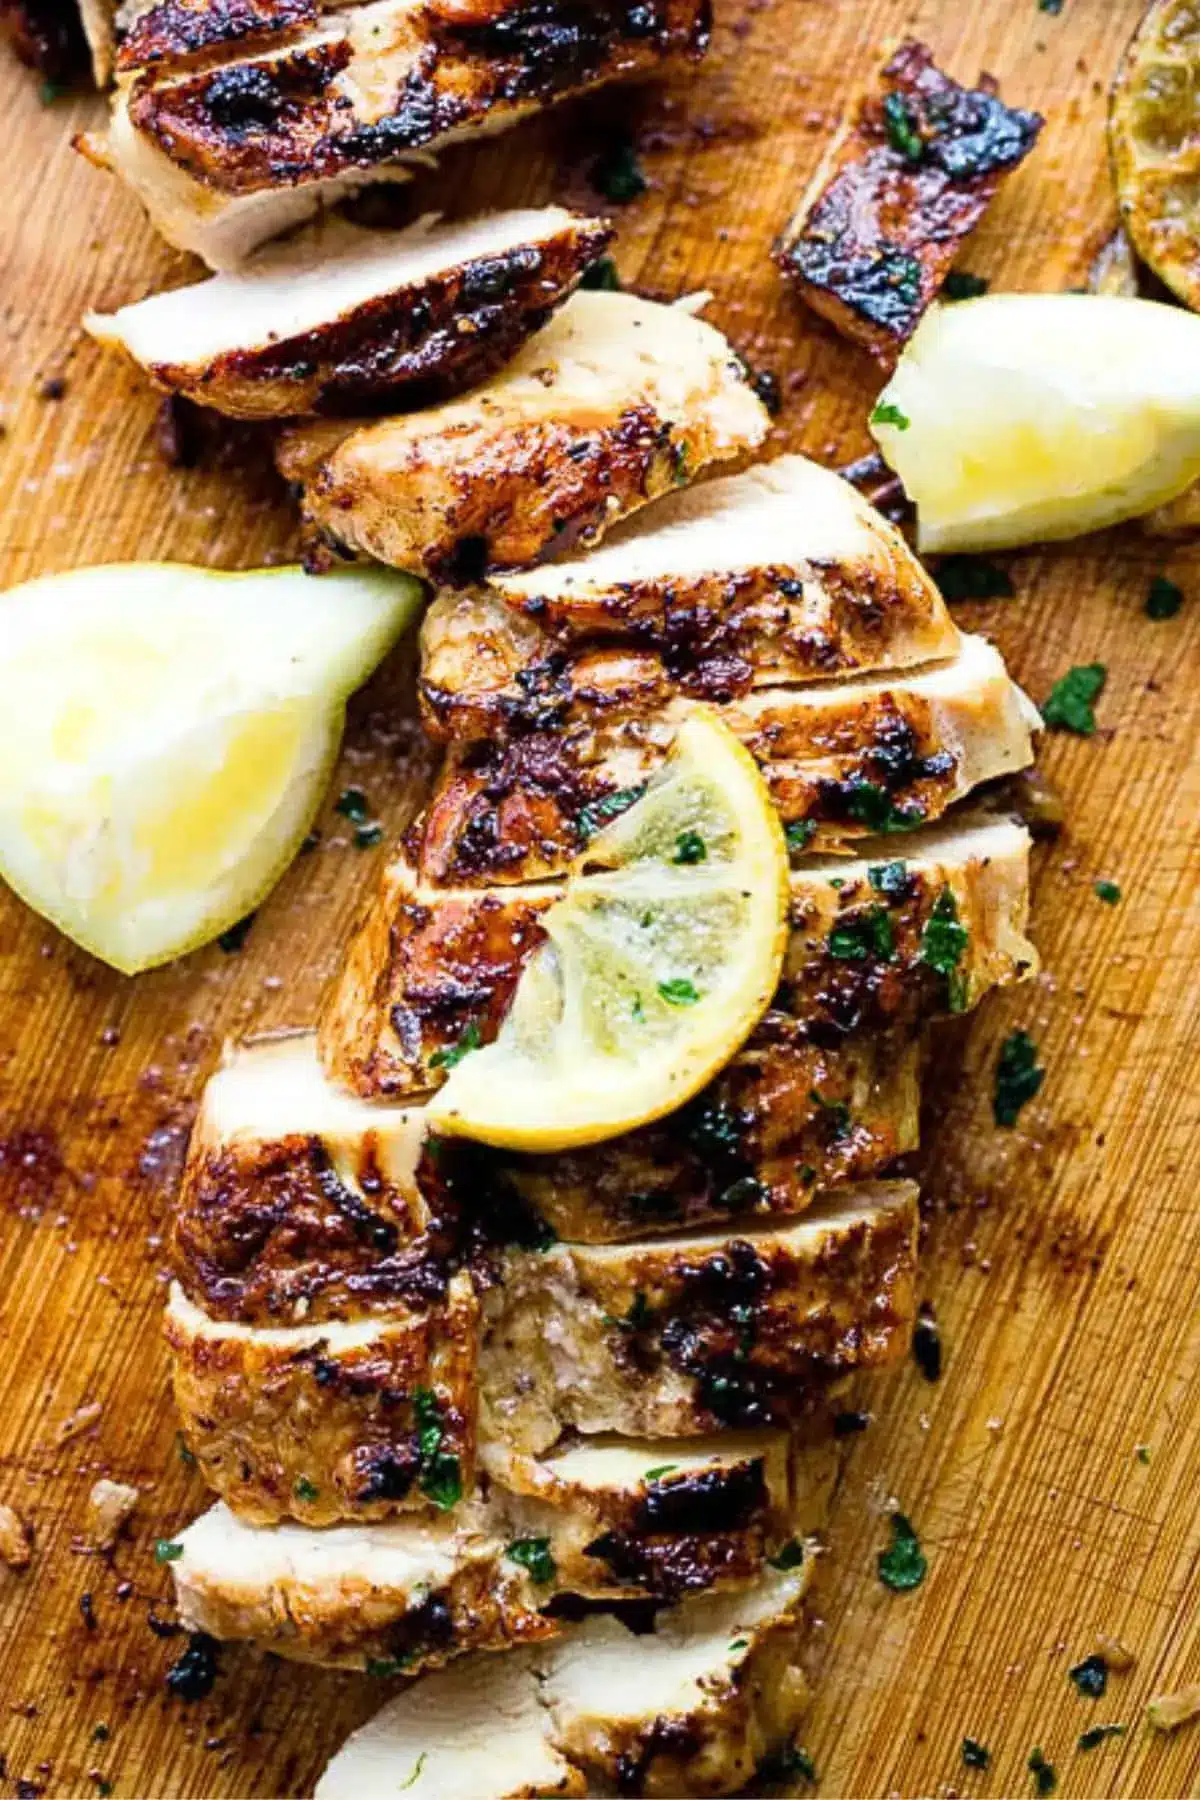
After your perfectly grilled lemon chicken has had its essential resting period, it’s ready to be transformed into a beautiful meal. The aromas will be intoxicating, hinting at the bright, zesty, and savory flavors that await. You can serve the chicken breasts whole, allowing each diner to appreciate the beautiful grill marks and imagine the tangy marinade that infused them.
Alternatively, for a more versatile presentation, slice the chicken breasts into thick strips or dice them into bite-sized pieces. This makes it easier to incorporate into salads, pasta dishes, or to serve as part of a larger platter. If you grilled lemon slices alongside the chicken, these can be artfully arranged around the serving platter, offering a visual cue to the chicken’s flavor profile and a tangy garnish for those who enjoy an extra burst of lemon.
Consider a final flourish of fresh, finely chopped parsley sprinkled over the top. This not only adds a pop of color but also reinforces the fresh herb notes present in the marinade. A final, light crack of fresh black pepper can also enhance the overall presentation and flavor. The goal is to present a dish that is as visually appealing as it is delicious, inviting your guests to savor every bite of this expertly prepared lemon chicken.
Pro Tips for Grilled Lemon Chicken
Even Thickness is Key: To ensure your chicken cooks evenly, try to pound the chicken breasts to a uniform thickness before marinating. This eliminates thicker parts that might undercook while thinner parts overcook, leading to a more consistent result.
Don’t Crowd the Grill: When grilling, avoid placing too much chicken on the grill at once. Overcrowding lowers the grill’s temperature and prevents the chicken from searing properly, resulting in steamed, less flavorful meat and poor grill marks. Cook in batches if necessary.
Marinade Wisely: While marinating is essential, don’t over-marinate, especially with acidic ingredients like lemon juice. More than 24 hours can sometimes break down the chicken’s texture too much, making it mushy. Four to twelve hours is typically the sweet spot for this recipe.
Embrace the Sizzle: For that perfect restaurant-quality char, ensure your grill is hot enough before the chicken hits it. A hot grill sears the exterior quickly, locking in juices and creating delicious caramelized bits. If you’re using a grill pan, preheating it thoroughly is equally important.
Quality Ingredients Matter: Use fresh lemons for both zest and juice, and good quality olive oil. The simplicity of this recipe means that the flavor of each ingredient shines through, so better ingredients translate to a better final dish. Fresh herbs like parsley make a noticeable difference compared to dried.
Serving Suggestions for Grilled Lemon Chicken
Decoration
To visually enhance the presentation of your grilled lemon chicken, consider a scattering of fresh, vibrant green parsley over the top. Thinly sliced lemon wheels, grilled alongside the chicken, can also be used as an edible and attractive garnish. A sprinkle of finely grated lemon zest directly on top just before serving adds an extra burst of citrus aroma and visual appeal.
Side Dishes
This lemon chicken pairs beautifully with a wide array of side dishes. A fluffy mound of Mediterranean rice pilaf is perfect for soaking up any extra marinade juices. For a lighter option, consider serving it alongside a crisp Greek salad with cucumbers, tomatoes, olives, and feta cheese. Roasted vegetables like asparagus, broccoli, or bell peppers are also excellent companions, their earthy flavors complementing the bright chicken.
Creative Serving Ideas
Transform this grilled lemon chicken into a delightful pasta topping by slicing or dicing it and tossing it with linguine, a light garlic-butter sauce, and a sprinkle of Parmesan cheese. It’s also a fantastic addition to salads; simply chop the cooked chicken and toss it with mixed greens, cherry tomatoes, red onion, and your favorite vinaigrette for a satisfying meal. For a more casual gathering, serve it as part of a skewer platter with cherry tomatoes, zucchini chunks, and bell peppers, offering a fun and interactive dining experience.
Preparation & Storage
Storing Leftovers
To store any leftover grilled lemon chicken, allow it to cool completely to room temperature. Once cooled, transfer the chicken into an airtight container. This helps to prevent it from drying out and absorbs any lingering odors from the refrigerator. Properly stored, the chicken should remain fresh and delicious in the refrigerator for up to 4 days. It’s perfect for quick lunches or adding to salads the next day.
Freezing
While grilled chicken is best enjoyed fresh, it can be frozen for longer storage. Ensure the chicken is completely cooled before freezing. Wrap individual portions tightly in plastic wrap, then place them inside a heavy-duty freezer bag or an airtight container. This double-layer protection helps to prevent freezer burn. Frozen grilled lemon chicken can be stored for up to 2-3 months.
Reheating
To reheat leftover chicken, the microwave is a quick option; heat in short intervals, checking for doneness to avoid drying it out. For a more tender result, reheat the chicken in a preheated oven at 350°F (175°C) until it is heated through. If reheating from frozen, allow it to thaw in the refrigerator overnight before reheating using your preferred method. Be cautious not to overcook during reheating, as this can make the chicken dry.
Frequently Asked Questions
-
Can I use bone-in chicken pieces for this recipe?
Yes, you can absolutely use bone-in chicken pieces like thighs or drumsticks. However, you will need to adjust the grilling time significantly, as bone-in cuts take longer to cook through. Ensure you cook them until an instant-read thermometer inserted into the thickest part, avoiding the bone, registers 165°F (74°C). Marinating time can remain the same, but keep a close eye on the internal temperature during grilling.
-
How do I prevent my chicken from sticking to the grill?
Preventing sticking involves a few key steps. First, ensure your grill grates are thoroughly cleaned and preheated to the correct temperature. Second, oil the grates generously just before placing the chicken on them, using a high-heat oil like canola or vegetable oil applied with a paper towel held by tongs. Finally, and crucially, avoid moving or pressing down on the chicken during the initial searing period; let it cook undisturbed for at least 4-5 minutes to develop a natural crust that will release easily from the grates.
-
What is the best way to zest and juice lemons?
For optimal flavor and ease, always zest your lemons before juicing them. Use a microplane or a fine grater to remove only the yellow outer layer, avoiding the bitter white pith underneath. Once zested, cut the lemon in half and squeeze the juice using a citrus reamer, juicer, or even just by hand. Strain the juice to remove any seeds before adding it to your marinade. Using fresh lemons provides a much brighter, more intense citrus flavor compared to bottled juice, which is essential for this recipe.