Grandma’s Coconut Cookies: The Irresistible Chewy Treat

There’s a special kind of joy that fills my kitchen when I whip up a batch of Grandma’s Coconut Cookies. The moment the oven door swings open and the warm, sweet scent of coconut wafts through the air, I’m transported back to my childhood, where every cookie held a story.
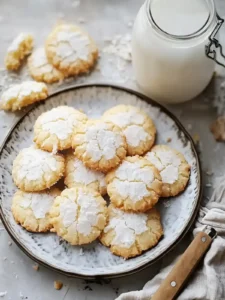
These delightful treats boast a chewy texture, with just the right balance of sweetness from brown sugar and shredded coconut. With versatile mix-ins for every taste—from chocolate chips to dried fruit—this recipe makes it easy to customize your cookies, ensuring that each bite reflects your personal touch. Whether you’re baking for an afternoon pick-me-up or a festive gathering, these easy-to-make cookies are bound to bring smiles and create new memories.
Why You Will Love This Recipe
- Nostalgia Factor: These cookies evoke warm childhood memories, making each bite a trip down memory lane and a comforting experience.
- Ease of Preparation: Even if you’re new to baking, this recipe is straightforward and forgiving, guaranteeing delicious results without fuss or extensive culinary skills.
- Customizable Flavors: The ability to add a variety of mix-ins like chocolate chips, nuts, or dried fruits allows you to tailor the cookies to suit any preference or occasion, making them truly your own.
- Perfect Chewy Texture: Achieved through the careful balance of ingredients and proper technique, the signature chewy center with slightly crisp edges makes these cookies utterly irresistible.
- Versatile Occasion Treat: From a simple afternoon snack to a centerpiece at a holiday gathering, these cookies are always a welcome addition and a guaranteed crowd-pleaser for all ages.
Ingredients You Need
Crafting these delightful cookies begins with selecting quality ingredients that will ensure a perfect texture and rich flavor. Each component plays a vital role, from the base fat that provides tenderness to the sweeteners that offer depth and the star, shredded coconut, that defines the cookie’s essence. Ensuring you have the right amounts of each element is key to achieving that signature chewiness and delightful sweetness that makes Grandma’s Coconut Cookies so beloved.
Grandma’s Coconut Cookies
Enjoy the nostalgic taste of Grandma’s Coconut Cookies, a chewy delight made with coconut and customizable mix-ins.
- 1 cup shortening
- 1 cup sugar
- 1 cup brown sugar
- 2 large eggs
- 1 teaspoon vanilla extract
- 2 cups all-purpose flour
- 1 teaspoon baking powder
- 1 teaspoon baking soda
- 1 teaspoon salt
- 1 cup old-fashioned oats
- 3 cups sweetened shredded coconut
- 1 cup chocolate chips
- 1 cup chopped nuts
- 1 cup dried fruit
- 1 teaspoon coconut extract
- 1 teaspoon spices
- 1 tablespoon zest
- 1In a mixing bowl, beat the shortening, sugar, brown sugar, and vanilla until light and fluffy, about 3-5 minutes.
- 2Crack in the eggs one at a time, mixing well after each addition.
- 3Whisk together the flour, baking powder, baking soda, and salt in a separate bowl. Gradually mix into wet ingredients until just combined.
- 4Gently fold in the old-fashioned oats and shredded coconut.
- 5Divide the dough into four equal parts, shape each into 6-inch logs, wrap in waxed paper, and freeze for about 2 hours.
- 6Preheat your oven to 350°F (175°C). Slice the logs into ½-inch thick pieces and arrange on ungreased baking sheets.
- 7Bake for 10-12 minutes until the edges are golden brown.
- 8Allow to cool on the baking sheets for 5 minutes before transferring to wire racks.
Keywords: coconut cookies, grandma's cookies, chewy cookies, dessert, baking
- shortening: adds moisture and fluffiness; can be substituted with butter for a richer taste.
- sugar: provides sweetness and contributes to crispiness; brown sugar enhances the richness.
- brown sugar: increases humidity and offers a creamy texture; dark brown sugar amplifies flavor.
- eggs: bind ingredients together and enrich texture; use room temperature for optimal mixing.
- vanilla extract: enhances flavor; almond extract is a fun alternative for a different profile.
- all-purpose flour: forms the structure of the cookies; can use a gluten-free flour blend as a substitute for dietary needs.
- baking powder: provides rise and helps achieve a lighter texture; can be swapped with baking soda for a different leavening effect.
- baking soda: works alongside baking powder for texture and helps with browning; essential for the cookie’s lift.
- salt: balances sweetness and enhances overall flavors; use judiciously to avoid an overpowering taste.
- old-fashioned oats: provides a satisfying chewy texture and hearty substance; avoid instant oats for consistency.
- sweetened shredded coconut: adds the quintessential coconut flavor and moisture; toasted coconut further enhances this taste profile.
- chocolate chips: optional mix-in for bursts of sweetness; mini chocolate chips distribute more evenly.
- chopped nuts: optional for added texture and a complementary flavor; walnuts or pecans work wonderfully.
- dried fruit: optional for a chewy, tangy, or sweet contrast; cranberries, raisins, or apricots are excellent choices.
- coconut extract: an alternative or addition to vanilla for an intensified coconut flavor experience.
- spices: optional for warmth and depth; cinnamon or nutmeg are classic pairings that complement coconut beautifully.
- zest: optional for a bright, aromatic lift; lemon zest provides a refreshing counterpoint to the sweetness.
These are the core components that will form the foundation of your delicious Grandma’s Coconut Cookies; precise quantities are detailed in the recipe card.
Variations
Elevating the classic Grandma’s Coconut Cookies to new heights is an exciting culinary adventure, and the beauty of this recipe lies in its adaptability. You can transform these simple delights into something entirely unique with just a few thoughtful additions or substitutions. Consider the possibility of infusing them with a tropical essence that goes beyond the standard coconut, or perhaps creating a flavor profile that leans towards warm spices or a refreshing citrus note.
For a vibrant and healthy twist, try incorporating finely chopped crystallized ginger and a tablespoon of fresh lime zest into the dough. The ginger adds a delightful warmth and a hint of spice, while the lime zest provides a zesty, aromatic brightness that cuts through the sweetness. This combination offers a sophisticated and invigorating flavor profile, perfect for those seeking something a little different from the usual cookie offerings.
Another wonderful variation involves tapping into the rich world of chocolate. Instead of just standard chocolate chips, consider using a mix of dark chocolate chunks and a swirl of melted white chocolate drizzled on top after baking. You could even dust them lightly with cocoa powder for a more intense chocolate experience. This option is a dream for any true chocolate aficionado, offering layers of cocoa goodness with every bite.
For those who enjoy a touch of warmth and spice, introducing a hint of cinnamon and a pinch of cardamom to the dry ingredients can create a wonderfully aromatic cookie. You might also consider a splash of almond extract alongside the vanilla for a more complex nutty undertone. These spiced variations are particularly delightful during the autumn and winter months, adding a cozy and comforting dimension to the cookie’s flavor.
How to Prepare Grandma’s Coconut Cookies
Step 1: Creaming the Foundation
Begin by gathering all your ingredients and ensuring your shortening or butter is at the right temperature, typically softened but not melted. In a large mixing bowl, combine the shortening, granulated sugar, and brown sugar. These are the foundational elements that will contribute significantly to the cookie’s final texture and sweetness. Using a stand mixer with a paddle attachment or a sturdy hand mixer is recommended for this stage to achieve the best results.
Cream these ingredients together on medium speed for approximately 3 to 5 minutes, or until the mixture is exceptionally light, fluffy, and pale in color. This creaming process is crucial as it incorporates air into the dough, which contributes to a lighter, chewier cookie texture rather than a dense, flat one. Scrape down the sides and bottom of the bowl periodically to ensure all the sugar and fat are evenly combined and properly aerated.
Once the mixture has achieved the desired light and fluffy consistency, you’ll then introduce the vanilla extract. Mix it in just until it’s fully incorporated, allowing its aromatic essence to begin infusing the buttery base. The aroma alone at this stage is often a delightful preview of the cookies to come, a sweet and comforting scent that promises deliciousness.
Step 2: Incorporating Wet Ingredients
With the creamy base established, it’s time to add the eggs. It’s important to add the eggs one at a time, mixing thoroughly after each addition. This method ensures that each egg is fully emulsified into the creamed mixture, creating a smooth and stable foundation for the rest of the dough. Adding them all at once can cause the mixture to curdle or separate, impacting the final texture of your cookies.
After the first egg is beaten in until no yellow streaks remain, pause and scrape down the sides of the bowl again. This ensures that any unincorporated egg or fat clinging to the bowl is brought back into the mix for a uniform batter. Then, add the second egg and repeat the thorough mixing process. The mixture should become even more cohesive and slightly lighter in color after the eggs are fully incorporated.
This gradual incorporation of the eggs is a key technique in cookie making, contributing to a tender crumb and a cohesive dough that holds its shape well during baking. A well-emulsified wet mixture is vital for distributing the fats and sugars evenly, leading to consistently delicious cookies every time you bake them. The smooth texture at this point signifies that the foundation is ready for the dry ingredients.
Step 3: Combining the Dry Elements
In a separate, medium-sized bowl, whisk together the all-purpose flour, baking powder, baking soda, and salt. Whisking these dry ingredients together thoroughly before adding them to the wet mixture is an important step. It ensures that the leavening agents (baking powder and baking soda) and the salt are evenly distributed throughout the flour, preventing pockets of saltiness or uneven rising in the final cookies.
Once these dry ingredients are well combined, you will gradually add this flour mixture to the creamed butter and sugar mixture. It’s best to add it in two or three additions, mixing on low speed after each addition, just until the flour streaks have disappeared. Overmixing at this stage can develop the gluten in the flour too much, resulting in tough, dense cookies rather than the desired chewy texture.
The goal is to achieve a just-combined dough. Stop mixing as soon as you no longer see any dry flour. The dough might still look a little shaggy, which is perfectly fine. This gentle approach to combining the dry and wet ingredients is essential for maintaining the tenderness and chewiness that defines Grandma’s Coconut Cookies. It ensures that the structure of the cookie is built without becoming overly tough.
Step 4: Folding in the Add-Ins
Now comes the exciting part where you incorporate the star ingredients and any optional mix-ins: the old-fashioned oats and the sweetened shredded coconut. It’s crucial to use old-fashioned oats rather than instant oats, as they hold their shape better and contribute a more satisfying chewiness to the cookie without becoming mushy during baking.
Gently fold the oats and shredded coconut into the dough using a rubber spatula or wooden spoon. Avoid using the mixer at this point, as overmixing can break down the oats and coconut, and can also lead to toughening the dough. The aim is to distribute them evenly throughout the cookie dough without overworking the mixture. If you are adding other mix-ins like chocolate chips, nuts, or dried fruit, fold them in at this stage as well.
Be mindful not to overfill the dough with too many add-ins, as this can affect the cookie’s structure and baking time. The dough should be thick and slightly sticky, but hold together well. The visual of the oats and coconut interspersed throughout the dough is a hallmark of this classic cookie, promising a delightful texture and flavor in every bite. The dough is now ready to be shaped for chilling.
Step 5: Shaping and Chilling the Dough
To achieve perfectly uniform cookies and a more manageable dough for slicing, the next step involves shaping the cookie dough into logs and chilling it. Divide the cookie dough into four equal portions. This makes handling the dough much easier and ensures that each log is of a similar size, which will lead to evenly baked cookies.
On a clean surface, roll each portion of dough into a log shape, approximately 6 inches in length and about 1.5 to 2 inches in diameter. Wrap each log tightly in waxed paper or plastic wrap. This wrapping is essential for maintaining the log’s shape and preventing the dough from drying out or picking up any odors from the refrigerator or freezer. The smooth outer surface created by the wrap will also help in slicing.
Once wrapped, place the dough logs in the refrigerator for at least 2 hours, or until they are firm and easy to slice. Chilling the dough not only makes it easier to handle but also allows the flavors to meld together, and it helps to prevent the cookies from spreading too much during baking, resulting in a thicker, chewier cookie. For longer storage, these logs can be frozen for up to six months, which is a fantastic make-ahead option.
Step 6: Baking to Golden Perfection
When the dough logs have chilled sufficiently and are firm to the touch, preheat your oven to 350°F (175°C). Prepare your baking sheets by lining them with parchment paper or silicone baking mats to prevent sticking and ensure even browning. If you don’t have these, ungreased sheets are acceptable, though parchment paper makes cleanup significantly easier and aids in consistent baking.
Remove the chilled dough logs from their wrapping and carefully slice them into ½-inch thick rounds. Place the cookie slices onto the prepared baking sheets, leaving about 2 inches of space between each cookie. This spacing is important to allow for a slight spread during baking without the cookies running into each other. For a slightly different presentation, you can also press the tops of the cookies lightly with a fork or the bottom of a glass.
Bake the cookies for approximately 10 to 12 minutes, or until the edges are golden brown and the centers appear set but still slightly soft. It is crucial not to overbake them if you desire that signature chewy texture. The residual heat will continue to cook the cookies on the baking sheet after you remove them from the oven, so pulling them out at the right moment is key to achieving perfect chewiness. Allow the cookies to cool on the baking sheets for about 5 minutes before transferring them to a wire rack to cool completely.
Pro Tips for Grandma’s Coconut Cookies
Room Temperature Ingredients are Key: Ensure your eggs are at room temperature before you start mixing. This is essential because room temperature ingredients emulsify better, creating a smoother, more cohesive dough that bakes more evenly. Cold eggs can shock the mixture, leading to a less desirable texture in your final cookies, so allow them to sit out for about 30-60 minutes.
Accurate Flour Measurement is Crucial: Avoid scooping flour directly from the bag with your measuring cup. Instead, use a spoon to lightly fill the measuring cup, then level off the excess with a straight edge, like the back of a knife. Too much flour can result in dry, crumbly cookies that lack the desired chewiness, so precision here is vital for success.
Don’t Overbake for Maximum Chew: The secret to Grandma’s Coconut Cookies’ signature chewy texture lies in not overbaking. Pull the cookies from the oven when the edges are just beginning to turn golden brown, but the centers still look slightly soft and underdone. They will continue to bake and firm up on the hot baking sheet, achieving that perfect chewy consistency.
Chill the Dough for Easy Handling: If your cookie dough feels too sticky or soft to handle, don’t hesitate to chill it in the refrigerator for an additional 30 minutes to an hour. Chilled dough is much easier to shape into uniform logs and slice cleanly, ensuring that all your cookies are the same size and thickness for consistent baking. This step is especially helpful on warmer days.
Toasting Coconut Enhances Flavor: For a deeper, more intense coconut flavor, consider toasting your shredded coconut before adding it to the dough. Spread the shredded coconut in a thin layer on a baking sheet and toast it in a 300°F (150°C) oven for 5-10 minutes, stirring frequently, until lightly golden brown and fragrant. Let it cool completely before folding it into the dough.
Serving Suggestions for Grandma’s Coconut Cookies
Decoration
Elevate the visual appeal of your Grandma’s Coconut Cookies with simple yet effective decorative touches. A light dusting of powdered sugar can give them a delicate, snow-kissed look, especially fitting for a cozy winter treat. Alternatively, a fine drizzle of melted white or dark chocolate over the tops adds a touch of elegance and extra decadence, creating a beautiful contrast with the golden-brown cookie base.
For a pop of color and added texture, consider pressing a few additional toasted coconut flakes or a small piece of candied ginger onto the warm surface of the cookies immediately after they come out of the oven. You could also lightly press a whole pecan half or a small dollop of brightly colored jam into the center of each cookie before baking. These small additions can make your cookies look as delightful as they taste.
Side Dishes
Grandma’s Coconut Cookies pair wonderfully with a variety of beverages that complement their sweet, chewy nature. A steaming mug of freshly brewed coffee or a rich, aromatic tea makes for a classic and comforting combination, perfect for an afternoon break or a dessert course. For a lighter, more refreshing option, a cold glass of milk or a chilled fruit juice can provide a pleasant counterpoint to the cookies’ richness.
Consider serving these cookies alongside a scoop of creamy vanilla bean ice cream for an indulgent dessert experience. The contrast in temperatures and textures—warm, chewy cookie with cold, smooth ice cream—is simply divine. A small side of fresh fruit, such as sliced strawberries or a handful of blueberries, can also offer a bright, palate-cleansing element that balances the cookie’s sweetness beautifully.
Creative Serving Ideas
Transform your Grandma’s Coconut Cookies into a show-stopping dessert by layering them into a trifle. Crumble some cookies and layer them with whipped cream, fresh berries, and perhaps a custard or pudding for a delightful dessert that’s perfect for parties. You can also arrange them on a festive platter surrounded by fresh fruits and a complementary dip, such as a cream cheese or caramel sauce, for a more interactive dessert experience.
For a truly unique presentation, consider making mini cookie sandwiches by spreading a layer of cream cheese frosting or dulce de leche between two smaller cookies. This transforms them into bite-sized delights that are perfect for a cookie exchange or a themed party. Another charming idea is to package them in decorative tins or bags as homemade gifts, a thoughtful gesture that’s always appreciated. You can find inspiration for delightful cookie presentations on platforms like Pinterest, where countless creative ideas await.
Preparation & Storage
Storing Leftovers
Once your delightful Grandma’s Coconut Cookies have cooled completely, proper storage is key to maintaining their wonderful chewy texture and fresh flavor. The best way to store them is in an airtight container at room temperature. This prevents them from drying out and keeps them protected from moisture in the air, which can make them soggy.
Ensure the container is truly airtight. You can also place a piece of parchment paper between layers of cookies if you’re stacking them. When stored correctly, these cookies can remain wonderfully fresh and delicious for up to 5 days. This makes them perfect for baking ahead for events or simply enjoying over the course of a week.
If you find your kitchen is particularly humid, consider adding a small, food-safe silica gel packet or a piece of bread to the container. These can help absorb excess moisture and keep the cookies at their optimal texture. Avoid storing them in direct sunlight or near heat sources, as this can affect their quality and shelf life.
Freezing
Grandma’s Coconut Cookies freeze exceptionally well, making them an excellent choice for baking in larger batches and saving for future enjoyment. You can freeze both baked cookies and unbaked dough logs, offering great flexibility.
To freeze baked cookies, let them cool completely and then arrange them in a single layer on a baking sheet. Once frozen solid, transfer them to an airtight freezer-safe container or a heavy-duty freezer bag. It’s advisable to place a piece of parchment paper between layers of cookies to prevent them from sticking together. Baked cookies can be stored in the freezer for up to 3 months.
For unbaked dough logs, wrap them very tightly in plastic wrap, ensuring no air can get to them, and then place them in a freezer bag. This method prevents freezer burn and maintains the dough’s quality. Frozen unbaked dough logs can be stored for up to 6 months. When you are ready to bake from frozen, simply slice the logs and bake as usual, adding a few extra minutes to the baking time to account for the frozen state.
Reheating
If your cookies have been stored for a few days and you’d like to enjoy them with that just-baked warmth and chewiness, reheating is a simple process. For baked cookies that have lost a bit of their initial softness, a quick reheat can revive them. Place a few cookies on a baking sheet lined with parchment paper and warm them in a preheated oven at a low temperature, around 300°F (150°C), for about 3-5 minutes.
Alternatively, you can microwave a cookie for a very short period, about 10-15 seconds, if you need a quick fix. Be cautious not to overheat them in the microwave, as this can quickly turn them tough or rubbery. The oven method is generally preferred for maintaining the best texture and flavor.
If you are baking from frozen dough logs, you can often bake them directly from frozen. Just ensure they are sliced evenly and placed on a prepared baking sheet. You will likely need to increase the baking time by a few minutes, so keep a close eye on them to achieve that perfect golden-brown edge and soft center. This makes enjoying freshly baked cookies incredibly convenient.
Frequently Asked Questions
-
How do I select the best coconut for my cookies?
For the most delectable Grandma’s Coconut Cookies, opt for sweetened shredded coconut that feels moist and pliable. This type of coconut contributes significantly to the chewy texture and ensures a rich, tropical flavor that defines the cookie. Avoid coconut that appears dry, clumped, or has any off-putting odors, as these are signs of staleness that will negatively impact your baking. If you desire a deeper, nuttier coconut essence, consider using toasted shredded coconut; simply spread it on a baking sheet and toast it lightly in a moderate oven until golden brown, then let it cool completely before adding it to your dough.
-
How should I store my baked Grandma’s Coconut Cookies?
To preserve the delightful chewiness and fresh taste of your baked Grandma’s Coconut Cookies, it’s best to store them in an airtight container at room temperature. This method prevents them from becoming stale or absorbing excess moisture from the air. Ensure the container has a tight-fitting lid to create a good seal. When stored this way, your cookies should remain delicious for up to five days, making them perfect for enjoying over several days or for keeping a delightful treat on hand for unexpected guests. For very humid environments, a slice of bread or a food-safe moisture absorber can be added to the container to help maintain optimal cookie texture.
-
Can I freeze Grandma’s Coconut Cookies?
Absolutely! Grandma’s Coconut Cookies are an excellent candidate for freezing, both in their baked form and as unbaked dough logs, which offers incredible convenience. To freeze baked cookies, allow them to cool completely, then arrange them in a single layer on a baking sheet before freezing until solid. Once frozen, transfer them to an airtight freezer-safe container, layering with parchment paper to prevent sticking. Unbaked dough logs can be wrapped very tightly in plastic wrap and then placed in a freezer bag for optimal protection against freezer burn. Both baked cookies and unbaked logs can be frozen for up to six months, ensuring you always have a batch ready to enjoy. Simply thaw baked cookies at room temperature or bake unbaked dough directly from frozen, adjusting baking time as needed.