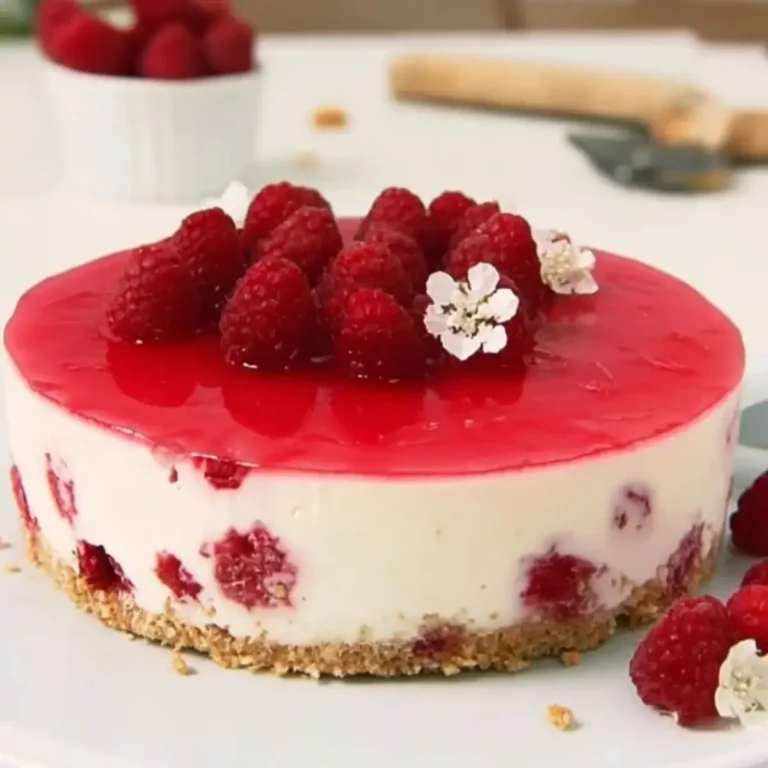
Ultimate Cashew Cream recipe

Cashew cream is a delightful addition to any kitchen, offering a luscious, creamy texture that can elevate a multitude of dishes. Have you ever craved a rich sauce or a decadent topping but wanted a lighter, plant-based alternative? This recipe for cashew cream is the perfect solution, providing the luxurious feel of traditional dairy cream without any of the heaviness, and it’s astonishingly easy to prepare.
This versatile cream is a secret weapon for anyone looking to enhance their culinary creations, whether you’re aiming for a smooth pasta sauce, a delightful dip, or a luscious dessert topping. Its adaptability means you can tailor it to your exact preferences, making it a staple in any modern kitchen that values both flavor and healthy eating. Prepare to be amazed by how simple it is to transform humble cashews into something truly special.
Why You Will Love This Recipe
- Incredibly Creamy Texture: Experience a rich, smooth, and decadent creaminess that rivals traditional dairy, perfect for satisfying any craving.
- Remarkably Easy to Make: With just a few basic ingredients and a blender, you can whip up this luxurious cashew cream in minutes, making it ideal for busy cooks.
- Unmatched Versatility: From savory pasta sauces and dips to sweet dessert toppings and salad dressings, this cream is a blank canvas ready to enhance any meal.
- Naturally Dairy-Free and Vegan: A fantastic alternative for those with lactose intolerance, dairy allergies, or following a plant-based lifestyle, without compromising on taste or texture.
- Nutrient-Rich Base: Cashews are a good source of healthy fats, magnesium, and copper, providing a more wholesome option compared to many processed creams.
- Customizable Flavor Profile: Easily adjust seasonings, add herbs, spices, or sweeteners to create endless flavor variations tailored to your specific culinary needs.
Ingredients You Need
The beauty of cashew cream lies in its simplicity, requiring just a handful of high-quality ingredients to achieve its signature richness. Opting for unsalted, raw cashews is paramount, as they provide the purest flavor and the smoothest texture without any competing salty notes or the altered taste that can come from roasted varieties. Water is essential for achieving the perfect consistency, while a touch of lemon juice adds a subtle brightness that cuts through the richness and enhances the overall flavor profile. A pinch of salt is crucial for bringing all the flavors together and rounding out the taste.
Easy Cashew Cream Recipe
A rich, creamy plant-based alternative to dairy made from raw cashews, perfect for dips, sauces, and topping various dishes. It's easy to make, versatile, and nutritious.
- 1 cup raw cashews (Use unsalted, raw cashews for the best results.)
- 1/2 cup water (Adjust as needed for desired consistency.)
- 1 tablespoon lemon juice (Adds a tangy flavor.)
- 1/2 teaspoon salt (Enhances overall taste.)
- 1Gather all your ingredients and make sure your cashews have soaked for at least 2 hours or overnight.
- 2Drain and rinse the soaked cashews under cold water.
- 3Add the soaked cashews to your blender along with the water, lemon juice, and salt.
- 4Blend on low speed for about 30 seconds until the mixture starts to break down.
- 5Gradually increase the blender speed to high and blend for 1-2 minutes until the mixture is completely smooth.
- 6If the mixture is too thick, add more water, one tablespoon at a time, until you reach your desired consistency.
- 7Taste the cashew cream and adjust seasoning if necessary.
- 8Serve immediately or transfer to a sealed container and store in the fridge.
Keywords: Cashew Cream, Dairy-Free, Healthy Condiment, Nut Cream, Vegan Sauce
- raw cashews: Use unsalted, raw cashews for the best results, ensuring a neutral and creamy base.
- water: This is key for blending and achieving your desired creamy consistency; start with the suggested amount and add more as needed.
- lemon juice: Freshly squeezed lemon juice adds a subtle tanginess that brightens the cream and balances its richness beautifully.
- salt: A small amount of salt is essential to enhance and meld all the flavors, making the cashew cream truly delicious.
The precise quantities for these essential components are readily available in the accompanying recipe card, ensuring you have all the details needed for success.
Variations
The foundational cashew cream recipe is a dream, but it truly shines when you begin to explore its potential for delicious variations. Think about infusing it with aromatic herbs for a fresh, vibrant touch that complements salads or vegetable dishes. A handful of fresh basil, a few sprigs of cilantro, or even some finely chopped dill can transform it into an entirely new experience. These additions bring a natural zest and complexity that is simply delightful.
For those who enjoy a bit of heat, a pinch of cayenne pepper or a dash of your favorite hot sauce can add an exciting kick, making it a perfect base for spicy dips or a daring topping for tacos. Conversely, for a sweeter profile, you might consider adding a touch of maple syrup or agave nectar, along with a hint of vanilla extract. This sweet iteration is absolutely divine spooned over fresh fruit, baked goods, or even blended into smoothies for an extra creamy texture.
Considering dietary needs further, you can also play with different acidic elements beyond lemon juice. Apple cider vinegar offers a slightly different tang, while lime juice can lend a more tropical note, especially fitting if you’re pairing it with dishes that have Latin American or Asian influences. The possibilities are truly endless, making this cashew cream a cornerstone for creative cooking.
How to Prepare cashew cream
Step 1: The Crucial Soaking Phase
The first and arguably most important step in creating luxurious cashew cream is the proper soaking of your raw cashews. This process is not merely about softening them; it’s a vital preparation that breaks down enzyme inhibitors and phytic acid present in raw nuts, making them easier to digest and unlocking their creamy potential. Aim to soak your cashews in ample water for a minimum of two hours at room temperature. For an even smoother, more delicate cream, an overnight soak in the refrigerator is highly recommended, especially if you don’t have a high-powered blender.
Ensure that the cashews are fully submerged by at least an inch of water. This allows them to absorb moisture uniformly. If you’re pressed for time, a quick soak method involves boiling water and pouring it over the cashews, letting them sit for about 15-30 minutes; however, this method may not yield quite the same level of creaminess or digestibility as a longer, cold soak. The goal here is to achieve cashews that are plump and yield easily when squeezed, indicating they have absorbed sufficient water to blend into a silken texture.
Proper soaking is the foundation of a truly exceptional cashew cream. Skipping this step or not soaking long enough will inevitably lead to a grainy, less smooth final product, no matter how powerful your blender. Patience during this initial stage pays off immensely in the final texture and flavor of your cream, setting the stage for a truly satisfying culinary experience.
Step 2: Draining and Rinsing – The Essential Cleanse
Once your cashews have undergone their essential soaking period, the next critical step is to thoroughly drain and rinse them. This action serves multiple purposes, contributing significantly to the final quality and healthfulness of your cashew cream. Draining removes the soaking water, which may contain any residual antinutrients or impurities that were leached from the cashews during the soaking process.
Rinsing the cashews under cool, running water is equally important. This ensures that any lingering bitterness or unpleasant flavors are washed away, leaving you with a clean, neutral base for your cream. Imagine rinsing any sediment or cloudiness from rice before cooking; it’s a similar principle here. A thorough rinse guarantees that the pure, nutty flavor of the cashews will be the star of your cream, unmarred by any unwanted notes.
Take your time with this step. Use a fine-mesh sieve to catch even the smallest cashew pieces. Gently agitate the cashews under the running water, ensuring each one is rinsed. This meticulous approach to draining and rinsing is key to achieving that pure, silken texture and clean taste that makes homemade cashew cream so special. It’s a small effort that yields a considerable improvement in the final outcome.
Step 3: Introducing the Elements to Your Blender
With your perfectly soaked and rinsed cashews ready, it’s time to bring them together with the other essential ingredients in your blender. This is where the magic truly begins to unfold. Place the plumped cashews directly into the carafe of your high-speed blender. Ensure you’re using a blender that has the power to pulverize nuts into a smooth consistency; a standard blender might struggle and require more liquid or longer blending times.
Next, add the measured amount of fresh, cool water. This liquid is crucial for facilitating the blending process and helping the cashews break down into a creamy emulsion. You’ll also add the tablespoon of fresh lemon juice. This ingredient is not just for flavor; its acidity helps to emulsify the mixture, contributing to a smoother, more stable cream. Finally, sprinkle in the half teaspoon of salt. Salt is a flavor enhancer, crucial for bringing out the nutty notes of the cashews and balancing the tang of the lemon.
This combination of ingredients – the softened nuts, the liquid, the acid, and the salt – forms the perfect foundation for your cashew cream. Don’t be tempted to add too much water at this stage; it’s always easier to thin the cream later if it’s too thick than to thicken it if it’s too thin. The precise ratio is designed to create a wonderfully rich texture right from the start.
Step 4: The Initial Breakdown – Gentle Blending Begins
Now that all the ingredients are in the blender, you can begin the blending process. It’s often best to start on a lower speed. This allows the blades to start breaking down the softened cashews and incorporating them with the liquid without immediately creating an overly thick paste that could strain your blender’s motor. The initial thirty seconds to a minute on a low setting is about initiating the emulsification process.
Observe the mixture as it starts to transform. You’ll see the cashews begin to break apart, releasing their natural oils and mingling with the water. The mixture will start to look cloudy and somewhat thick. This stage is crucial for ensuring that even larger pieces of cashew are beginning to soften and reduce in size, preparing them for the more vigorous blending that’s to come. Resist the urge to immediately crank the speed to high; a gradual approach often yields superior results.
This initial gentle blending helps to ensure a more uniform breakdown of the cashews. It prevents large chunks from remaining stuck to the sides of the blender carafe and helps to create a more homogeneous starting point. Pay attention to the sound and visual cues from your blender; it will tell you when the mixture is ready to progress to the next stage of blending. This careful initiation sets the stage for a perfectly smooth final product.
Step 5: Unleashing High-Speed Perfection – Achieving Creaminess
Once the initial breakdown is complete, it’s time to elevate your blender to its highest setting. This is where the true transformation into luscious cashew cream happens. Gradually increase the speed of your blender, allowing the powerful blades to whirl at maximum velocity. Blend for a solid one to two minutes, or potentially longer, depending on the power of your blender.
During this high-speed blending phase, the cashews will be pulverized into an incredibly fine, smooth paste. Their natural oils will be released, emulsifying with the water to create a rich, creamy, and dairy-like consistency. Keep an eye on the mixture; it will transition from a slightly grainy texture to a silky smooth liquid that coats the sides of the blender carafe. You should see a uniform, glossy finish develop.
If your blender has a tamper, now is the time to use it. Gently push the ingredients down towards the blades to ensure everything is incorporated and to help create the smoothest possible texture. Continue blending until you achieve a consistency that is completely free of any grittiness. This sustained high-speed blending is what separates truly exceptional cashew cream from a merely acceptable one, delivering that luxurious mouthfeel everyone craves.
Step 6: The Art of Consistency – Fine-Tuning Your Cream
After the initial high-speed blending, your cashew cream will likely be quite thick, almost like a rich paste. This is often the perfect consistency for many applications, but sometimes you’ll want it a little thinner, especially for sauces or dressings. This is where the art of fine-tuning comes into play.
If you find your cream is too thick for your liking, the solution is simple: add more water, but do so judiciously. Begin by adding just one tablespoon of water at a time. After each addition, give the blender a quick pulse or a few seconds of blending to fully incorporate the new liquid and assess the consistency. Continue adding water in small increments until you reach your desired thickness. It’s always better to add a little at a time to avoid making it too watery.
Conversely, if by some chance you’ve added too much water and the cream is too thin, don’t despair entirely. While it’s difficult to fully rectify, you can try adding a few more soaked and rinsed cashews and blending again to thicken it, though this might slightly alter the flavor balance. For minor thinning, you can also let the cream sit in the refrigerator for a while, as it will naturally thicken as it chills. This step ensures your cashew cream is perfect for whatever dish you’re preparing.
Step 7: The Flavor Check – Tasting and Adjusting
This is a crucial step that elevates your homemade cashew cream from good to exceptional. Once you’ve achieved your desired consistency, take a small spoonful and taste it. This is your opportunity to ensure the flavors are perfectly balanced and to make any necessary adjustments. Don’t be shy; taste it critically!
Consider the saltiness and the tanginess. Does it need a touch more salt to bring out the nutty flavors? Perhaps it could benefit from a little more brightness; in that case, add another tiny splash of lemon juice. If you’re aiming for a more savory profile, you might consider a pinch of garlic powder or a dash of nutritional yeast at this stage. For a sweeter version, this is where you’d add your sweetener of choice, like maple syrup or agave.
The beauty of making your own cashew cream is the control you have over the flavor. What tastes perfect to one person might need a slight tweak for another. This step ensures that your cashew cream is precisely to your liking. A well-balanced cashew cream should have a delicate harmony between the creamy nuttiness, a hint of acidity, and the savory notes from the salt. This personal touch makes all the difference.
Step 8: The Grand Finale – Serve or Store with Care
You’ve reached the final stage of creating your beautiful cashew cream! At this point, it’s ready to be used immediately in your culinary creations, or it can be stored for later use. If you’re serving it right away, pour it over your pasta, use it as a dip, or drizzle it over your favorite dish. Its creamy texture and subtle flavor will impress anyone who tastes it.
If you plan to store it, transfer the cashew cream to an airtight container. This is vital for preserving its freshness and preventing it from absorbing odors from other foods in the refrigerator. A glass container with a tight-fitting lid is ideal. Properly stored, your homemade cashew cream will remain fresh and delicious in the refrigerator for up to a week. Remember to give it a good stir before each use, as some slight separation is normal and can be easily remedied.
This step ensures that the wonderful effort you put into making cashew cream can be enjoyed over several days. Knowing you have a healthy, delicious, and versatile condiment on hand makes meal preparation so much easier and more enjoyable. Cherish the satisfaction of creating such a versatile ingredient from scratch!
Pro Tips for cashew cream
Use a High-Powered Blender: For the silkiest, smoothest cashew cream, a high-powered blender like a Vitamix or Blendtec is highly recommended. These blenders have the power to break down cashews into a truly fine emulsion, eliminating any hint of grittiness. If you don’t have one, a strong food processor might work, but it will likely require longer processing times and potentially more liquid, affecting the final texture.
Don’t Skip the Soaking: As mentioned, soaking raw cashews is absolutely crucial. It not only softens them for easier blending but also aids in digestion by breaking down phytic acid. An overnight soak in the refrigerator is ideal, yielding plump, tender nuts that blend into a luxuriously smooth cream. A quick soak can work in a pinch, but the texture might not be as refined.
Adjust Water Gradually: When thinning your cashew cream, always add water incrementally. Start with the recommended amount and then add more, one tablespoon at a time, blending after each addition. This prevents you from accidentally making your cream too watery. You can always add more liquid, but it’s much harder to thicken a cream that’s too thin.
Taste and Season Generously: Cashew cream is a blank canvas, so tasting and adjusting the seasonings is key to unlocking its full flavor potential. Don’t be afraid to add a little more salt to enhance the nuttiness, or a touch more lemon juice for brightness. For savory applications, consider garlic powder, onion powder, or nutritional yeast for a cheesy flavor. For sweet versions, maple syrup, vanilla extract, or a pinch of cinnamon work wonders.
Consider Flavor Enhancements: Beyond the basic salt and lemon, think about other flavor boosters. For a garlicky cashew cream, blend in a clove of roasted garlic. For an herby cream, add fresh basil, chives, or parsley. Nutritional yeast is a game-changer for a “cheesy” flavor, perfect for vegan pasta dishes. These additions transform the simple cream into a sophisticated component for any dish.
Serving Suggestions for cashew cream
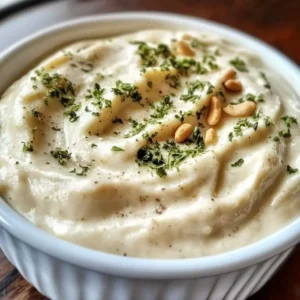
Decoration
A swirl of cashew cream can instantly elevate the visual appeal of any dish. Garnish pasta with a delicate dollop, or artfully drizzle it over roasted vegetables for a touch of elegance. A scattering of fresh herbs, such as chives, parsley, or basil, adds a vibrant contrast and a hint of freshness to the cream’s smooth appearance. A sprinkle of toasted sesame seeds or a few toasted pine nuts can also provide a pleasing textural and visual accent, making your plated dishes look restaurant-quality.
Side Dishes
Cashew cream is a perfect accompaniment to a variety of side dishes. Serve it alongside fresh vegetable crudités like carrot sticks, cucumber slices, and bell pepper strips for a healthy and satisfying dip. It makes an excellent dressing for hearty grain bowls, adding a creamy richness that binds all the components together. Consider pairing it with roasted root vegetables or grilled asparagus to add a delightful creamy counterpoint to their earthy or slightly charred flavors.
Creative Serving Ideas
Beyond traditional uses, cashew cream can be a star in more creative culinary endeavors. Use it as a base for a vegan cheese sauce, perfect for mac and cheese or as a topping for nachos. It can also be a luscious filling for vegan pastries or a decadent topping for fruit tarts and pies, offering a lighter alternative to traditional pastry creams. Blend it into smoothies for an extra boost of creaminess and healthy fats, or use it as a binding agent in vegan burger patties to improve moisture and texture.
Preparation & Storage
Storing Leftovers
To keep your delicious cashew cream fresh for future use, transfer any leftovers into an airtight container. Glass containers with tightly fitting lids are ideal, as they prevent the cream from absorbing odors from other foods in your refrigerator and maintain optimal freshness. Store the container in the main part of your refrigerator, not in the door, where temperatures can fluctuate more.
When you’re ready to use the stored cashew cream, give it a good stir before serving. It’s normal for some separation to occur as it chills; a quick whisk will bring it back to its smooth consistency. Properly stored, homemade cashew cream typically lasts for up to five to seven days in the refrigerator.
Freezing
Cashew cream freezes remarkably well, making it convenient to prepare a larger batch and save some for later. The best way to freeze it is by portioning it into an ice cube tray. Once frozen, you can transfer the cashew cream “cubes” into a freezer-safe bag or container for more compact storage. This method allows you to easily thaw only the amount you need for a recipe.
Freezing cashew cream does not significantly impact its texture or flavor, though it may require a thorough whisking after thawing to regain its initial smoothness. It’s a fantastic way to ensure you always have a supply of this versatile condiment readily available, reducing food waste and saving time on future meal preparations.
Reheating
If you’ve stored your cashew cream in the refrigerator and it has become quite thick, or if you’ve thawed frozen cashew cream cubes, gentle reheating might be necessary. The easiest method is to place the desired amount of cream in a small saucepan over low heat. Stir constantly to prevent scorching and to ensure even warming. Alternatively, you can place the cream in a microwave-safe bowl and heat it in short intervals, stirring between each interval, until it reaches your desired temperature.
For thawed frozen cashew cream, place the cubes in a bowl and allow them to thaw in the refrigerator overnight. If you need them faster, you can place the bowl in a larger bowl of warm (not hot) water. Once thawed, whisk vigorously to restore its smooth texture before using. The key is gentle heat to avoid altering the delicate texture and flavor of the cream.
Frequently Asked Questions
-
Can I make cashew cream without soaking the cashews?
While it is technically possible to make cashew cream without soaking, it is highly discouraged if you desire a truly smooth and creamy texture. Unsoaked cashews are significantly harder and contain more phytic acid, making them difficult to break down completely even in a high-powered blender. This will likely result in a grainy or gritty final product. The soaking process is essential for softening the nuts, making them easily digestible, and facilitating the creation of that signature silky texture that defines excellent cashew cream.
-
What is the best way to achieve a very thick cashew cream for dips?
To achieve a very thick cashew cream suitable for dips, begin by using slightly fewer cashews relative to the water amount than you might for a thinner sauce. More importantly, ensure you use less water during the blending process. Start with the minimum amount of water called for in the recipe, and only add more in very small increments if your blender struggles. After blending, if the cream is still not as thick as you’d like, cover it and let it chill in the refrigerator for at least an hour. The cooling process will naturally thicken the cashew cream considerably, making it perfect for dipping.
-
Can I add different flavors or ingredients to cashew cream, and how should I do it?
Absolutely! Cashew cream is a wonderfully versatile base that can be flavored in countless ways. For savory applications, consider adding roasted garlic cloves, finely chopped fresh herbs like chives or dill, a pinch of smoked paprika, or nutritional yeast for a cheesy flavor. For sweet variations, incorporate vanilla extract, cinnamon, cocoa powder, or a sweetener like maple syrup or dates. It’s best to add these flavorings during the final stages of blending or just before serving, tasting and adjusting as you go to achieve your desired flavor profile. Ensure any solid additions like herbs are blended until very fine to maintain the cream’s smooth texture.