Irresistible Homemade Brownie Batter Ice Cream Made Easy
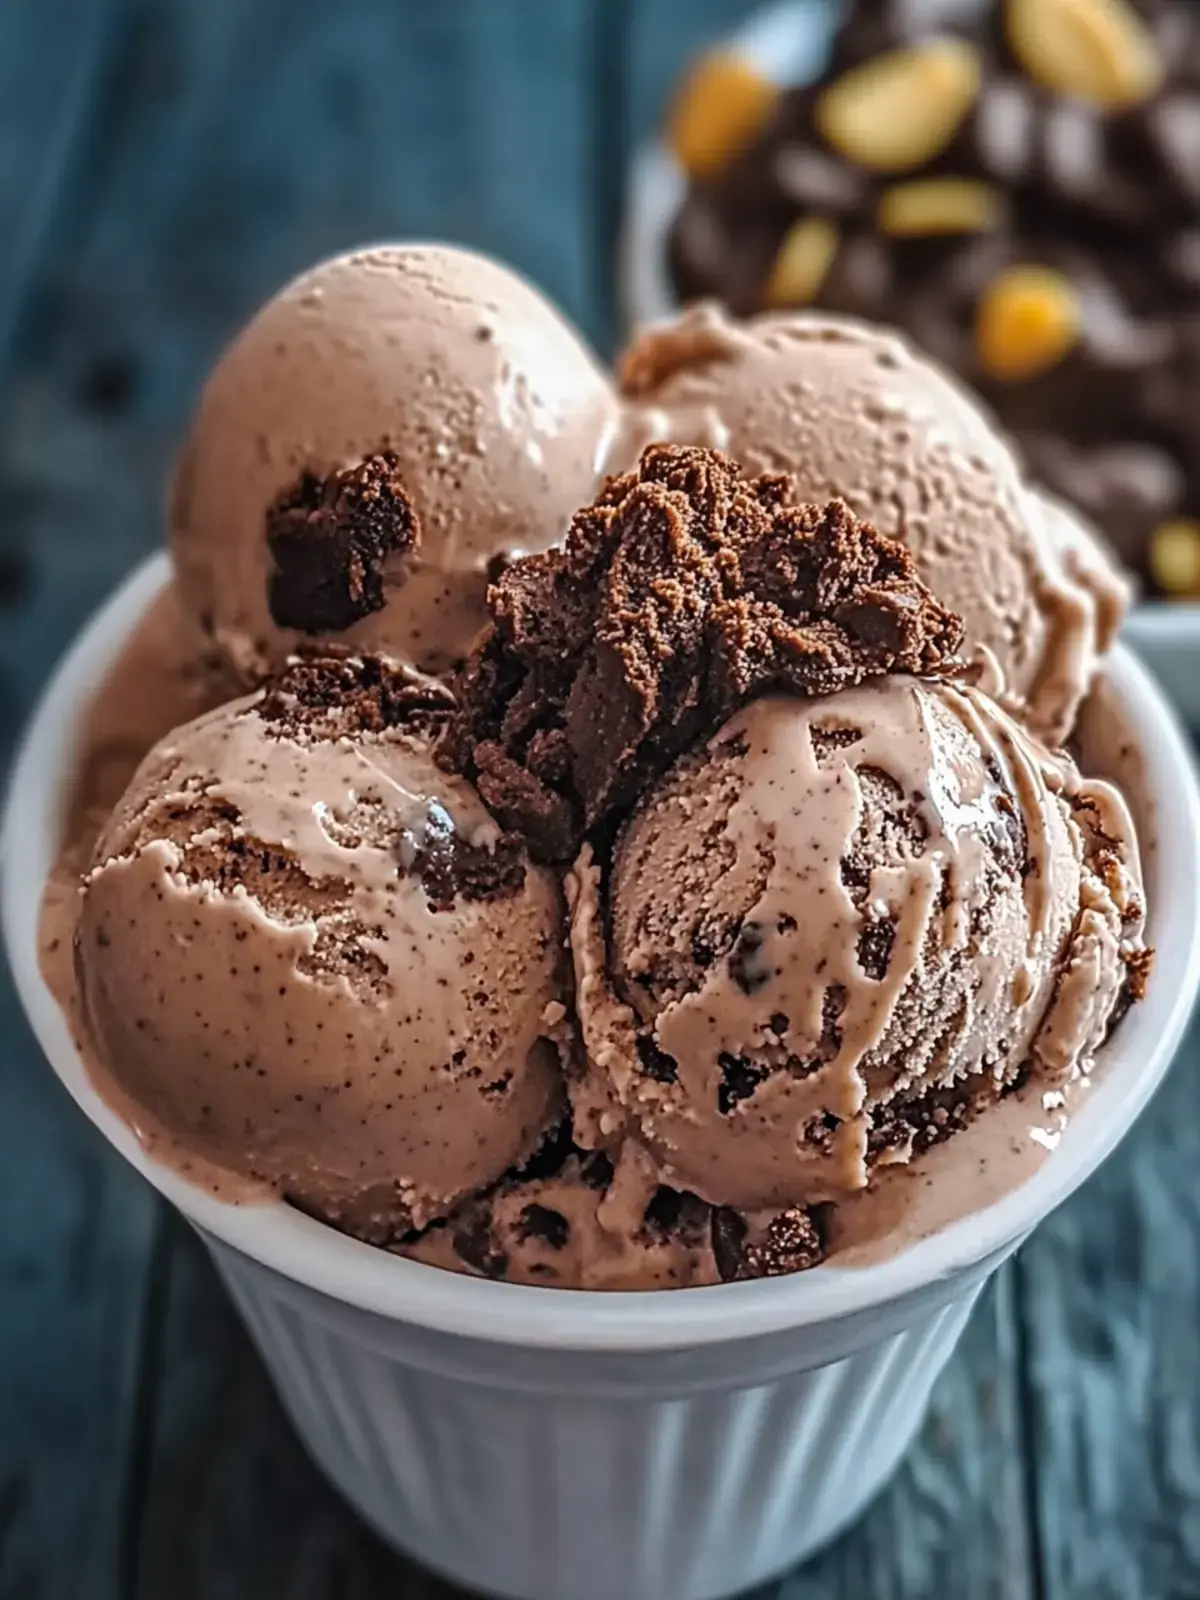
There is a certain joy that comes from transforming simple kitchen staples into a truly indulgent homemade treat. Picture this: it is a warm, sunny afternoon, and you find yourself craving something remarkably cool and delightfully chocolatey. That exact craving sparked my journey to create the ultimate Homemade Brownie Batter Ice Cream, a concoction that perfectly marries a rich, velvety base with generous, fudgy brownie chunks.
This recipe is far more than just a quick dessert; it acts as a blank canvas for your culinary creativity. You do not need expensive professional equipment to master this frozen delight, as the process is approachable for cooks of every skill level. With every single scoop, you will savor the deep chocolate notes accented by the irresistible texture of brownies, making it a dessert that truly elevates your home-cooking repertoire.
Why You Will Love This Recipe
- Quick Preparation: You can have the base ready for the churner in just a few minutes, meaning your path to indulgence is incredibly short.
- No Machine Needed: While an ice cream maker is fantastic for speed, you can achieve a luscious, creamy result using simple manual methods.
- Customizable Treat: This flexible recipe allows you to swap milks, sweeteners, or mix-ins to perfectly align with your specific dietary preferences or pantry availability.
- Crowd-Pleaser Potential: The combination of brownie batter flavors and actual brownie pieces is a guaranteed hit at any family gathering or dinner party.
- Time-Saving Delight: By preparing the components in advance, you can keep this treat ready in the freezer to impress guests on any occasion.
Ingredients You Need
Quality Matters: Using high-quality cocoa powder and fresh dairy ensures that your ice cream achieves a professional-grade mouthfeel and depth of flavor. Always prioritize fresh ingredients to ensure the best possible outcome for your frozen creation. You can find the exact measurements and specific quantities located in the recipe card details below.
Homemade Brownie Batter Ice Cream
Indulge in the perfect marriage of rich, creamy chocolate ice cream and generous chunks of fudgy brownie. This homemade treat is easily customizable and requires no fancy equipment for a decadent dessert experience.
- 2 cups Heavy Cream (or half-and-half)
- 1 cup Whole Milk (or low-fat/almond milk)
- 3/4 cup Granulated Sugar (or brown sugar)
- 3/4 cup Cocoa Powder (unsweetened or Dutch-processed)
- 1 cup Brownies, chopped
- 1/2 cup Chocolate Chips
- 1 teaspoon Vanilla Extract
- Pinch of salt
- 1In a large mixing bowl, blend granulated sugar, cocoa powder, and a pinch of salt until well combined.
- 2Gradually pour in the whole milk while whisking to dissolve all dry ingredients until smooth.
- 3Stir in the heavy cream and vanilla extract until the mixture is smooth and luscious.
- 4Pour the chocolate base into an ice cream maker and churn according to instructions (about 20-25 minutes).
- 5Gently incorporate the brownie chunks and optional chocolate chips with a spatula.
- 6Transfer the mixture to an airtight container and freeze for at least 4 hours.
- 7Serve in bowls, topped with extra brownie pieces or chocolate sauce if desired.
Keywords: chocolate, ice cream, brownie, dessert, homemade, creamy
- heavy cream: provides the essential rich, velvety base for the ice cream.
- whole milk: balances the richness and adds a smooth consistency to the mixture.
- granulated sugar: creates the perfect level of sweetness and aids in the texture.
- cocoa powder: delivers the intense, deep chocolate flavor that defines brownie batter.
- brownies: these add the iconic chewy, fudgy texture that makes this dessert so special.
- chocolate chips: an optional addition that provides extra pockets of intense chocolate goodness.
- vanilla extract: adds a necessary aromatic layer that rounds out all the flavors.
Variations
Dairy-Free Living: For those following a plant-based diet, you can easily substitute heavy cream with chilled coconut cream or cashew-based cream. Replace the whole milk with almond, oat, or soy milk, and ensure your brownie mix-ins are also vegan-certified to maintain consistency.
Low Carb Options: If you are looking to reduce your sugar intake, swap the granulated sugar for a high-quality erythritol or monk fruit sweetener. Use sugar-free chocolate chips and brownies made with almond flour to ensure your treat fits within your macro goals while remaining satisfyingly rich.
Nutty and Spicy Twists: To introduce a sophisticated crunch, fold in toasted walnuts or pecans during the final stage of mixing. For the adventurous palate, adding a tiny pinch of cayenne pepper or espresso powder to the cocoa base will significantly deepen the flavor complexity.
How to Prepare Homemade Brownie Batter Ice Cream
Step 1: Whisking the Base
Start Strong: Begin by grabbing a large mixing bowl to combine your granulated sugar, high-quality cocoa powder, and a small pinch of sea salt. Using a whisk, ensure these dry ingredients are thoroughly blended to avoid any clumps in your finished product.
Foundation Building: This initial step is critical because it creates the foundation of your ice cream’s flavor profile. Properly integrating the cocoa ensures that every single bite is consistently chocolatey and well-balanced.
Step 2: Incorporating Liquids
Smooth Transitions: Gradually pour your whole milk into the dry mixture while whisking continuously to dissolve the sugar and cocoa. Keep a steady pace until the base is completely smooth and looks like a rich, dark chocolate syrup.
Silky Texture: A smooth base is the secret to a professional-quality frozen dessert. Continue whisking until you are certain that there are no remaining dry pockets or lumps hiding in the bottom of your bowl.
Step 3: Creating the Creaminess
Richness Factor: Gently stir in the heavy cream and a splash of pure vanilla extract until the mixture is fully incorporated and luscious. The cream provides the necessary fat content to prevent harsh ice crystals from forming during the freezing process.
Flavor Balance: The vanilla extract acts as an enhancer, making the chocolate notes pop. Ensure this liquid mixture is well combined so the fats and sugars are evenly distributed throughout the base.
Step 4: The Churning Process
Machine Magic: Carefully pour your chocolate mixture into an ice cream maker and turn it on according to the manufacturer’s specific instructions. This process typically takes about 20 to 25 minutes, depending on the power of your machine.
Achieving Consistency: You are aiming for a soft-serve consistency before moving on to the mix-ins. If you prefer a firmer texture, you can let it churn for an extra minute, but be careful not to over-churn.
Step 5: Adding the Fudgy Goodness
The Fold: Once your base has reached a soft-serve consistency, gently fold in your brownie chunks and optional chocolate chips using a sturdy spatula. Do not use the machine to mix these in, as that may break the brownie pieces down into tiny crumbs.
Final Touch: Distribute the brownie chunks evenly throughout the cream so every scoop contains plenty of texture. Once everything is folded in, your mixture is ready for the final freezing stage.
Step 6: Freezing to Perfection
Storage Strategy: Transfer the mixture into a chilled airtight container and smooth the top with your spatula. Press a piece of parchment paper directly onto the surface to prevent ice crystals from forming during the freezing process.
Patience is Key: Place the container in the coldest part of your freezer for at least 4 hours, though overnight is ideal for the best texture. This allows the mixture to firm up properly so you can achieve those beautiful, rounded scoops later.
Pro Tips for Homemade Brownie Batter Ice Cream
Tip 1: Always chill your mixing bowl and the container for your ice cream maker in the freezer before you begin. A cold environment prevents the cream from heating up during the process and keeps the mixture stable.
Tip 2: When cutting your brownies, ensure they are chilled or even slightly frozen before you fold them into the base. This prevents them from absorbing moisture and becoming mushy, keeping their distinct, chewy texture intact.
Tip 3: If you find yourself without an ice cream maker, do not worry; simply use a shallow pan and stir the mixture every 30 minutes. This physical agitation breaks up ice crystals manually, which is a great trick for a quick dessert prep.
Tip 4: To keep your chocolate base from being too hard to scoop later, ensure you are using enough fat, such as heavy cream. A lower fat content often results in a rock-hard frozen block, while proper fat ratios keep it scoopable.
Serving Suggestions for Homemade Brownie Batter Ice Cream
Decoration
Top your scoops with a light dusting of cocoa powder or a few extra brownie crumbles for a beautiful presentation. Adding a fresh mint leaf provides a vibrant color contrast against the dark chocolate ice cream.
Side Dishes
Serve alongside a warm German pancake or a simple fruit salad to balance the richness of the ice cream. The temperature difference between the warm sides and the cold ice cream creates a sensational culinary experience.
Creative Serving Ideas
Turn your scoops into an ice cream sandwich by pressing them between two chocolate cookies. You can also drop a scoop into a glass of chilled milk for a decadent milkshake experience that highlights the brownie flavor.
Preparation & Storage
Storing Leftovers
If you have any leftovers, keep them in an airtight container to prevent freezer burn and odor absorption. Always ensure the lid is sealed tightly to maintain the freshness of the brownie bits.
Freezing
Homemade ice cream is best consumed within two weeks for optimal flavor and texture. Beyond this, the quality of the brownie pieces and the smoothness of the cream may begin to degrade due to the freezer environment.
Reheating
While you certainly do not reheat ice cream, you should “temper” it before serving. Let the container sit on your counter for about 10 minutes to reach the perfect temperature for easy, smooth scooping.
Frequently Asked Questions
- How do I ensure my brownies stay chewy inside the ice cream? The secret is to use brownies that are slightly underbaked or fudgy to begin with. By freezing the brownie chunks before folding them into the churned ice cream base, they retain their structure and chewy texture rather than becoming icy or mushy.
- What is the best way to avoid ice crystals in my homemade batch? Ice crystals form when there is too much water content or when the mixture warms up during the freezing process. By using high-fat heavy cream and placing a layer of parchment paper directly against the surface of the ice cream before sealing, you significantly reduce the moisture that leads to crystal formation.
- Can I use a different type of sweetener instead of granulated sugar? Yes, you can use liquid sweeteners like maple syrup or agave, but keep in mind that they lower the freezing point of the mixture. This may result in a softer final product, so you might need to keep the ice cream in the coldest part of your freezer to ensure it sets firmly.
For more inspiration and to keep track of your kitchen adventures, make sure to follow us on Pinterest. Experimenting with homemade treats is a rewarding way to share joy with those you love. Enjoy every single scoop of your homemade masterpiece!