Vanillekipferl: 7 Steps to Magical Melt-in-Your-Mouth Cookie

When it comes to the sweet world of baking, few treats evoke as much warmth and nostalgia as Vanillekipferl. This delightful recipe originates from Austria and has found its way into the hearts and kitchens of many around the globe. The moment you take a bite, you are greeted with a cookie that crumbles beautifully, infused with a rich vanilla flavor and a subtle hint of almonds.
This recipe isn’t just any average cookie recipe; it’s a family tradition that brings people together. Imagine baking these cookies during the holidays while your loved ones gather around, sharing stories and laughter. The magical aroma wafting through your kitchen invites everyone to experience a taste of history, culture, and a sprinkle of love. If you’ve been searching for an easy yet impressive recipe that will leave everyone asking for more, look no further.
Why You Will Love This Recipe
- Irresistible Flavor: The almond-infused vanilla flavor gives these cookies a unique taste that’s hard to resist, creating a perfect balance of sweet and nutty notes in every bite.
- Simplicity: With straightforward steps and easy-to-find ingredients, even novice bakers can master this recipe, making it accessible and rewarding for everyone.
- Perfect for Any Occasion: Whether it’s a holiday gathering, a festive celebration, or a casual get-together, these cookies will always shine and impress your guests.
- Family-Friendly: Kids absolutely love the whimsical crescent shape and the delightful taste, making it a fantastic recipe for involving the whole family in the kitchen and creating cherished memories.
- Customizable: You can easily adapt the recipe to suit dietary needs or personal preferences, adding a personal touch to a timeless classic that everyone can enjoy.
Ingredients You Need
The magic of Vanillekipferl lies in its simple yet perfect combination of high-quality ingredients. Each element plays a crucial role in achieving that signature melt-in-your-mouth texture and delicate flavor profile. Opting for fresh, good-quality ingredients will undoubtedly elevate your final creation, ensuring a truly delightful baking experience.
Vanillekipferl: 7 Steps to Magical Melt-in-Your-Mouth Cookies
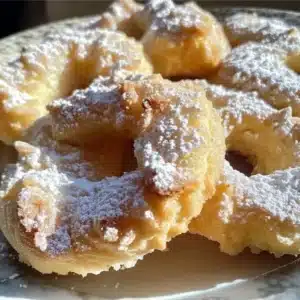
Discover the delightful Vanillekipferl, a traditional Austrian cookie renowned for its melt-in-your-mouth texture and enchanting vanilla-almond flavor. This recipe, perfect for holidays and special occasions, is simple to make and yields incredibly delicious results. Learn how to create these classic crescent-shaped cookies that are sure to become a family favorite.
- 200g all-purpose flour
- 100g unsalted butter, softened
- 80g powdered sugar, plus extra for dusting
- 2 tsp vanilla extract
- 100g ground almonds
- 1 pinch of salt
- 1Gather all ingredients, ensuring butter is softened. Preheat oven to 175°C (350°F).
- 2In a mixing bowl, combine flour, ground almonds, and salt. Whisk to combine.
- 3In another bowl, cream softened butter and powdered sugar until light and fluffy (about 3-5 minutes).
- 4Mix in the vanilla extract into the butter-sugar mixture.
- 5Gradually add the dry ingredients to the wet ingredients, mixing until a cohesive dough forms.
- 6Roll small portions of dough into crescent shapes (about 2 inches long) and place on a parchment-lined baking sheet.
- 7Bake for 10-12 minutes, or until lightly golden around the edges.
- 8Let cookies cool on a wire rack. Once cool, dust generously with powdered sugar.
Keywords: Almond Cookies, Cookies, Holiday Baking, Traditional Recipe, Vanillekipferl, Austrian Cookies, Melt-in-your-mouth, Vanilla Cookies
- all-purpose flour: the foundational dry ingredient that provides structure to the cookies.
- unsalted butter, softened: contributes richness, tenderness, and a melt-in-your-mouth quality.
- powdered sugar: lends sweetness and helps create a tender crumb, plus extra for dusting.
- vanilla extract: imparts that essential warm, sweet, and aromatic vanilla flavor.
- ground almonds: adds a distinct nutty depth and a slightly coarser texture, crucial for the authentic taste.
- salt: a small amount enhances all the other flavors and balances the sweetness.
The specific quantities for these ingredients are detailed within the provided recipe card, ensuring you have everything you need for success.
Variations
While the classic Vanillekipferl is undeniably perfect, the beauty of baking lies in its potential for creative adaptation. These cookies serve as a wonderful canvas for various flavor profiles and dietary adjustments, allowing you to tailor them to any preference.
For a truly decadent twist, consider a Chocolate-Dipped Vanillekipferl. Once the cookies have cooled completely, gently dip one or both ends into melted dark or milk chocolate. You can then sprinkle them with chopped nuts or a touch of sea salt before the chocolate sets for an extra layer of flavor and texture. This variation transforms the simple cookie into a more sophisticated treat, perfect for special occasions or as a gift.
Another exciting avenue is introducing citrus notes. Incorporating a tablespoon or two of finely grated Citrus Zest, such as orange or lemon, into the dough before baking can add a bright, refreshing counterpoint to the rich vanilla and almond. This vibrant addition makes the cookies wonderfully zesty and perfect for spring or summer gatherings, offering a delightful contrast to the typical heavier holiday flavors.
For those who enjoy a spicier palette, a Spiced Vanillekipferl variation can be incredibly rewarding. A pinch of ground cinnamon, nutmeg, or even a touch of cardamom added to the dry ingredients will infuse the cookies with a warm, aromatic complexity. These spices complement the existing flavors beautifully, adding an extra layer of cozy comfort that is especially welcome during cooler months.
How to Prepare Vanillekipferl
Step 1: Prepare Your Workspace and Ingredients
Begin by ensuring your kitchen is clean and ready for baking. Gather all the necessary ingredients and baking tools. It is crucial that your unsalted butter is softened to room temperature, as this will make creaming it with the sugar significantly easier and more effective.
Properly softened butter incorporates more air, leading to a lighter, more tender cookie texture. If your butter is too cold, it will be difficult to cream, potentially resulting in a denser dough. Conversely, if it’s too warm or melted, the dough might become greasy and hard to handle.
Step 2: Preheat Your Oven and Prepare Baking Sheets
Preheating your oven to the specified temperature, typically 175°C (350°F), is a fundamental step for achieving perfectly baked cookies. An accurately preheated oven ensures that the cookies begin baking immediately and evenly, preventing uneven browning or undercooked centers. It’s also a good time to prepare your baking sheets by lining them with parchment paper.
Parchment paper not only prevents the delicate Vanillekipferl from sticking to the baking sheet but also makes for much easier cleanup afterward. This simple preparation step is vital for a smooth baking process and helps maintain the integrity of the cookie’s shape as it bakes.
Step 3: Combine the Dry Ingredients
In a medium-sized mixing bowl, carefully combine the all-purpose flour, the finely ground almonds, and a pinch of salt. Whisk these dry ingredients together thoroughly. This ensures that the almonds and salt are evenly distributed throughout the flour, which is essential for consistent flavor and texture in every cookie.
The salt is a key ingredient here, as it doesn’t just add a salty taste; it actually enhances the sweetness of the sugar and the nuttiness of the almonds. A good whisking action will prevent any pockets of salt or clumps of almonds, contributing to a uniform dough.
Step 4: Cream the Butter and Sugar
In a separate, larger mixing bowl, add the softened unsalted butter and the powdered sugar. Using an electric mixer (handheld or stand mixer), beat these two ingredients together until the mixture is light, fluffy, and pale in color. This process, known as creaming, typically takes about 3 to 5 minutes of continuous beating.
This creaming stage is critical for the cookie’s texture. It incorporates air into the dough, which helps create a tender and crumbly cookie rather than a dense and hard one. Scrape down the sides of the bowl periodically to ensure all the butter and sugar are evenly incorporated into the fluffy mixture.
Step 5: Incorporate the Vanilla Extract
Once you have achieved a light and fluffy creamed butter and sugar mixture, it’s time to add the vanilla extract. Pour the vanilla extract directly into the bowl with the creamed ingredients. Beat briefly again, just until the vanilla extract is fully incorporated into the butter and sugar mixture. This will begin to infuse the base with its characteristic aromatic flavor.
Using good quality vanilla extract will make a noticeable difference in the final taste of your Vanillekipferl. The scent alone is a delightful preview of the delicious cookies to come, setting the stage for their signature sweet and comforting aroma during baking.
Step 6: Combine Wet and Dry Mixtures to Form Dough
Now, it’s time to bring everything together. Gradually add the dry ingredient mixture (flour, ground almonds, salt) to the wet ingredients (creamed butter, sugar, vanilla) in the larger bowl. Mix on a low speed or by hand using a spatula. Continue mixing only until the ingredients are just combined and a cohesive dough begins to form.
It is important not to overmix the dough at this stage. Overmixing can develop the gluten in the flour, leading to tougher cookies. The dough might seem a bit crumbly initially, but it should hold together when pressed. If it seems too dry, you can add a tiny bit more butter or a splash of milk; if too wet, a dusting more of flour. However, with the correct ingredient ratios, it should be manageable.
Step 7: Shape the Vanillekipferl
Take small portions of the dough, about the size of a walnut or a tablespoon, and roll them gently between your palms to form a rough log. Then, curve each log into a classic crescent moon shape, reminiscent of a small horn. Aim for consistency in size so that all the cookies bake evenly.
Place the shaped cookies onto the prepared baking sheets, leaving a little space between them as they might spread slightly. The iconic crescent shape is not just for aesthetics; it contributes to the even baking and delightful texture of these traditional cookies. You can use a small cookie scoop to ensure each piece of dough is uniform in size for consistent results.
Step 8: Bake to Golden Perfection
Carefully place the baking sheets into the preheated oven. Bake the Vanillekipferl for approximately 10 to 12 minutes. The cookies are ready when their edges are lightly golden brown, but the centers should remain pale. It is crucial to watch them closely, as they can go from perfectly baked to overdone very quickly.
The goal is a cookie that is tender and slightly crisp around the edges but still soft and melt-in-your-mouth in the center. Overbaking will result in a dry, hard cookie that loses its delicate charm. They should look just set, not deeply browned, to retain their signature delicate texture.
Step 9: Cool and Dust with Powdered Sugar
Once the baking time is complete, remove the cookies from the oven. Allow them to cool on the baking sheets for a few minutes before carefully transferring them to a wire rack to cool completely. This step is important to prevent them from breaking while still hot and delicate.
Only after the cookies have cooled entirely should you generously dust them with powdered sugar. Using a fine-mesh sieve will help you achieve an even, delicate coating that adds the final touch of sweetness and visual appeal. This classic dusting is what gives Vanillekipferl their signature snowy appearance.
Step 10: Savor Your Homemade Delights
Congratulations! Your homemade Vanillekipferl are now ready to be enjoyed. These delightful cookies are perfect with a warm cup of coffee or tea, or simply on their own. They are a testament to the simple joys of baking and sharing delicious, traditional treats with loved ones.
Share them with family and friends, pack them in lunchboxes, or keep a hidden stash for yourself to enjoy whenever a sweet craving strikes. The aroma and taste are sure to bring smiles and create memorable moments, making your baking efforts incredibly rewarding.
Pro Tips for Vanillekipferl
To ensure your Vanillekipferl turn out perfectly every time, consider these expert tips. They address common pitfalls and offer insights into achieving that authentic, melt-in-your-mouth texture.
The Importance of Cold Ingredients: While the butter needs to be softened for creaming, ensuring the dough itself stays relatively cool is paramount for texture. If the dough becomes too warm and soft, the cookies will spread excessively during baking, losing their signature shape and becoming flat. Working quickly and chilling the dough briefly if it becomes too soft can make a significant difference.
Don’t Overmix the Dough: As mentioned in the preparation steps, overmixing is a primary culprit for tough cookies. Mix the dry ingredients into the wet just until they are combined. The dough should be crumbly but hold together when gently pressed. Overdeveloped gluten strands will result in a chewy rather than a delicate, crumbly cookie.
Uniform Size is Key: For even baking, it’s essential that all your Vanillekipferl are roughly the same size. This ensures they all cook at the same rate, preventing some from burning while others remain undercooked. Using a small cookie scoop or a kitchen scale to portion the dough can help achieve this consistency reliably.
Watch the Baking Time Closely: Vanillekipferl bake quickly and can burn easily due to their delicate nature and relatively low sugar content in the dough itself (most sweetness comes from dusting). Keep a close eye on them during the last few minutes of baking. They should be lightly golden on the edges but still pale in the center. Removing them just as they are set is crucial for that melt-in-your-mouth quality.
Cool Completely Before Dusting: Patience is key when it comes to dusting with powdered sugar. Wait until the cookies are entirely cool before you begin. If you dust them while they are still warm, the powdered sugar will melt and clump, creating a sticky mess rather than a light, snowy coating. A fine-mesh sieve is your best friend for achieving an even and attractive dusting.
Serving Suggestions for Vanillekipferl
Decoration
The classic decoration for Vanillekipferl is a generous dusting of powdered sugar, which gives them a snowy, festive appearance, reminiscent of winter holidays. This simple yet elegant finish is what most people associate with this traditional cookie. For an added touch of flair, you can sprinkle them with finely chopped almonds or pistachios after dusting, providing a subtle crunch and visual contrast.
If you are aiming for a more elaborate presentation, consider a light drizzle of melted white or dark chocolate over the cooled, powdered cookies. This adds a decadent element and makes them stand out on a cookie platter. Another creative idea is to use a stencil to apply intricate patterns with the powdered sugar, transforming them into edible works of art for a truly special occasion.
Side Dishes
Vanillekipferl are wonderful on their own, but they also pair beautifully with a variety of beverages and light accompaniments. A rich, dark coffee or a smooth espresso provides a wonderful contrast to the cookie’s sweetness and delicate almond flavor. Alternatively, a warm cup of herbal tea, such as chamomile or peppermint, can complement the subtle vanilla notes and offer a comforting pairing.
For a refreshing option, consider serving them with a glass of cold milk, a classic pairing that appeals to both children and adults. They also work surprisingly well with a dollop of freshly whipped cream or a small bowl of seasonal berries, like raspberries or strawberries, which add a burst of tartness to balance the sweetness of the cookies. The interplay of textures and flavors makes for a delightful experience.
Creative Serving Ideas
Beyond simply placing them on a plate, consider incorporating Vanillekipferl into a larger dessert presentation. They make excellent garnishes for cakes, tarts, or even ice cream sundaes, adding a unique texture and flavor. Imagine crumbling a few over a scoop of vanilla bean ice cream or using them to decorate the sides of a festive Yule log cake.
These cookies are also perfect for creating edible gifts. Package them in charming tins or cellophane bags tied with a festive ribbon. They are a staple at holiday cookie exchanges, where their traditional charm and delightful taste are always a hit. You can even create mini cookie towers by stacking them and securing them with a touch of frosting for a whimsical centerpiece.
Preparation & Storage
Storing Leftovers
To keep your Vanillekipferl fresh and delicious, it’s essential to store them properly. The best method is to place the completely cooled cookies in an airtight container. This prevents them from drying out and protects them from absorbing any unwanted odors from other foods.
Store the airtight container at room temperature, away from direct sunlight and heat sources. When stored correctly, Vanillekipferl can maintain their delightful texture and flavor for approximately 7 to 10 days. Check them periodically to ensure they remain in optimal condition.
Freezing
Vanillekipferl freeze exceptionally well, making them an ideal make-ahead treat for busy holiday seasons. You can freeze the baked cookies or even the unbaked dough. For baked cookies, arrange them in a single layer on a baking sheet and freeze until solid before transferring them to a freezer-safe bag or airtight container to prevent breakage and freezer burn.
If freezing the dough, shape it into logs or the crescent shape and place them on a parchment-lined tray to freeze until firm. Once frozen, transfer the shaped dough pieces to a freezer-safe container. They can be stored in the freezer for up to 3 months. It is advisable to freeze them unfrosted if you plan to dust them with powdered sugar later, as moisture can affect the sugar’s texture.
Reheating
When you’re ready to enjoy frozen Vanillekipferl, whether they are baked or unbaked dough, the process is quite simple. For frozen baked cookies, remove them from the freezer and allow them to come to room temperature on a wire rack. This usually takes about 20-30 minutes, depending on the size of the cookie and the ambient temperature.
If you prefer your cookies slightly warmed, you can place the cooled cookies on a baking sheet and warm them in a preheated oven at a low temperature (around 150°C / 300°F) for just a few minutes until they are heated through. For unbaked dough, it’s best to let it thaw in the refrigerator overnight before shaping and baking as usual. This allows the fats to solidify again, ensuring proper texture.
Frequently Asked Questions
-
Can I make the Vanillekipferl dough ahead of time and how should I store it?
Yes, absolutely! The dough for Vanillekipferl can be prepared up to 2-3 days in advance and stored in the refrigerator. It’s best to wrap the dough tightly in plastic wrap or place it in an airtight container to prevent it from drying out. When you’re ready to bake, allow the dough to sit at room temperature for about 15-20 minutes to make it easier to handle and shape. This advance preparation is incredibly helpful for busy holiday schedules or when entertaining guests.
-
What are the best substitutions if I have dietary restrictions or need to adapt the recipe?
If you require a gluten-free version, you can successfully substitute all-purpose flour with a good quality gluten-free all-purpose flour blend. For a dairy-free option, use a high-quality plant-based butter or vegan margarine in place of unsalted butter. If you need to avoid nuts entirely, you can increase the amount of flour slightly or use a finely ground seed like sunflower seeds, though this will alter the flavor profile. Always ensure your vanilla extract is pure for the best flavor. Adjustments for vegan recipes might also involve ensuring your powdered sugar is vegan-friendly.
-
How do I know when my Vanillekipferl are perfectly baked, and what’s the ideal texture?
The ideal texture for Vanillekipferl is delicate, crumbly, and melt-in-your-mouth tender. You’ll know they are perfectly baked when the edges of the cookies turn a very light golden brown, but the centers remain pale and soft. They should feel set to the touch but not hard. Overbaking will lead to a dry, crisp, and potentially hard cookie, which detracts from their signature melt-in-your-mouth quality. It’s always better to slightly underbake than overbake these delicate treats, as they will continue to firm up slightly as they cool on the baking sheet.