No Bake Lemon Icebox Cake: Your Ultimate Refreshing Treat
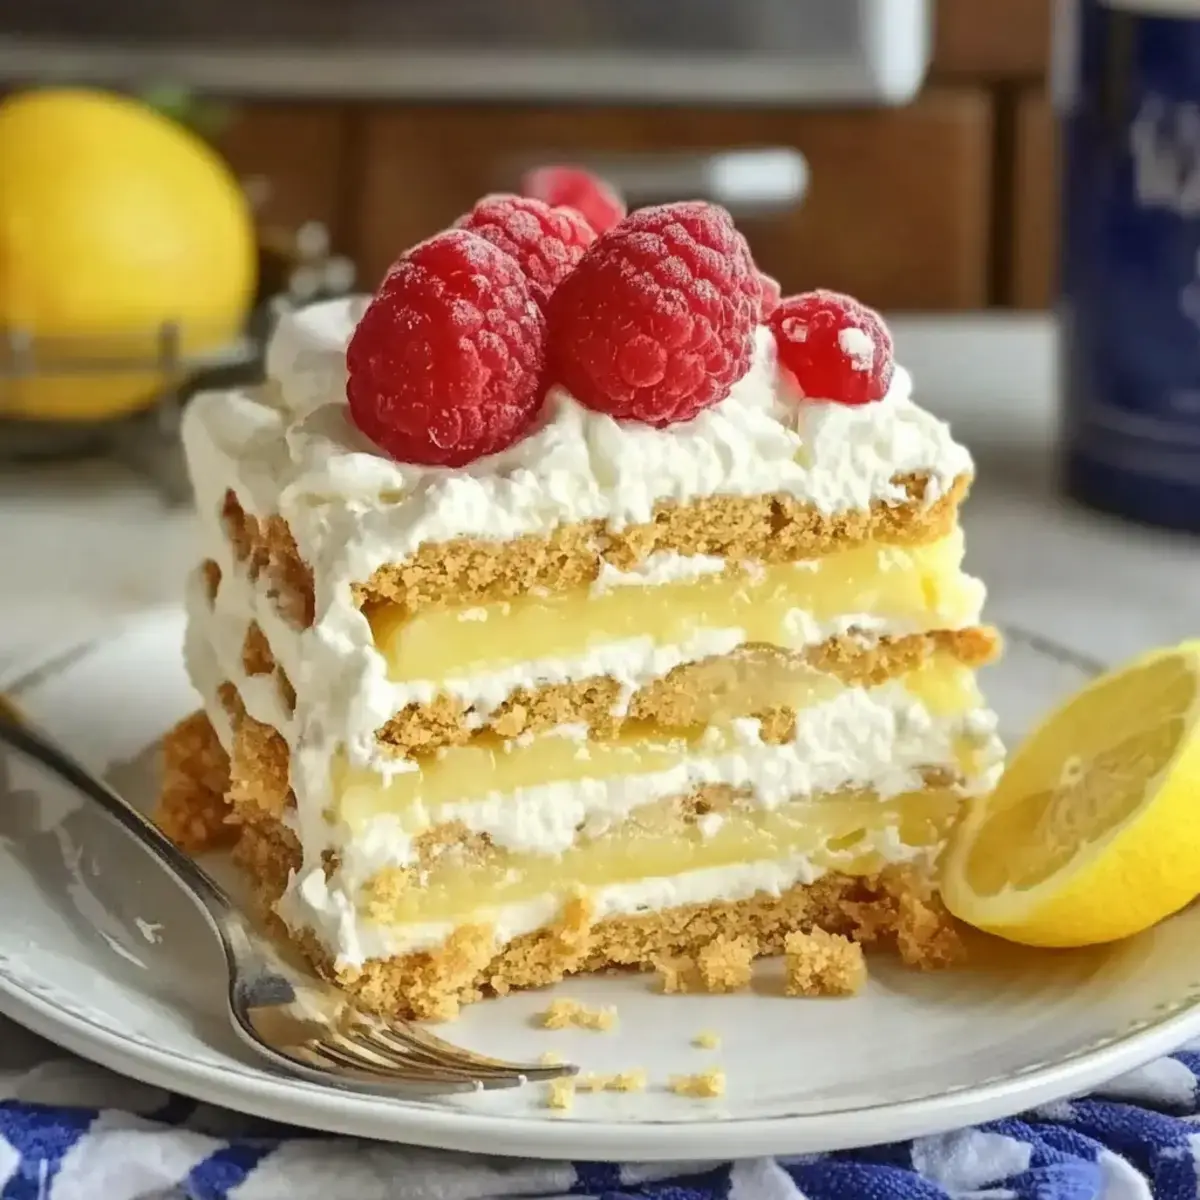
As the vibrant spirit of summer calls for lighter, brighter flavors, our culinary desires often turn towards desserts that offer refreshment without the oppressive heat of the oven. This No Bake Lemon Icebox Cake emerges as a stellar choice, perfectly embodying the essence of effortless summer indulgence. Its zesty citrus notes are sure to awaken the palate, making it an ideal centerpiece for any warm-weather gathering, from casual backyard barbecues to more elegant celebrations.
Imagine a dessert that comes together with minimal fuss, allowing you more time to savor precious moments with loved ones. This recipe delivers precisely that, offering a delightful balance of creamy textures and tangy lemon, all enveloped in the comforting embrace of softened graham crackers. It’s a symphony of simple ingredients transformed into something truly special, a testament to the magic that can happen in your own kitchen without ever preheating the oven.
Why You Will Love This Recipe
- Effortless Preparation: This No Bake Lemon Icebox Cake comes together in a matter of minutes, making it perfect for busy weeknights or unexpected guests. It’s a true testament to how simple ingredients can create something spectacular with very little effort.
- Zesty Refreshment: With its bright lemon flavor, it’s an ideal cool treat for scorching summer days, serving as a delicious antidote to the heat. The tanginess cuts through the richness, making each bite incredibly invigorating and satisfying.
- Versatile Layers: Customize the dessert by swapping graham crackers for vanilla wafers or adding fresh berries, ensuring it’s always a crowd-pleaser. This flexibility allows you to adapt the cake to your specific preferences or seasonal availability of fruits.
- Make-Ahead Convenience: Prepare it in advance and simply let it chill; you’ll have more time to enjoy gatherings without any last-minute baking stress. This feature is invaluable for hosts who want to reduce pre-party pressure.
- Eye-Catching Presentation: Finished with a beautiful top layer, it’s as visually appealing as it is tasty, making it perfect for special occasions or potlucks. The smooth finish and potential for creative garnishes make it a dessert that truly shines.
Ingredients You Need
The beauty of this No Bake Lemon Icebox Cake lies in its accessible ingredients, which combine to create a symphony of refreshing flavors and creamy textures. Opting for high-quality components, such as fresh lemons and full-fat dairy products, will undoubtedly elevate the final dessert, infusing it with a richness that’s both satisfying and delightful. Even simple pantry staples can be transformed into something extraordinary with the right approach.
No Bake Lemon Icebox Cake
A refreshing no-bake dessert perfect for summer gatherings, featuring layers of creamy lemon filling and soft graham crackers. Effortless to prepare and a delight to eat!
- For the Base:12 sheets Graham crackers (Consider substituting with vanilla wafers for a different flavor.)
- For the Lemon Filling:1 box Instant lemon pudding mix (Provides that signature tangy lemon flavor.)2 cups Cold milk (Stick to full-fat for a more decadent bite.)8 ounces Whipped topping (Lightens the lemon filling.)1 tablespoon Lemon zest (Enhances both aroma and flavor.)1/2 cup Fresh lemon juice (Fresh is best for optimal taste.)1 cup Powdered sugar (Sweetens the mixture.)8 ounces Cream cheese (Adds richness and creamy mouthfeel.)
- 1Prepare the Lemon Pudding: In a medium mixing bowl, whisk together the instant lemon pudding mix and 2 cups of cold milk for about 2 minutes until it thickens and is fully set. Look for a smooth, creamy consistency that holds its shape.
- 2Make the Creamy Filling: In a separate bowl, beat 8 ounces of cream cheese until smooth, then add in 1/2 cup of fresh lemon juice and 1 cup of powdered sugar. Mix well until there are no lumps. The mixture should be creamy and fluffy, with the bright scent of lemon.
- 3Fold in the Whipped Topping: Gently fold 8 ounces of whipped topping into the cream cheese mixture using a spatula. Be careful to incorporate it evenly without deflating the mixture too much. When done, you’ll have a light and fluffy filling that adds a wonderful texture.
- 4Assemble the Cake Layers: Start layering by placing a single layer of graham crackers in the bottom of a 9x13 inch baking dish. Spread a third of the lemon pudding mixture over the graham crackers, creating an even layer. Repeat this process, alternating layers until all components are used up.
- 5Finish with the Top Layer: After your final layer of graham crackers, spread the remaining lemon filling over the top. Make sure it’s evenly spread to create a smooth, eye-catching finish.
- 6Chill the Cake: Cover the assembled cake with plastic wrap or aluminum foil and refrigerate for at least 4 hours, or better yet, overnight. This chilling period allows the flavors to meld and the layers to set properly.
- 7Serve and Enjoy: When ready to serve, slice the No Bake Lemon Icebox Cake into squares and plate each piece carefully. Consider garnishing with fresh berries or a drizzle of white chocolate for an elegant touch.
Keywords: no bake, lemon, icebox cake, dessert, summer, refreshing, easy, vegetarian
These core components are listed with their specific quantities within the accompanying recipe card, ensuring you have all the details needed for perfect execution.
Variations
The inherent simplicity of this No Bake Lemon Icebox Cake makes it a fantastic canvas for creative culinary exploration. Beyond the classic rendition, there are numerous delightful ways to adapt this recipe to suit different tastes and dietary needs, ensuring there’s a version for everyone to enjoy.
Consider a **Vegan Delight** by substituting traditional cream cheese with a cashew-based cream cheese alternative and using a plant-based whipped topping, such as coconut cream. For the graham cracker base, opt for vegan-friendly cookies or even a simple blend of crushed nuts and dates for a wholesome, gluten-free crust. The lemon pudding mix can also be replaced with a homemade lemon-flavored chia seed pudding or a cornstarch-thickened lemon custard made with plant-based milk. This approach results in a remarkably decadent vegan dessert that rivals its traditional counterpart in terms of flavor and texture, offering a beautiful, dairy-free alternative for your gatherings.
For those mindful of carbohydrate intake, a **Low-Carb Lemon Dream** is achievable by using a sugar-free instant lemon pudding mix and sugar substitutes like erythritol or stevia for sweetening. The graham cracker layer can be ingeniously replaced with a base made from crushed almonds, coconut flour, and melted butter or coconut oil, creating a nutty, satisfying crust. You might also explore using a sugar-free vanilla wafer alternative or even a simple layer of unsweetened shredded coconut mixed with a touch of sweetener and binder. This adaptation maintains the refreshing lemon flavor while fitting seamlessly into a ketogenic or low-carb lifestyle, proving that indulgence doesn’t have to mean sacrificing dietary goals.
Another exciting avenue is the **Berry Bliss Twist**, where the lemon pudding is swapped for a strawberry, raspberry, or mixed berry instant pudding. The fresh lemon juice and zest can be reduced or omitted entirely, allowing the berry flavors to take center stage. You could even fold in a cup of fresh or frozen berries directly into the filling for pops of fruitiness and vibrant color. This variation transforms the cake into a delightful fruit-forward dessert, perfect for those who prefer a sweeter, more jam-like profile, reminiscent of a summer fruit tart. It offers a refreshing change of pace, showcasing the versatility of the icebox cake format.
How to Prepare No Bake Lemon Icebox Cake
Step 1: Prepare the Lemon Pudding Base
In a medium-sized mixing bowl, combine the instant lemon pudding mix with precisely 2 cups of cold milk. Whisk these ingredients together vigorously for approximately two minutes. The goal here is to achieve a thickened, fully set mixture that holds its shape beautifully. This initial step is crucial, as the pudding mixture forms the very foundation of the creamy layers in your No Bake Lemon Icebox Cake, ensuring a smooth and delightful texture throughout.
Ensure that you whisk consistently and thoroughly to prevent any clumps from forming and to activate the pudding’s setting agents. The cold milk is essential for this thickening process, so avoid using lukewarm or room temperature liquid, as it may result in a less stable filling. You should observe the mixture transforming into a thick, creamy consistency that resembles a soft mousse or custard.
Take your time with this step; a well-prepared pudding base is paramount for the structural integrity and overall success of the icebox cake. The vibrant, tangy flavor introduced by the lemon pudding mix is what gives this dessert its signature zest and refreshing character, making it a beloved treat, particularly during warmer months.
Step 2: Craft the Rich Cream Cheese Filling
In a separate, clean mixing bowl, begin by softening the 8 ounces of cream cheese. Use an electric mixer on a medium speed to beat it until it achieves a luxuriously smooth and creamy consistency, free from any lumps. This smooth foundation is vital for an even distribution of flavors and textures in the final cake.
Next, gradually incorporate the 1/2 cup of fresh lemon juice and the 1 cup of powdered sugar into the cream cheese. Continue to mix until all the ingredients are thoroughly combined and the mixture is homogenous. The addition of lemon juice will impart a bright, citrusy tang, while the powdered sugar will introduce a gentle sweetness, balancing the tanginess of the cream cheese.
You’re aiming for a filling that is both rich and slightly tangy, with a delightful aroma of fresh lemon. This creamy component will provide a wonderful contrast to the lighter pudding layers, adding depth and a satisfying mouthfeel to every bite of your No Bake Lemon Icebox Cake. Ensure there are no pockets of unmixed cream cheese or sugar to guarantee a perfect, uniform flavor profile throughout the dessert.
Step 3: Gently Fold in the Whipped Topping
With the cream cheese and lemon mixture smoothly combined, it’s time to introduce the lightness and airiness of the whipped topping. Take the 8 ounces of whipped topping and gently fold it into the cream cheese mixture using a rubber spatula. The technique of folding is crucial here; it involves carefully scooping down through the mixture, across the bottom, and then up and over, turning the bowl as you go.
The objective is to incorporate the whipped topping evenly without overmixing, which could deflate the airy texture. You want to maintain as much of the volume as possible, as this contributes significantly to the overall light and fluffy consistency of the filling for your No Bake Lemon Icebox Cake. The whipped topping will lighten the richness of the cream cheese and add a delicate, cloud-like quality to the filling.
When done, the filling should appear uniformly blended with subtle swirls and a creamy, inviting appearance. This step ensures that the final cake has a wonderful balance of richness from the cream cheese and lightness from the whipped topping, creating a truly delightful dessert experience that is both satisfying and refreshing, characteristic of this classic no-bake treat.
Step 4: Assemble the Cake Layers with Precision
Begin the assembly process by arranging a single, even layer of graham crackers at the bottom of your 9×13 inch baking dish. Ensure the crackers cover the entire base of the dish as completely as possible, breaking them to fit any awkward spaces if necessary. This initial layer will begin to absorb moisture from the filling as the cake chills, softening to create that desirable cake-like texture.
Next, carefully spread approximately one-third of the prepared lemon pudding mixture evenly over the layer of graham crackers. Use a spatula to ensure an even distribution, reaching all corners of the dish. This creates the first of many delightful layers that define the icebox cake.
Now, repeat this process, alternating between layers of graham crackers and layers of the lemon pudding mixture. Continue layering until you have used up all the components, typically resulting in three to four layers of each. The careful arrangement of these layers is key to achieving the visually appealing and texturally satisfying slices that make this No Bake Lemon Icebox Cake so beloved. Each layer contributes to the overall experience, building a cohesive and delicious dessert.
Step 5: Create the Beautiful Final Layer
Once you have completed the alternating layers of graham crackers and pudding, it’s time to add the final creamy topping. Gently spread the remaining lemon filling mixture over the uppermost layer of graham crackers. This final layer is the visible surface of your No Bake Lemon Icebox Cake and plays a significant role in its aesthetic appeal.
Use your spatula to ensure this top layer is spread smoothly and evenly across the entire cake. Pay attention to reaching the edges of the baking dish to create a clean, polished look. A uniform top surface not only enhances the presentation but also ensures that every slice you serve is beautifully finished, promising a delightful visual as well as a taste sensation.
This final layer of creamy lemon goodness is the crowning glory of your icebox cake. Its smooth finish provides a perfect canvas for optional garnishes, and it seals in the flavors, promising a cohesive and satisfying dessert. The visual appeal of this perfectly smooth top layer is the first hint of the deliciousness that awaits in every spoonful of this wonderfully refreshing No Bake Lemon Icebox Cake.
Step 6: Chill the Cake to Perfection
With the No Bake Lemon Icebox Cake fully assembled, it’s time to allow the magic of chilling to work its wonders. Cover the baking dish tightly with plastic wrap or aluminum foil. This barrier is essential to prevent the cake from drying out or absorbing any unwanted odors from the refrigerator.
Place the covered cake in the refrigerator for a minimum of 4 hours. However, for the absolute best results, it is highly recommended to chill it overnight. This extended chilling period is crucial for several reasons: it allows the flavors to meld together, creating a more harmonious taste profile, and it enables the graham crackers to soften considerably, transforming them into a tender, cake-like texture that is the hallmark of a true icebox cake.
You’ll know your No Bake Lemon Icebox Cake is ready when the filling is firm to the touch and the layers have achieved their perfect soft consistency. Rushing this step will result in a less cohesive and less satisfying dessert, so patience is truly a virtue when it comes to achieving the ideal texture and flavor development. This chilling process is as important as the assembly itself.
Step 7: Serve and Savor Each Delightful Bite
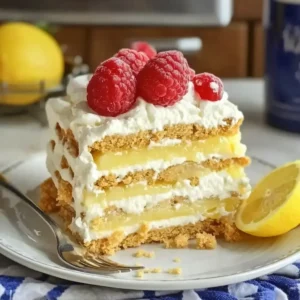
Once the No Bake Lemon Icebox Cake has reached its optimal chilled state, it’s ready to be unveiled and enjoyed. Carefully remove the plastic wrap or foil covering the dish. Using a sharp knife, slice the cake into individual portions, aiming for neat, clean cuts to showcase the beautiful layers within.
Gently plate each slice, perhaps using an offset spatula for a clean transfer from the dish to the plate. For an added touch of elegance and an extra burst of flavor, consider garnishing each serving. Fresh berries, such as vibrant strawberries, blueberries, or raspberries, add a beautiful pop of color and a refreshing tartness that complements the lemon beautifully. A light dusting of powdered sugar or a delicate drizzle of white chocolate ganache can also elevate the presentation and taste.
Serve the cake immediately and watch as your guests delight in its refreshing flavors and wonderfully creamy texture. This No Bake Lemon Icebox Cake is designed to be a delightful, easy-to-enjoy dessert that’s perfect for any occasion, especially during the warmer months when a cool, zesty treat is most welcome. Enjoy the culmination of your simple yet rewarding culinary effort!
Pro Tips for No Bake Lemon Icebox Cake
Pudding Consistency is Key: Ensure the instant lemon pudding mix is fully set and thickened according to package directions before combining it with the other filling ingredients. If it’s too loose, your cake may not hold its structure well. Whisk for the full recommended time and use very cold milk to achieve the proper set for your No Bake Lemon Icebox Cake.
Don’t Rush the Chill: While a minimum of 4 hours is suggested, allowing the cake to chill overnight makes a significant difference in texture. The graham crackers have more time to soften completely, integrating seamlessly into the creamy filling for that signature cake-like consistency. Patience here truly rewards you with a superior dessert experience.
Layer with Care: Use an offset spatula or the back of a spoon to spread each layer of filling evenly. This ensures consistent texture and flavor distribution throughout the No Bake Lemon Icebox Cake. Avoid overfilling any single layer, which can cause the cake to become unstable or difficult to slice cleanly.
Garnish for Greatness: A simple garnish can transform the appearance of your No Bake Lemon Icebox Cake from homemade to haute cuisine. Fresh berries, a sprig of mint, a drizzle of white chocolate, or even a dusting of lemon zest can add visual appeal and a complementary flavor dimension. These small touches make a big impact.
Storage Savvy: Leftover cake should always be stored tightly covered in the refrigerator to maintain its freshness and prevent it from drying out or absorbing fridge odors. It typically stays delicious for up to three days. For longer storage, consider freezing, which offers an almost ice cream-like texture.
Serving Suggestions for No Bake Lemon Icebox Cake
Decoration
Elevate the visual appeal of your No Bake Lemon Icebox Cake with simple yet stunning decorations. A generous scattering of fresh berries, such as vibrant raspberries, plump blueberries, or sliced strawberries, provides a beautiful contrast in color and adds a fresh, fruity element. For a touch of elegance, a delicate drizzle of melted white chocolate or a simple dusting of powdered sugar across the top can create a sophisticated look. A few fresh mint sprigs not only add a lovely green accent but also contribute a subtle, refreshing aroma that complements the lemon flavor.
Side Dishes
While this No Bake Lemon Icebox Cake is a complete dessert on its own, it pairs wonderfully with certain accompaniments that enhance the overall dining experience. A light, tangy lemon sorbet served alongside can amplify the citrus notes and provide an extra layer of refreshing chill, making it perfect for a hot summer day. For a textural contrast, consider offering crisp almond biscotti or vanilla wafers for dipping, allowing guests to enjoy the creamy filling in a different way. A simple, chilled glass of unsweetened iced tea or a refreshing lemonade serves as a perfect beverage pairing, cleansing the palate between bites.
Creative Serving Ideas
Think beyond the standard slice to present this delightful No Bake Lemon Icebox Cake in unique ways. Individual portions can be created by layering the mixture in charming small glasses or mason jars, making them ideal for picnics, potlucks, or as elegant individual desserts. You could also transform it into mini tartlets by pressing a graham cracker crust into muffin tins and topping with the lemon filling, creating delightful bite-sized treats. If serving for a special occasion, consider presenting it on a decorative tiered stand, showcasing its layers and making it a true centerpiece for your dessert table. For a playful twist, serve it slightly more frozen for an ice cream cake-like consistency, offering a refreshing surprise on a particularly warm afternoon.
Preparation & Storage
Storing Leftovers
To keep your No Bake Lemon Icebox Cake tasting as fresh and delicious as possible, it’s essential to store any leftovers properly. Once cut, the cake should be covered tightly with plastic wrap, ensuring that the exposed surfaces are well protected to prevent drying out. Alternatively, you can place the remaining cake in an airtight container before refrigerating. Properly stored in the refrigerator, this delightful dessert can maintain its quality and flavor for up to three days, making it a perfect make-ahead treat.
Freezing
For those who wish to enjoy this delightful icebox cake over a longer period or desire a firmer, ice-cream-like texture, freezing is an excellent option. Before freezing, ensure the cake is well-chilled and firm. Wrap the entire cake, or individual slices, securely in a layer of plastic wrap, followed by a protective layer of aluminum foil. This double wrapping helps to prevent freezer burn and preserve the delicate flavors and textures. Frozen No Bake Lemon Icebox Cake can typically be stored for up to two months.
Reheating
One of the many joys of a No Bake Lemon Icebox Cake is that it requires absolutely no reheating; it is designed to be enjoyed chilled. When you are ready to serve frozen portions, the best method is to allow them to thaw gradually. Remove the frozen cake from the freezer and let it sit at room temperature for approximately 30 minutes, or until it reaches a slightly softened, sliceable consistency. This thawing process ensures that the creamy filling and softened cracker layers can be enjoyed as intended, offering a perfectly cool and refreshing dessert experience.
Frequently Asked Questions
-
How do I choose the best lemons for maximum flavor in this No Bake Lemon Icebox Cake?
Selecting ripe, juicy lemons is key to achieving the vibrant citrus flavor that defines this icebox cake. Look for lemons that have a bright yellow, smooth, and firm skin. They should feel heavy for their size, which indicates a good juice content. Avoid lemons with dull skin, soft spots, or any signs of mold, as these may be past their prime or contain less flavor. For the most intense zest and juice, opt for organic lemons if possible, and ensure they are washed thoroughly before zesting and juicing.
-
What are the best ways to store the No Bake Lemon Icebox Cake to maintain its freshness and texture?
Proper storage is crucial for preserving the delightful texture and flavor of your No Bake Lemon Icebox Cake. Always keep it covered tightly in the refrigerator to prevent it from drying out or absorbing other odors from your fridge. An airtight container or well-sealed plastic wrap works best. If you plan to store it for more than a couple of days, consider freezing individual slices or the entire cake, wrapped in plastic wrap and then aluminum foil, for up to two months. This ensures that you can enjoy this refreshing treat whenever a craving strikes.
-
Can I make this No Bake Lemon Icebox Cake ahead of time, and if so, how far in advance?
Absolutely, this No Bake Lemon Icebox Cake is an excellent candidate for make-ahead preparation, which is one of its greatest conveniences. You can assemble the entire cake up to 24 hours in advance and store it, tightly covered, in the refrigerator. This extended chilling time is actually beneficial, as it allows the graham cracker layers to soften beautifully, creating the perfect cake-like texture and allowing all the flavors to meld together harmoniously. If you prefer, you can also prepare the lemon filling separately and store it in the fridge for up to three days, then assemble the cake with graham crackers just a few hours before serving.