Ultimate Boston Cream Pie Cupcakes
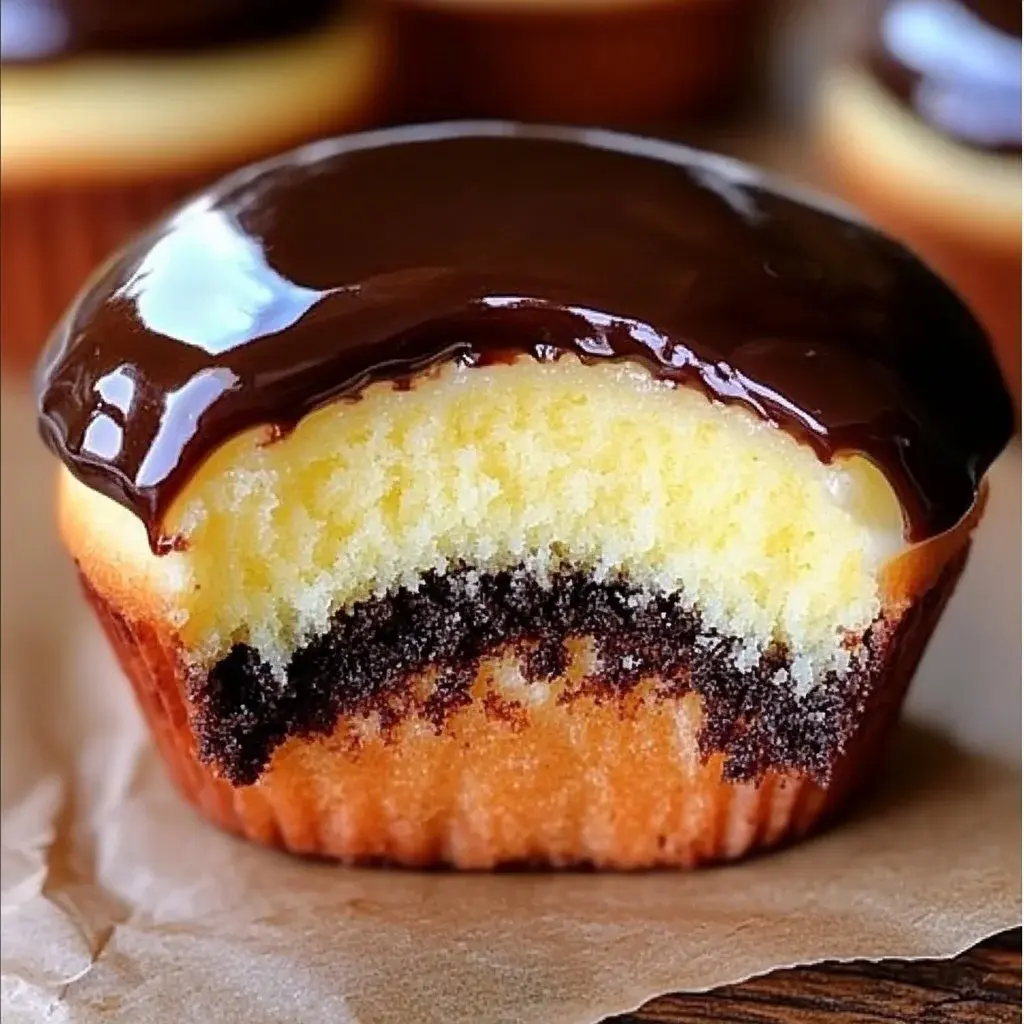
When you’re in the mood for a delightful, sweet treat, there’s something irresistible about Boston Cream Pie Cupcakes. These delightful little desserts pack all the classic flavors of the traditional Boston cream pie into a portable format. Imagine tender vanilla cupcakes filled with rich custard, all topped off with a luscious chocolate ganache. What’s not to love?
Whether you’re hosting a party, celebrating a birthday, or simply treating yourself after a long day, these cupcakes are always a crowd-pleaser. Their moist texture and decadent filling make them a perfect indulgence for both kids and adults alike. Plus, they’re relatively easy to prepare, so you won’t find yourself overwhelmed in the kitchen.
Why You Will Love This Recipe
- Flavor Explosion: Enjoy a blissful combination of rich chocolate, creamy custard, and soft vanilla cake that perfectly mimics the beloved Boston Cream Pie.
- Easy to Make: With straightforward steps and minimal fuss, even novice bakers can create these stunning cupcakes with ease, making it a stress-free baking experience.
- Versatile and Customizable: Feel free to tweak the recipe to suit your taste preferences or dietary needs, allowing for endless creative possibilities.
- Family-Friendly: These cupcakes are sure to be a hit with both kids and adults, making them a perfect choice for family gatherings and special occasions.
- Perfect for Celebrations: Great for any occasion, from birthdays to holiday parties, these individual treats leave everyone wanting more and are a guaranteed showstopper.
Ingredients You Need
The success of these Boston Cream Pie Cupcakes hinges on the quality of your ingredients. Using fresh, high-quality components will elevate the flavor and texture significantly, ensuring a truly memorable dessert experience for everyone who tries them. Opting for good ingredients is a small step that makes a world of difference in the final outcome.
Boston Cream Pie Cupcakes
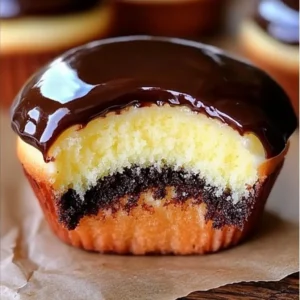
Soft vanilla cupcakes filled with silky pastry cream and topped with a glossy chocolate ganache — the perfect handheld version of the classic Boston Cream Pie. Enjoy a blissful combination of rich chocolate, creamy custard, and soft vanilla cake.
- For the Cupcakes: 3/4 cup unsalted butter, softened
- 1 1/2 cups granulated sugar
- 3 large eggs
- 2 1/2 cups all-purpose flour
- 1 cup buttermilk
- 2 tsp vanilla extract
- For the Pastry Cream Filling: 3 cups whole milk
- 1/2 cup granulated sugar
- 1/3 cup cornstarch
- 1/4 tsp salt
- 1 tsp vanilla extract
- 1 tbsp butter (for finishing the cream)
- For the Chocolate Ganache Topping: 1 cup heavy cream
- 4 oz semi-sweet chocolate, chopped
- 1 tsp vanilla extract
- 1Preheat the oven to 350°F (175°C) and line a cupcake pan with paper liners.
- 2Cream butter and sugar together until light and fluffy. Beat in eggs one at a time, then add vanilla.
- 3Alternate adding flour and buttermilk, starting and ending with flour. Mix just until combined.
- 4Fill cupcake liners about halfway and bake for 20–25 minutes, until a toothpick inserted in the center comes out clean. Cool completely.
- 5To make the pastry cream, whisk sugar, cornstarch, and salt in a saucepan. Slowly add warm milk while whisking, then temper in the egg yolks.
- 6Cook over medium heat, whisking constantly, until thickened. Remove from heat, add butter and vanilla, and cover with plastic wrap directly on the surface. Chill for at least 30 minutes.
- 7For the ganache, heat heavy cream until just simmering. Pour over chopped chocolate, let sit 1 minute, then stir until smooth. Add vanilla.
- 8Use a small knife or cupcake corer to remove the center of each cupcake. Fill with pastry cream using a piping bag.
- 9Replace the cupcake tops and spoon or drizzle chocolate ganache over each one.
- 10Let the ganache set at room temperature or refrigerate before serving.
Keywords: Boston Cream, Chocolate Ganache, Cupcake, Pastry Cream
- all-purpose flour: the foundation of your cupcake, providing structure and a tender crumb.
- baking powder: essential for achieving that perfect, airy rise.
- salt: a flavor enhancer that balances the sweetness and brings out the other tastes.
- unsalted butter, softened: contributes richness, moisture, and a delightful tender texture.
- granulated sugar: sweetens the batter and helps create a wonderfully soft and moist cupcake.
- large eggs: bind the ingredients together and add crucial moisture and richness to the cake.
- vanilla extract: infuses the cupcakes with a warm, comforting, and classic flavor.
- milk: ensures a tender crumb and adds that signature moistness to the vanilla cake.
- prepared vanilla custard: the luscious, creamy heart of the cupcake, reminiscent of the original pie.
- semi-sweet chocolate, chopped: the key ingredient for a decadent and glossy chocolate ganache topping.
- heavy cream: creates the silky, smooth texture of the luscious chocolate ganache.
Specific quantities for each ingredient can be found in the recipe card above, ensuring you have everything you need for perfect execution.
Variations
For those seeking a delightful dessert that caters to specific dietary needs, the Boston Cream Pie Cupcakes offer fantastic flexibility. Consider a vegan adaptation by substituting the butter with a plant-based alternative, using almond or soy milk instead of dairy milk, and replacing the eggs with a flax egg or commercial vegan egg replacer. Ensure your chosen vanilla custard is also dairy-free or create a homemade vegan version using coconut milk or a plant-based creamer for a rich filling.
A low-carb version can be achieved by using your favorite sugar substitute in place of granulated sugar and almond flour or a gluten-free baking blend in place of all-purpose flour. It’s crucial to ensure that the custard filling is also keto-friendly, which might involve using a sugar-free thickener like xanthan gum and a sugar substitute. The chocolate ganache can be made with sugar-free chocolate chips for a guilt-free indulgence.
Another exciting variation is to introduce different flavor profiles to the cupcakes themselves. Infuse the vanilla batter with a hint of citrus zest, like lemon or orange, for a brighter taste. Alternatively, you could add a touch of coffee or espresso powder to the batter for a mocha twist, or even swirl in some fruit puree like raspberry or strawberry before baking for a fruity surprise. These simple additions can completely transform the cupcake experience.
How to Prepare boston cream pie cupcakes
Step 1: Gathering and Preparing Your Ingredients
Begin by meticulously gathering all the necessary ingredients for both the cupcake batter and the custard filling. Ensure your butter is at the perfect softened consistency, not melted but yielding to the touch, which is critical for proper creaming. Measure out all dry ingredients accurately to ensure the correct ratios for a light and fluffy cake. This initial step is about organization and precision, setting the stage for a smooth and successful baking process.
Having all your ingredients prepped and measured before you start mixing is known as “mise en place,” a French culinary term that translates to “everything in its place.” This practice is fundamental in professional kitchens and highly beneficial for home bakers as it minimizes the chances of forgetting an ingredient or rushing through a crucial step. It allows you to focus entirely on the technique of mixing and baking, leading to more consistent and delicious results.
For the custard, have your milk measured, sugar and cornstarch combined, and eggs ready. The precise measurement of cornstarch is vital for achieving the right thickness without a gummy texture. Similarly, having the eggs at room temperature will help them emulsify better into the butter-sugar mixture, creating a smoother batter. Don’t forget to have your vanilla extract on hand to imbue that classic aroma and taste into both components.
Step 2: Creating the Perfect Vanilla Cupcake Batter
In a large mixing bowl, cream together the softened unsalted butter and granulated sugar until the mixture is exceptionally light and fluffy. This process, typically done with an electric mixer on medium-high speed, incorporates air into the batter, which is crucial for achieving a tender crumb and a good rise. Continue creaming for at least 3-5 minutes, scraping down the sides of the bowl periodically to ensure uniform incorporation.
Next, add the large eggs one at a time, beating well after each addition to ensure they are fully incorporated into the butter-sugar mixture. Incorporating eggs gradually prevents the mixture from becoming greasy or curdled. Following the eggs, stir in the pure vanilla extract, which will infuse the cupcakes with its wonderful aroma and classic flavor. A good quality vanilla extract will make a noticeable difference in the final taste.
Now, it’s time to alternate adding the dry ingredients (flour, baking powder, salt) and the milk to the creamed mixture. Begin by adding about one-third of the dry ingredients and mix until just combined. Then, add half of the milk and mix again. Continue this pattern, finishing with the dry ingredients, ensuring you don’t overmix the batter. Overmixing can develop the gluten in the flour too much, leading to tough cupcakes.
Step 3: Baking the Cupcakes to Golden Perfection
Preheat your oven to the specified temperature of 350°F (175°C) and prepare your cupcake pan by lining it with paper liners. It’s essential that the oven is fully preheated before the cupcakes go in to ensure even baking and proper rise. Using paper liners not only prevents sticking but also makes for a much cleaner removal of the baked cupcakes and a more presentable final product.
Fill each cupcake liner about two-thirds full with the prepared batter. Overfilling the liners will cause the batter to overflow during baking, resulting in misshapen cupcakes and a mess in your oven. Conversely, underfilling can lead to cupcakes that are too flat. Using a cookie scoop or a spoon to portion the batter can help ensure consistency across all your cupcakes.
Bake for approximately 18-20 minutes, or until a toothpick inserted into the center of a cupcake comes out clean or with only a few moist crumbs attached. If the toothpick comes out with wet batter, the cupcakes need more time. Rotate the pan halfway through baking if your oven has hot spots to ensure even browning. Once baked, remove the pan from the oven and let the cupcakes cool in the pan for a few minutes before transferring them to a wire rack to cool completely.
Step 4: Crafting the Luscious Custard Filling
While the cupcakes are cooling, it’s time to prepare the rich vanilla custard that will be the heart of your Boston Cream Pie Cupcakes. In a medium saucepan, whisk together the granulated sugar, cornstarch, and salt. This dry mixture ensures that the cornstarch is evenly distributed and prevents lumps from forming when the liquid is added.
Gradually whisk in the milk until the mixture is smooth and homogenous. Place the saucepan over medium heat and cook, stirring constantly with a whisk, until the mixture thickens significantly and begins to bubble. It’s crucial to keep stirring to prevent scorching on the bottom of the pan and to ensure a smooth, velvety texture. The custard should be thick enough to coat the back of a spoon.
Once thickened, remove the saucepan from the heat. Stir in the butter and vanilla extract until the butter is fully melted and incorporated, adding a final layer of richness and flavor. To prevent a skin from forming on top, press a piece of plastic wrap directly onto the surface of the custard. Allow it to cool, then refrigerate for at least 30 minutes, or until thoroughly chilled and set, before filling the cupcakes.
Step 5: Creating the Glossy Chocolate Ganache
The final touch for these delightful cupcakes is a decadent chocolate ganache that adds a beautiful sheen and a rich chocolatey finish. Place the finely chopped semi-sweet chocolate in a heatproof bowl. Ensure the chocolate is chopped into small, uniform pieces to facilitate even melting.
In a separate small saucepan, heat the heavy cream over medium heat until it just begins to simmer around the edges. Be careful not to let it boil vigorously, as this can cause the cream to separate. Once simmering, immediately pour the hot cream over the chopped chocolate in the bowl.
Let the mixture stand undisturbed for about one minute, allowing the heat from the cream to begin melting the chocolate. After the minute has passed, gently whisk the mixture, starting from the center and working your way outwards, until the chocolate is completely melted and the ganache is smooth, glossy, and fully combined. Stir in the vanilla extract for an extra hint of flavor.
Step 6: Assembling and Decorating Your Masterpieces
Once the cupcakes have cooled completely and the custard is chilled and set, it’s time for assembly. Using a small knife or a cupcake corer tool, carefully remove a cone-shaped piece from the center of each cupcake. Be sure not to go all the way through to the bottom, leaving enough cake to hold the filling.
Generously fill the cavity of each cupcake with the chilled vanilla custard. You can use a spoon or a piping bag for a cleaner and more professional look. Ensure each cupcake is well-filled, providing that signature Boston Cream Pie experience with every bite. Don’t be afraid to fill them generously, as this is where much of the delightful flavor comes from.
After filling, you can gently place the removed cupcake tops back onto the filled cupcakes, or you can leave them open-faced for a more rustic presentation. Spoon or drizzle the prepared chocolate ganache over the top of each cupcake, allowing it to drip down the sides slightly for a more appealing visual. Let the ganache set at room temperature for a bit, or refrigerate them briefly to help the ganache firm up before serving. You can find even more decorating inspiration on Pinterest.
Pro Tips for boston cream pie cupcakes
Don’t Overmix the Batter: Overmixing develops gluten, leading to tough cupcakes. Mix just until the ingredients are combined, and your cupcakes will be wonderfully tender and fluffy. This is a common pitfall, so gentle mixing is key for that delicate crumb.
Cool Completely Before Filling: Filling warm cupcakes will cause the custard to melt and seep out, creating a soggy mess. Patience is a virtue here; let them cool entirely on a wire rack before you start the assembly process.
Use High-Quality Vanilla Extract: The flavor of vanilla is prominent in these cupcakes. Investing in a good quality pure vanilla extract will make a significant difference in the final taste and aroma. Avoid imitation vanilla if possible.
Test for Doneness Accurately: A toothpick inserted into the center of a cupcake should come out clean or with only a few moist crumbs. Baking them for too long will result in dry cupcakes, so keep a close eye on them during the last few minutes of baking.
Chill the Custard Thoroughly: The custard needs to be well-chilled and set before filling the cupcakes. This ensures it holds its shape and doesn’t become runny. If it’s still warm, it won’t provide that satisfying creamy texture.
Serving Suggestions for boston cream pie cupcakes
Decoration
The chocolate ganache is the classic and most stunning decoration for these Boston Cream Pie Cupcakes. Ensure it has a beautiful, glossy finish by not overheating the cream or over-whisking the mixture. For an extra touch of elegance, you can use a piping bag to create swirls or a decorative pattern on top of each cupcake before the ganache fully sets. Consider adding a single fresh raspberry or a sprinkle of edible gold dust for a truly gourmet presentation.
Side Dishes
While these cupcakes are a complete dessert on their own, they pair wonderfully with a variety of accompaniments. A scoop of high-quality vanilla bean ice cream provides a delightful contrast in temperature and texture, enhancing the overall dessert experience. Fresh berries, such as sliced strawberries, raspberries, or blueberries, offer a refreshing counterpoint to the richness of the chocolate and custard, adding a burst of color and natural sweetness.
Creative Serving Ideas
Elevate your dessert table by arranging these cupcakes on a tiered stand, creating a visually appealing focal point for any party. For a more interactive experience, set up a “cupcake decorating station” where guests can add their own sprinkles or a dollop of whipped cream. You could also serve them alongside a perfectly brewed cup of coffee or a delicate herbal tea, transforming them into an elegant afternoon treat perfect for a dessert gathering.
Preparation & Storage
Storing Leftovers
To keep your Boston Cream Pie Cupcakes tasting their best, it’s essential to store them properly. Store any uneaten cupcakes in an airtight container in the refrigerator. This prevents them from drying out and keeps the custard fresh for consumption. They will maintain their optimal flavor and texture for up to three to four days when stored this way.
Freezing
Freezing these cupcakes is a great option for making them ahead of time or for long-term storage. It’s best to freeze the unfrosted cupcakes without the custard filling for the best results. Once baked and completely cooled, wrap each cupcake individually in plastic wrap, then place them in a freezer-safe bag or container. They can be stored in the freezer for up to three months.
Reheating
When you’re ready to enjoy your frozen Boston Cream Pie Cupcakes, the best method is to thaw them in the refrigerator overnight. This allows them to defrost gradually, preserving their texture. Once thawed, you can proceed with adding the custard filling and chocolate ganache as per the recipe instructions. Avoid microwaving, as this can make the cake dry and rubbery.
Frequently Asked Questions
-
Can I make the components of Boston Cream Pie Cupcakes ahead of time?
Absolutely! The vanilla cupcake base can be baked a day in advance and stored in an airtight container at room temperature. The vanilla custard filling can also be made a day ahead and refrigerated until ready to use. For the ganache, it is best prepared closer to the time of assembly for optimal texture and gloss. This allows you to assemble the cupcakes closer to serving time, ensuring maximum freshness and a delightful presentation.
-
What is the best way to ensure a smooth and creamy custard filling?
The key to a smooth and creamy custard is constant whisking and moderate heat. Ensure that the cornstarch is fully dissolved in the milk before heating to prevent lumps. Whisk continuously while the mixture heats up and thickens, paying close attention to the bottom and sides of the saucepan to prevent scorching, which can impart a bitter flavor. After removing from heat, straining the custard through a fine-mesh sieve before chilling can also help catch any tiny lumps and ensure a silky-smooth consistency.
-
How can I achieve a perfect chocolate ganache that drips beautifully down the sides?
For a beautiful ganache drip, the ratio of chocolate to cream is crucial. Typically, a 1:1 ratio by weight of chocolate to heavy cream works well for a pourable ganache. Ensure the cream is heated to just a simmer and then poured over finely chopped chocolate, allowing it to sit for a minute before stirring gently. If the ganache is too thick, you can thin it slightly with a teaspoon of warm milk or cream; if it’s too thin, let it sit at room temperature for a bit longer to thicken. Applying it when it’s still warm but not hot will encourage it to flow beautifully over the cupcakes.