Cherry Danish
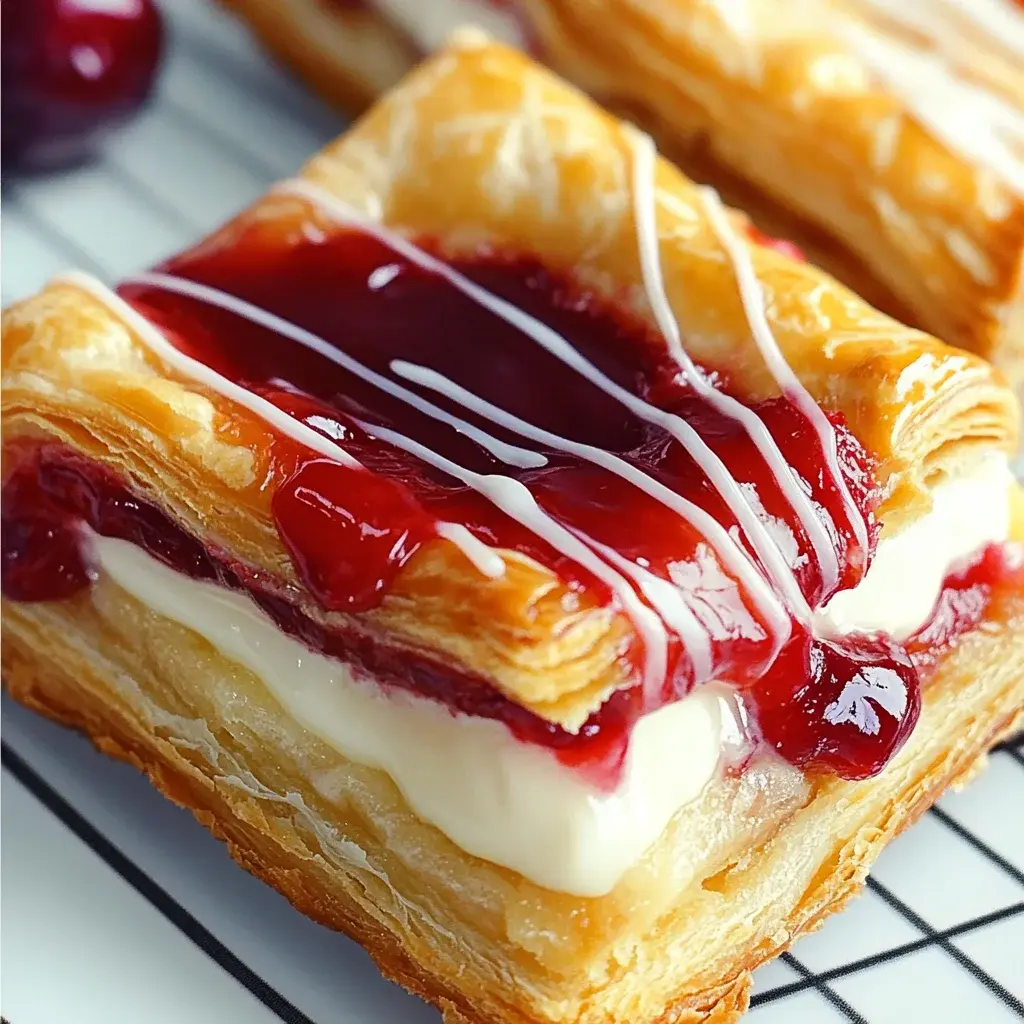
Experience the delightful crunch of flaky pastry embracing a luscious heart of sweet cherries and a smooth, creamy cheese filling. This Cherry Danish recipe promises a moment of pure bliss, perfect for elevating your weekend mornings or surprising guests with an effortless yet elegant treat. Its charm lies in its simplicity and the stunning visual appeal that belies the ease of preparation.
Imagine the aroma filling your kitchen as these golden pastries bake to perfection, offering a delightful balance of sweet and tangy flavors. It’s a versatile indulgence that seamlessly transitions from a special breakfast to a charming dessert, proving that extraordinary treats don’t require hours in the kitchen.
Why You Will Love This Recipe
- Effortless Elegance: Achieve a bakery-worthy presentation with minimal fuss, making any occasion feel special.
- Quick Preparation: From start to finish, these delightful danishes are ready in a flash, perfect for busy mornings or spontaneous cravings.
- Decadent Filling: The harmonious blend of rich cream cheese and vibrant cherry creates a truly irresistible combination.
- Customizable Delight: Easily adapt the fruit filling to suit seasonal availability or personal taste preferences, offering endless variations.
- Crowd-Pleasing Appeal: These pastries are universally loved, appealing to both children and adults with their comforting flavors and satisfying textures.
Ingredients You Need
Crafting these beautiful Cherry Danishes begins with selecting quality ingredients that form the foundation of their exquisite taste and texture. Using fresh, well-handled components ensures that each bite is a testament to simple, delicious baking. The magic truly happens when these few, carefully chosen items come together in harmony.
Cherry Danish
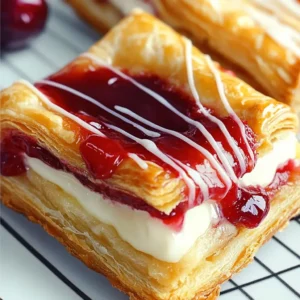
Indulge in the delightful taste of Cherry Danish, a scrumptious pastry that perfectly balances flaky puff pastry with a rich cream cheese filling and sweet cherry topping. This easy-to-make treat is ideal for breakfast or brunch and can double as a charming dessert. With just a few simple steps, you can create an impressive dish that will wow your family and friends. The versatility of this recipe allows you to customize the filling according to your preferences, making it a fantastic choice for any occasion. Whether enjoyed warm from the oven or at room temperature, this Cherry Danish is sure to become a favorite.
- 1 sheet puff pastry (thawed)
- 8 ounces cream cheese (softened)
- 1/4 cup granulated sugar
- 1 1/2 teaspoons vanilla extract (divided)
- 1 can cherry pie filling
- 1 large egg
- 2 tablespoons water
- 1/3 cup powdered sugar
- 2 teaspoons heavy cream
- 1Preheat oven to 400°F (200°C).
- 2Lay out thawed puff pastry on a clean work surface and cut each sheet into 6 rectangles, making a total of 12 rectangles.
- 3Score a ½ inch border around each rectangle, cutting about halfway down into the dough.
- 4Prick several areas in the middle of each rectangle with a fork.
- 5Place pastries onto a baking sheet, about 1 inch apart.
- 6In a medium bowl, beat together cream cheese, granulated sugar, and 1 teaspoon vanilla extract until smooth.
- 7Scoop cream cheese mixture onto the center of each pastry rectangle, avoiding the scored border.
- 8In a small bowl, whisk together egg and water. Brush the scored border of each pastry with this egg wash.
- 9Bake at 400°F for about 18-20 minutes, until puffed up and golden brown.
- 10Remove from oven and let cool slightly on a wire rack.
- 11While still warm, spoon cherry pie filling into the center of each pastry over the cream cheese layer.
- 12In another small bowl, whisk powdered sugar with heavy cream and remaining vanilla extract. Drizzle this frosting over the cooled pastries before serving.
Keywords: Cherry Danish, puff pastry, cream cheese, breakfast pastry, brunch, dessert, easy recipe, German pastry
- puff pastry (thawed): a single sheet, the foundation of our flaky, golden layers.
- cream cheese (softened): eight ounces of creamy richness that provides a luscious base.
- granulated sugar: a quarter cup to sweeten the cream cheese filling to perfection.
- vanilla extract: one and a half teaspoons to add a warm, aromatic depth to the filling and glaze.
- cherry pie filling: one can, the star attraction delivering bursts of sweet and tart cherry goodness.
- large egg: one, lightly beaten with water to create a beautiful, golden egg wash.
- water: two tablespoons, combined with the egg for the essential egg wash.
- powdered sugar: one third cup, to create a simple yet elegant glaze.
- heavy cream: two teaspoons, for a silky smooth consistency in the glaze.
Quantities for each ingredient are detailed within the provided recipe card for your convenience.
Variations
Beyond the classic cherry, these danishes offer a canvas for culinary creativity. Consider transforming them into a delightful dessert by using a mixed berry filling, perhaps featuring raspberries and blueberries for a vibrant, slightly tart counterpoint to the sweet cream cheese. A touch of lemon zest added to the cream cheese mixture before baking would introduce an extra layer of brightness.
For those mindful of carbohydrates, a low-carb adaptation is entirely possible. Instead of traditional puff pastry, you might explore using a pre-made low-carb pastry base or even thin slices of zucchini topped with a sugar-free cream cheese mixture and a judicious amount of low-carb berries like raspberries. This requires careful attention to baking times and moisture control, but the result can be a surprisingly satisfying guilt-free treat.
Another exciting avenue is to infuse the cream cheese filling with complementary flavors. A hint of almond extract can add a sophisticated nutty note that pairs beautifully with cherries. Alternatively, a touch of cinnamon or even a pinch of cardamom can introduce warm, comforting spice, making these danishes perfect for cooler weather or a cozy breakfast experience.
How to Prepare Cherry Danish recipe
Step 1: Preheat the Oven and Prepare Baking Sheets
Begin by preheating your oven to a precise 400 degrees Fahrenheit (200 degrees Celsius). This initial step is crucial for ensuring that the puff pastry bakes up evenly and achieves that desirable golden-brown crispness. A properly preheated oven is the first key to flaky, well-risen pastries.
While the oven heats, prepare your baking sheets by lining them with parchment paper. This simple step prevents sticking and makes for effortless cleanup after your baking endeavors. Ensure you have enough space on the baking sheets for the danishes, allowing about an inch between each one.
Proper oven temperature and sheet preparation are foundational for achieving bakery-quality results at home, setting the stage for success throughout the rest of the recipe. Do not underestimate the importance of these preliminary actions.
Step 2: Preparing the Puff Pastry
Gently unfold the thawed puff pastry sheets onto a clean, lightly floured surface. It is essential that the puff pastry is properly thawed according to package instructions; frozen pastry will not yield the desired flaky texture, and overly warm pastry can become difficult to handle.
Using a sharp knife or a pizza cutter, carefully cut each sheet of puff pastry into six equal rectangular portions. This will yield a total of twelve individual pastry bases for your danishes. Aim for consistent sizing to ensure even baking across all pastries. Precision here contributes significantly to the final presentation.
Handle the pastry gently to avoid overworking it, which can toughen the dough and diminish its flaky qualities. The goal is to maintain the delicate layers that puff pastry is known for. Keep any unused portions of the pastry chilled while you work on the rest.
Step 3: Scoring the Pastry Edges
With the same sharp knife, meticulously score a border approximately half an inch in from the edges of each pastry rectangle. The score lines should be deep enough to cut about halfway through the dough, but not all the way to the bottom. This technique creates a raised edge that will puff up beautifully during baking.
The scored border acts as a containing wall, ensuring that the filling stays neatly within the center of the danish. This visual cue also provides a lovely structural element, adding to the overall aesthetic appeal of the finished pastry. Take your time with this step to achieve clean, precise lines.
This scoring is not merely decorative; it’s functional. It directs the way the pastry bakes, encouraging the outer edges to rise independently of the center, creating a delightful pocket for the delectable filling. The contrast between the puffy crust and the flatter center is a hallmark of a well-made danish.
Step 4: Pricking the Pastry Centers
Once the borders have been scored, it’s time to address the center of each pastry rectangle. Take a fork and gently prick the entire surface of the central area of each pastry multiple times. Ensure you are only pricking the area within the scored border.
This pricking action, known as docking, serves a critical purpose. It allows steam to escape from the dough during baking, which prevents the center of the pastry from puffing up excessively. Without this step, your danishes might develop uneven, balloon-like centers, compromising their structure and ability to hold the filling.
Think of it as creating small vents for the pastry to breathe as it bakes. This ensures that the center remains relatively flat and creates a perfect well for the subsequent addition of the cream cheese and cherry fillings. This step is vital for achieving the characteristic danish shape.
Step 5: Arranging Pastries on Baking Sheets
Carefully transfer the scored and pricked pastry rectangles onto your prepared baking sheets. Arrange them with adequate spacing, ensuring that each danish has at least one inch of clearance from its neighbors. This is vital to allow for proper air circulation around each pastry as it bakes and to prevent them from merging together.
If you are using a single large baking sheet, ensure you do not overcrowd it. It may be more advantageous to use two medium-sized baking sheets to guarantee optimal baking conditions for each danish. Overcrowding can lead to uneven cooking and a less desirable texture for the pastries.
Ensure the pastries are placed on the baking sheet with the scored border facing upwards. This ensures that the scored edges are exposed to the direct heat of the oven, promoting their signature puff and golden color. This arrangement sets the foundation for the final assembly.
Step 6: Crafting the Cream Cheese Filling
In a medium-sized mixing bowl, combine the softened cream cheese, granulated sugar, and one teaspoon of vanilla extract. The cream cheese should be at room temperature to ensure it whips up smoothly without lumps.
Using an electric mixer on medium speed, beat these ingredients together until the mixture is completely smooth, creamy, and well incorporated. Scrape down the sides of the bowl occasionally to ensure all ingredients are thoroughly combined. The resulting mixture should be luxuriously smooth and spreadable.
Once the cream cheese filling is prepared, carefully spoon a portion onto the center of each pastry rectangle, staying within the scored border. Do not spread the filling all the way to the edges, as this will prevent the border from puffing up correctly during baking. Aim for an even distribution of the cream cheese mixture.
Step 7: Applying the Egg Wash
In a small bowl, whisk together one large egg with two tablespoons of water. This simple mixture creates an egg wash, which is essential for achieving a beautiful golden-brown sheen and professional finish on the pastry borders. The water helps to thin the egg slightly, allowing for a more even application.
Using a pastry brush, gently but thoroughly brush the scored border of each pastry rectangle with the egg wash mixture. Be careful not to let the egg wash drip down into the cream cheese filling or onto the parchment paper, as this can affect how the pastry bakes.
The egg wash not only enhances the visual appeal by giving the pastries a lovely glossy, golden hue but also helps them to brown evenly. This step adds that extra touch of polish, making your homemade danishes look as professional as those from a high-end bakery. The sheen it provides is unmistakable.
Step 8: Baking the Pastries to Golden Perfection
Place the prepared baking sheets into the preheated oven. Bake at 400 degrees Fahrenheit (200 degrees Celsius) for approximately 18 to 20 minutes. The exact baking time may vary slightly depending on your oven, so keep a close eye on them.
You are looking for the pastry edges to be beautifully puffed up, golden brown, and crisp. The centers should be set, and the cream cheese filling should be warm and slightly melty. Avoid over-baking, which can lead to dry or burnt pastries. The aroma filling your kitchen at this stage is a delightful reward.
Once they have reached this perfect state of golden deliciousness, carefully remove the baking sheets from the oven. Using a spatula, transfer the baked danishes immediately to a wire cooling rack. This allows air to circulate around them, preventing the bottoms from becoming soggy and ensuring they retain their crisp texture.
Step 9: Adding the Cherry Filling
While the danishes are still warm, but not piping hot, it’s time to add the star of the show: the cherry pie filling. Spoon a generous portion of the cherry pie filling directly onto the center of each danish, over the layer of cream cheese. Ensure you distribute the filling evenly among all the pastries.
You want to fill the center pocket created by the puffed pastry border. Avoid overfilling, as this could cause the filling to spill out during serving or while the danishes are still warm. The goal is a beautiful, contained mound of ruby-red cherries atop the creamy base.
The warmth of the danishes will help to slightly warm the cherry filling, making it more cohesive and enhancing the overall flavor profile. This combination of warm pastry, melted cream cheese, and sweet cherries is absolutely irresistible. This step brings the danish to its full delicious potential.
Step 10: Drizzling with Sweet Glaze
In a separate small bowl, whisk together the powdered sugar, the remaining one teaspoon of vanilla extract, and two teaspoons of heavy cream. Continue whisking until you achieve a smooth, pourable glaze. If the glaze is too thick, add a tiny bit more cream; if too thin, add a bit more powdered sugar.
Once the danishes have cooled slightly on the wire rack, it’s time for the final decorative touch. Using a spoon or a piping bag with a thin tip, drizzle this sweet glaze artfully over the cooled danishes. You can create a zigzag pattern or a more intricate design, depending on your preference.
This sweet glaze adds an extra layer of sweetness and visual appeal, making your Cherry Danishes truly irresistible. It’s the perfect finishing touch that elevates these homemade pastries to a professional standard. Serve and enjoy your delightful homemade Cherry Danish creations!
Pro Tips for Cherry Danish recipe
Mastering the Puff Pastry: Always ensure your puff pastry is fully thawed but still cold when you begin working with it. Cold butter layers within the pastry are what create those signature flaky layers; if the butter melts too early, the pastry will be dense rather than airy. Handle the dough as little as possible to avoid developing the gluten too much, which can result in a tough texture.
Achieving Perfect Borders: When scoring the pastry, use a sharp knife and apply even pressure. The score line should be visible and about halfway through the dough’s thickness. This is what encourages the distinct puffed border that cradles the filling beautifully and prevents the center from puffing up too much.
The Cream Cheese Consistency: For the smoothest cream cheese filling, make sure your cream cheese is truly at room temperature. This allows it to whip up effortlessly with the sugar and vanilla, creating a silky texture that is easy to spread and bakes up beautifully without lumps. A lumpy filling can detract from the overall refined experience of the danish.
Preventing Soggy Bottoms: Baking the danishes on parchment paper and allowing them to cool slightly on a wire rack are crucial steps. The parchment paper prevents direct contact with a potentially cooler baking sheet, and the wire rack allows air circulation underneath, maintaining the crispness of the pastry base. Do not skip these simple yet effective measures.
Filling Balance: While it’s tempting to overfill with cherry goodness, restraint is key. Too much filling can lead to spills during baking, making a mess and potentially causing the pastry to become soggy. Aim for a generous but contained amount that complements the cream cheese without overwhelming it.
Serving Suggestions for Cherry Danish recipe
Decoration
Elevate the visual appeal of your Cherry Danishes with simple yet elegant decorative touches. A light dusting of powdered sugar provides a classic, snowy finish that enhances the vibrant red of the cherry filling. Alternatively, a delicate drizzle of a simple glaze made from powdered sugar and a touch of milk or lemon juice adds a touch of sophistication and extra sweetness.
For a more elaborate presentation, consider adding a few fresh berries, such as raspberries or blueberries, around the cherry filling just before serving. A small sprig of mint can also add a pop of color and a refreshing aroma. These small additions transform a simple pastry into a show-stopping dessert or breakfast item.
The goal is to complement the existing flavors and colors without overpowering the danish itself. A light hand with decoration often yields the most appealing results, allowing the natural beauty of the pastry and filling to shine through.
Side Dishes
Cherry Danishes pair wonderfully with a variety of side dishes that balance their sweetness and richness. A dollop of breakfast-style Greek yogurt offers a tangy, creamy contrast that cuts through the sweetness beautifully. Adding a sprinkle of granola to the yogurt provides a delightful textural crunch.
A simple, refreshing fruit salad made with seasonal fruits like melon, grapes, and citrus segments serves as a light and healthy accompaniment. For a more substantial meal, consider serving the danishes alongside lightly scrambled eggs or a small portion of crispy bacon. The savory notes provide a pleasant counterpoint to the sweet pastry.
For a beverage pairing, a steaming cup of freshly brewed coffee or a delicate herbal tea offers a comforting and classic choice. The warmth and subtle bitterness of coffee, or the fragrant lightness of tea, complement the pastry without competing with its flavors. A smooth drink is always a good idea.
Creative Serving Ideas
Transform your Cherry Danishes into a delightful brunch centerpiece by arranging them attractively on a tiered stand. Serve them alongside a selection of other pastries and fruits for a truly decadent spread that guests will adore. This creates an abundant and inviting display, perfect for special occasions.
Consider serving them warm, fresh from the oven, with a scoop of vanilla bean ice cream or a swirl of freshly whipped cream for an indulgent dessert experience. The contrast of warm, flaky pastry with cold, creamy ice cream is simply divine. This elevates the danish into a more formal dessert option.
Another creative idea is to offer a “Danish Bar” where guests can customize their own with various toppings like chopped nuts, different fruit preserves, or even a drizzle of chocolate sauce. This interactive approach adds a fun element and allows everyone to tailor the danish to their personal taste. It’s a fantastic way to engage your guests with the food.
Preparation & Storage
Storing Leftovers
Should you be fortunate enough to have any Cherry Danishes remaining, proper storage is key to preserving their delightful texture. Place any cooled leftovers in an airtight container, ensuring a snug fit to prevent them from drying out. Avoid stacking them too tightly, as this can cause them to stick together or become misshapen.
Store the airtight container in a cool, dry place at room temperature for up to two days. If the ambient temperature is particularly warm, or if you plan to keep them for longer than two days, it is advisable to store them in the refrigerator. Refrigeration can help maintain their freshness for a slightly extended period.
It is important to note that while refrigeration can extend shelf life, it may slightly affect the crispness of the puff pastry. For optimal enjoyment, it’s best to consume them within a day or two of baking.
Freezing
Cherry Danishes freeze exceptionally well, making them a convenient option for future enjoyment. To freeze, ensure the danishes have cooled completely to room temperature. This step is vital to prevent condensation from forming and making the pastry soggy during the freezing process.
Once cooled, arrange the danishes in a single layer on a baking sheet lined with parchment paper. Place the baking sheet in the freezer for about 1 to 2 hours, or until the danishes are firm and frozen solid. This flash-freezing technique prevents them from sticking together when packed.
After they are frozen solid, carefully transfer the danishes into a freezer-safe airtight container or a heavy-duty freezer bag. Remove as much air as possible from the bag before sealing. Properly frozen, Cherry Danishes can be stored for up to 2 months, retaining their delicious flavor and texture.
Reheating
To best enjoy your frozen or previously stored Cherry Danishes, reheating is recommended. For the most satisfying result, preheat your oven to 350 degrees Fahrenheit (175 degrees Celsius). Place the danishes directly on a baking sheet or a small oven-safe dish.
Bake for approximately 10 to 15 minutes, or until they are heated through and the pastry has regained some of its crispness. Keep a watchful eye to prevent them from burning, as oven temperatures can vary. This method helps to revive the flaky texture beautifully.
If you need a quicker option, a microwave can be used, but with caution. Heat one danish at a time on medium power for about 20 to 30 seconds. Be careful not to overheat, as this can make the pastry tough and rubbery. For a single serving that needs a quick warm-up, the microwave is functional but less ideal for restoring crispness.
Frequently Asked Questions
-
What is the ideal way to achieve the flakiest puff pastry for my Cherry Danish?
Achieving superior flakiness in your puff pastry for Cherry Danishes relies on a few key principles. Firstly, ensure your puff pastry is always kept cold until the very moment it is ready to be baked; this maintains the integrity of the butter layers. When handling the dough, work quickly and with minimal pressure to avoid overworking it, which can toughen the gluten structure. Scoring the pastry accurately, as detailed in the preparation steps, is also crucial, as it allows steam to escape in a controlled manner, encouraging the distinct puff and separation of layers. Finally, baking at the correct high temperature ensures a rapid rise and sets the flaky layers before they have a chance to become soggy.
-
Can I substitute fresh cherries for the canned cherry pie filling in this recipe? If so, how should I prepare them?
Absolutely, you can substitute fresh cherries for canned pie filling, and it can add a wonderfully vibrant, homemade touch to your danishes. To prepare fresh cherries, you’ll want to pit about 2 cups of fresh cherries – sweet or tart varieties work well, depending on your preference. In a saucepan, combine the pitted cherries with 1/4 cup of sugar (adjust to taste based on the sweetness of your cherries) and 1 tablespoon of cornstarch mixed with 2 tablespoons of water to create a slurry. Cook this mixture over medium heat, stirring constantly, until the cherries soften and the filling thickens to a consistency similar to jam. Allow this fresh cherry filling to cool completely before using it in the danishes.
-
How far in advance can I prepare the components of the Cherry Danish recipe, and how should they be stored?
You can prepare several components of the Cherry Danish in advance to streamline the final assembly. The cream cheese filling can be made a day ahead and stored in an airtight container in the refrigerator; just ensure it’s brought back to room temperature and stirred well before using. The egg wash can also be prepared a few hours ahead and kept refrigerated. If you are using fresh cherries, preparing the filling a day in advance and storing it chilled in an airtight container is also feasible. However, the puff pastry should ideally be thawed only when you are ready to assemble the danishes, as it is best handled when cold and fresh. Assembled, unbaked danishes can be refrigerated for a few hours but are best baked soon after assembly to ensure the pastry remains as crisp as possible.