Lemon Curd Cookies Recipe: Irresistibly Tangy & Soft Delight!

This Lemon Curd Cookies Recipe transforms ordinary butter cookies into bright little bites of sunshine, offering a perfect balance of sweet cookie base and tangy lemon filling.
They are an irresistible treat that disappears from my cookie jar faster than I can say “citrus,” becoming a go-to for everything from afternoon tea to holiday cookie exchanges.
Why You Will Love This Recipe
- Perfect Balance of Sweet and Tangy: These cookies brilliantly combine a buttery, melt-in-your-mouth cookie base with a bright, zingy lemon curd center, offering a delightful sensory experience without being overwhelmingly sweet.
- Easy Make-Ahead Option: The dough can be prepared up to three days in advance and chilled, and the lemon curd can also be made ahead or purchased, providing excellent flexibility for busy bakers and last-minute needs.
- Ideal for Cookie Exchanges: Their beautiful appearance and delightful flavor make them a standout choice for any cookie swap, ensuring you’ll receive plenty of compliments and recipe requests.
- Versatile Flavor Profile: While lemon is classic, this recipe provides a fantastic base for creative variations like lime, orange, or even adding a hint of floral or tropical notes for a unique twist.
- Elegant Presentation: With simple garnishes like powdered sugar or fresh mint, these cookies can be elevated for special occasions, making them perfect for impressing guests or enhancing a dessert spread.
Ingredients You Need
The quality of your ingredients plays a pivotal role in achieving the perfect texture and vibrant flavor of these lemon curd cookies. Using fresh, high-quality butter and zest will truly elevate the taste. Always opt for fresh lemon juice for that authentic tanginess.
Lemon Curd Cookies
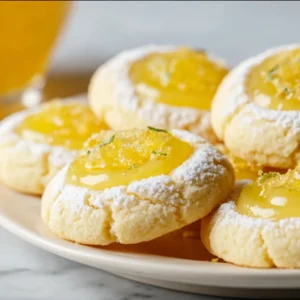
These Lemon Curd Cookies transform ordinary butter cookies into bright little bites of sunshine. The perfect balance of sweet cookie base and tangy lemon filling creates an irresistible treat.
- For the Cookie Dough:
- 1 cup (2 sticks) unsalted butter, softened
- 1/2 cup granulated sugar
- 1 large egg yolk
- 1 teaspoon vanilla extract
- 2 1/4 cups all-purpose flour
- 1/4 teaspoon salt
- For the Lemon Curd Filling (or use store-bought):
- 1/2 cup granulated sugar
- 1/4 cup fresh lemon juice
- 1 tablespoon lemon zest
- 2 large eggs
- 1/4 cup (1/2 stick) unsalted butter, cut into pieces
- 1Make the Cookie Dough: In a large bowl, cream together the softened butter and granulated sugar until light and fluffy. Beat in the egg yolk and vanilla extract.
- 2In a separate bowl, whisk together the flour and salt. Gradually add the dry ingredients to the wet ingredients, mixing until just combined. Do not overmix.
- 3Divide the dough in half, flatten each half into a disc, wrap in plastic wrap, and refrigerate for at least 30 minutes, or up to 3 days.
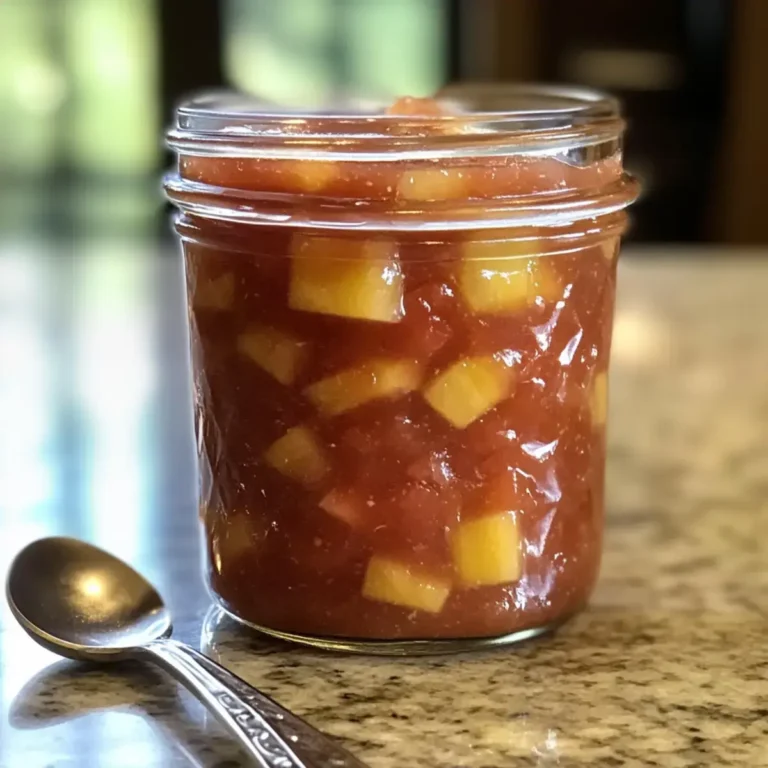
- 4Prepare the Lemon Curd (if making from scratch): In a medium saucepan, whisk together the sugar, lemon juice, lemon zest, and eggs.
- 5Cook over low heat, stirring constantly with a whisk, until the mixture thickens enough to coat the back of a spoon (about 8-10 minutes). Do not boil.
- 6Remove from heat and whisk in the butter pieces, one at a time, until fully melted and incorporated.
- 7Strain the lemon curd through a fine-mesh sieve into a bowl. Cover the surface directly with plastic wrap to prevent a skin from forming and refrigerate until chilled and thickened.
- 8Assemble and Bake the Cookies: Preheat your oven to 350°F (175°C). Line baking sheets with parchment paper.
- 9On a lightly floured surface, roll out the chilled dough to about 1/4-inch thickness. Use a round cookie cutter (about 2-3 inches in diameter) to cut out cookies.
- 10Place the cookies on the prepared baking sheets, about 1 inch apart. Use the back of a measuring teaspoon or your thumb to gently press an indentation into the center of each cookie, creating a well for the filling.
- 11Bake for 10-12 minutes, or until the edges are lightly golden brown and the centers are set but still pale. Do not overbake.
- 12Let the cookies cool on the baking sheets for 5 minutes before transferring them to a wire rack to cool completely.
- 13Fill the Cookies: Once the cookies are completely cool, spoon or pipe the chilled lemon curd into the indentations.
- 14Store the cookies in an airtight container in the refrigerator for up to 3 days.
Keywords: lemon curd cookies, lemon cookies, butter cookies, shortbread, tangy, sweet, citrus, baking, dessert, vegetarian
- all-purpose flour: a foundational element providing structure to the cookie dough
- unsalted butter, softened: the key to that rich, buttery flavor and tender texture
- granulated sugar: for sweetness and to help with the cookies’ crispness
- egg yolk: adds richness and helps bind the dough
- vanilla extract: enhances the overall flavor profile
- salt: balances the sweetness and brings out other flavors
- lemon curd: the star filling, providing a bright, tangy contrast
Quantities for each ingredient can be found within the recipe card provided above.
Variations
Lime Curd Twist: Substitute the lemon curd with a homemade or store-bought lime curd for a delightful variation. The sharp, zesty notes of lime offer a slightly different but equally captivating citrus punch that beautifully complements the buttery cookie. This twist is perfect for those who enjoy a more intense citrus flavor. It’s a refreshing change that keeps the cookie intriguing.
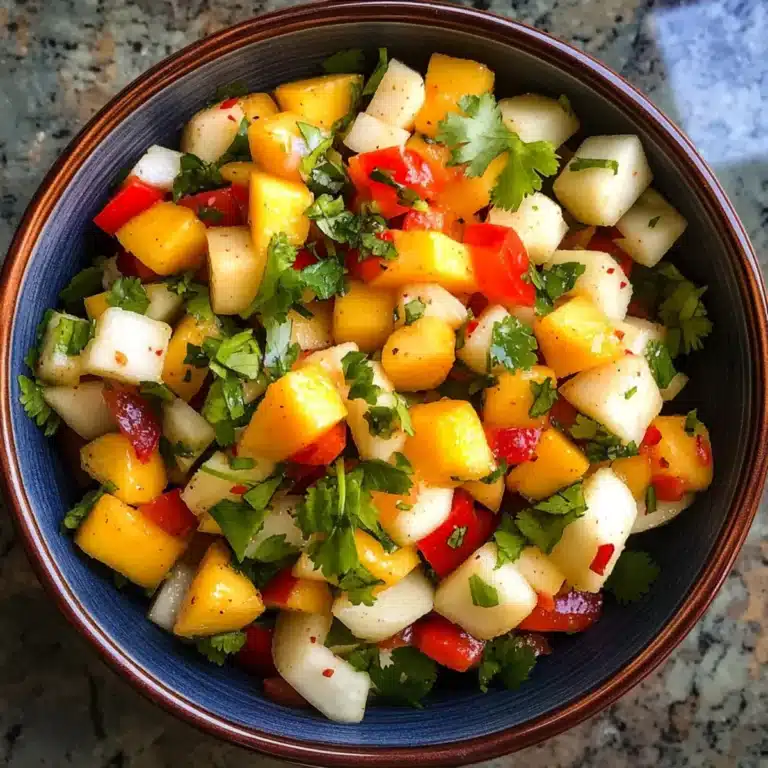
Tropical Mango Infusion: For a taste of the tropics, gently fold a tablespoon or two of finely diced, ripe mango into your lemon curd before filling the cookies. This adds a subtle sweetness and a beautiful fruity undertone that pairs wonderfully with the bright lemon. The small pieces of mango provide delightful bursts of flavor and a lovely texture contrast. It creates a cookie that feels like a vacation in every bite.
Lavender Lemon Delight: Incorporate a subtle floral aroma by adding about half a teaspoon of culinary lavender buds to your cookie dough before chilling. The fragrant lavender notes don’t overpower the lemon but rather enhance its brightness, creating a sophisticated and unique flavor combination. This variation is particularly elegant and suitable for afternoon tea or special occasions. The delicate aroma adds a layer of complexity that surprises and delights. It transforms the cookie into something truly special and memorable.
How to Prepare Lemon Curd Cookies Recipe
Step 1: Creaming the Butter and Sugar
Begin by ensuring your unsalted butter is at the perfect room temperature – softened but not melted. This is crucial for achieving a light and fluffy texture when creaming. In a large mixing bowl, combine the softened butter and granulated sugar. Use an electric mixer, either a stand mixer with a paddle attachment or a hand mixer, to beat these two ingredients together.
Beat them on medium speed for about 3 to 5 minutes, until the mixture becomes pale yellow and visibly fluffy. This process, known as creaming, incorporates air into the dough, which is essential for the cookies’ tender crumb. Scrape down the sides of the bowl periodically to ensure all the butter and sugar are thoroughly incorporated. The goal is a light, aerated mixture that will serve as the base for your delicious cookies.
Step 2: Incorporating Wet Ingredients
Once the butter and sugar are beautifully creamed, it’s time to add the other wet ingredients. Add the egg yolk and vanilla extract to the creamed mixture. The egg yolk will contribute to the richness and a slightly chewy texture, while the vanilla extract provides that classic comforting aroma and flavor. Beat these ingredients in on low speed, just until they are fully combined with the butter and sugar.
Be careful not to overmix at this stage, as overmixing can develop the gluten in the flour too much, leading to tougher cookies. Scrape down the sides of the bowl once more to ensure everything is well integrated. The mixture should look smooth and homogeneous, ready for the dry ingredients to be introduced. This step ensures all the foundational flavors are well established before proceeding to the structure of the cookie.
Step 3: Adding Dry Ingredients and Forming Dough
In a separate medium bowl, whisk together the all-purpose flour and salt. This ensures the salt is evenly distributed throughout the flour, preventing any salty pockets in your cookies. Gradually add the dry ingredients to the wet ingredients in the main mixing bowl.
Mix on low speed or by hand using a spatula until just combined. It is very important not to overmix the dough once the flour is added. Overmixing develops gluten, which can result in tough, dense cookies instead of the desired tender, crumbly texture. The dough will be soft and slightly sticky at this point. Ensure all the flour is incorporated, but stop as soon as there are no dry streaks visible.
Step 4: Chilling the Dough
Once the dough is formed, wrap it tightly in plastic wrap. Flatten it into a disc shape before wrapping; this makes it easier to roll out later and ensures even chilling. Refrigerate the dough for at least 30 minutes, or up to 2 days. Chilling the dough is a critical step that prevents the cookies from spreading too much during baking.
It solidifies the butter within the dough, which means it will melt more slowly in the oven. A well-chilled dough is easier to handle and shape, leading to more uniform cookies. If you plan to bake the cookies over several days, you can divide the dough into smaller portions before chilling. This makes it more convenient to bake just a few cookies at a time. Don’t skip this step for the best cookie structure and texture.
Step 5: Shaping and Baking
Preheat your oven to 350°F (175°C) and line baking sheets with parchment paper. Remove the chilled dough from the refrigerator and, on a lightly floured surface, roll it out to about ¼ inch thickness. Use a round cookie cutter, approximately 2 inches in diameter, to cut out circles. Reroll scraps gently to avoid overworking the dough.
Place the cookie circles onto the prepared baking sheets, leaving about 1 inch between them. Using the back of a small measuring spoon (like a ½ teaspoon), gently press an indentation into the center of each cookie. This creates a well for the lemon curd. If the edges crack slightly, gently press them back together with your fingers. Bake for 10-12 minutes, or until the edges are lightly golden and the centers are set but still pale. Do not overbake.
Step 6: Filling with Lemon Curd and Finishing
Allow the baked cookies to cool on the baking sheets for 5 minutes before transferring them to a wire rack to cool completely. This allows them to firm up properly before handling. Once the cookies are entirely cool, spoon or pipe a small amount of lemon curd into the indentation of each cookie. Be careful not to overfill, as the curd can spread and seep out.
You can use a small spoon, a piping bag with a small round tip, or even a Ziploc bag with the corner snipped off for this. If your lemon curd is a little runny, you might want to chill it for about 30 minutes before filling. For an extra touch of elegance, you can dust the cookies lightly with powdered sugar just before serving. These cookies are best enjoyed within a few days of baking.
Pro Tips for Lemon Curd Cookies Recipe
Chill Your Dough Thoroughly: This cannot be stressed enough. Proper chilling solidifies the butter, preventing excessive spreading and ensuring your cookies maintain their shape and develop a tender texture. A minimum of 30 minutes is essential, but chilling for an hour or even overnight can yield even better results for shaping and baking. Ensure the dough is well-wrapped to prevent drying out in the refrigerator. This step is fundamental for a successful bake.
Use High-Quality Lemon Curd: While homemade lemon curd is divine, a good quality store-bought option can save time without compromising flavor. Look for a curd made with real lemon juice and zest, with a thick, spoonable consistency. The quality of your curd directly impacts the final taste and appearance of the cookies, so choose wisely. A superior curd ensures a vibrant, tangy filling that perfectly balances the sweet cookie.
Don’t Overbake the Cookies: The key to a tender cookie is to remove them from the oven when they are just set. They should appear pale with only a hint of golden brown around the edges. The residual heat will continue to cook them slightly on the baking sheet. Overbaking will result in dry, crisp cookies that detract from the delightful soft texture you’re aiming for. Watch them closely during the last few minutes of baking.
Gentle Indentation is Key: When creating the well for the lemon curd, press gently but firmly with the back of a measuring spoon or your thumb. You want to create a distinct cavity without breaking through the bottom of the cookie. If the edges of the dough crack, a gentle press with your fingertips can easily mend them before baking. This ensures the curd stays neatly contained within the cookie.
Room Temperature Serving: For the best flavor and texture, allow the filled cookies to come to room temperature for about 15-20 minutes before serving, especially if they have been refrigerated. This allows the butter in the cookie to soften slightly, enhancing its melt-in-your-mouth quality, and the lemon curd to reach its optimal flavor profile. Serving them too cold can mute the flavors.
Serving Suggestions for Lemon Curd Cookies Recipe
Decoration
A simple dusting of powdered sugar using a fine-mesh sieve creates an elegant, snowy effect that complements the bright yellow of the lemon curd. For a more festive look, especially during holidays, a light drizzle of white chocolate ganache or edible glitter can add sparkle and visual appeal. A tiny, fresh mint leaf or a small candied lemon peel placed gently on top of the curd adds a touch of color and a hint of fresh aroma. These small decorative touches elevate the cookie from simple to sophisticated.
Side Dishes
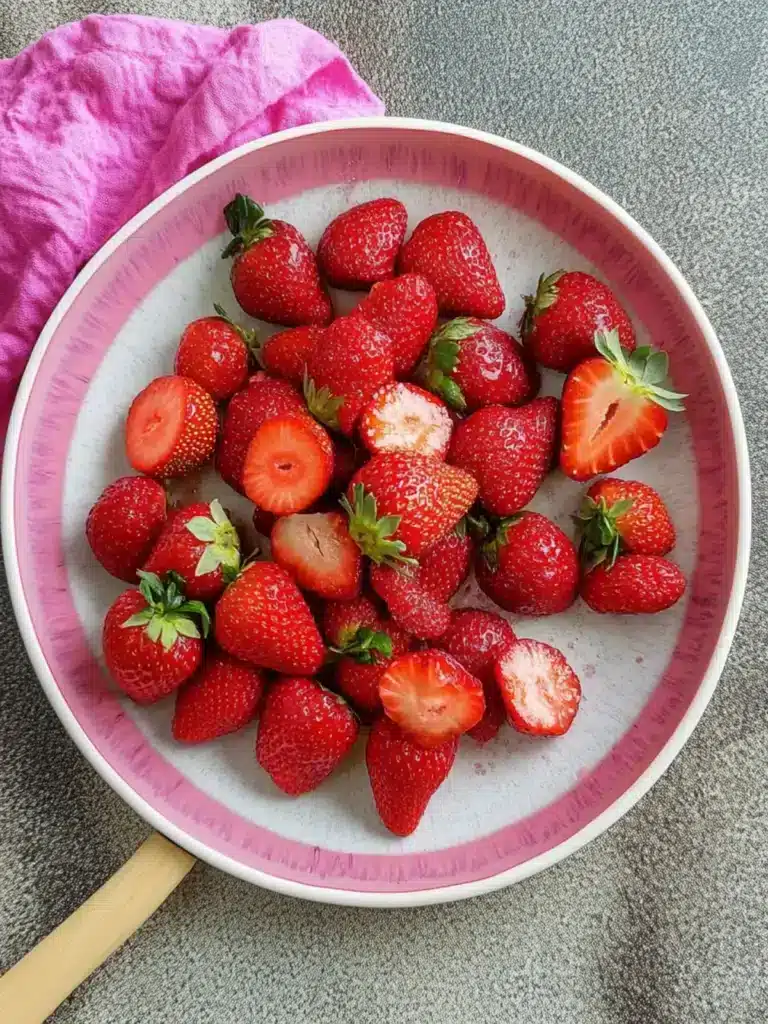
These lemon curd cookies pair wonderfully with a cup of Earl Grey tea, whose bergamot notes enhance the citrus flavor. For a more substantial pairing, consider serving them alongside fresh berries such as raspberries or blueberries, which offer a complementary tartness and vibrant color. They also make a delightful end to a light lunch, perhaps following a salad or a lemon-themed entrée. Their bright flavor makes them a refreshing contrast to richer dishes.
Creative Serving Ideas
Arrange these cookies on a tiered stand for an elegant afternoon tea presentation, interspersed with finger sandwiches or scones. Create a delightful dessert board by combining them with other small treats like mini berry tarts, dark chocolate truffles, and fresh fruit. For a whimsical touch, serve them in small paper cups or decorative tins as favors for parties or baby showers. They are also a charming addition to breakfast or brunch spreads, adding a sweet and zesty note to the morning. Consider serving them alongside a refreshing glass of homemade lemonade for a complete citrus experience.
Preparation & Storage
Storing Leftovers
To keep your lemon curd cookies fresh and delicious, store them in an airtight container at room temperature for up to 2 days. It’s best to place a piece of parchment paper between layers to prevent the cookies from sticking together, especially if the curd is particularly moist. If you live in a warm climate or if the weather is humid, it’s advisable to store them in the refrigerator to prevent the curd from becoming too soft or the cookies from becoming stale quickly. Always ensure the container is sealed tightly to maintain optimal freshness.
Freezing
For longer storage, the un-filled baked cookie shells freeze exceptionally well. Once completely cooled, wrap individual cookies or small batches tightly in plastic wrap, then place them in a freezer-safe bag or airtight container. They can be frozen for up to 3 months. To serve, thaw the cookie shells at room temperature for about 15-20 minutes, then fill them with fresh lemon curd just before serving. Freezing the filled cookies is not recommended as the curd can become watery upon thawing.
Reheating
These cookies are best enjoyed at room temperature or slightly chilled, as reheating can alter the texture of both the cookie and the curd. If the cookies have been refrigerated, take them out about 20-30 minutes before serving to allow them to come to room temperature. This is crucial for the cookie to regain its tender, melt-in-your-mouth quality and for the lemon curd to develop its full, bright flavor. Reheating is generally not recommended for optimal taste and texture.
Frequently Asked Questions
- Can I make the lemon curd from scratch, and what are the key points for success?
Absolutely! Making lemon curd from scratch involves whisking together egg yolks, sugar, lemon juice, and lemon zest in a saucepan. Cook this mixture over low heat, stirring constantly, until it thickens enough to coat the back of a spoon. Straining the curd through a fine-mesh sieve is a crucial step for achieving a silky-smooth texture, free from any bits of zest or cooked egg. Using fresh, good-quality lemons will yield the brightest, most vibrant flavor. Ensure you don’t let the mixture boil vigorously, as this can scramble the eggs and ruin the smooth consistency. - What is the best way to ensure the lemon curd doesn’t soak into the cookie base and make it soggy?
To prevent a soggy cookie base, ensure your cookies are completely cooled before filling them with lemon curd. The curd itself should be relatively thick; if it seems too runny, chilling it for about 30 minutes in the refrigerator before use can help. Another effective method is to fill the cookies just a few hours before you plan to serve them, rather than days in advance. Storing the filled cookies in an airtight container in the refrigerator also helps maintain their crispness, as the cooler temperature firms up the curd and slows down moisture migration. - Can I use different types of citrus for the curd filling, and how would that affect the cookies?
Yes, you can definitely use other citrus fruits for the curd! Lime curd offers a sharper, more intense tartness that is incredibly refreshing and pairs beautifully with the buttery cookie. Orange curd will provide a sweeter, more mellow citrus flavor with floral undertones, creating a gentler contrast to the cookie base. Grapefruit curd offers a sophisticated balance of tartness and slight bitterness, giving the cookies a more grown-up profile. Each citrus will bring its unique aroma and flavor, transforming the cookie into a distinctly different, yet equally delicious, treat. Experimenting with these variations allows for endless possibilities and caters to a wider range of preferences.
This lemon curd cookie recipe is a testament to the simple joy of a perfectly balanced sweet and tangy treat. The buttery, tender cookie dough forms the ideal vessel for the bright, zesty lemon curd, creating a delightful bite that’s both comforting and invigorating. They are perfect for any occasion, from a casual afternoon tea to a more elaborate dessert spread, and are sure to become a favorite in your baking repertoire. These little sunshine bites are a wonderful way to brighten any day.
For more delightful baking inspiration, be sure to explore our Pinterest boards and discover other delicious recipes from dessert categories.