Ultimate Christmas Cookie Cake
The holiday season is a magical time, filled with twinkling lights, joyful gatherings, and the irresistible aroma of festive baking.
If you’re looking to add a truly special and dazzling treat to your celebrations this year, the Christmas Cookie Cake is an absolute showstopper that perfectly captures the spirit of Christmas in every delicious bite.
Why You Will Love This Recipe
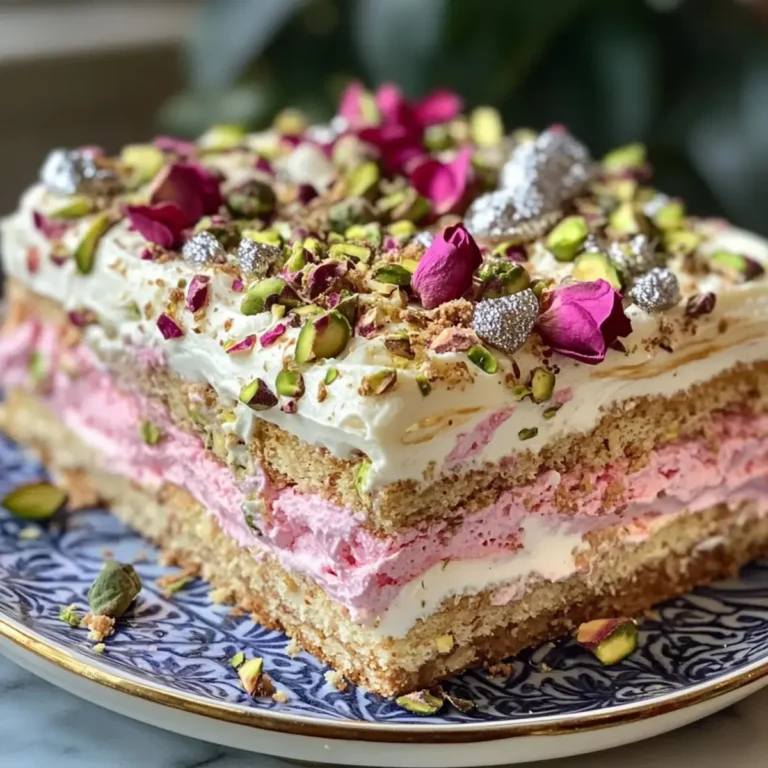
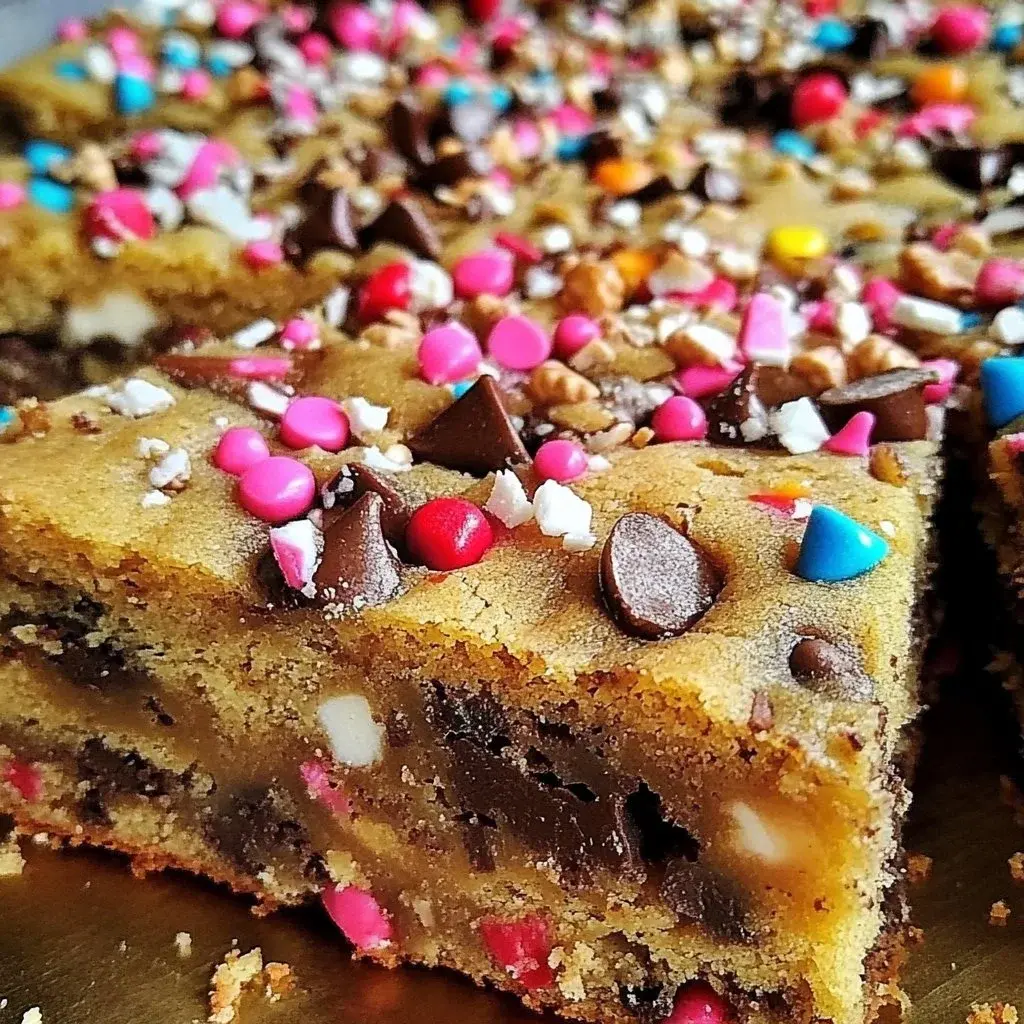
- Festive Fun: This cake is a vibrant explosion of holiday cheer, with colorful sprinkles and rich chocolate chips that are visually as delightful as they are delicious.
- Easy to Bake: Designed for simplicity, this recipe uses straightforward steps, making it an ideal project for bakers of all skill levels, ensuring a stress-free holiday baking experience.
- Crowd-Pleasing Flavors: It combines the beloved tastes of classic Christmas cookies into a single, shareable dessert, guaranteeing smiles and satisfaction for all your guests, young and old.
- Highly Customizable: Feel free to adapt this recipe with your favorite holiday additions, from extra spices to different types of chocolate or nuts, creating a unique treat tailored to your preferences.
- Perfect for Sharing: Its generous size makes it the ultimate dessert for parties and family get-togethers, allowing everyone to enjoy a generous slice of holiday happiness.
Ingredients You Need
Crafting this delightful Christmas Cookie Cake begins with selecting high-quality ingredients that will ensure a wonderfully textured and flavorful result. Using fresh, room-temperature components, especially for butter and eggs, is crucial for achieving that perfect, tender crumb. These simple yet essential elements are the foundation of a truly memorable holiday dessert that everyone will rave about.
Christmas Cookie Cake

A festive dessert that combines traditional Christmas cookie flavors into a delightful and easy-to-make cake, perfect for holiday gatherings. This recipe beautifully merges the classic flavors of traditional Christmas cookies into a single, scrumptious cake. Imagine biting into a soft, buttery slice studded with chocolate chips and vibrant sprinkles that mirror the joy of holiday celebrations.
- 2 1/2 cups all-purpose flour
- 1 teaspoon baking soda
- 1/2 teaspoon salt
- 1 cup unsalted butter, softened
- 1 cup brown sugar, packed
- 1/2 cup granulated sugar
- 2 large eggs
- 1 teaspoon vanilla extract
- 2 cups chocolate chips
- 1/2 cup festive sprinkles
- 1Gather all ingredients and preheat your oven to 350°F (175°C). Grease your 9×13 inch baking pan.
- 2In a medium-sized bowl, whisk together the flour, baking soda, and salt.
- 3In a large mixing bowl, cream the softened butter, brown sugar, and granulated sugar until the mixture is light and fluffy.
- 4Beat in the eggs one at a time, ensuring each is fully incorporated before adding the next. Stir in the vanilla extract.
- 5Gradually mix in the dry ingredients until just combined.
- 6Gently fold in the chocolate chips and festive sprinkles.
- 7Spread the batter evenly in the prepared baking pan, ensuring it reaches the corners for even baking.
- 8Place the pan in the oven and bake for 25–30 minutes, or until a toothpick inserted into the center comes out clean.
- 9Once baked, let the cake cool in the pan for at least 15 minutes before transferring it to a wire rack. Allow it to cool completely before slicing.
- 10Slice your cake into squares, decorate as desired, and serve to your eager guests.
Keywords: Baking, Christmas Cookie Cake, Easy Dessert, Festive Dessert, Holiday Cake, Chocolate Chip Cake, Sprinkles, Holiday Baking
- all-purpose flour: the base of our delightful cake, providing structure and a tender crumb
- baking soda: our leavening agent, ensuring a light and fluffy texture
- salt: a subtle enhancer that balances the sweetness and brings out other flavors
- unsalted butter, softened: provides richness, tenderness, and a delicious buttery base
- brown sugar, packed: adds moisture, a chewy texture, and a wonderful caramel-like depth
- granulated sugar: contributes to sweetness and helps create a delicate crispness on the edges
- large eggs: bind the ingredients together and add richness and structure
- vanilla extract: a classic aromatic enhancer that complements all the other flavors beautifully
- chocolate chips: pockets of melted goodness that add bursts of decadent chocolate throughout
- festive sprinkles: the crowning jewels that bring vibrant color and a touch of playful magic
The precise quantities for each ingredient are detailed within the comprehensive recipe card for your convenience.
Variations
To make your Christmas Cookie Cake even more unique, consider a few delightful variations that cater to different tastes and dietary needs. A vegan adaptation is surprisingly simple, requiring only a few mindful swaps to achieve the same delightful texture and flavor profile.
For those following a low-carb lifestyle, substituting traditional flour with almond flour or coconut flour, and using a sugar substitute, can create a guilt-free indulgence that doesn’t compromise on festive cheer.
You could also explore adding seasonal fruits like dried cranberries or cherries for a tart counterpoint to the sweetness, or incorporating a hint of peppermint extract for a refreshing twist that evokes the essence of a winter wonderland.
How to Prepare Christmas Cookie Cake
The journey to creating your spectacular Christmas Cookie Cake begins with a few fundamental preparations that set the stage for baking success. Ensuring all your ingredients are measured accurately and at the correct temperature is the first crucial step, paving the way for a perfectly textured and evenly baked treat.
Preheating your oven to the specified temperature is also essential; a properly heated oven guarantees that the cake bakes uniformly from the moment it enters, preventing any undercooked centers or overly browned edges. Preparing your baking pan properly, whether by greasing and flouring or lining it with parchment paper, is a non-negotiable step that ensures your beautiful creation releases cleanly, maintaining its structural integrity and aesthetic appeal.
Step 1: Gather and Prepare Your Ingredients
The foundation of any successful baking endeavor lies in meticulous preparation, and this Christmas Cookie Cake is no exception. Before you even think about mixing, take a moment to lay out all your required ingredients. This systematic approach ensures that you don’t find yourself mid-mix realizing a key component is missing or hasn’t been brought to the correct temperature.
Specifically, ensure your unsalted butter is softened to room temperature – it should yield slightly to gentle pressure but not be melted. Similarly, your eggs should also be at room temperature; this helps them emulsify better with the fats and sugars, creating a smoother, more cohesive batter. Weighing or carefully measuring your flour is also paramount; using too much can result in a dry, dense cake, while too little can lead to a crumbly texture.
Don’t forget to preheat your oven to 350°F (175°C) during this stage. A properly preheated oven is critical for even baking. You can also prepare your 9×13 inch baking pan by generously greasing it with butter or cooking spray and then lightly dusting it with flour, tapping out any excess. This thorough preparation guarantees that your finished cake will slide out of the pan effortlessly.
Step 2: Combine the Dry Ingredients
In a medium-sized mixing bowl, you will begin by harmoniously combining the dry components of your Christmas Cookie Cake. This step might seem simple, but it plays a vital role in ensuring consistent distribution of leavening agents and flavor enhancers throughout the final cake.
Using a whisk is the ideal tool here, as it aerates the flour and thoroughly incorporates the baking soda and salt. This thorough blending prevents any concentrated pockets of leavening, which could lead to uneven rising or an unpleasant texture. The salt, while subtle, is crucial for balancing the sweetness and elevating the overall flavor profile of the cake, ensuring it’s not just sweet but also complex and satisfying.
Once whisked together until they are uniformly blended and appear slightly fluffy, set this bowl of dry ingredients aside. This prepared mixture will be incorporated into the wet ingredients in a later, carefully timed step, contributing to the cake’s perfect structure and delightful crumb.
Step 3: Cream the Butter and Sugars
This is where the magic of texture truly begins, as you introduce the softened butter and both types of sugar to a large mixing bowl. Using an electric mixer, whether a stand mixer with a paddle attachment or a handheld version, is highly recommended for this stage. You’ll want to beat the butter and sugars together until the mixture becomes light, fluffy, and noticeably pale in color.
This creaming process is fundamental; it incorporates tiny air bubbles into the mixture, which will expand during baking, contributing significantly to the cake’s tender and airy crumb. Be patient here; this can take anywhere from 3 to 5 minutes of consistent mixing. The resulting creamy texture is a hallmark of a well-made cake, providing a delightful mouthfeel that is both rich and delicate.
Scraping down the sides and bottom of the bowl periodically with a spatula is essential to ensure that all the butter and sugar are evenly creamed. This thoroughness guarantees a consistent texture throughout the entire cake, avoiding any pockets of unmixed ingredients that could lead to a less-than-perfect outcome.
Step 4: Incorporate Eggs and Vanilla
Once your butter and sugar mixture has achieved that perfect, light, and fluffy consistency, it’s time to introduce the eggs and vanilla extract. Add the large eggs one at a time, beating well after each addition until each egg is completely incorporated into the creamed mixture.
This gradual addition helps to maintain the emulsion that you’ve worked so hard to create during the creaming stage, preventing the mixture from separating or becoming greasy. If the mixture appears to curdle slightly, don’t panic; this is sometimes normal, and it will likely come back together when the dry ingredients are added. After the eggs are fully integrated, stir in the pure vanilla extract.
The vanilla is more than just a pleasant aroma; it’s a flavor enhancer that rounds out the sweetness of the sugars and butter, adding a subtle warmth and complexity. Ensure it’s thoroughly mixed in, so its delightful notes are evenly distributed throughout the batter, promising a wonderfully fragrant and delicious final product.
Step 5: Gradually Combine Wet and Dry Ingredients
Now, it’s time to bring together the wet and dry components of your Christmas Cookie Cake batter. With your mixer on a low speed, begin adding the whisked dry ingredients (flour, baking soda, and salt) to the creamed butter-sugar-egg mixture. It’s best to add them in three additions, alternating with the liquids if any were specified, though in this recipe, they are all integrated into the creamed mixture.
The key here is to mix until *just* combined. Overmixing the flour after it’s been hydrated develops the gluten strands in the flour, which can lead to a tough, dense, and chewy cake rather than the light and tender crumb you desire. Stop mixing as soon as you no longer see streaks of dry flour. A few small lumps are perfectly acceptable and will disappear during baking.
Using a spatula to finish incorporating any lingering bits of flour from the sides or bottom of the bowl ensures everything is evenly mixed without overworking the batter. This careful balance is crucial for achieving that signature Christmas Cookie Cake texture.
Step 6: Fold in the Chocolate Chips and Sprinkles
This is arguably the most exciting part of preparing the batter, as you introduce the festive elements that give this cake its signature appeal. Gently fold in the chocolate chips and the vibrant festive sprinkles using a rubber spatula. The goal here is to distribute these delightful additions evenly throughout the batter without overmixing or breaking them up too much.
A folding motion involves using your spatula to cut down through the center of the batter, sweep across the bottom, and then lift and fold the batter over the ingredients you are incorporating. This technique preserves the airiness of the batter while ensuring that the chips and sprinkles are well-distributed. This ensures that every slice of your Christmas Cookie Cake will have a delightful surprise of melted chocolate and a festive pop of color.
Be generous with your sprinkles; they aren’t just for decoration but also contribute to the overall festive texture and visual appeal of the cake. The contrast between the rich, yielding chocolate chips and the slightly firm sprinkles against the tender cake base is what makes this dessert so irresistible and fun.
Step 7: Spread the Batter into the Prepared Pan
With your delicious and festive batter ready, it’s time to transfer it into your prepared 9×13 inch baking pan. Use your spatula to carefully scrape all the batter from the mixing bowl into the pan. Ensure you get every last bit, as this batter is precious and packed with flavor.
Once the batter is in the pan, use your spatula to spread it out evenly. Work from the center towards the edges, making sure the batter reaches all the corners. A smooth, even surface will promote uniform baking, resulting in a cake that is perfectly level and appealingly presented once cooled and sliced. Avoid pressing down too firmly, as this can compact the batter and lead to a denser cake.
Take a moment to look at the batter’s surface. If there are any particularly thick or thin spots, gently adjust with your spatula to create as uniform a layer as possible. This attention to detail in the spreading stage directly contributes to the cake’s final appearance and eating experience.
Step 8: Bake to Golden Perfection
Carefully place the prepared pan into your preheated oven. Bake for approximately 25 to 30 minutes. The exact baking time can vary slightly depending on your oven, so it’s important to keep an eye on the cake during the latter part of the baking period.
You’ll know the cake is ready when a toothpick or a thin knife inserted into the center comes out clean, with no wet batter attached. The edges should be lightly golden brown and may start to pull away slightly from the sides of the pan. The top should appear set and slightly springy to the touch.
Resist the temptation to open the oven door too early, as this can cause the cake to deflate. Once baked, remove the pan from the oven and place it on a wire rack. This initial cooling period in the pan is crucial for the cake’s structure to set properly before it’s moved.
Step 9: Cool the Cake
Allow the Christmas Cookie Cake to cool in the baking pan on a wire rack for at least 15 to 20 minutes. This initial cooling period is critical; it allows the cake to firm up sufficiently so that it doesn’t crumble or break when you attempt to remove it from the pan.
After this initial cooling, carefully invert the pan onto the wire rack to release the cake. If you greased and floured your pan properly, it should come out cleanly. If it seems stuck in any spot, gently run a thin knife around the edges to loosen it. Once inverted, let the cake cool completely on the wire rack. Trying to slice or decorate a warm cake can lead to a messy outcome, as the chocolate chips will melt excessively and the cake itself will be too delicate.
Complete cooling ensures that the cake holds its shape when sliced and that any frosting or decorations applied will adhere properly without melting. Patience here is key to a beautifully presented final product.
Step 10: Decorate and Serve Your Masterpiece
Once your Christmas Cookie Cake has completely cooled, it’s time for the final flourish: decoration. While the cake is already festive with its embedded sprinkles and chocolate chips, a little extra decoration can elevate it to show-stopping status. You can dust it with a light snowfall of powdered sugar, drizzle it with melted white or dark chocolate, or even pipe on some festive buttercream frosting.
Consider using more Christmas-themed sprinkles, edible glitter, or even small festive candies to enhance its holiday charm. Cut the cake into generous squares using a sharp knife for clean slices. Presenting these vibrant squares on a festive platter will surely impress your guests and add a touch of magic to your holiday table.
Serve immediately and watch as smiles light up the faces of your loved ones with every delicious bite. This cake is designed to be a centerpiece of joy and celebration during the holiday season, bringing people together to share in its delightful flavors and festive spirit.
Pro Tips for Christmas Cookie Cake
Achieving a perfect Christmas Cookie Cake involves a few insider tips that can elevate your bake from good to absolutely outstanding. Pay close attention to the temperature of your ingredients; room temperature butter and eggs are non-negotiable for the best texture and emulsification, ensuring a tender and moist cake.
Don’t be tempted to overmix the batter once the flour is added. Overmixing develops gluten, which can lead to a tough cake. Mix only until the dry ingredients are just incorporated, leaving a few small lumps as a sign of a properly mixed batter.
Using high-quality chocolate chips can make a significant difference in the final flavor. Consider a mix of semi-sweet and milk chocolate chips for a more complex chocolate profile. Lastly, ensure your baking pan is properly greased and floured to prevent sticking; a clean release is crucial for presentation.
Expert Advice for Baking Success
Temperature is Key: Always ensure your butter is softened to room temperature and your eggs are also at room temperature. This uniformity allows them to blend smoothly, creating a stable emulsion that yields a light and tender cake crumb. Cold ingredients can lead to a dense, heavy cake.
Gentle Mixing is Essential: Once the dry ingredients are added to the wet ingredients, mix only until they are just combined. Overmixing develops gluten, resulting in a tough and chewy texture. A few small lumps in the batter are perfectly fine and indicate you haven’t overworked it.
Quality Ingredients Matter: Opt for good-quality chocolate chips; they will melt beautifully and provide a rich, satisfying chocolate flavor that truly shines. Similarly, using unsalted butter allows you to control the salt content precisely. The taste difference can be quite noticeable.
Don’t Skip the Cooling: Allow the cake to cool in the pan for at least 15-20 minutes before inverting it onto a wire rack. This resting period allows the cake to set, preventing it from breaking when you try to remove it. Cooling completely on the rack before decorating is vital for neatness.
Decorate with Flair: While not strictly necessary, a simple dusting of powdered sugar, a drizzle of melted chocolate, or some extra festive sprinkles can truly enhance the visual appeal of your Christmas Cookie Cake, making it a stunning centerpiece for any holiday gathering. Get creative with your decorating!
Serving Suggestions for Christmas Cookie Cake
The Christmas Cookie Cake is a versatile dessert that shines on its own but can be beautifully complemented by various accompaniments and decorations. Its inherent festive nature makes it a perfect centerpiece for any holiday celebration, drawing appreciative eyes and eager forks.
Decoration
Elevate your Christmas Cookie Cake from delicious to dazzling with a few simple decorative touches. A light dusting of powdered sugar can mimic a fresh snowfall, offering a delicate sweetness and a classic winter aesthetic. Alternatively, a drizzle of melted white or dark chocolate creates elegant swirls and patterns, adding a touch of sophistication.
For an extra burst of holiday spirit, generously sprinkle more festive candies, edible glitter, or even small gingerbread figures onto the surface of the cake before it fully sets. You can also pipe festive designs using buttercream frosting, perhaps creating snowflakes, holly, or other holiday motifs.
Side Dishes
While the Christmas Cookie Cake is a complete dessert in itself, pairing it with complementary items can enhance the overall tasting experience. A scoop of high-quality vanilla bean ice cream offers a creamy, cool contrast to the cake’s sweetness and texture, creating a delightful sensation. Peppermint ice cream is another excellent choice, offering a refreshing minty twist that pairs wonderfully with chocolate.
A dollop of freshly whipped cream adds a cloud-like lightness and subtle sweetness, cutting through the richness of the cake. For those who enjoy a warm beverage alongside their dessert, a mug of rich hot chocolate or a aromatic cup of coffee provides a comforting and classic pairing.
Creative Serving Ideas
Transform your Christmas Cookie Cake into an interactive dessert experience. Consider cutting it into individual, bite-sized squares or festive shapes using cookie cutters for easy grab-and-go enjoyment at parties. You could also serve it alongside a variety of toppings like fresh berries, caramel sauce, or a raspberry coulis, allowing guests to customize their own slice.
Another creative idea is to present individual mini cookie cakes, baked in muffin tins or small round pans, for a charming, personalized treat. This makes for beautiful party favors or individual servings that are equally delightful and impressive, ensuring everyone gets their own perfect portion of holiday cheer.
Preparation & Storage
Ensuring your Christmas Cookie Cake remains as delightful as the day it was baked is straightforward with proper preparation and storage techniques. These methods help maintain its texture and flavor, allowing you to enjoy this festive treat over several days.
Storing Leftovers
To keep your Christmas Cookie Cake fresh and delicious for subsequent enjoyment, proper storage is key. Once the cake has cooled completely, transfer any uneaten portions to an airtight container. This simple step prevents the cake from drying out and protects it from absorbing any unwanted odors from other foods in your refrigerator or pantry.
If stored at room temperature, the cake should remain fresh for up to 3 days. Ensure the container is sealed tightly to maintain maximum freshness. This makes it convenient for enjoying a slice whenever a festive craving strikes without compromising quality.
Freezing
For longer-term storage, the Christmas Cookie Cake freezes beautifully, allowing you to prepare it well in advance of holiday gatherings or savor its flavor long after the season has ended. To freeze, it’s best to slice the cake into individual portions. This makes thawing and reheating much easier and more convenient.
Wrap each individual slice tightly in plastic wrap, ensuring there are no exposed edges that could lead to freezer burn. Then, place the wrapped slices into a heavy-duty freezer bag or an airtight freezer-safe container. Properly stored, the cake can maintain its quality in the freezer for up to 3 months.
Reheating
When you’re ready to enjoy your frozen or previously stored Christmas Cookie Cake, reheating is simple and effective. If you’re reheating a slice directly from the freezer, allow it to thaw at room temperature for a few hours until it’s no longer frozen solid. This gentle thawing helps preserve its texture.
For a slightly warm and extra decadent experience, you can carefully reheat individual slices in the microwave. A short burst of about 15-20 seconds on a medium power setting is usually sufficient to warm the cake through without making it rubbery or dry. Serve immediately after reheating to enjoy its delightful texture and flavors at their best.
Frequently Asked Questions
- Can I prepare the Christmas Cookie Cake ahead of time, and if so, how should I store it?
Absolutely, you can prepare this delightful Christmas Cookie Cake a day in advance. Once it has cooled completely, store it in an airtight container at room temperature. This will keep it fresh and moist, ready to be decorated and served when needed. Ensure the container is well-sealed to prevent the cake from drying out or absorbing any unwanted odors.
- What are the best substitutions for common ingredients if I have dietary restrictions or preferences?
For a gluten-free version, you can effectively substitute the all-purpose flour with a reputable gluten-free all-purpose flour blend; ensure it contains xanthan gum for proper binding. If you need a vegan option, replace the eggs with flaxseed eggs (1 tablespoon ground flaxseed mixed with 2.5 tablespoons water per egg) and use a high-quality vegan butter substitute. For dairy-free needs, vegan butter also works wonders. These substitutions generally maintain the cake’s delightful texture and flavor profile.
- How long does the Christmas Cookie Cake typically last, and are there specific tips for keeping it fresh?
The Christmas Cookie Cake generally stays fresh for about 3 days when stored properly at room temperature in an airtight container. If you prefer to extend its shelf life, you can refrigerate it, where it can last up to a week; however, refrigeration can sometimes slightly alter the texture. Always ensure the cake is completely cool before sealing it in its container to prevent condensation, which can lead to sogginess. Freezing is also an excellent option for longer storage, keeping it delicious for up to 3 months.