Ultimate Rosemary Focaccia
There’s something truly magical about the aroma of freshly baked bread wafting through the kitchen, isn’t there? It instantly evokes feelings of warmth, comfort, and home. Imagine transforming simple ingredients into a golden, fluffy masterpiece that not only delights your senses but also serves as the perfect accompaniment to any meal or gathering.
This Rosemary Focaccia recipe is designed to bring that delightful experience to your own home, even if you’re new to baking. It’s a testament to how straightforward ingredients can create something truly special with just a little care and attention. Get ready to impress yourself and your loved ones with a bread that’s both rustic and elegant.
Why You Will Love This Recipe
- Exceptional Flavor Profile: The fragrant essence of fresh rosemary perfectly melds with the richness of high-quality olive oil, creating a savory and aromatic bread that is simply irresistible.
- Remarkable Simplicity: This recipe is incredibly accessible, featuring clear, easy-to-follow steps and a concise list of common ingredients, making it a joy for bakers of all skill levels.
- Incredible Versatility: Whether you’re seeking a delightful appetizer, a satisfying snack, or a perfect side to your favorite dinner, this focaccia adapts beautifully and can be customized with various toppings.
- Universal Family Appeal: The comforting taste and wonderful texture of warm, homemade bread are universally loved; this focaccia is sure to be a hit with both children and adults, becoming a cherished family favorite.
- Perfect for Any Occasion: From casual weeknight meals and cozy dessert pairings to more formal dinner parties or delightful picnics, this Rosemary Focaccia adds a touch of homemade charm to any event.
Ingredients You Need
The foundation of any great dish lies in the quality of its ingredients, and this focaccia is no exception. Using fresh, high-quality olive oil will significantly enhance the bread’s flavor and texture, while fragrant fresh rosemary provides an aromatic punch that defines this classic. The flour, yeast, salt, and water work in harmony to create that signature airy crumb and slightly crisp crust.
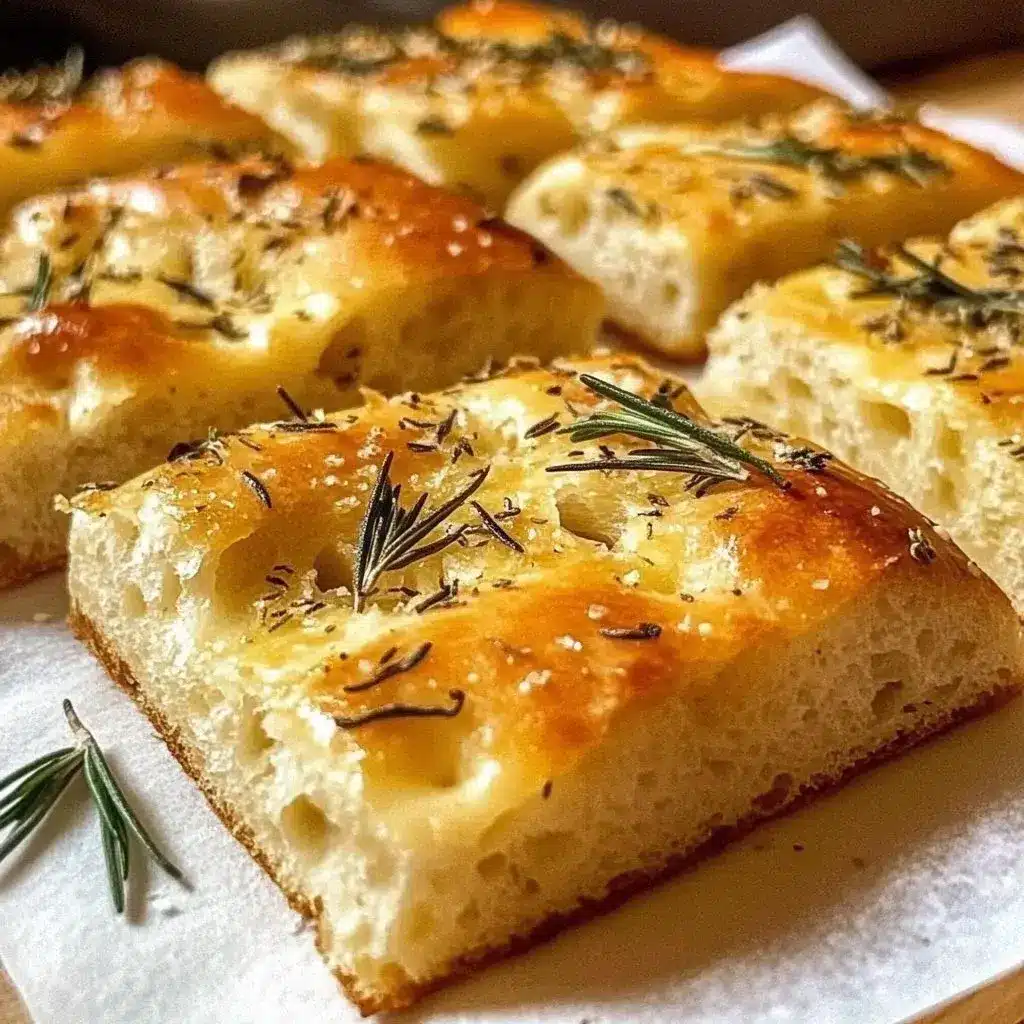
Rosemary Focaccia

This classic Italian focaccia bread is fluffy, golden, and infused with fragrant rosemary and olive oil. Perfect as a side, sandwich base, or dipped in soups and sauces. It's simple to make and sure to impress!
- 2 1/4 tsp active dry yeast (1 packet)
- 1 cup warm water (about 110°F (43°C))
- 2 Tbsp olive oil (plus more for brushing)
- 1 tsp sugar
- 1 tsp salt
- 2 1/2 cups all-purpose flour (plus more if needed)
- 2 Tbsp olive oil (for topping)
- 1 1/2 Tbsp fresh rosemary, chopped (or 1 1/2 tsp dried)
- 1/2 tsp coarse sea salt (for sprinkling)
- 1In a large bowl, combine warm water, sugar, and yeast. Stir and let sit for 5–10 minutes until foamy.
- 2Add olive oil, salt, and 2 cups of flour. Mix until dough starts to form, then add remaining flour as needed to create a soft, slightly sticky dough.
- 3Turn out onto a floured surface and knead for 5–7 minutes until smooth and elastic. Transfer to a greased bowl, cover, and let rise for 1 hour or until doubled in size.
- 4Punch down the dough and press it into a greased 9x13-inch baking pan. Use your fingers to make dimples across the surface. Cover and let rise another 20–30 minutes.
- 5Preheat oven to 400°F (200°C). Drizzle olive oil over the dough, sprinkle with chopped rosemary and sea salt.
- 6Bake 20–25 minutes until golden brown. Remove from oven and brush with extra olive oil for shine and flavor.
- 7Cool slightly before slicing. Serve warm with olive oil or butter, or use as a sandwich base.
Keywords: Bread, Focaccia, Homemade, Olive Oil, Rosemary, Italian, Mediterranean
- all-purpose flour: the main structure for our delicious bread.
- instant yeast: essential for making the dough rise and become wonderfully airy.
- salt: a crucial flavor enhancer that balances the sweetness and richness.
- sugar: a touch of sweetness to help activate the yeast and add a hint of depth.
- warm water: the perfect temperature to awaken the yeast and form our dough.
- olive oil: the star for flavor, richness, and that signature moist texture.
- fresh rosemary, chopped: the aromatic herb that gives this focaccia its distinctive taste.
- coarse sea salt for topping: adds a delightful crunch and salty burst with every bite.
You will find the precise measurements for each ingredient within the accompanying recipe card, ensuring perfect results every time.
Variations
While the classic Rosemary Focaccia is absolutely divine on its own, its adaptable nature means you can easily introduce exciting variations to suit different tastes and occasions. Think about how you can elevate this simple bread into something entirely new and unique.
The Cheesy Delight Variation: For those who adore cheese, consider incorporating a generous layer of shredded or crumbled cheese into the dimples before baking. A blend of Gruyère and Parmesan offers a nutty, sharp flavor that complements the rosemary beautifully. Alternatively, dollops of creamy ricotta or dollops of a soft goat cheese can add a luxurious richness that melts into the warm bread.
A Mediterranean Medley: Transport your taste buds to the sunny Mediterranean with a few thoughtful additions. Scatter a handful of Kalamata olives, halved cherry tomatoes, and perhaps some sun-dried tomatoes over the dimpled dough. A sprinkle of dried oregano or thyme alongside the rosemary can further enhance this robust flavor profile, creating a truly vibrant loaf perfect for serving with soups or salads.
Sweet & Savory Brunch Option: Who says focaccia is only for savory meals? For a delightful brunch twist, after the initial bake, you can drizzle the warm focaccia with a touch of honey or maple syrup and scatter some toasted slivered almonds or chopped pistachios over the top. This creates a wonderful contrast of sweet, savory, and nutty flavors, making it a unique and memorable addition to any brunch spread, perhaps even a wonderful pairing for a cup of coffee from our drinks section.
How to Prepare Rosemary Focaccia
Step 1: The Foundation of Flavor
Begin by gathering all your necessary ingredients and ensuring your workstation is ready. This initial step is crucial for a smooth baking process. Measure out your flour, yeast, salt, and sugar accurately, and have your warm water and olive oil close at hand. The warmth of the water is vital; it should feel comfortably warm to the touch, around 110°F (43°C), which is the ideal temperature for activating the instant yeast and encouraging a robust rise.
Having everything prepped and measured before you start mixing will prevent any last-minute rushes or forgotten ingredients. This organized approach not only saves time but also minimizes the chances of errors, setting you up for baking success from the very beginning. This meticulousness is key to achieving that perfect focaccia texture.
Step 2: Bringing the Dough to Life
In a large, sturdy mixing bowl, combine the all-purpose flour, instant yeast, salt, and sugar. Whisk these dry ingredients together thoroughly. This ensures that the yeast and salt are evenly distributed throughout the flour, which is essential for a consistent rise and well-balanced flavor in the final bread. The sugar provides a small amount of food for the yeast, aiding in its activation.
Once the dry ingredients are well combined, it’s time to introduce the wet components. Gradually pour in the warm water and the specified amount of olive oil. Begin mixing with a wooden spoon or a sturdy spatula. Continue mixing until a shaggy, somewhat sticky dough begins to form. At this stage, the dough will likely be quite wet and unmanageable, which is perfectly normal and exactly what we’re aiming for.
Step 3: Developing the Gluten
Turn the sticky dough out onto a lightly floured surface. This is where the magic of kneading begins, developing the gluten structure that will give your focaccia its characteristic airy and chewy texture. Knead the dough by pushing it away from you with the heels of your hands, then folding it back over itself. Rotate the dough and repeat this process for approximately 5 to 7 minutes.
During kneading, you may find the dough to be quite sticky. Resist the urge to add too much extra flour, as this can result in a dense bread. Instead, use a bench scraper to help manage the dough and lightly dust your hands or the surface only when absolutely necessary. The dough is ready when it becomes noticeably smoother, more elastic, and less sticky, though it should still have a slight tackiness.
Step 4: The Patient Rise
Once the dough has been kneaded to the desired smoothness and elasticity, transfer it to a lightly oiled bowl. Turn the dough in the bowl to ensure it is coated with a thin layer of oil; this prevents it from drying out as it rises. Cover the bowl tightly with plastic wrap or a clean kitchen towel to create a warm, humid environment for the yeast to work its wonders. Place the covered bowl in a warm, draft-free spot in your kitchen.
Allow the dough to rise for approximately 1 to 2 hours, or until it has doubled in size. The exact time will depend on the ambient temperature of your kitchen; a warmer environment will speed up the rising process. Resist the temptation to rush this step, as adequate rising time is crucial for developing the light, airy texture that defines perfect focaccia. You’ll know it’s ready when it looks significantly puffed up and has a bubbly surface.
Step 5: Preparing for the Oven
While the dough is undergoing its first significant rise, preheat your oven to 425°F (220°C). It’s important to give your oven ample time to reach and stabilize at this temperature to ensure even baking. Once the dough has doubled in size and your oven is preheated, gently punch down the dough. This action deflates the air bubbles, redistributes the yeast, and prepares the dough for its final shape.
Lightly grease a baking sheet or a suitable baking pan, such as a 9×13 inch pan. Carefully transfer the punched-down dough onto the prepared pan. Using your fingertips, gently spread the dough to fill the pan, or to create the desired rustic shape. The dough will be somewhat elastic and may resist stretching initially; let it rest for a few minutes if needed, then continue gently pushing it towards the edges.
Step 6: The Signature Dimples and Toppings
This is where the focaccia gets its distinctive texture and appearance. With lightly oiled fingers, press down firmly into the dough all over the surface, creating deep dimples. These indentations are not just for aesthetics; they help to trap olive oil and seasonings, ensuring that the bread bakes evenly and develops pockets of delicious flavor. Don’t be shy; the deeper the dimples, the better the result.
Once the dough is dimpled, it’s time for the toppings. Drizzle the surface generously with more olive oil, ensuring it pools in the dimples. Sprinkle the chopped fresh rosemary evenly over the oiled surface, pressing it gently into the dough. Finally, scatter coarse sea salt over the top, which will provide a delightful crunchy contrast to the soft bread. This combination of rosemary and sea salt is classic, but feel free to add other favorites like garlic or a sprinkle of dried herbs.
Step 7: Baking to Golden Perfection
Carefully place the prepared focaccia into the preheated oven. Bake for 20 to 25 minutes, or until the focaccia is a beautiful golden brown color and the crust is firm to the touch. Keep an eye on it during the last few minutes of baking, as oven temperatures can vary, and you want to avoid over-browning. The aroma that fills your kitchen during this stage is absolutely incredible.
Once baked to perfection, remove the focaccia from the oven. For an extra touch of flavor and a lovely sheen, you can brush the top with a little more olive oil while it’s still warm. This step enhances both the taste and the visual appeal of your homemade bread. Let the focaccia cool on the baking sheet for a few minutes before transferring it to a wire rack to cool further or slicing it to serve warm.
Step 8: Serving and Enjoying
Allow the focaccia to cool slightly before slicing, which will help it hold its shape better. Serve it warm, tearing off pieces to share. The airy interior and crisp exterior are best enjoyed fresh from the oven. This versatile bread is perfect on its own, or it can be paired with a variety of complementary dishes, as discussed in the serving suggestions.
The satisfaction of pulling a warm, fragrant loaf of Rosemary Focaccia from your oven is immense. It’s a testament to the simple joy of baking and the delicious rewards that come with it. Share this homemade goodness with family and friends, and savor every delightful bite. Consider this a wonderful addition to your baking repertoire, much like a well-loved recipe for German pancakes or a classic chocolate chip cookie.
Pro Tips for Rosemary Focaccia
Use High-Quality Olive Oil: The flavor of olive oil is prominent in focaccia, so opt for a good extra virgin olive oil. It makes a significant difference in the final taste and aroma, imparting a fruity, peppery note that is characteristic of authentic Italian baking.
Don’t Skimp on the Dimples: Those dimples are essential! They create pockets that hold olive oil and seasonings, ensuring even baking and delivering bursts of flavor throughout the bread. Press firmly and generously.
Patience with the Rise: Allow the dough ample time to rise in a warm place. This process develops flavor and creates that signature light, airy texture. Rushing this step will result in a denser loaf.
Consider a Cold Ferment: For even deeper flavor development, after the first rise, you can punch down the dough, shape it in the pan, dimple it, add toppings, and then cover and refrigerate it overnight. Bake it directly from the refrigerator; it might require a slightly longer baking time.
Experiment with Toppings: While rosemary is classic, don’t hesitate to get creative. Olives, cherry tomatoes, caramelized onions, or even a sprinkle of red pepper flakes can add exciting new dimensions to your focaccia.
Serving Suggestions for Rosemary Focaccia
Decoration
The beauty of focaccia often lies in its rustic charm, and the rosemary sprigs themselves serve as a lovely natural decoration. You can arrange whole rosemary sprigs artfully on top before baking, allowing them to become fragrant and slightly crisp. For an added visual appeal and a touch of color, consider scattering a few halved cherry tomatoes or a handful of plump olives over the dough alongside the rosemary.
Side Dishes
Rosemary Focaccia is incredibly versatile as a side dish. It pairs exceptionally well with hearty Italian soups like minestrone or ribollita, providing a satisfying bread to sop up every last drop. A fresh, vibrant salad, such as a classic Caesar or a simple mixed greens salad with a balsamic vinaigrette, also makes a wonderful accompaniment, offering a refreshing contrast to the rich bread.
Creative Serving Ideas
Elevate your meal by using focaccia as a base for mini pizzas or open-faced sandwiches. Simply top slices with your favorite pizza ingredients or a spread of hummus and roasted vegetables for a delightful lunch. It’s also fantastic served alongside a cheese board, offering a rustic, flavorful bread that complements various cheeses beautifully, much like a perfectly baked chicken dish would.
Preparation & Storage
Storing Leftovers
To keep your Rosemary Focaccia fresh, wrap it tightly in plastic wrap or aluminum foil. Store it at room temperature for up to three days. If your kitchen tends to be quite warm, refrigeration is an option for longer storage, but be aware that this can slightly alter the texture, making it a bit firmer.
Freezing
This focaccia freezes remarkably well, making it convenient to have on hand. For the best results, slice the focaccia into individual portions before freezing. Wrap each slice securely in plastic wrap or aluminum foil, then place them in a freezer-safe bag or container. Properly frozen, it can last for up to three months.
Reheating
To reheat leftover focaccia, place slices on a baking sheet and warm them in a preheated oven at 350°F (175°C) for about 5-7 minutes. This will help restore its crisp crust and warm interior. If reheating directly from frozen, you may need to increase the oven temperature slightly or the warming time.
Frequently Asked Questions
-
Can I prepare the dough ahead of time?
Yes, absolutely! You can prepare the focaccia dough, let it go through its first rise, then punch it down, shape it in the pan, dimple it, add toppings, and cover it. Refrigerate it overnight. When ready to bake, let it sit at room temperature for about 30 minutes before putting it into the preheated oven. This cold fermentation process can even deepen the flavor.
-
What is the best way to store focaccia to maintain its freshness?
For best results, store cooled focaccia at room temperature, tightly wrapped in plastic wrap or aluminum foil, for up to three days. If you live in a very warm climate, refrigerating it is an option, but it may slightly firm up the crumb. For longer storage, freezing is recommended; ensure it’s well-wrapped to prevent freezer burn.
-
Can I use different types of flour in this recipe?
While all-purpose flour is recommended for its balance of gluten and tenderness, you can experiment. Bread flour can be used for a chewier texture due to its higher gluten content. For gluten-free versions, use a high-quality gluten-free all-purpose flour blend, but be prepared to adjust the liquid content as gluten-free flours absorb moisture differently. Almond flour can also be used, but it will result in a denser, richer bread.