Smoky Grilled Beer Can Chicken
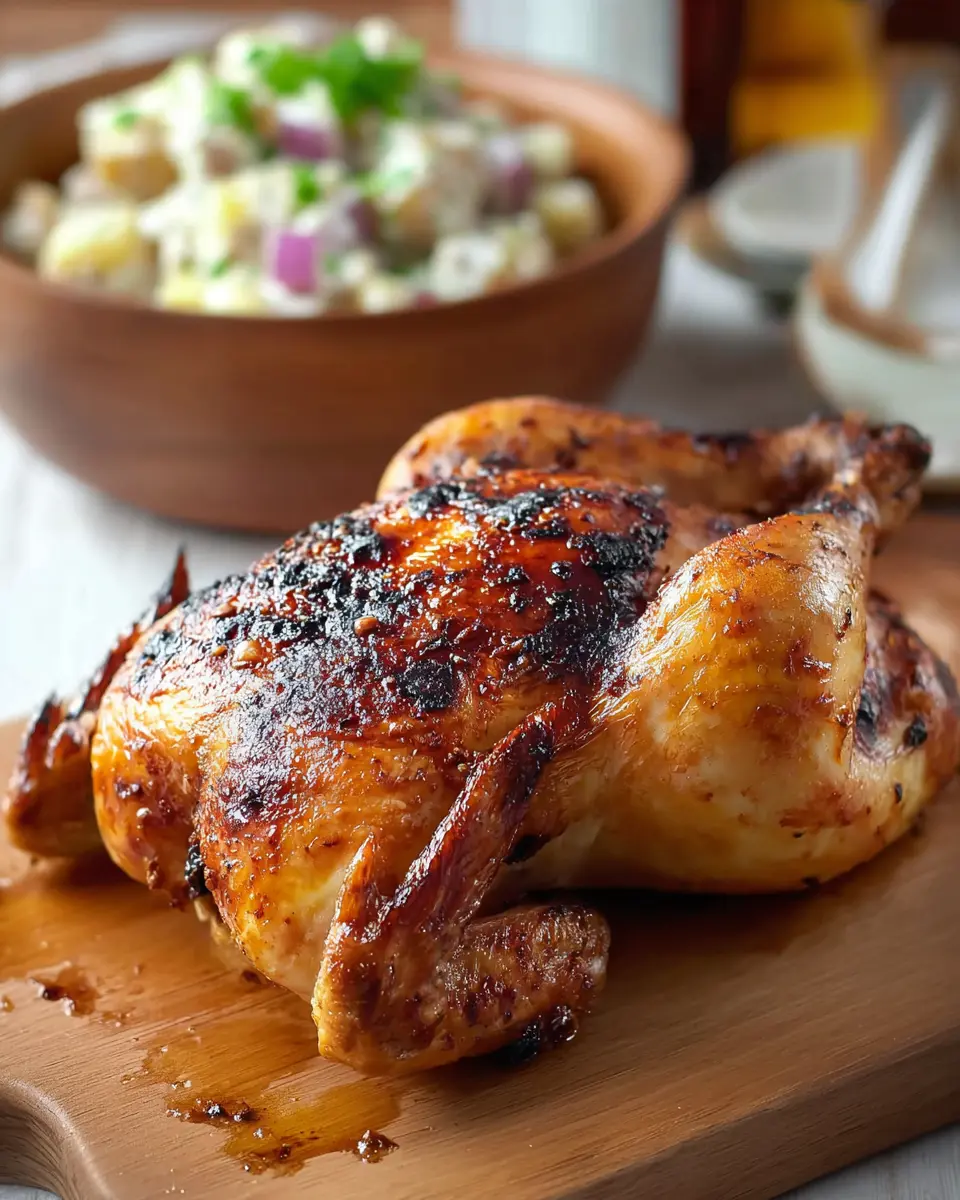
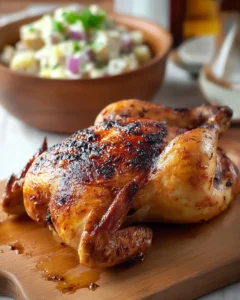
This grilled beer can chicken recipe promises a truly exceptional culinary experience, blending smoky barbecue flavors with incredibly juicy, tender meat. The unique upright cooking method ensures that the chicken is enveloped in a gentle, even heat, resulting in perfectly cooked poultry with a delightfully crisp, golden-brown skin that is a feast for the eyes and the palate.
Imagine the aroma wafting from your grill as this masterpiece cooks, a tantalizing preview of the deliciousness to come. It’s the perfect centerpiece for any gathering, offering a sophisticated yet surprisingly simple approach to homemade barbecue that will undoubtedly impress your guests and leave them craving more.
Why You Will Love This Recipe
- Exceptional Juiciness: The beer can acts as a steam reservoir, infusing the chicken with moisture from the inside out, ensuring every bite is incredibly tender and succulent.
- Crispy, Golden Skin: The upright cooking position, combined with a well-formulated dry rub and indirect heat, guarantees a beautifully browned and delightfully crispy exterior.
- Deeply Flavored Meat: The strategic application of a robust dry rub and a crucial resting period allow the seasonings to deeply penetrate the chicken, creating a complex and satisfying flavor profile.
- Effortless Setup: While the resting time is key, the active preparation and grilling process are straightforward, making this an accessible yet impressive dish for any home cook.
- Versatile Crowd-Pleaser: Its classic appeal and adaptable flavor make it a perfect main course for casual backyard barbecues, holiday feasts, or any occasion where delicious, comforting food is a must.
Ingredients You Need
The success of this grilled beer can chicken hinges on the quality of your ingredients and the thoughtful preparation of the dry rub. Selecting a fresh, good-quality whole chicken is paramount for achieving the best results. The spices used in the rub are carefully chosen to complement the chicken’s natural flavors and the smoky notes from the grill, creating a harmonious and unforgettable taste experience. Remember that the magic lies in the combination and balance of these simple, yet powerful, components.
Grilled Beer Can Chicken
This grilled beer can chicken is seasoned with a robust dry rub, then cooked upright over indirect heat for exceptionally juicy meat and well-browned skin. A period of uncovered refrigeration allows the seasoning to deeply penetrate the chicken before it is slowly grilled until perfectly cooked.
- 1 whole chicken (about 4 pounds)
- 1 tablespoon packed dark brown sugar
- 2 teaspoons smoked paprika
- 1 teaspoon mustard powder
- 2 teaspoons chili powder
- 1/4 cup coarse salt
- 1 teaspoon garlic powder
- 2 teaspoons freshly ground black pepper
- 1 can (12 ounces) lager beer, such as Budweiser or Miller Lite
- BBQ sauce (optional, for serving)
- 1Remove the giblets from the cavity of the chicken 8 to 48 hours before grilling. Set the chicken breast-side up on a baking sheet fitted with a rack.
- 2Combine the coarse salt, black pepper, brown sugar, smoked paprika, chili powder, mustard powder, and garlic powder in a small bowl. Distribute the seasoning mixture over the entire chicken, including inside the cavity, pressing it into the skin with your fingers.
- 3Transfer the seasoned chicken to the refrigerator and leave it uncovered for at least 8 hours, though 24 to 48 hours will provide the fullest flavor.
- 4When ready to grill, take the chicken out of the refrigerator. Open the can of beer and discard about half of the contents.
- 5Lower the chicken carefully onto the beer can, pushing it down until it stands upright. Pull the legs slightly forward so the bird forms a steady tripod shape.
- 6Prepare the grill for two-zone cooking. Ignite one side of the burners, or light the charcoal. Once the charcoal is coated with ash, bank it to one side so the grill has both direct and indirect heat zones.
- 7Set the chicken on the unlit side of the grill so it cooks with indirect heat. Close the lid and grill until the internal temperature in the thickest part of the breast reaches 165°F, about 1 hour and 45 minutes.
- 8Lift the chicken from the grill with care and place it on a rimmed baking sheet to catch any juices released during resting. Let it stand for about 10 minutes.
- 9Move the rested chicken to a cutting board. Insert a knife into the top cavity and carefully push the beer can out through the bottom cavity. Carve the chicken into portions.
- 10Serve immediately, with BBQ sauce on the side if desired.
Keywords: Grilled Beer Can Chicken, Beer Can Chicken, Grilled Chicken, BBQ Chicken, Backyard Grilling
- whole chicken: a plump bird weighing approximately 4 pounds is ideal for even cooking and stable balance.
- coarse salt: essential for flavor and drawing out moisture for better skin crisping, about 1/4 cup.
- freshly ground black pepper: a robust complement to salt, adding a subtle heat, around 2 teaspoons.
- dark brown sugar: imparts a hint of sweetness and aids in achieving a beautiful caramelization on the skin, roughly 1 tablespoon.
- smoked paprika: provides a quintessential smoky aroma and a rich, reddish hue to the chicken’s exterior, about 2 teaspoons.
- chili powder: contributes a mild, savory spice that adds depth to the rub without overpowering, approximately 2 teaspoons.
- mustard powder: introduces a touch of tanginess that cuts through richness and adds complexity, about 1 teaspoon.
- garlic powder: a foundational savory element that enhances the overall flavor profile, around 1 teaspoon.
- lager beer: one 12-ounce can serves as the internal support and adds a subtle malty undertone, choose a classic lager.
- BBQ sauce: optional, but perfect for brushing on at the end or serving alongside for an extra layer of smoky sweetness.
The precise quantities for each ingredient are detailed within the recipe card for your convenience.
Variations
While this classic grilled beer can chicken is a triumph on its own, its inherent adaptability opens doors to a world of creative variations. You can easily tailor this recipe to suit different dietary needs or flavor preferences, ensuring everyone can enjoy its deliciousness.
For those seeking a plant-based alternative, consider a “beer can” mushroom recipe. Large portobello mushrooms can be marinated in a similar spice blend, then stuffed with a smoky breadcrumb or quinoa mixture and cooked upright on a can of non-alcoholic beer or vegetable broth on the grill. This offers a surprisingly hearty and satisfying vegetarian main course.
If you’re following a low-carb lifestyle, you can still embrace the essence of beer can chicken. Instead of a traditional rub heavy on sugar, opt for a blend featuring herbs, garlic powder, onion powder, and perhaps a touch of cayenne pepper for heat. The beer can can be substituted with a can of unsweetened broth or even just a metal canning jar lid placed inside the cavity to maintain the upright structure.
Another exciting avenue is infusing different liquids into the can. While lager is traditional, you could experiment with apple cider for a hint of fruity sweetness, or even a dark stout for a richer, more complex undertone. This simple substitution can subtly alter the final flavor profile of the chicken.
How to Prepare grilled beer can chicken
Step 1: Preparing the Chicken and Crafting the Rub
The journey to perfectly grilled beer can chicken begins with meticulous preparation of the bird and the creation of its flavor foundation. Carefully remove the giblets from the chicken’s cavity, ensuring it’s clean both inside and out. Then, pat the entire chicken thoroughly dry with paper towels; this step is crucial for achieving that coveted crispy skin. Place the bird on a wire rack set inside a baking sheet, which will allow air to circulate for even drying and facilitate easy handling.
In a small bowl, combine all the dry rub ingredients: coarse salt, freshly ground black pepper, dark brown sugar, smoked paprika, chili powder, mustard powder, and garlic powder. Whisk these spices together until they are thoroughly mixed, ensuring an even distribution of each component for a balanced flavor. This fragrant blend is the heart of your beer can chicken, so take your time to ensure it’s perfectly combined. The aroma alone is a promise of the deliciousness to come.
Once your rub is ready, generously apply it all over the exterior of the chicken. Gently lift the skin where possible and try to get some rub underneath it, especially over the breast and thighs, for maximum flavor penetration. Don’t forget to season the inside of the cavity generously as well. Press the rub firmly into the skin so that it adheres well; this will help it stay put during the grilling process and contribute to that beautiful browned finish.
Step 2: The Crucial Dry Brine and Refrigeration Period
This stage is where the real magic happens, transforming a simple rub into a deeply flavorful marinade that permeates the chicken. After the chicken has been thoroughly seasoned, it needs time to rest and allow the salt to work its magic. This process, known as dry brining, helps to tenderize the meat and draw out just enough moisture from the skin to promote superior crisping on the grill.
Place the seasoned chicken, uncovered, on the wire rack within the baking sheet and transfer it to the refrigerator. It’s essential that the chicken remains uncovered during this period so that the skin can dry out properly. Aim for a minimum of 8 hours in the refrigerator; however, for truly exceptional flavor and the crispiest skin, allowing it to rest for a full 24 to 48 hours is highly recommended. This extended chill time allows the salt to penetrate deeply into the muscle fibers, seasoning the meat from within and enhancing its overall juiciness.
During this refrigeration period, you’ll notice the skin becoming taut and slightly dry. This is exactly what you want, as drier skin will render more fat and become wonderfully crisp when exposed to the heat of the grill. Resist the temptation to cover the chicken; the exposure to cold air is vital for this step’s success. The flavors will meld and intensify, creating a more complex and satisfying taste profile for your final dish.
Step 3: Assembling the Beer Can Chicken for Grilling
With your chicken properly seasoned and having undergone its crucial resting period, it’s time to prepare it for its upright grilling adventure. Take the chicken out of the refrigerator approximately 30 to 60 minutes before you plan to grill, allowing it to come closer to room temperature. This will help it cook more evenly on the grill.
Now, for the iconic step: the beer can. Open the 12-ounce can of lager beer and carefully pour out about half of the liquid. You can discard the poured-out beer or save it for another use, like drinking alongside your meal. The remaining liquid will help steam the chicken from the inside and impart a subtle malty flavor.
With the chicken on your work surface, grasp the beer can firmly and carefully lower the chicken onto it, pushing it down until the can is nestled securely within the chicken’s cavity. The chicken should now be standing upright, balanced on the can. To ensure maximum stability and prevent tipping on the grill, gently pull the legs slightly forward, creating a tripod-like stance for the bird. This stable positioning is key for even cooking and a beautiful presentation.
Step 4: Setting Up Your Grill for Two-Zone Cooking
Proper grill setup is critical for achieving the perfectly cooked, juicy, and evenly browned beer can chicken. You will employ a two-zone cooking method, which involves creating distinct areas of high and low heat on your grill. This technique allows you to sear or crisp ingredients over direct heat and then move them to a cooler zone for gentler, indirect cooking, preventing burning while ensuring thorough cooking.
If you are using a gas grill, simply ignite one side of the burners to medium-high heat and leave the other side unlit. The lit side will provide your direct heat zone, while the unlit side will serve as your indirect heat zone. For charcoal grills, ignite your charcoal and allow it to burn until it is covered with a fine layer of gray ash, indicating it’s ready. Once the coals are fully lit, carefully bank them to one side of the grill, leaving the other side completely free of coals. This arrangement creates the necessary direct and indirect heat zones.
The beer can chicken will be placed on the indirect heat side of the grill. This method ensures that the chicken cooks slowly and evenly without the risk of burning its exterior before the interior is fully cooked. Maintaining a consistent grill temperature in the indirect zone, ideally between 325°F and 350°F (160°C to 175°C), is crucial for optimal results. This controlled environment is what allows the beer to steam and the chicken to cook through to perfection.
Step 5: The Grilling Process and Achieving Perfect Doneness
Now comes the exciting part: grilling your beer can chicken. Carefully place the assembled chicken, standing upright on its beer can, onto the indirect heat side of your prepared grill. Once the chicken is positioned, close the grill lid promptly. This is vital for trapping the heat and smoke, which are essential for cooking the chicken evenly and developing its characteristic flavor and texture.
Allow the chicken to cook undisturbed for approximately 1 hour and 45 minutes. The exact cooking time can vary depending on the size of your chicken, the ambient temperature, and the consistent heat of your grill. It’s important to resist the urge to open the lid frequently, as this releases valuable heat and can prolong the cooking process. The enclosed environment of the grill is designed to circulate heat and cook the chicken thoroughly.
The most reliable way to determine if your chicken is perfectly done is by using an instant-read meat thermometer. Insert the thermometer into the thickest part of the breast, avoiding any contact with bone. The chicken is safely cooked when the internal temperature reaches 165°F (74°C). Additionally, the juices should run clear when the thigh is pierced with a fork or knife, and the meat should appear opaque throughout.
Step 6: Resting and Carving for Optimal Flavor and Texture
Once your beer can chicken has reached the perfect internal temperature, it’s time to remove it from the grill and allow it to rest. This is a non-negotiable step that significantly impacts the final texture and juiciness of the meat. Carefully lift the chicken off the grill, using sturdy grilling gloves or heat-resistant tongs, and transfer it to a clean, rimmed baking sheet or a large cutting board with a channel to catch juices. Let the chicken rest, uncovered, for about 10 to 15 minutes.
During this resting period, the juices within the chicken redistribute themselves throughout the meat. If you were to carve the chicken immediately after removing it from the heat, those precious juices would run out onto the plate, resulting in drier, less flavorful meat. The short rest allows the muscle fibers to relax, locking in moisture and ensuring each slice is succulent and tender. This patient approach is key to achieving restaurant-quality results at home.
After resting, it’s time to carefully remove the beer can. You may need to use a sturdy spatula or a knife to gently loosen the can from the chicken’s cavity. Once the can is removed, you can carve the chicken into your desired serving pieces. Common cuts include the breast, thighs, drumsticks, and wings. For an extra touch of flavor, consider brushing the chicken with your favorite BBQ sauce during the last few minutes of grilling or serving it on the side for dipping. This final flourish adds another layer of deliciousness to this already spectacular dish.
Pro Tips for grilled beer can chicken
Embrace the Chill: The longer the chicken rests uncovered in the refrigerator after seasoning, the better. An overnight dry brine is excellent, but 24-48 hours yields even more intensely flavored meat and dryer, crispier skin.
Indirect Heat is King: Always cook your beer can chicken over indirect heat. Direct heat can lead to charred skin before the internal temperature is safely reached, resulting in an unevenly cooked and potentially burnt bird.
Trust Your Thermometer: While cooking times are a guideline, an instant-read meat thermometer is your best friend. Don’t guess; a reading of 165°F in the thickest part of the breast ensures it’s perfectly cooked and safe to eat.
Moisture Management is Key: Ensure the chicken is patted thoroughly dry before seasoning and that it remains uncovered during its refrigeration period. This helps the skin crisp up beautifully on the grill.
Stabilize for Success: When placing the chicken on the beer can, gently pull the legs forward to create a stable tripod. This prevents the chicken from tipping over on the grill, ensuring even cooking and a safe cooking environment.
Serving Suggestions for grilled beer can chicken
Decoration
Elevate the presentation of your grilled beer can chicken with a few simple decorative touches. A scattering of fresh, vibrant green herbs like parsley, chives, or cilantro over the carved chicken adds a pop of color and freshness. If serving whole, a few lemon wedges artfully arranged around the base can provide a bright visual accent and a hint of citrus aroma. Consider placing it on a rustic wooden board or a large platter for a more impressive centerpiece.
Side Dishes
This versatile chicken pairs wonderfully with a wide array of classic cookout sides. Creamy potato salad offers a cooling, mellow contrast to the smoky, savory rub, while crisp coleslaw provides a delightful crunch and tangy brightness. For warm accompaniments, consider grilled corn on the cob, hearty baked beans, or perfectly roasted potatoes, all of which complement the chicken’s robust flavors beautifully. A simple, fresh green salad can also provide a lighter, refreshing counterpoint to the richness of the chicken, making for a balanced and satisfying meal.
Creative Serving Ideas
Beyond traditional plating, think outside the box for serving your grilled beer can chicken. Consider serving it family-style, with the whole carved chicken presented at the table for guests to serve themselves. Alternatively, for a more casual gathering, pull the meat off the bone and serve it in sliders or tacos, topped with your favorite barbecue sauce and slaw. Leftover chicken can be shredded and incorporated into flavorful chicken salads, hearty stews, or quick weeknight pasta dishes, extending its deliciousness beyond the initial meal.
Preparation & Storage
Storing Leftovers
Once your delicious grilled beer can chicken has been enjoyed, proper storage of any leftovers is key to maintaining its quality and safety. Allow the chicken to cool to room temperature, which should take no longer than two hours after it has been removed from the heat. This prevents the growth of harmful bacteria. Store the carved chicken pieces in an airtight container in the refrigerator.
In the refrigerator, leftover chicken will remain fresh and flavorful for approximately 3 to 4 days. Ensure the container is well-sealed to prevent the chicken from drying out or absorbing odors from other foods in the fridge. Enjoying the leftovers within this timeframe will ensure the best possible taste and texture.
If you anticipate having a significant amount of chicken left over, it’s a good idea to remove the meat from the bones before storing it. This makes it more convenient for future use. Always check for any signs of spoilage, such as off-putting smells or slimy texture, before consuming.
Freezing
For longer-term storage, freezing is an excellent option to preserve the deliciousness of your grilled beer can chicken. Remove the meat from the bones and portion it into convenient serving sizes. This makes thawing and reheating much easier. Place the meat into freezer-safe bags or airtight containers, ensuring as much air as possible is removed from the packaging to prevent freezer burn.
When properly packaged and frozen, your beer can chicken can maintain its quality for up to 3 months. Beyond this period, while it may still be safe to consume, the texture and flavor might start to degrade. Label your containers with the date of freezing to keep track of its shelf life.
Thawed chicken from frozen should ideally be used promptly. It’s best to thaw frozen chicken in the refrigerator overnight. Avoid thawing at room temperature to maintain food safety. The texture may be slightly softer after freezing and thawing, but the flavor should remain largely intact.
Reheating
Reheating your grilled beer can chicken is a straightforward process designed to bring back its succulence and warmth. The best method is often to reheat it gently in a covered dish in the oven. Place the chicken in an oven-safe dish, add a tablespoon or two of chicken broth, water, or even a bit of BBQ sauce to help maintain moisture, cover it tightly with foil, and warm it in a preheated oven at around 300-325°F (150-160°C) until heated through. This low and slow approach prevents the meat from drying out.
Alternatively, you can reheat smaller portions in the microwave. Place the chicken in a microwave-safe dish with a splash of liquid (water, broth, or sauce), cover it loosely with a damp paper towel, and heat on medium power in short intervals, checking for doneness between each burst. Stirring or turning the chicken can help ensure even heating.
Avoid reheating chicken multiple times, as this can compromise its texture and lead to excessive dryness. Always ensure the chicken is thoroughly heated before serving to guarantee it is safe to eat. A properly reheated piece of beer can chicken can still be incredibly flavorful and satisfying.
Frequently Asked Questions
-
Can I season the chicken a day ahead?
Absolutely, and it’s highly recommended for this recipe! Letting the seasoned chicken rest uncovered in the refrigerator for 24 to 48 hours before grilling significantly enhances the flavor penetration and helps the skin dry out, leading to a crispier finish. This dry-brining process is a cornerstone of achieving truly exceptional grilled beer can chicken.
-
Do I have to use beer for beer can chicken?
While the classic method famously uses beer, the primary function of the can is to provide an upright structure for even cooking and to create steam within the chicken. If you prefer not to use beer, you can substitute it with a non-alcoholic beverage like apple cider, broth, or even just water. Some people also use a ceramic beer can chicken roaster or a sturdy metal can filled with liquid to achieve a similar effect, prioritizing the upright position and the internal steaming.
-
How do I know when grilled beer can chicken is done?
The most accurate way to determine doneness is by using an instant-read meat thermometer. Insert it into the thickest part of the breast, ensuring it doesn’t touch the bone. The chicken is fully cooked and safe to eat when the internal temperature reaches 165°F (74°C). You can also check by piercing the thigh with a fork; the juices should run clear, and the meat should be opaque throughout.