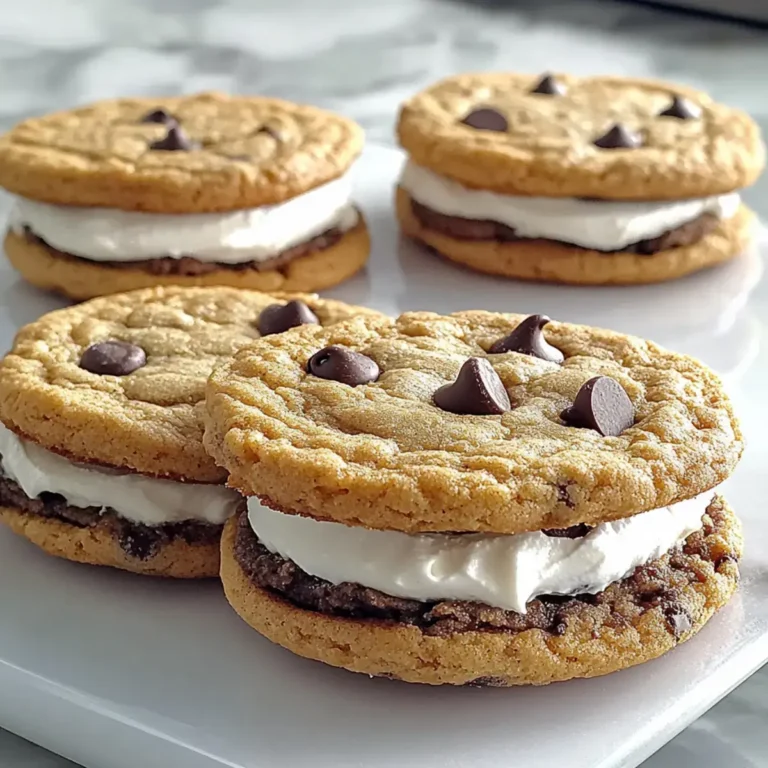
Irresistible Strawberry Chocolate Cake with Creamy Frosting
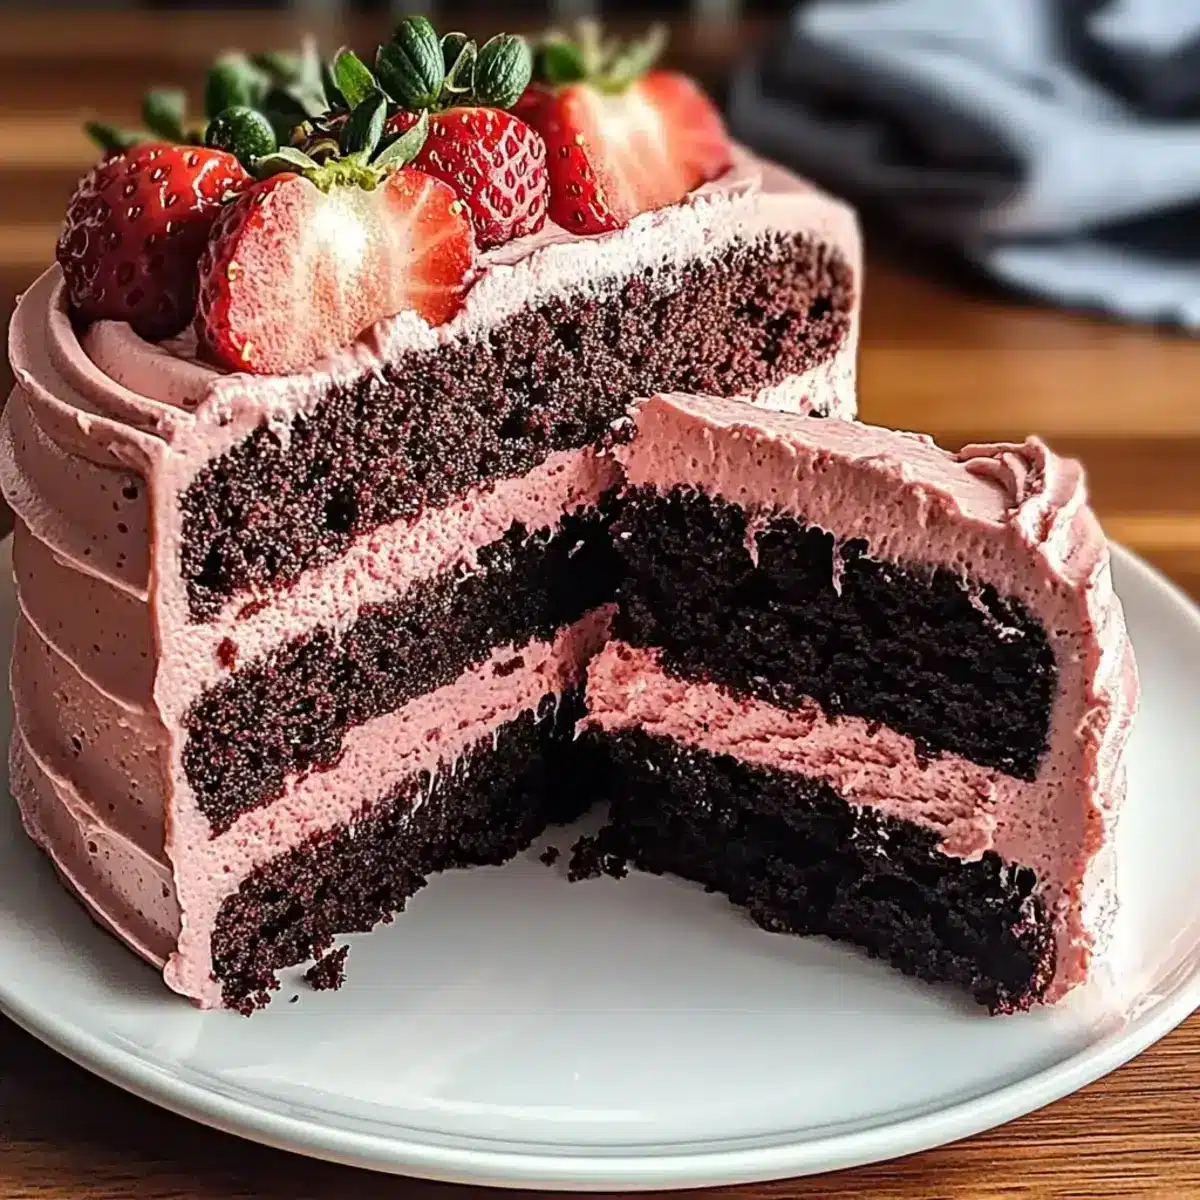
The aroma of melting chocolate and sweet strawberries wafts through my kitchen, instantly lifting my spirits. There’s something magical about creating a Strawberry Chocolate Cake that not only delights the taste buds but also wins hearts, a true testament to the power of simple, yet elegant, home baking.
This decadent dessert combines moist, fudgy chocolate layers with a luscious homemade strawberry jam filling, and a smooth cream cheese frosting that is simply irresistible. Perfect for celebrations or a cozy family dinner, this cake is an easy way to impress without spending hours in the kitchen, becoming a delightful centerpiece for any occasion.
Why You Will Love This Recipe
- Decadent Flavors: The rich, deep chocolate notes perfectly complement the bright, sweet tang of fresh strawberries, creating a harmonious and unforgettable taste experience that will have everyone asking for seconds.
- Showstopper Appeal: With its beautiful, often layered, appearance and creamy, luxurious frosting, this cake is designed to be an eye-catching centerpiece, guaranteed to impress guests at any gathering or special event.
- Accessible Baking: The straightforward steps involved in preparing this cake make it an achievable and enjoyable project for bakers of all skill levels, whether you are a seasoned culinary artist or a complete beginner taking your first steps into cake creation.
- Versatile Occasion: This cake is incredibly adaptable, fitting seamlessly into a variety of celebrations, from joyful birthdays and romantic anniversaries to simple weekend treats or even elegant brunches.
Ingredients You Need
Selecting high-quality ingredients is paramount to achieving the most delightful results for this Strawberry Chocolate Cake. Fresh, ripe strawberries will offer the best natural sweetness and vibrant color for the filling and decoration, while premium cocoa powder ensures a deep, rich chocolate flavor in the cake layers. Using room-temperature eggs and dairy allows for better emulsification and a smoother batter, contributing to a tender crumb.
Strawberry Chocolate Cake

Indulge in this decadent Strawberry Chocolate Cake, featuring moist, fudgy chocolate layers filled with luscious homemade strawberry jam and topped with a smooth cream cheese frosting. It's an easy-to-master, showstopper dessert perfect for any celebration.
- For the Strawberry Filling:
- 500 g strawberries (fresh or frozen, thawed and drained)
- 50 g granulated sugar
- 1 tablespoon water
- For the Cake Batter:
- 190 g all-purpose flour
- 75 g natural cocoa powder
- 1 teaspoon baking powder
- 1/2 teaspoon baking soda
- 1/2 teaspoon salt
- 115 g unsalted butter (melted)
- 100 g light-tasting oil
- 100 g granulated sugar
- 100 g brown sugar
- 2 large eggs (room temperature)
- 330 g milk (room temperature)
- For the Cream Cheese Frosting:
- 250 g cream cheese (softened to room temperature)
- 115 g unsalted butter (softened to room temperature)
- 100 g powdered sugar
- 70 g strawberry jam
- 1 teaspoon vanilla extract
- For Decoration:
- 200 g strawberries (finely diced)
- 7 strawberries (halved for decoration)
- 1Preheat the Oven: Preheat your oven to 350°F (175°C). Grease and flour two 9-inch round baking pans.
- 2Whisk Dry Ingredients: In a large bowl, whisk together flour, cocoa powder, baking powder, baking soda, and salt.
- 3Mix Wet Ingredients: In another bowl, combine melted butter, oil, granulated sugar, brown sugar, eggs, and milk. Mix until smooth.
- 4Combine Mixtures: Gradually fold the dry ingredients into the wet ingredients until just combined. Do not over-mix.
- 5Bake the Cake: Divide batter evenly between prepared pans. Bake for 30-35 minutes, or until a toothpick inserted comes out clean. Let cool in pans for 10 minutes before transferring to wire racks to cool completely.
- 6Prepare the Frosting: Beat softened cream cheese and butter until creamy. Gradually add powdered sugar, vanilla extract, and strawberry jam, mixing until smooth.
- 7Assemble the Cake: Place one cooled cake layer on a serving plate. Spread with strawberry jam filling and finely diced strawberries. Top with the second cake layer.
- 8Frost the Cake: Cover the top and sides of the cake with cream cheese frosting. Decorate with halved strawberries.
Keywords: Strawberry Chocolate Cake, Chocolate Cake, Strawberry Cake, Cream Cheese Frosting, Homemade Cake, Dessert, Baking, Celebration Cake
- strawberries: fresh or frozen; ensure thawed and drained if using frozen for a fresh flavor.
- granulated sugar: sweetens the strawberry filling; reduce if strawberries are extremely sweet.
- water: aids in creating a smooth strawberry jam filling.
- all-purpose flour: provides structure; can substitute with gluten-free flour for dietary needs.
- natural cocoa powder: adds a rich chocolate flavor; dark cocoa can deepen the taste.
- baking powder: essential for helping the cake rise.
- baking soda: works with acids to leaven the batter effectively.
- salt: enhances flavor and balances sweetness.
- unsalted butter (melted): contributes moisture and richness to the cake.
- light-tasting oil: keeps the cake moist; consider coconut oil for a fragrant twist.
- granulated sugar: sweetens the cake batter for a delightful taste.
- brown sugar: adds moisture and caramel notes to the cake.
- large eggs (room temperature): binds ingredients and adds richness.
- milk (room temperature): contributes moisture; almond milk can be a great alternative.
- cream cheese (softened to room temperature): provides a creamy base for the frosting; vegan options are available too.
- unsalted butter (softened to room temperature): enhances the richness of the frosting.
- powdered sugar: sweetens and thickens the frosting for the perfect consistency.
- strawberry jam: boosts the strawberry flavor in the frosting; homemade or store-bought works well.
- vanilla extract: adds depth and warmth to the frosting.
- strawberries (finely diced): perfect for layering and adding fresh flavor within the cake.
Detailed quantities for all these essential components can be found within the integrated recipe card for your convenience.
Variations
The beauty of this Strawberry Chocolate Cake lies not only in its classic deliciousness but also in its remarkable adaptability. You can easily transform this recipe to suit different dietary needs or flavor preferences, ensuring everyone can enjoy a slice of this delightful creation.
For those seeking a lighter, brighter taste, consider a berry variation by substituting the chocolate cake layers with a vanilla or even a lemon-infused cake. This swap allows the vibrant strawberry flavor to shine even more prominently, creating a refreshing dessert that’s perfect for warmer weather or when a lighter option is desired. The contrast between the zesty cake and the sweet strawberries is truly wonderful.
A fantastic option for those reducing their carbohydrate intake is a low-carb adaptation. You can achieve this by using a blend of almond flour and coconut flour for the cake base, and a sugar substitute like erythritol or stevia in both the cake and the frosting. This modification allows for a guilt-free indulgence, proving that delicious treats can also be health-conscious. It’s amazing how closely it can mimic the original’s texture and flavor with a few clever ingredient swaps.
For a truly vegan experience, the cake layers can be made using plant-based milk and oil, and the frosting can be crafted from vegan cream cheese and butter alternatives. The result is a cruelty-free dessert that is just as decadent and satisfying as the original. This ensures that those following a vegan lifestyle don’t have to miss out on the joy of a rich chocolate and strawberry confection, making it inclusive for all your guests.
How to Prepare strawberry chocolate cake
Step 1: Preparing the Foundation for Sweetness
Begin by preheating your oven to a precise 350 degrees Fahrenheit (175 degrees Celsius). This initial step is crucial for ensuring that your cake bakes evenly and achieves that perfect golden-brown exterior. While the oven is heating, meticulously prepare your two round baking pans, typically 9-inch in diameter. Grease them thoroughly using cooking spray or a generous coating of butter, and then dust lightly with flour or cocoa powder, tapping out any excess.
This meticulous pan preparation is your first line of defense against a cake sticking to the pan, which is a common frustration for home bakers. A well-greased and floured pan guarantees that your delicate cake layers will release cleanly, preserving their beautiful shape and integrity. This simple yet vital step sets the stage for a flawless baking process and a beautiful final presentation of your cake.
Taking the time to ensure your pans are perfectly prepped is an investment in the success of your Strawberry Chocolate Cake. It minimizes the risk of breakage and damage during the all-important de-panning stage, leading to a more professional-looking final product. This foundational step, often overlooked, makes a significant difference in the overall outcome of your baking endeavor.
Step 2: Crafting the Rich Chocolate Base
In a generously sized mixing bowl, combine your dry ingredients: the all-purpose flour, natural cocoa powder, baking powder, baking soda, and salt. Use a whisk to thoroughly blend these components together, ensuring that there are no clumps of cocoa powder or leavening agents remaining. This thorough mixing ensures an even distribution of ingredients, which is key for a consistent texture and rise in your cake layers.
The goal here is to create a homogenous blend of dry elements that will form the very structure and flavor profile of your chocolate cake. A few extra moments spent whisking ensures that every bite will deliver the same delightful chocolatey goodness without any pockets of bitterness or insufficient leavening. This careful attention to detail in the dry mix contributes significantly to the overall quality of the final cake.
Achieving this well-aerated dry mixture is a critical precursor to combining it with the wet ingredients. It helps to prevent gluten development and ensures that the baking powder and soda can effectively do their job, leading to a light and fluffy cake crumb. This careful preparation of the dry components is a hallmark of professional baking techniques.
Step 3: Emulsifying the Luscious Wet Components
In a separate, yet equally important, mixing bowl, bring together the wet ingredients. Start by combining the melted unsalted butter with the light-tasting oil, ensuring a smooth, liquid base. Next, incorporate the granulated sugar and brown sugar, whisking them in until they are well integrated into the buttery mixture. This dual sugar approach provides both sweetness and a wonderful moistness, contributing to a tender crumb.
Following this, add your two large eggs, making sure they are at room temperature for optimal emulsification. Then, pour in the room-temperature milk, whisking everything together until you achieve a perfectly smooth and cohesive mixture. The temperature of your eggs and milk is crucial here; cold ingredients can cause the butter to seize, leading to an undesirable texture. This emulsified blend is the flavor and moisture powerhouse of your cake.
This careful combination of wet ingredients creates a rich, flavorful foundation that will interact beautifully with the dry components. The interplay of fats, sugars, eggs, and liquid contributes essential moisture and tenderness to the final cake structure, ensuring it is not dry or crumbly. It’s this balanced wet mixture that makes the cake so enjoyable and satisfying to eat.
Step 4: Gently Uniting the Mixtures
Now comes the delicate art of combining the dry and wet ingredients. Gradually introduce the whisked dry mixture into the bowl containing the wet ingredients. Use a spatula or a whisk to gently fold the ingredients together, stirring just until everything is incorporated. It is absolutely imperative that you do not over-mix the batter at this stage; over-mixing can develop the gluten in the flour too much, resulting in a dense and tough cake.
The objective is to achieve a batter that is thick yet pourable, with no visible streaks of dry flour. The batter should look uniformly blended, with a rich, chocolatey hue. This careful merging ensures that the leavening agents have the best opportunity to work effectively during baking, leading to a light and airy crumb that is characteristic of a well-made cake. Patience and a gentle hand are key here.
The ideal batter consistency is one that flows smoothly off your spatula, indicating it’s ready for the oven. This moment of unification is where all your careful ingredient preparation culminates. Properly combined, this batter promises a wonderfully moist and flavorful Strawberry Chocolate Cake that will delight everyone who tastes it.
Step 5: The Transformation in the Oven
Once your batter is beautifully combined, divide it evenly between the two prepared baking pans. Ensure that each pan receives a similar amount of batter to promote uniform baking and ensure that your cake layers will be of equal height. This even distribution is a small but significant detail that contributes to a more aesthetically pleasing and balanced final cake.
Carefully place the filled pans into the preheated oven. Allow them to bake for approximately 30 to 35 minutes. You will know the cakes are ready when a toothpick, inserted directly into the center of each cake, comes out clean or with only a few moist crumbs attached. Avoid opening the oven door too early in the baking process, as this can cause the cakes to sink.
After removing the cakes from the oven, let them cool in their pans on a wire rack for about 10 minutes. This initial cooling period allows the cakes to firm up slightly, making them easier to handle. Then, carefully invert the pans onto the wire racks to allow the cake layers to cool completely. Ensuring they are completely cool is essential before moving on to the frosting and assembly stages of your dessert.
Step 6: Whipping Up the Velvety Cream Cheese Frosting
While your cake layers are patiently cooling, it’s time to prepare the luscious cream cheese frosting. In a medium-sized mixing bowl, combine the softened cream cheese and softened unsalted butter. Beat these two ingredients together using an electric mixer on medium speed until the mixture is exceptionally creamy and smooth, free from any lumps. This smooth base is crucial for a silky frosting texture.
Gradually add the powdered sugar to the cream cheese and butter mixture, starting the mixer on low speed to prevent a cloud of sugar from erupting. Once the powdered sugar is mostly incorporated, increase the speed to medium and continue beating until the frosting is light and fluffy. Stir in the vanilla extract for that classic warm aroma and flavor, and finally, the strawberry jam.
Mix the strawberry jam in until it’s just combined, creating beautiful swirls of pink and a delightful hint of fruity sweetness throughout the frosting. Taste the frosting to ensure it’s to your liking, adjusting sweetness or strawberry flavor as needed. This decadent frosting will be the perfect complement to the rich chocolate cake and the fruity jam filling.
Step 7: Assembling the Masterpiece Layers
With your exquisite chocolate cake layers completely cooled, it’s time to bring them together into a stunning creation. Place one of the cooled cake layers onto your chosen serving plate or cake stand. This forms the stable base for the rest of your delicious construction. Ensure the plate is flat and clean, ready to showcase your baking artistry.
Generously spread a layer of your prepared strawberry jam filling over the surface of the first cake layer. This creates a sweet, fruity barrier and adds an intense burst of strawberry flavor. On top of the jam, scatter the finely diced fresh strawberries, distributing them evenly across the jam layer. These diced strawberries add both texture and fresh, vibrant flavor bursts throughout the cake.
Carefully lift the second chocolate cake layer and gently place it on top of the first layer, ensuring it is centered and level. Press down very gently to ensure the layers are stable and form a cohesive unit. This careful alignment is key to a visually appealing and structurally sound cake that’s easy to slice.
Step 8: The Grand Finale: Frosting and Decorating
Now, take your velvety cream cheese frosting and begin to generously coat the assembled cake. Start by frosting the top surface, spreading the frosting evenly towards the edges. Then, carefully frost the sides of the cake, using an offset spatula to achieve a smooth, professional finish. You can create elegant swirls or a sleek, clean look, depending on your preference.
Don’t be afraid to use a generous amount of frosting; it adds to the richness and decadence of the cake. Once the entire cake is covered, it’s time for the final flourish. Arrange the 7 halved strawberries artfully on top of the cake. Position them strategically to create a beautiful, inviting visual that highlights the star ingredients of this dish.
This final decorating step transforms your assembled cake into a showstopper, ready to impress and delight your guests. The vibrant red of the strawberries against the creamy white frosting creates a striking contrast, hinting at the delicious flavors waiting within. It’s a truly triumphant culmination of your baking efforts.
Pro Tips for strawberry chocolate cake
Temperature is Key: Always ensure your butter, cream cheese, and eggs are at room temperature before you begin. This allows them to emulsify properly, resulting in a smoother batter and a lighter, more consistent cake texture. Cold ingredients can lead to lumps and a denser cake structure. Using ingredients at the correct temperature is a cornerstone of successful baking, especially for delicate cakes like this.
Gentle Mixing Prevents Toughness: Be very careful not to over-mix the cake batter once you combine the dry and wet ingredients. Over-mixing develops the gluten in the flour, which can result in a tough, dense cake. Mix only until the ingredients are just combined and no dry streaks of flour remain visible. A light hand yields the best crumb.
Patience with Cooling: It is absolutely essential to allow your cake layers to cool completely before attempting to frost and assemble them. Warm cakes are fragile and the frosting will melt, causing a messy outcome and potentially making the cake slide apart. Allow them to cool on a wire rack for at least an hour, or even longer, to ensure they are fully set and ready for decorating. This patience pays off in a beautifully structured cake.
Moisture Maintenance: For an extra moist cake, consider brushing the cooled cake layers with a simple syrup or a light milk wash before adding the frosting. This simple step adds an additional layer of moisture that will keep the cake tender and delicious for days. It’s a secret weapon for ensuring every bite is as delightful as the first.
Taste and Adjust Sweetness: Before adding the sugar to your strawberry filling, take a moment to taste your fresh strawberries. Their natural sweetness can vary significantly, and you may find you need less added sugar than the recipe suggests. This allows you to tailor the sweetness perfectly to the specific fruit you are using, ensuring a balanced flavor profile in your final cake.
Serving Suggestions for strawberry chocolate cake
Decoration
The visual appeal of your Strawberry Chocolate Cake can be elevated with simple yet impactful decorative touches. Fresh strawberries are the obvious and most fitting choice for adorning this dessert. You can halve them and arrange them in a decorative pattern on top, such as a circular wreath or a clustered mound, allowing their vibrant red color to pop against the creamy frosting.
For an extra touch of elegance, consider dusting the top with a light sprinkle of powdered sugar or cocoa powder, creating a subtle contrast. Edible flowers, like violas or pansies, can also add a sophisticated and colorful flair, turning your cake into a true work of art. A drizzle of melted dark chocolate or white chocolate over the top can also add visual interest and an extra layer of flavor for those who can’t get enough chocolate.
A delicate piping of frosting around the edges, perhaps in a shell or star pattern, can frame the cake beautifully. Alternatively, a scattering of finely chopped chocolate shavings or even some crushed freeze-dried strawberries can provide interesting texture and visual appeal. The key is to complement the cake’s inherent beauty without overwhelming it.
Side Dishes
Complementing the rich flavors of your Strawberry Chocolate Cake with carefully selected side dishes can create a truly memorable dessert experience. A scoop of high-quality vanilla bean ice cream offers a classic and delightful pairing, its cool creaminess providing a perfect counterpoint to the warm chocolate and bright strawberry notes. The simple, pure flavor of vanilla lets the cake shine while still offering a comforting contrast in temperature and texture.
For those who enjoy a lighter accompaniment, a refreshing fruit salad featuring seasonal berries and melon can provide a palate-cleansing contrast. The natural sweetness and slight tartness of the fresh fruit cuts through the richness of the cake, making each bite feel new and exciting. A small glass of milk or a light, fruity herbal tea can also serve as an excellent beverage pairing that enhances the overall flavor profile.
A dollop of lightly sweetened whipped cream adds an airy texture and a touch of sweetness that balances the density of the cake without being overpowering. Some might even enjoy a small serving of chocolate mousse on the side for an indulgent, double-chocolate experience. The aim is to provide accompaniments that enhance, rather than compete with, the star of the show—your magnificent cake.
Creative Serving Ideas
Elevate your Strawberry Chocolate Cake beyond the traditional slice with a few creative serving ideas that add an element of surprise and delight. Consider deconstructing the cake by serving a slice of chocolate layer alongside a dollop of the strawberry filling and a swirl of cream cheese frosting in individual glasses or bowls. This offers a visually interesting presentation and allows guests to mix the components to their liking.
Another imaginative approach is to transform the cake into individual portions, like mini trifles. Layer crumbled pieces of the chocolate cake with the strawberry jam and diced strawberries, topped with a generous swirl of the cream cheese frosting in small jars or glasses. This makes for an elegant and portable dessert option, perfect for parties or as take-home treats.
For a truly unique presentation, consider serving warm slices of the cake with a drizzle of warm chocolate ganache and a side of raspberry coulis. This adds an extra layer of decadence and visual appeal, transforming a simple slice into a gourmet experience. You could also present it alongside a delicate strawberry shortcake biscuit, offering two delightful ways to enjoy the flavor combination.
Preparation & Storage
Storing Leftovers
To keep your delicious Strawberry Chocolate Cake fresh and flavorful for as long as possible, proper storage is key. The best way to store leftover cake is by placing it in an airtight container. This prevents the cake from drying out and also shields it from absorbing any unwanted odors from the refrigerator.
If the cake is fully frosted, ensure the container is large enough to accommodate it without squashing the frosting. You can also individually wrap slices of cake in plastic wrap before placing them in an airtight container for added protection. Stored correctly in the refrigerator, leftover cake can typically remain enjoyable for up to 4 to 5 days, maintaining its delightful moisture and taste.
Make sure the cake has cooled completely before you attempt to store it. Storing a warm cake will create condensation inside the container, leading to a soggy texture. If you plan on keeping it for an extended period, consider freezing it instead.
Freezing
Freezing is an excellent option for preserving your Strawberry Chocolate Cake for longer periods, allowing you to enjoy its deliciousness at a later date. First, ensure that the cake is completely cooled and has been frosted, as this helps to protect it during the freezing process. If the cake is unfrosted, it is still possible to freeze it, but frosting adds a layer of defense against freezer burn.
Carefully wrap the entire cake, or individual slices, tightly in multiple layers of plastic wrap. This creates a barrier against air and moisture. After wrapping in plastic wrap, add a layer of aluminum foil for an additional protective shield. This double-layer wrapping is crucial for preventing freezer burn and maintaining the cake’s texture and flavor.
Place the double-wrapped cake or slices into a freezer-safe container or bag. Properly frozen, your Strawberry Chocolate Cake can retain its quality for up to 2 to 3 months. Remember to label the container with the date it was frozen for easy tracking.
Reheating
When you are ready to enjoy your frozen or refrigerated Strawberry Chocolate Cake, proper reheating is important to bring it back to its optimal deliciousness. If the cake has been frozen, the best approach is to thaw it slowly overnight in the refrigerator. This gradual thawing helps to maintain the cake’s texture and prevents it from becoming too moist or mushy.
Once thawed, you can serve the cake as is, or gently reheat individual slices for a warmer, more comforting experience. For reheating, place a slice of cake on a microwave-safe plate and heat it in short intervals of about 10-15 seconds at a time. Be very careful not to overheat, as this can cause the frosting to melt excessively and the cake to become dry.
Alternatively, you can gently warm slices in a low oven (around 250°F or 120°C) for about 5-10 minutes, checking frequently. This method can help to re-crisp any parts of the cake that might have softened during thawing. The goal is to achieve a pleasant warmth that enhances the flavors without compromising the cake’s structure.
Frequently Asked Questions
-
How do I select the best strawberries for the filling?
For the most vibrant flavor and beautiful color in your Strawberry Chocolate Cake filling, choose ripe, firm strawberries that are deep red throughout. Avoid any with bruising or mold. If fresh strawberries are not in season or readily available, high-quality frozen strawberries can be used; just ensure they are fully thawed and thoroughly drained to prevent excess moisture from making your filling too watery. Gently pressing them in a sieve can help remove any remaining liquid, ensuring a perfectly textured jam.
-
What’s the best way to store leftover Strawberry Chocolate Cake?
Leftover Strawberry Chocolate Cake should be stored in an airtight container in the refrigerator. This is crucial for maintaining its moisture and preventing it from drying out or picking up unwanted smells from other foods. If the cake is frosted, ensure the container is deep enough to accommodate it without damaging the frosting. Properly stored, the cake can last for up to 4-5 days, offering delicious leftovers for several days.
-
Can I freeze the Strawberry Chocolate Cake? If so, how?
Yes, absolutely! Freezing is a wonderful way to preserve your Strawberry Chocolate Cake for future enjoyment. After the cake has completely cooled and has been frosted, wrap it tightly in several layers of plastic wrap, followed by a layer of aluminum foil. This double-wrapping provides excellent protection against freezer burn. Place the wrapped cake in a freezer-safe container or bag and freeze for up to 2-3 months. To thaw, remove the wrapping and let it defrost slowly in the refrigerator overnight for the best results.
-
What should I do if my cake layers are too dense?
A dense cake layer in your Strawberry Chocolate Cake is often a result of over-mixing the batter. When flour is over-mixed with liquid, the gluten strands become too developed, leading to a tough texture. To avoid this, mix the wet and dry ingredients only until just combined, being careful not to stir vigorously. Additionally, ensure your baking soda and baking powder are fresh, as expired leavening agents can also lead to a poor rise and dense cake. Using room temperature ingredients also contributes to a lighter batter.
-
Are there any dietary considerations I should keep in mind for this cake?
Certainly. For gluten-sensitive individuals, you can substitute the all-purpose flour with a good quality gluten-free flour blend, ensuring it contains a binder like xanthan gum. To make the cake dairy-free, use a plant-based milk (like almond or oat milk) and ensure your butter and cream cheese in the frosting are dairy-free alternatives. Always double-check ingredient labels to confirm they meet specific dietary needs. It’s also worth noting that some people have allergies to strawberries, so be mindful of your guests’ potential sensitivities.
-
What can I do if my cream cheese frosting isn’t spreading well?
If your cream cheese frosting is too stiff to spread easily, it likely needs a little softening. Ensure your cream cheese and butter were truly at room temperature before beating them together; this is the most common cause of stiff frosting. If it’s still too thick after mixing, you can try adding a tablespoon or two of milk or cream, mixing until it reaches a smoother, more spreadable consistency. Be cautious not to add too much liquid, as this can make the frosting too thin. A slightly warm spatula can also help when frosting a chilled cake.