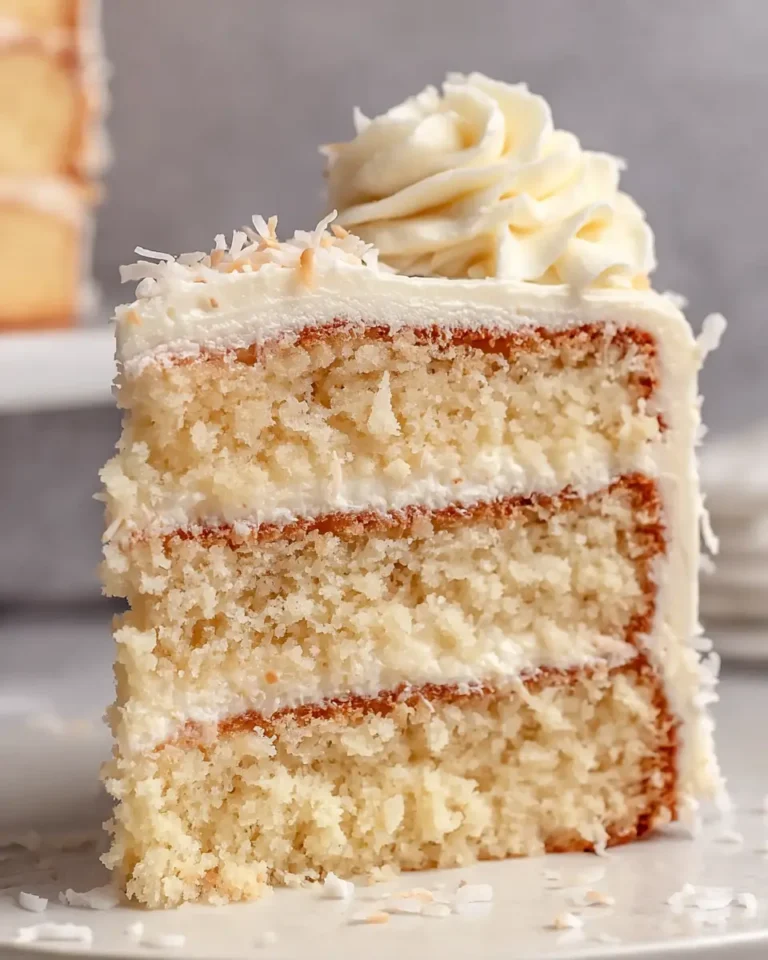
Pineapple Coconut Layer Cake
This Pineapple Coconut Cake is a symphony of tropical flavors, a dessert that transports you straight to a sun-drenched beach with every bite. Its tender, coconut-infused layers are perfectly complemented by a luscious pineapple curd and a creamy, tangy frosting. It’s the ideal centerpiece for any celebration, offering a delightful escape from the ordinary.
You’ll find this cake to be incredibly satisfying, striking a beautiful balance between rich sweetness and bright, fruity notes. The texture is wonderfully tender, the filling is smooth and vibrant, and the frosting provides a luxurious finish without being overly heavy. It’s a cake designed to impress, both visually and gastronomically.
Why You Will Love This Recipe
- Tropical Bliss: Indulge in the exotic pairing of pineapple and coconut, creating a flavor profile that is both refreshing and comforting.
- Tender Crumb: The cake layers are exceptionally soft and moist, thanks to the careful selection of ingredients and the gentle folding technique.
- Silky Smooth Filling: The homemade pineapple curd offers a burst of tangy sweetness that cuts through the richness of the cake and frosting beautifully.
- Dreamy Frosting: A creamy coconut cream cheese frosting provides the perfect creamy texture and a subtle coconut essence that ties the entire cake together harmoniously.
- Make-Ahead Marvel: Many components of this cake can be prepared in advance, making assembly less stressful for parties and gatherings.
Ingredients You Need
The success of any great cake lies in the quality of its ingredients, and this Pineapple Coconut Cake is no exception. Using fresh, vibrant components will ensure the best possible flavor and texture. Always opt for full-fat dairy and good quality extracts for that authentic tropical taste that shines through.
Pineapple Coconut Cake

A rich yet bright layer cake with tender coconut-scented layers, silky pineapple curd, and creamy frosting, making it a great make-ahead dessert for birthdays, gatherings, or anytime you want a tropical cake that slices neatly and feels special. The pineapple keeps it lively, while the coconut brings softness and warmth.
- For the cake: 1 cup pineapple pieces, 2 teaspoons baking powder, 1 teaspoon coconut extract, 3/4 cup full-fat coconut milk (brought to room temperature), 1 1/2 cups granulated sugar, 1 teaspoon fine salt, 1 cup sweetened shredded coconut, 2 tablespoons pineapple juice, 1/2 cup sour cream, 2 1/2 cups cake flour, 3/4 cup unsalted butter (softened), 4 large egg whites (at room temperature), 1/2 teaspoon baking soda, 2 teaspoons vanilla extract
- For the pineapple curd: 1/3 cup granulated sugar, 2 large egg yolks, 1/3 cup pineapple juice, 1 1/2 teaspoons cornstarch, 1/8 teaspoon salt, 1 large egg, 1/4 cup unsalted butter (softened)
- For the frosting: 4 cups powdered sugar, 1/4 teaspoon salt, 1/2 cup unsalted butter, 2 teaspoons vanilla extract, 1/4 cup coconut milk, 8 ounces full-fat cream cheese (softened)
- 1Preheat the oven to 350°F (177°C). Grease three 8-inch cake pans, line the bottoms with parchment rounds, and grease the parchment as well to ensure easy release after baking.
- 2In a medium bowl, whisk together the cake flour, baking powder, baking soda, and salt. Set the dry mixture aside.
- 3In a large mixing bowl, beat the softened butter with the granulated sugar on medium-high speed for about 2 minutes, or until the mixture becomes pale and creamy. Scrape down the bowl as needed.
- 4Add the egg whites, sour cream, vanilla extract, and coconut extract to the butter mixture. Beat until incorporated. The batter may appear slightly curdled at this stage.
- 5With the mixer on low speed, add the dry ingredients in portions, alternating with the coconut milk and pineapple juice, until the batter comes together. Fold in the shredded coconut and pineapple chunks, mixing only until evenly distributed. Finish with a final stir by hand to make sure the batter is smooth and free of lumps. It should be somewhat thick.
- 6Divide the batter evenly among the prepared pans. Bake for 22 to 24 minutes, or until a toothpick inserted into the center comes out clean.
- 7Set the pans on a wire rack and allow the cake layers to cool completely before assembling and frosting.
- 8To prepare the pineapple curd, fill the bottom portion of a double boiler with 1 to 2 inches of water and bring it to a gentle simmer.
- 9In the top portion of the double boiler, whisk together the whole egg, egg yolks, sugar, cornstarch, pineapple juice, and salt. Cook over the simmering water, whisking continuously, for about 10 minutes, or until the mixture thickens to a consistency similar to hollandaise sauce.
- 10Remove the curd from the heat and whisk in the softened butter until fully melted and smooth. Transfer the curd to a container and press plastic wrap directly onto the surface. Let it cool completely; it will thicken further as it rests.
- 11For the frosting, beat the cream cheese and butter together in a large bowl for about 2 minutes, until smooth and creamy.
- 12Add the powdered sugar, coconut milk, vanilla extract, and salt. Mix on low speed at first, then increase to high speed and beat for 2 more minutes. For a firmer frosting, blend in an additional 1/4 cup powdered sugar if needed.
- 13If the cake layers have domed tops, level them with a serrated knife. Place the first cake layer on a serving plate or cake stand and spread with a scant 1/2 cup of frosting, followed by 1/4 cup of pineapple curd.
- 14Repeat the same layering process with the second cake layer. Carefully position the third layer on top.
- 15Spread a thin crumb coat of frosting over the entire cake, then refrigerate it for 30 to 60 minutes to set.
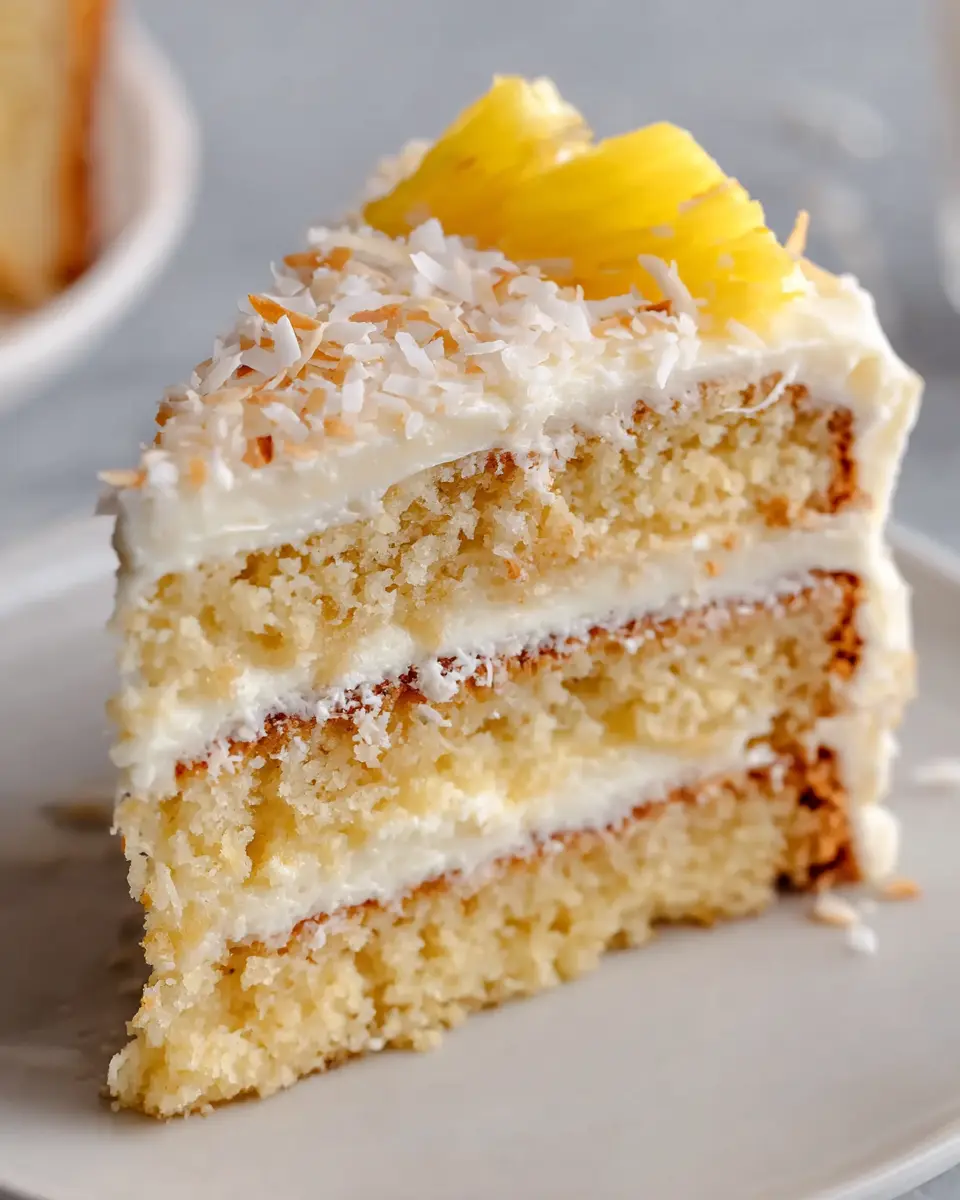
- 16Once chilled, cover the cake with the remaining frosting. Garnish the top with pineapple chunks and gently press shredded coconut onto the sides, if desired.
- 17Refrigerate the finished cake for at least 20 minutes before slicing so it holds its shape neatly when served.
Keywords: Pineapple Coconut Cake, Tropical Cake, Layer Cake, Fruit Cake, Cream Cheese Frosting, Make-ahead Dessert
These are the essential building blocks for your masterpiece; precise quantities and any additional notes can be found within the detailed recipe card.
Variations
Vegan Delight: To transform this into a stunning vegan treat, simply substitute the butter with a high-quality vegan butter alternative, and use a flax egg (1 tablespoon flaxseed meal mixed with 3 tablespoons water, left to sit for 5 minutes) for each egg white. For the sour cream, a thick, unsweetened plant-based yogurt like coconut or soy yogurt will work wonderfully. The cream cheese frosting can be recreated using vegan cream cheese and vegan butter, ensuring all the tropical notes are preserved.
Gluten-Free Indulgence: Crafting a gluten-free version is achievable by swapping the all-purpose flour for a reputable gluten-free baking blend. Ensure your blend contains xanthan gum, which is crucial for providing structure and elasticity in the absence of gluten. You might need to slightly adjust the liquid content, adding a touch more coconut milk or pineapple juice if the batter appears too thick, to maintain that signature tender crumb.
Low-Carb Tropical Twist: For those mindful of sugar intake, a low-carb adaptation is possible. Use a granulated sugar substitute like erythritol or monk fruit blend for both the cake and frosting. You can also use a sugar-free pineapple juice or unsweetened crushed pineapple, ensuring it’s thoroughly drained. Almond flour or a coconut flour blend can be used in place of cake flour, though you may need to experiment with ratios to achieve the perfect texture.
How to Prepare Pineapple Coconut Cake
Step 1: Preparing the Cake Pans and Oven
Begin by preheating your oven to a steady 350°F (177°C). This consistent temperature is crucial for ensuring the cake bakes evenly and develops a beautiful, golden-brown crust. Properly preparing your cake pans is the first defense against a cake that sticks, which is a common frustration for bakers.
Generously grease three 8-inch cake pans. Don’t be shy with the butter or baking spray; a thorough coating is essential. Next, cut rounds of parchment paper to fit the bottom of each pan. Place these rounds on the greased bottoms, and then grease the parchment paper itself. This double-layer of protection ensures your delicate cake layers will release effortlessly after baking.
Step 2: Mixing the Dry and Wet Ingredients
In a medium-sized bowl, take your cake flour and whisk it together with the baking powder, baking soda, and fine salt. This initial whisking action is vital because it evenly distributes the leavening agents and salt throughout the flour. An even distribution means your cake layers will rise uniformly and have a balanced flavor profile, without any pockets of saltiness.
In a separate, larger mixing bowl, cream together the softened unsalted butter and granulated sugar. Beat these on medium-high speed for about two minutes until the mixture becomes visibly pale and acquires a fluffy, creamy texture. This creaming process incorporates air, which contributes significantly to the cake’s lightness and tender crumb. Afterward, add the room-temperature egg whites, sour cream, vanilla extract, and coconut extract to the creamed butter and sugar mixture. Beat until everything is well combined, forming a cohesive base for your cake batter.
Step 3: Combining the Batter and Folding in Fruit
With your mixer running on a low speed, begin to incorporate the dry ingredients into the wet ingredients in stages. Alternate adding portions of the whisked dry mixture with the liquid ingredients – the room-temperature full-fat coconut milk and the pineapple juice. This alternating method helps prevent the batter from becoming overworked, which can lead to a tough cake. Ensure you scrape down the sides of the bowl periodically to incorporate all the ingredients.
Once the batter is almost smooth and mostly combined, it’s time to gently fold in the shredded sweetened coconut and the pineapple pieces. Use a spatula or a large spoon for this task, folding with a light hand to ensure the fruit and coconut are evenly distributed throughout the batter without deflating the air you’ve incorporated. A final, gentle stir by hand can ensure there are no hidden pockets of dry ingredients or clumps of fruit, resulting in a beautifully uniform batter ready for the pans.
Step 4: Baking and Cooling the Cake Layers
Carefully divide the prepared batter evenly among the three greased and parchment-lined 8-inch cake pans. An even distribution of batter is key to ensuring all three layers bake at the same rate and are roughly the same height. Smooth the tops slightly with your spatula to create a level surface for baking.
Place the pans into your preheated oven and bake for approximately 22 to 24 minutes. The cake is done when the tops are set and spring back slightly when gently touched. A more definitive test is to insert a toothpick or a thin skewer into the center of a cake layer; if it comes out clean with no wet batter attached, your cakes are perfectly baked. Once baked, remove the pans from the oven and let them cool in the pans on a wire rack for about 10-15 minutes. This initial cooling period allows the cakes to firm up slightly, making them easier to handle. Then, invert the cakes onto the wire rack to cool completely. It is absolutely critical that the cake layers are fully cooled before you attempt to assemble and frost them; warm cake will melt the curd and frosting, leading to a messy, unstable cake.
Step 5: Crafting the Pineapple Curd
To create the luscious pineapple curd, you’ll need a double boiler setup. Fill the bottom portion of your double boiler with about 1 to 2 inches of water and bring it to a gentle simmer over medium heat. The gentle, indirect heat is essential for cooking the eggs without scrambling them.
In the top part of the double boiler, whisk together the whole egg, egg yolks, granulated sugar, cornstarch, pineapple juice, and salt. This mixture will be cooked over the simmering water. Continuously whisk the ingredients for about 10 minutes, or until the mixture thickens significantly to a consistency similar to hollandaise sauce or a thick custard. It should coat the back of a spoon nicely. Once thickened, remove the top pot from the heat. Immediately whisk in the softened butter until it is fully melted and completely incorporated, resulting in a smooth, glossy curd. Transfer the hot curd to a clean container and press a piece of plastic wrap directly onto the surface of the curd. This prevents a skin from forming as it cools. Allow the curd to cool completely at room temperature, and then chill it in the refrigerator; it will continue to thicken as it rests.
Step 6: Preparing the Creamy Coconut Frosting
To make the decadent coconut cream cheese frosting, start by beating the softened cream cheese and softened unsalted butter together in a large mixing bowl. Use an electric mixer on medium speed and beat for about two minutes until the mixture is completely smooth and creamy, with no lumps of cream cheese remaining. This smooth base is crucial for a silky frosting texture.
Gradually add the powdered sugar to the creamed mixture, mixing on low speed at first to avoid a cloud of sugar dust. Once the sugar is incorporated, increase the mixer speed to high and beat for an additional two minutes until the frosting is light, fluffy, and wonderfully spreadable. Incorporate the coconut milk, vanilla extract, and salt, beating until everything is just combined. If your kitchen is particularly warm, or if you prefer a firmer frosting that is easier to handle for stacking, you can mix in an additional 1/4 cup of powdered sugar, one tablespoon at a time, until your desired consistency is reached.
Step 7: Assembling and Crumb Coating the Cake
If your baked cake layers have developed domed tops, use a long, serrated knife to carefully level them, creating flat surfaces for stacking. This step is important for stability and a professional appearance. Place the first cake layer onto your serving plate or cake stand.
Spread a generous, but not overly thick, layer of frosting over the first cake layer – about half a cup should suffice. Then, spoon about a quarter cup of the cooled pineapple curd over the frosting, spreading it gently to the edges. Place the second cake layer on top of this, and repeat the frosting and curd layering process. Carefully position the third and final cake layer on top of the second. Now, apply a very thin, even layer of frosting all over the cake – this is your crumb coat. Its purpose is to trap any loose crumbs, preventing them from making the final frosting layer look messy. Once the crumb coat is applied, refrigerate the cake for 30 to 60 minutes until the frosting is firm to the touch. This chilling step is vital for achieving clean frosting lines.
Step 8: Final Frosting and Decoration
Once the cake has chilled and the crumb coat has set, remove it from the refrigerator. Apply the remaining frosting to the cake, covering the top and sides evenly. Use an offset spatula to create smooth finishes or decorative swirls as desired. This is where your cake truly comes to life visually.
If you wish to enhance the tropical theme, you can garnish the top of the cake with fresh pineapple chunks. Gently press shredded coconut onto the sides of the cake for an extra textural element and to reinforce the coconut flavor. The beauty of this cake is that it looks stunning with simple decorations that highlight its natural elegance. Before slicing and serving, it is highly recommended to chill the finished cake again for at least 20 minutes. This final chilling period helps the frosting firm up slightly, ensuring that each slice holds its shape beautifully and showcases the distinct layers of cake, curd, and frosting.
Pro Tips for Pineapple Coconut Cake
Achieve Perfect Temperature: For the smoothest batter and most even bake, ensure all your dairy products (butter, egg whites, sour cream, and coconut milk) are at a true room temperature. Cold ingredients can cause the batter to separate or lead to dense spots.
Manage Moisture: When using pineapple pieces, make sure they are well-drained of excess liquid. Too much moisture can weigh down the cake layers and potentially affect the baking process, leading to a gummy texture. Similarly, ensure your pineapple curd is not too watery.
The Magic of Chilling: Don’t underestimate the power of chilling. Refrigerating the cake after the initial crumb coat is essential for a clean final frosting. A chilled cake also slices much more neatly, allowing the beautiful layers to be admired.
Flavor Boost: For an even more intense coconut flavor, consider toasting the shredded coconut lightly before folding it into the batter or using it for decoration. Toasting brings out the nutty undertones and adds a delightful crunch.
Extract Quality Matters: Invest in good quality vanilla and coconut extracts. They are concentrated flavor powerhouses, and using premium extracts will make a noticeable difference in the overall taste of your cake, elevating it from good to truly exceptional.
Serving Suggestions for Pineapple Coconut Cake
Decoration
Adorn the top of your Pineapple Coconut Cake with fresh, vibrant pineapple chunks. Arrange them artfully, perhaps in a circular pattern or a cheerful cluster. A light dusting of toasted shredded coconut around the edges of the top or pressed gently onto the sides of the cake adds a beautiful textural contrast and visual appeal, reinforcing the tropical theme.
Side Dishes
Serve this delightful cake with a dollop of lightly sweetened whipped cream. The cream provides a cool, airy counterpoint to the richness of the cake and frosting, enhancing the overall sensory experience. A small side of fresh pineapple slices on the plate can further brighten the fruit notes and complement the cake’s flavors beautifully.
Creative Serving Ideas
For an extra touch of elegance, consider serving individual slices with a drizzle of passion fruit coulis. This adds another layer of tropical tanginess that pairs wonderfully with pineapple and coconut. A small scoop of coconut sorbet or a delicate vanilla bean ice cream would also be a sophisticated accompaniment, turning a slice of cake into a complete dessert experience.
Preparation & Storage
Storing Leftovers
Because this cake contains cream cheese frosting and a fruit-based curd, it must be stored in the refrigerator. Cover the cake tightly with plastic wrap or place it in an airtight cake container. This will help to maintain its moisture and prevent it from drying out or absorbing unwanted odors from the refrigerator. Properly stored, leftover Pineapple Coconut Cake can remain delicious for up to 5 days.
Freezing
For longer-term storage, freezing is an excellent option. It’s best to freeze individual slices rather than the whole cake, as this allows for more convenient thawing and serving. Wrap each slice very securely in plastic wrap, followed by a layer of aluminum foil or a freezer-safe bag to prevent freezer burn. Frozen cake slices can be kept for up to 2 months.
Reheating
This Pineapple Coconut Cake is best enjoyed chilled or at room temperature. You do not need to reheat it, as the frosting and curd are designed to be served cool. However, if you’ve frozen your cake, allow thawed slices to come to room temperature for about 15 to 20 minutes before serving. This brief resting period will soften the frosting slightly and allow the complex tropical flavors to fully emerge, offering the most enjoyable taste experience.
Frequently Asked Questions
-
Can I make the pineapple curd ahead of time?
Absolutely, and it’s highly recommended! The pineapple curd can be made up to a day in advance and stored in an airtight container in the refrigerator. It actually thickens more as it chills, which is ideal for assembly. Ensure it’s at a spreadable consistency before using; if it becomes too firm, let it sit at room temperature for a short while or whisk it gently to soften.
-
Why does the cake batter sometimes look slightly curdled before baking?
The appearance of slight curdling in the batter, particularly after the egg whites and sour cream are incorporated, is quite normal. This is often due to the combination of fats and proteins in these ingredients. As long as the dry and wet ingredients are added correctly in subsequent steps, the batter should smooth out into a thick, cohesive mixture. The key is to ensure proper emulsification during the mixing process.
-
Will the frosting be firm enough for layering and stacking, especially in warm weather?
Generally, the cream cheese frosting, when prepared with the specified ingredients and proportions, should be firm enough, especially after chilling the cake during the crumb-coating stage. If you are in a particularly warm environment or find the frosting too soft to handle, don’t hesitate to add a little more powdered sugar, one tablespoon at a time, until it reaches a firmer, more manageable consistency. Refrigerating the cake after the crumb coat is crucial for stabilizing it before the final frosting application.