Pineapple Glazed Pound Cake

This Pineapple Pound Cake is a true testament to classic baking, offering a deeply satisfying and moist dessert that’s perfect for any occasion. It’s the kind of cake that evokes warmth and comfort, with its rich, buttery texture complemented by the bright, tropical notes of pineapple.
The beauty of this cake lies in its simplicity and its ability to deliver consistent deliciousness every time. Whether you’re a seasoned baker or just starting out, this recipe is incredibly approachable, promising a delightful treat that’s both impressive and wonderfully forgiving.
Why You Will Love This Recipe
- Exceptional Moisture: The inclusion of crushed pineapple, along with its juice, ensures every bite of this pound cake is incredibly moist and tender, preventing the dryness that can sometimes plague denser cakes.
- Balanced Sweetness: While delightfully sweet, the pineapple adds a natural tartness that beautifully balances the rich butter and sugar, creating a flavor profile that is complex yet utterly harmonious.
- Classic Pound Cake Texture: Despite the added moisture from the fruit, this cake retains the dense, velvety crumb that is the hallmark of a perfect pound cake, making it satisfyingly substantial.
- Versatile Serving Options: This cake is delightful on its own, but it also serves as a fantastic base for creative toppings and pairings, allowing you to customize it for different events and preferences.
- Make-Ahead Friendly: Its structure and flavor profile hold up wonderfully over time, making it an ideal choice for preparing in advance for parties or busy weeks.
Ingredients You Need
Crafting an exceptional Pineapple Pound Cake begins with selecting high-quality ingredients that will contribute to its signature flavor and texture. Using room-temperature dairy and eggs is crucial for achieving a smooth, emulsified batter that bakes up evenly and without any dense streaks. The crushed pineapple, importantly, should be undrained, as its natural juice is key to infusing the cake with irresistible moisture and a bright fruity essence.
Pineapple Pound Cake

A rich, buttery pound cake made especially moist with crushed pineapple and finished with a warm pineapple glaze for added sweetness and flavor. This is the kind of cake that feels classic the moment it comes out of the pan. It has the dense, satisfying texture you expect from a pound cake, but the crushed pineapple keeps every slice soft and tender instead of heavy.
- For the cake:
- 3 cups granulated sugar
- 6 large eggs
- 1/2 cup buttermilk, brought to room temperature
- 2 teaspoons vanilla essence or pure vanilla extract
- 1 3/4 cups salted butter, softened
- 20 ounces crushed pineapple in juice, undrained
- 4 cups all-purpose flour
- For the glaze:
- 1 tablespoon butter
- 1 cup granulated sugar
- Pineapple and pineapple juice (as used in the glaze preparation)
- 1Preheat the oven to 325°F. Coat a 10-inch tube pan thoroughly with non-stick spray. Make certain the ingredients, particularly the refrigerated ones, are at room temperature before mixing.
- 2Place the flour, sugar, softened butter, buttermilk, eggs, 1/2 cup pineapple juice, and vanilla into the bowl of a stand mixer in that order. Beat on low speed for 1 minute.
- 3Stop the mixer and scrape down the sides of the bowl. Resume mixing on medium speed for 4 minutes, or until the batter is smooth and fully blended.
- 4Fold in the crushed pineapple gently so it is evenly distributed throughout the batter.
- 5Transfer the batter to the prepared tube pan. Bake for 1 hour and 20 minutes to 1 hour and 30 minutes, or until a wooden pick inserted into the cake comes out clean or with only dry crumbs attached.
- 6Let the cake rest in the pan on a wire rack for 20 to 30 minutes. After that, turn it out carefully onto a serving plate.
- 7To make the glaze, combine the pineapple, pineapple juice, and sugar in a small saucepan. Bring the mixture to a boil and cook for 2 minutes, then lower the heat and let it simmer for 2 to 3 minutes more.
- 8Take the saucepan off the heat and stir in the butter until fully melted and the glaze is smooth.
- 9Pour the hot pineapple glaze evenly over the cake once it has been placed on the serving dish. Allow the glaze to settle slightly before serving.
Keywords: Pineapple Pound Cake, Pound Cake, Pineapple Cake, Moist Cake, Fruit Cake, Glazed Cake, Holiday Baking, Potluck Dessert, Make-Ahead Baking, Classic Cake, German Pound Cake
- granulated sugar: This provides the primary sweetness and contributes to the cake’s structure and fine crumb when creamed properly with butter.
- large eggs: They bind the ingredients together, add richness, and contribute to the cake’s lift and tender texture.
- buttermilk: Its slight acidity reacts with baking soda (if used, though not in this particular formulation) and tenderizes the cake, adding moisture and a subtle tang.
- vanilla extract: A classic flavor enhancer that rounds out the sweetness and complements the pineapple beautifully.
- salted butter: The foundation of pound cake, providing richness, a smooth texture, and deep, buttery flavor.
- crushed pineapple in juice: The star ingredient, offering moisture, sweetness, and delightful pockets of fruit throughout the cake. Ensure it’s undrained for maximum flavor and moisture.
- all-purpose flour: The structure builder, providing the necessary framework for the cake to hold its shape while remaining tender.
- butter for the glaze: Adds a glossy sheen and a smooth, rich mouthfeel to the final topping.
- granulated sugar for the glaze: Sweetens the glaze and helps it to thicken slightly, creating a lovely syrupy coating.
- pineapple and pineapple juice for the glaze: Reinforces the pineapple flavor and provides the liquid base for the warm, sweet topping.
Quantities for all these essential components can be found within the detailed recipe card.
Variations
This delightful Pineapple Pound Cake serves as an excellent canvas for creative culinary exploration. You can easily adapt it to suit various dietary preferences or flavor profiles, ensuring everyone can enjoy a slice of this tropical delight.
For a truly decadent twist, consider infusing the batter with a hint of coconut. A few tablespoons of shredded sweetened coconut, folded in with the pineapple, will add another layer of tropical flavor and a pleasant chewiness. You could also elevate the glaze by stirring in a teaspoon of lime zest for a brighter, more zesty finish, or a splash of rum for a more adult-oriented dessert.
To cater to those seeking a lighter option, a vegan adaptation is wonderfully achievable. Simply substitute the butter with a high-quality vegan butter alternative and use a plant-based milk, such as almond or soy, with a touch of vinegar to mimic the buttermilk’s tang. For the eggs, a common and effective vegan binder like a flax egg (one tablespoon of ground flaxseed mixed with three tablespoons of water, left to sit for five minutes) per egg would work beautifully, maintaining the cake’s structure and moisture.
How to Prepare Pineapple Pound Cake
Step 1: Oven Preheat and Pan Preparation
The initial step in creating this exquisite Pineapple Pound Cake involves preheating your oven to the specified temperature, typically around 325°F (160°C). This ensures that when the cake batter is ready, the oven will be at the ideal temperature for even baking, preventing the outside from cooking too quickly before the inside is done. Simultaneously, you must meticulously prepare your 10-inch tube pan. This means greasing it thoroughly with butter or non-stick cooking spray and then lightly dusting it with flour, tapping out any excess. For an extra layer of insurance against sticking, some bakers prefer to also line the bottom of the pan with parchment paper.
Crucially, before you even begin mixing your ingredients, ensure that all your refrigerated items are brought to room temperature. This includes the butter, eggs, and buttermilk. Room-temperature ingredients emulsify much more effectively when creamed together, leading to a smoother batter and a lighter, more evenly textured cake. Cold ingredients can cause the butter to seize, resulting in an oily batter or dense streaks, which are undesirable in a classic pound cake.
This preparation phase is fundamental; skipping or rushing it can significantly impact the final outcome. Taking the time to properly preheat the oven and prepare the pan, alongside ensuring all ingredients are at the correct temperature, sets the stage for a successful and delicious bake, minimizing the risk of common baking mishaps like sticking or uneven cooking.
Step 2: Mixing the Main Batter Ingredients
In the bowl of a stand mixer fitted with the paddle attachment, or in a large mixing bowl if using a hand mixer, combine the primary cake ingredients. It’s often recommended to add them in a specific order, as suggested by many recipes, which usually involves placing the flour, granulated sugar, softened salted butter, room-temperature buttermilk, and large eggs into the bowl. Some recipes might specify adding the vanilla extract at this stage as well, while others prefer it later to preserve its aromatic qualities.
Begin mixing on a low speed. The initial purpose is to gently incorporate the ingredients, allowing them to start coming together without being overworked. You’ll notice the mixture will start to form a cohesive, albeit perhaps slightly shaggy, mass. This initial low-speed mix helps to prevent flour from flying out of the bowl when you increase the speed.
Once the ingredients have just begun to meld, it’s essential to stop the mixer and meticulously scrape down the sides and bottom of the bowl using a rubber spatula. This step is vital to ensure that all the dry flour from the edges and any butter that might have clung to the bottom is incorporated into the batter. After scraping, resume mixing, gradually increasing the speed to medium. Continue to beat the batter for approximately 4 minutes, or until it achieves a consistently smooth, creamy, and fully blended appearance. You should see no streaks of butter or unincorporated flour remaining; the batter should look homogenous and well-emulsified, a testament to the successful creaming process.
Step 3: Gently Folding in the Crushed Pineapple
Once the cake batter has reached a smooth, creamy, and homogenous consistency, it’s time to introduce the star ingredient: the crushed pineapple. It is absolutely critical that you do not drain the crushed pineapple; the juice it contains is a vital component for the cake’s exceptional moisture and rich pineapple flavor. The undrained pineapple will contribute liquid and fruit pieces directly into the batter, ensuring that every slice is infused with its tropical essence.
The technique here is crucial: you need to fold the pineapple into the batter gently. This is best achieved by using a large rubber spatula and a folding motion. Scoop the spatula down through the center of the batter, then sweep it along the bottom of the bowl, bringing the batter up and over the pineapple. Rotate the bowl slightly and repeat this motion until the pineapple is evenly dispersed throughout the batter. The goal is to distribute the pineapple pieces and their juice without overworking the batter.
Overmixing the batter at this stage, after the flour has been fully incorporated, can develop the gluten in the flour more than is desirable for a tender pound cake. Excessive gluten development can lead to a tougher, denser cake. Therefore, fold just until the pineapple is incorporated and no large pockets of undrained pineapple remain, but do not continue mixing beyond this point. The batter should look appealingly studded with pineapple pieces, promising delicious bursts of flavor in every bite.
Step 4: Spooning Batter and Baking
With the batter beautifully prepared and the pineapple evenly distributed, the next step is to carefully transfer it into the meticulously prepared tube pan. Use your rubber spatula to scoop all of the batter into the pan, making sure to get every last bit, as pound cake batter can be quite dense and sticky. Once the batter is in the pan, use the back of your spatula or a spoon to gently smooth the top. Aim for an even surface, which will help the cake bake uniformly, ensuring a consistent rise and even doneness across the entire cake.
Now, it’s time to bake the cake. Place the filled tube pan into the preheated oven. The baking time for a cake of this size and density is typically quite long, often ranging from 1 hour and 20 minutes to 1 hour and 30 minutes, or even a bit longer depending on your oven. It is essential to resist the urge to open the oven door frequently, especially during the first hour of baking, as this can cause the cake to collapse.
You’ll know the cake is done when it is deeply golden brown on top and a wooden skewer or toothpick inserted near the center of the cake comes out clean or with just a few dry crumbs attached. If it comes out with wet batter, it needs more time. Given that this is a large, moist cake, especially with the added moisture from the pineapple, it needs its full baking time to ensure the center is cooked through. Patience here is key to a perfectly baked pound cake.
Step 5: Cooling the Cake in the Pan
Once the Pineapple Pound Cake has reached perfect doneness, with a tester coming out clean, it’s time to remove it from the oven. The temptation might be to immediately turn it out onto a cooling rack, but for a pound cake, especially one with added moisture like pineapple, a brief resting period in the pan is crucial for its structural integrity. Place the hot cake, still in its tube pan, onto a wire cooling rack.
Allow the cake to cool in the pan for approximately 20 to 30 minutes. During this time, the cake continues to set and firm up. The internal structure, which might be quite soft and tender right out of the oven due to the moisture content, needs this time to stabilize. This resting period is especially useful for fruit-filled cakes, as it helps prevent them from becoming too fragile and breaking apart when you attempt to unmold them. The residual heat within the cake also continues to gently bake it, ensuring the center is perfectly done.
After the initial cooling period in the pan, it’s time to unmold the cake. Carefully invert the pan over the wire rack. If you prepared your pan well, the cake should release with relative ease. You might need to gently tap the bottom of the pan or run a thin, offset spatula around the edges if it seems stuck. Once released, allow the cake to cool completely on the wire rack before proceeding with glazing or slicing. Complete cooling ensures the cake holds its shape beautifully and the glaze adheres properly.
Step 6: Preparing and Applying the Glaze
While the cake cools, you can prepare the warm pineapple glaze, which adds an extra layer of sweetness, shine, and flavor. In a small saucepan, combine the ingredients for the glaze: a tablespoon of butter, a cup of granulated sugar, and the pineapple and its juice. The exact quantity of pineapple and juice will depend on the recipe, but it’s usually a smaller amount than used in the cake itself, designed to create a concentrated topping.
Place the saucepan over medium heat and bring the mixture to a gentle boil. Stir occasionally to ensure the sugar dissolves completely and the mixture begins to thicken slightly. Let it simmer for a couple of minutes, allowing the flavors to meld and the glaze to reach a syrupy consistency. The goal is a glaze that is pourable but not too thin, so it coats the cake beautifully without running off entirely.
Once the glaze has simmered and achieved the desired consistency, remove the saucepan from the heat. Stir in the tablespoon of butter. The residual heat will melt the butter, creating a smooth, glossy finish for the glaze. Stir until the butter is fully incorporated and the glaze looks silky and uniform. It’s important that the glaze is still warm when you pour it over the cake.
Once the Pineapple Pound Cake has cooled on the wire rack, carefully pour the warm pineapple glaze evenly over the top. Allow the glaze to drip down the sides naturally, coating the cake in a shimmering, sweet layer. The warmth of the glaze will help it soak slightly into the surface of the cake, enhancing its moistness and flavor. Let the glaze set for a few minutes before slicing and serving, allowing it to harden just enough to create that delightful sticky crust.
Pro Tips for Pineapple Pound Cake
Don’t Skip the Undrained Pineapple: The natural juice from the crushed pineapple is your secret weapon for an exceptionally moist cake. Draining it would significantly reduce the cake’s tenderness and overall lusciousness.
Room Temperature is Key: Ensure your butter, eggs, and buttermilk are at room temperature. This facilitates proper emulsification, leading to a smoother batter and a finer crumb structure, which is essential for a classic pound cake texture.
Gentle Folding is Paramount: When incorporating the crushed pineapple, use a gentle folding motion. Overmixing at this stage can toughen the cake by overdeveloping the gluten in the flour, diminishing its tender crumb.
Proper Pan Preparation Prevents Sticking: Thoroughly grease and flour your tube pan, or use baking spray with flour. This is critical for a clean release, especially with a dense, moist cake like this one.
Glaze Warmth Matters: Pour the glaze over the cake while it’s still warm but not piping hot. This allows it to flow and coat the cake beautifully, creating a glossy finish without making the cake soggy.
Patience During Cooling: Allow the cake to cool in the pan for about 20-30 minutes before inverting it. This short rest helps the cake set, making it easier to unmold without damage, and is particularly important for fruit-laden cakes.
Serving Suggestions for Pineapple Pound Cake
Decoration
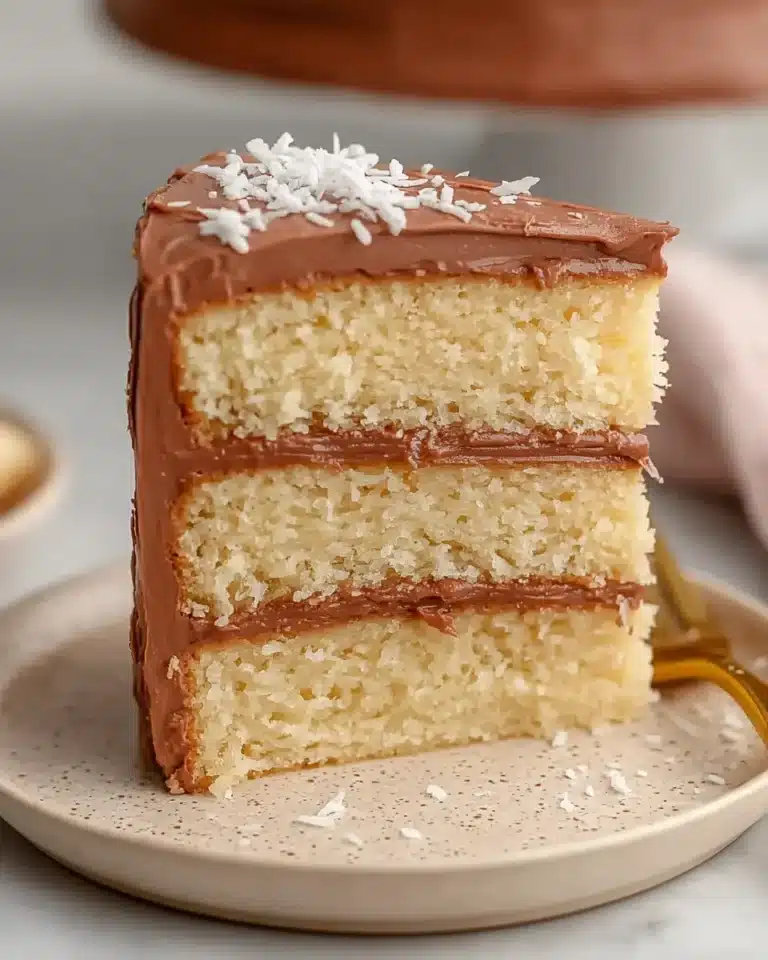
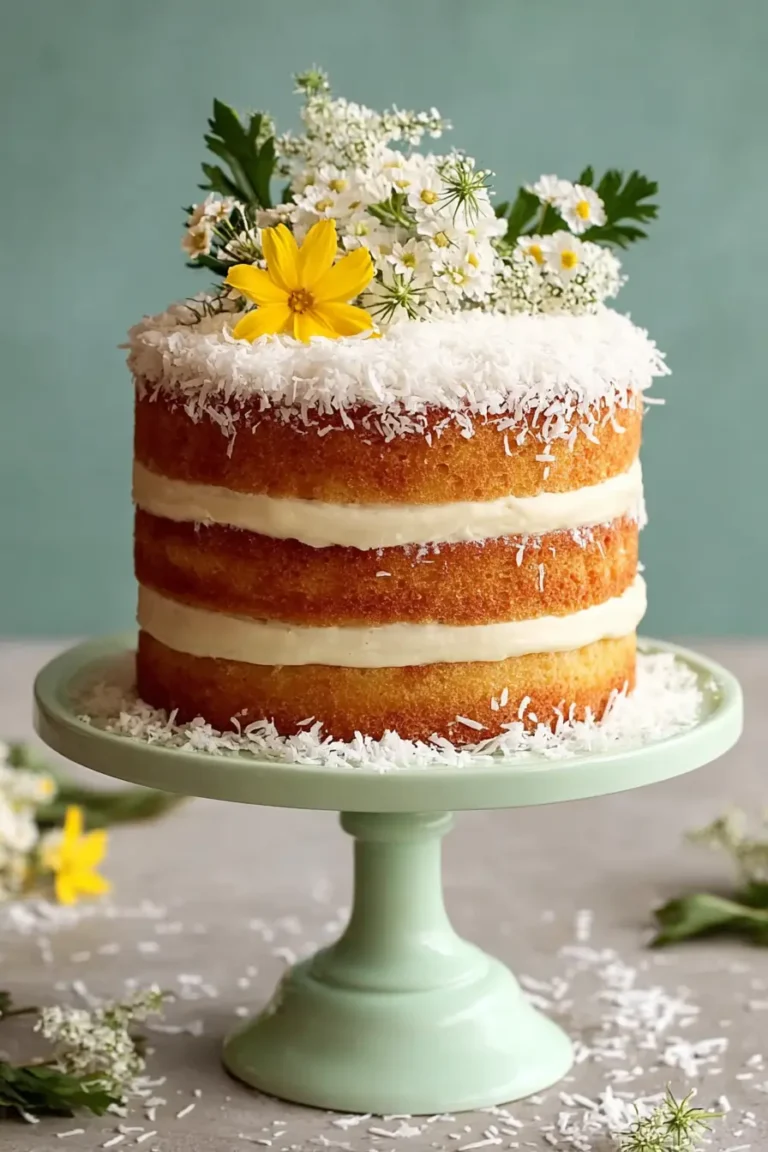
Adorn your Pineapple Pound Cake with a sprinkle of toasted shredded coconut for an extra layer of tropical flavor and visual appeal. A dusting of powdered sugar can also add a delicate sweetness and a beautiful finish. For a more elaborate touch, consider fresh pineapple wedges or curls arranged artfully on top, perhaps alongside a few vibrant maraschino cherries.
Side Dishes
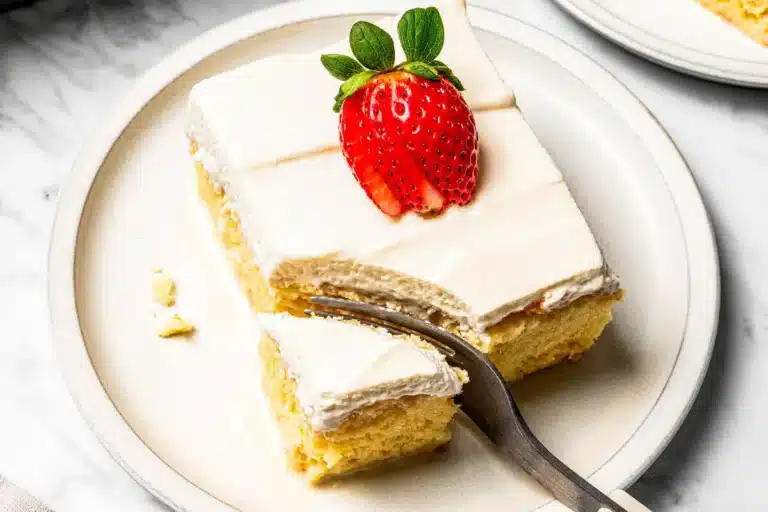
This pound cake is wonderfully complemented by a dollop of lightly sweetened whipped cream, which adds a cloud-like texture and balances the cake’s richness. Fresh berries, such as strawberries, raspberries, or blueberries, offer a refreshing tartness that cuts through the sweetness and adds a burst of color. A small scoop of vanilla bean ice cream or a light fruit sorbet can also make for an elegant dessert pairing.
Creative Serving Ideas
Serve slices of Pineapple Pound Cake warm with the pineapple glaze drizzled generously over the top. For a brunch setting, it can be a star accompaniment to a spread of fresh fruits and yogurt. Consider transforming it into a deconstructed dessert by crumbling pieces of the cake and layering them with cream and fruit in individual parfait glasses.
Preparation & Storage
Storing Leftovers
Once the Pineapple Pound Cake has cooled completely, it should be stored tightly covered to maintain its moisture. At room temperature, in a cool, dry place, the cake will remain fresh for about 1 to 2 days. If your kitchen tends to be warm or humid, it’s advisable to store it in the refrigerator to prevent spoilage and maintain its quality.
Freezing
For longer storage, the Pineapple Pound Cake freezes exceptionally well. You can freeze the entire cake or individual slices. Wrap the cooled cake or slices securely in plastic wrap, then in aluminum foil, or place them in an airtight freezer-safe container or heavy-duty freezer bag. Properly stored, it can maintain its quality for up to 2 months.
Reheating
To enjoy a slice of frozen or refrigerated pound cake, thawing is recommended. For frozen cake, transfer it from the freezer to the refrigerator and let it thaw overnight. If reheating a slice from the refrigerator or at room temperature, a brief period in the microwave, just a few seconds (10-15 seconds), can warm it through and slightly soften the glaze without making the cake gummy or dry. Be careful not to overheat, as this can alter the cake’s delicate texture.
Frequently Asked Questions
-
Why is my pineapple pound cake dense or heavy, and how can I achieve a lighter texture?
A dense or heavy pound cake can result from several factors, primarily overmixing the batter after the flour has been added, which develops the gluten excessively. Using cold ingredients instead of room-temperature ones also hinders proper emulsification, leading to a denser crumb. Additionally, underbaking the cake means the internal structure hasn’t fully set. To achieve a lighter texture, ensure you cream the butter and sugar thoroughly, mix the flour in just until combined, use room-temperature ingredients, and bake the cake until a tester comes out clean.
-
Can I substitute unsalted butter for the salted butter called for in the recipe, and if so, how should I adjust it?
Yes, you can absolutely substitute unsalted butter for salted butter. The primary reason for using salted butter is to add a subtle saltiness that balances the sweetness and enhances the overall flavor profile. If you opt for unsalted butter, you should add a small amount of salt directly to the batter to compensate. Typically, adding about 1/2 teaspoon of salt to the dry ingredients or directly into the batter along with the wet ingredients will provide a comparable flavor balance without altering the cake’s texture.
-
How do I know when the pineapple glaze is ready to be poured onto the cake, and what consistency should it have?
The pineapple glaze is ready when it has reached a syrupy consistency that coats the back of a spoon. You’ll know it’s ready after simmering the pineapple, juice, and sugar for a few minutes; the sugar should be fully dissolved, and the mixture will have thickened slightly. Stirring in the butter off the heat will make it glossy and smooth. The glaze should be pourable but not overly thin, so it can coat the cake beautifully and drip down the sides without running off completely. If it seems too thick, a tiny splash of pineapple juice can thin it; if too thin, let it simmer for another minute or two.