Irresistible Viral Healthy Brownie Balls
Have you ever craved a delicious treat that not only satisfies your sweet tooth but is also packed with nutrients? Look no further than the Viral Healthy Brownie Balls (Gluten Free, High Protein). This recipe is a game-changer for health enthusiasts and dessert lovers alike, striking the perfect balance between indulgence and wellness.
One unique aspect of these brownie balls is their ability to deliver a chocolatey punch without the guilt; they’re made from wholesome ingredients and are gluten-free and high in protein, making them a perfect option for those with dietary restrictions. Whether you’re looking for a quick snack, a post-workout treat, or a delightful dessert, these brownie balls are versatile enough to fit into any occasion.
What truly makes the Viral Healthy Brownie Balls stand out is how simple they are to make; with just a handful of ingredients, you’ll have a tasty treat ready in no time. The blend of dates, nut butter, and protein powder not only creates a rich and satisfying flavor but also provides essential nutrients. They are a wonderful way to satisfy cravings while maintaining a healthier lifestyle.
So why not give these brownie balls a try? They promise to be your new go-to recipe for indulgence without the compromise.
Why You Will Love This Recipe
- Nutrient-Dense Ingredients: Crafted with wholesome components like dates, almond flour, and protein powder, these balls offer a satisfying nutritional profile.
- Gluten-Free Goodness: Perfect for individuals who are sensitive to gluten or actively following a gluten-free lifestyle, ensuring everyone can enjoy this treat.
- High Protein Content: An excellent choice for post-workout recovery or as a substantial part of a meal replacement, providing sustained energy.
- Rapid Preparation: This straightforward recipe requires minimal effort and time, getting your delicious dessert on the table very quickly.
- Endless Customization: Easily adapt the recipe by incorporating your favorite nuts, seeds, or complementary spices for a personalized touch.
- Rich Chocolate Flavor: Indulge in an intensely chocolatey experience without the excessive sugar often found in traditional desserts.
Ingredients You Need
The secret to these incredibly satisfying brownie balls lies in the quality and simplicity of the ingredients used. Opting for fresh, high-quality components will elevate the taste and texture, ensuring a truly delightful experience with every bite. Remember that the specific quantities for each ingredient are conveniently listed in the detailed recipe card below.
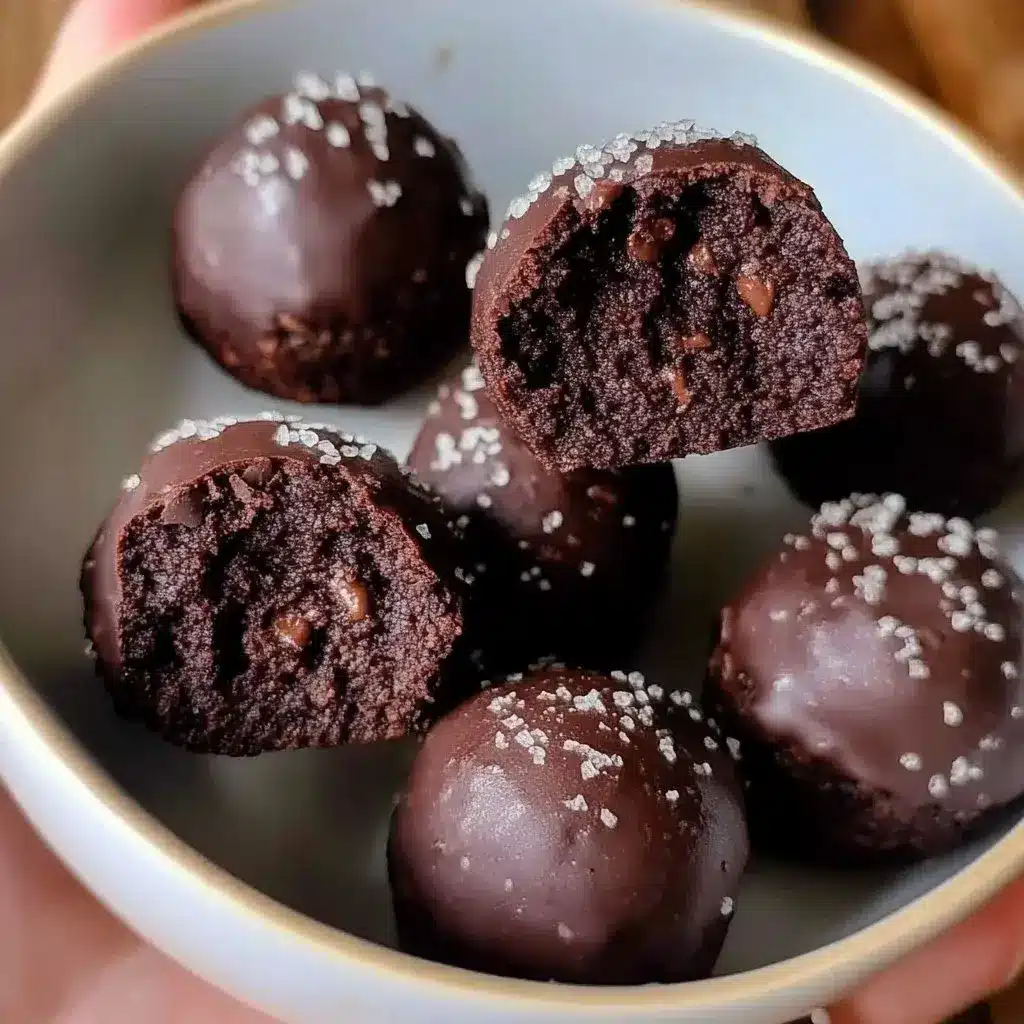
Viral Healthy Brownie Balls (Gluten Free, High Protein)

Indulge in these delicious and nutritious Viral Healthy Brownie Balls. They are gluten-free, high in protein, and surprisingly easy to make, making them a perfect guilt-free treat for any occasion. Packed with wholesome ingredients like dates, almond flour, and your favorite protein powder, these brownie balls offer a rich chocolate flavor without the excess sugar. Whether you need a quick snack, a post-workout boost, or a healthy dessert option, these versatile treats are sure to become a favorite.
- 1.5 cups dates (pitted)
- 2 tbsp almond flour
- 3 tbsp cocoa powder
- 1 scoop protein powder (any flavor)
- 2 tbsp honey
- 2 tbsp nut butter of choice (any nut/seed butter)
- 1 tsp vanilla extract
- 1 pinch sea salt
- 3/4 cup chocolate chips
- 1 heaping tsp coconut oil
- Flakey sea salt (for topping)
- 1Gather all ingredients. Ensure dates are pitted.
- 2Add all brownie ball ingredients (dates, almond flour, cocoa powder, protein powder, honey, nut butter, vanilla extract, sea salt) into a food processor or blender. Blend until fully combined and a crumbly, sand-like texture is achieved.
- 3Adjust consistency: If too sticky, add more protein powder or almond flour. If too dry, add a touch more nut butter or honey.
- 4Remove mixture from the food processor and roll into balls (aim for 8-10 large or 20 small).
- 5Place the rolled balls on a parchment paper-lined tray and set in the freezer.
- 6For the chocolate coating, combine chocolate chips and coconut oil in a microwave-safe bowl. Heat in 30-second intervals, stirring in between, until fully melted and smooth.
- 7Dip each brownie ball into the melted chocolate, ensuring even coating.
- 8Sprinkle flakey sea salt on top of each chocolate-coated ball.
- 9Place the coated brownie balls back onto the lined tray and return to the freezer for approximately 15-20 minutes, until the chocolate hardens.
- 10Enjoy immediately or store for later.
Keywords: Dessert Recipe, Gluten Free, Healthy Brownie Balls, High Protein, Nutritious Snack
- dates (pitted): provides natural sweetness and a fudgy base.
- almond flour: contributes to the brownie-like texture and adds healthy fats.
- cocoa powder: delivers the rich, deep chocolate flavor essential for brownie balls.
- protein powder (any flavor): boosts the protein content and helps bind the ingredients.
- honey: adds a touch more sweetness and aids in binding, though can be substituted for vegan options.
- nut butter of choice (any nut/seed butter): enhances creaminess, flavor, and provides healthy fats.
- vanilla extract: rounds out the chocolate flavor with its warm, aromatic notes.
- sea salt: a pinch here enhances the overall sweetness and complexity of the chocolate.
- chocolate chips: for the luscious, decadent coating that makes these truly irresistible.
- coconut oil: helps to create a smooth, glossy chocolate coating that hardens beautifully.
- flakey sea salt (for topping): adds a delightful textural contrast and a sophisticated touch of saltiness.
Variations
The beauty of these Viral Healthy Brownie Balls lies in their inherent adaptability. You can effortlessly transform them to suit various dietary needs or flavor preferences, ensuring there’s a perfect version for everyone.
Vegan Delight: To create a fully vegan treat, simply swap the honey for an equal amount of pure maple syrup or agave nectar. Ensure your chosen protein powder is also plant-based and that the chocolate chips used for coating are dairy-free.
Low-Carb Adaptation: For a lower-carbohydrate option, consider using a sugar-free sweetener in place of honey, and a low-carb protein powder. You might also experiment with finely ground almond flour or coconut flour as a partial substitute for dates, carefully adjusting moisture levels.
Fruity Fusion: Elevate the flavor profile by adding a handful of dried cranberries, cherries, or even finely chopped apricots to the mixture before rolling. These additions provide bursts of tangy sweetness that beautifully complement the rich chocolate.
Spiced Up Version: Introduce warming spices like cinnamon, a hint of nutmeg, or even a pinch of cayenne pepper for a subtle kick. A dash of espresso powder can also dramatically deepen the chocolate flavor.
These simple adjustments allow you to tailor the brownie balls to your exact taste and dietary requirements, making them an incredibly versatile and beloved treat.
How to Prepare Viral Healthy Brownie Balls
Step 1: Gather and Prepare Your Ingredients
The foundation of any successful recipe begins with meticulous preparation. Before you even think about mixing, ensure all your ingredients are measured out accurately and ready to go. This not only streamlines the process but also prevents last-minute rushes or forgotten components.
Specifically, take a moment to ensure that every single date is pitted; even a single pit left behind can disrupt the smooth texture of the finished balls. Having your almond flour, cocoa powder, protein powder, nut butter, and other flavorings neatly arranged will allow for a smooth transition into the blending stage.
This initial step of organization is crucial for achieving the perfect consistency and flavor, setting the stage for the delicious outcome that awaits.
Step 2: Create the Rich Brownie Base
Now, it’s time to bring all the core ingredients together in your food processor or a high-powered blender. Add the pitted dates, almond flour, cocoa powder, your chosen protein powder, honey (or vegan alternative), nut butter, vanilla extract, and that essential pinch of sea salt into the appliance.
Begin processing, starting at a lower speed and gradually increasing. You’re looking for the mixture to transform from individual components into a cohesive, yet still slightly crumbly, mass. The ideal texture should resemble coarse, damp sand that holds together when you squeeze it between your fingers.
Avoid over-processing; you want a texture that still has a slight bite, reminiscent of a dense brownie batter, rather than a completely smooth paste. This texture is key for achieving the perfect chewiness in your finished brownie balls.
Step 3: Achieve the Perfect Consistency
Once you’ve achieved that initial crumbly texture, it’s crucial to assess and adjust the consistency. The goal is a dough that is pliable enough to roll into balls but not so sticky that it adheres excessively to your hands or the equipment.
If the mixture seems too dry and won’t hold together when squeezed, it’s time to add a little more binding agent. Gradually introduce a teaspoon or two more of your nut butter or honey, processing briefly after each addition until the desired moldable texture is reached. Be cautious not to add too much liquid at once, as this can make the mixture overly wet.
Conversely, if the dough is too sticky and unmanageable, gradually incorporate a bit more almond flour or protein powder, processing in short bursts. This gradual adjustment ensures you don’t compromise the flavor balance while achieving the perfect, non-sticky consistency needed for easy rolling.
Step 4: Shape the Delicious Brownie Balls
With your perfectly textured brownie dough ready, it’s time to get your hands involved. Scoop out portions of the mixture using a small cookie scoop or simply by hand. Aim for consistent sizes to ensure even freezing and coating later on.
Roll each portion firmly between your palms to create smooth, compact balls. The size is entirely up to your preference: you can opt for larger, more substantial balls, which will yield around 8-10, or smaller, bite-sized spheres, which can result in approximately 20 pieces.
As you roll each ball, place it onto a parchment paper-lined baking sheet or tray. Ensure there’s a little space between each ball to prevent them from sticking together as they firm up in the freezer.
Step 5: Chill for Firmness
Before embarking on the chocolate coating process, it’s essential to firm up the rolled brownie balls. Place the entire tray of rolled balls into the freezer for at least 15-20 minutes.
This chilling period is critical; it solidifies the date and nut butter base, making the balls easier to handle and ensuring they maintain their shape when dipped into the warm chocolate. Without this step, the balls might start to crumble or melt into the chocolate, resulting in a less polished finish.
While they are chilling, you can take this time to prepare your ingredients for the chocolate coating, ensuring a seamless transition to the next exciting stage of the recipe.
Step 6: Prepare the Silky Chocolate Coating
In a microwave-safe bowl, combine the chocolate chips and the heaping teaspoon of coconut oil. The coconut oil is key to achieving a smooth, glossy, and easily spreadable chocolate coating that hardens beautifully.
Microwave the mixture in 30-second intervals, stirring thoroughly after each interval. Continue this process until the chocolate is completely melted and smooth, with no lumps remaining. Be patient and avoid overheating, as this can cause the chocolate to seize or become grainy.
Once the chocolate is perfectly melted and glossy, stir it one final time to ensure it’s homogenous and ready for dipping. The smooth consistency of the melted chocolate is crucial for achieving an even and attractive coating on your brownie balls.
Step 7: Coat Each Brownie Ball
With the chilled brownie balls and the melted chocolate at the ready, it’s time for the most decadent step. Using a fork or a toothpick, carefully dip each frozen brownie ball into the melted chocolate mixture.
Gently swirl the ball to ensure it is completely and evenly coated. Allow any excess chocolate to drip back into the bowl for a cleaner finish. This process should be relatively quick, as the cold brownie ball will help the chocolate set faster.
Place the chocolate-coated balls back onto the parchment-lined tray. Aim for a smooth, uniform coating that showcases the rich chocolate, making them look as appealing as they taste.
Step 8: Add a Touch of Salt
For an elevated flavor experience, immediately after coating each brownie ball, sprinkle a few flakes of sea salt on top while the chocolate is still wet. This step adds a delightful contrast to the sweetness of the chocolate and the rich brownie base.
The flaky sea salt not only enhances the overall taste but also provides a pleasing textural crunch that breaks up the smoothness of the chocolate. It transforms the simple brownie ball into a gourmet-inspired treat.
This small addition makes a significant impact on the final flavor profile, making each bite a complex and satisfying experience. It’s a chef’s trick that brings out the best in the chocolate and the brownie flavors.
Step 9: Final Freeze for Perfect Hardening
After all the brownie balls have been coated and sprinkled with sea salt, return the tray to the freezer. This final freezing period is crucial for allowing the chocolate coating to harden completely.
Allow the balls to chill in the freezer for at least another 15-20 minutes, or until the chocolate is firm to the touch and no longer tacky. This ensures that when you handle them, the chocolate coating remains intact and doesn’t smudge.
This step guarantees that your Viral Healthy Brownie Balls will have that satisfying snap and smooth finish, making them perfect for serving or storing.
Step 10: Savor Your Creation
Congratulations, you have successfully created Viral Healthy Brownie Balls! Once the chocolate coating has fully hardened, your delicious and nutritious treats are ready to be enjoyed. You can savor them immediately for a delightful snack or dessert.
Alternatively, you can store them for later enjoyment. Proper storage will ensure they maintain their delicious taste and texture for days to come. This recipe is incredibly rewarding, offering a healthy indulgence that feels truly special.
Share these with friends and family, or keep them all to yourself – either way, prepare for compliments on your amazing baking skills!
Pro Tips for Viral Healthy Brownie Balls
Perfect Date Preparation: For the smoothest base, soak your pitted dates in warm water for about 10 minutes before blending. This softens them and makes them easier to process into a cohesive dough.
Nut Butter Nuances: Experiment with different nut or seed butters like cashew, peanut, or sunflower seed butter for varied flavor profiles. Ensure your chosen butter is unsweetened for better control over sweetness.
Protein Powder Power: The flavor of your protein powder will significantly impact the final taste. Consider a high-quality chocolate or vanilla protein powder for classic brownie flavor, or explore other options for creative twists.
Chocolate Coating Clarity: When melting chocolate, use a double boiler or microwave in very short intervals to prevent burning. Adding a touch of coconut oil ensures a smooth, glossy, and easy-to-work-with coating.
Texture Control: If your mixture is too crumbly, add a tiny bit more nut butter or honey; if it’s too sticky, incorporate a little more almond flour or protein powder. Always adjust gradually and re-process briefly.
Serving Suggestions for Viral Healthy Brownie Balls
Decoration
Elevate the visual appeal of your brownie balls with simple yet effective garnishes. A final dusting of cocoa powder or a drizzle of melted white chocolate can add a beautiful contrast. You can also press a whole nut, a small piece of dried fruit, or a few extra chocolate chips onto the still-wet chocolate coating for texture and visual interest.
Side Dishes
These brownie balls are fantastic on their own, but they can also be part of a larger dessert spread. Serve them alongside fresh berries like raspberries or strawberries for a burst of freshness. A dollop of coconut yogurt or Greek yogurt makes for a delightful creamy contrast. They also pair wonderfully with a glass of cold almond milk or a rich hot chocolate.
Creative Serving Ideas
Consider arranging them on a decorative platter for parties, perhaps with a few sprigs of mint for a pop of green. For a more elaborate dessert, stack them with slices of a homemade [easy-berry-tart-2] or serve them as a sweet accompaniment to a slice of [german-pancake-recipe]. They also make excellent edible gifts when packaged in small cellophane bags tied with ribbon.
Preparation & Storage
Storing Leftovers
To maintain the perfect texture and freshness of your Viral Healthy Brownie Balls, store them in an airtight container. They can be kept at room temperature for a day or two, but for optimal longevity and firmness, refrigerating them is recommended. In the refrigerator, they will stay delicious for up to a week.
Freezing
These brownie balls freeze exceptionally well, making them a perfect candidate for batch prepping. Place them in a single layer on a parchment-lined tray and freeze until solid, which usually takes about 1-2 hours. Once frozen, transfer them to a freezer-safe bag or container. They can be stored in the freezer for up to 2-3 months.
Reheating
If your brownie balls have been refrigerated or frozen, you can enjoy them directly from their storage. For a colder, fudgier experience, eat them straight from the freezer. If you prefer them slightly softer, allow them to thaw at room temperature for about 15-30 minutes, or gently warm them in a microwave for 5-10 second intervals, being careful not to overheat them.
Frequently Asked Questions
-
Can I make these vegan and gluten-free?
Absolutely! To make these Viral Healthy Brownie Balls vegan, substitute the honey with an equivalent amount of maple syrup or agave nectar. Ensure that your chosen protein powder is plant-based and that the chocolate chips used for coating are dairy-free. The rest of the ingredients, such as dates, almond flour, cocoa powder, nut butter, vanilla extract, sea salt, and coconut oil, are naturally vegan and gluten-free, making the transition straightforward.
-
How long do these brownie balls last, and what’s the best way to store them?
When stored properly, these delicious brownie balls have a good shelf life. For the best results and texture, keep them in an airtight container in the refrigerator; they will remain fresh and enjoyable for up to one week. If you wish to store them for an extended period, freezing is an excellent option, where they can be preserved for two to three months while retaining their excellent flavor and texture.
-
What are the best substitutes for dates, and will they affect the texture?
While dates provide a unique natural sweetness and fudgy texture, you can use substitutes if necessary. Unsweetened applesauce or ripe mashed bananas are viable alternatives that will contribute moisture and sweetness. However, be aware that using these substitutes may slightly alter the final texture, potentially making the balls softer or less dense. It’s advisable to start with a smaller amount and adjust as needed to achieve the desired consistency.