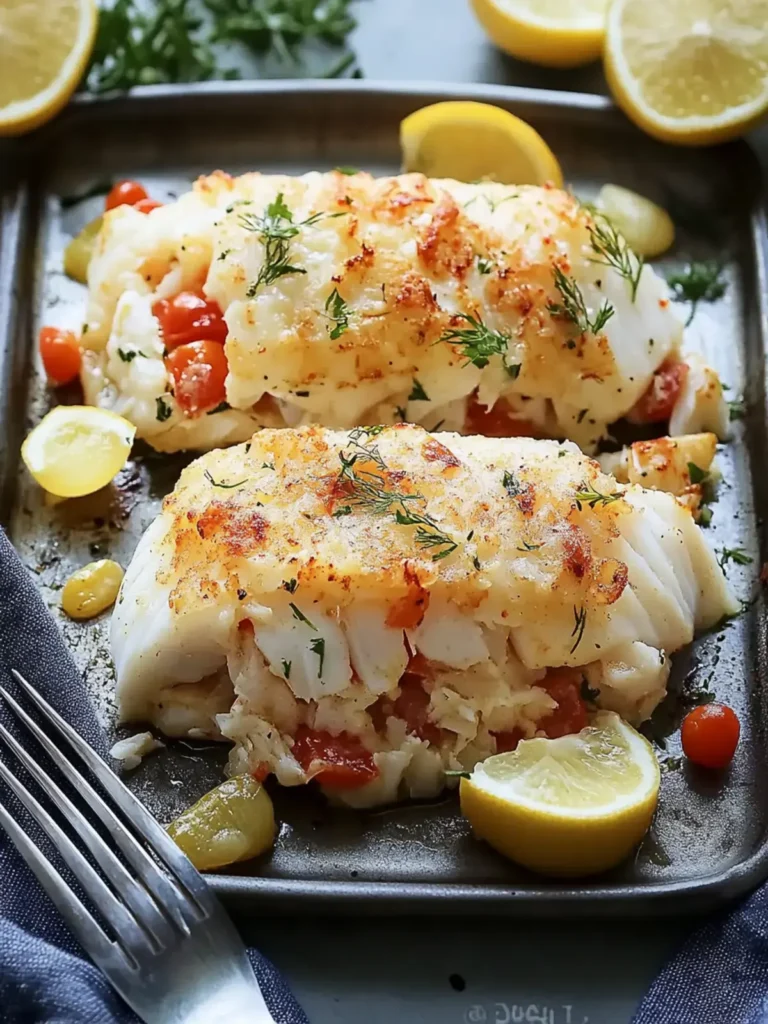
Traeger Grill Beer Can Chicken

Traeger Grill Beer Can Chicken is a smoky, beginner-friendly whole chicken that turns out juicy inside with crisp, caramelized skin outside. It is a great cookout centerpiece when you want bold flavor, reliable results, and minimal hands-on prep.
This is the kind of chicken that feels a little special without making your day harder. Once the bird is seasoned and set on the grill, the Traeger does most of the work for you while the wood-fired heat builds flavor slowly.
Why You Will Love This Recipe
- Juicy & Tender: The unique upright cooking method, combined with the slow initial smoke, ensures the chicken remains incredibly moist and tender throughout.
- Crispy, Flavorful Skin: A finishing blast of high heat renders the fat, creating irresistibly crispy skin with a perfectly caramelized, sweet-smoky crust.
- Simple Seasoning: A straightforward blend of pantry staples like brown sugar, smoked paprika, garlic, and mustard builds deep flavor without complexity.
- Beginner-Friendly: This recipe is remarkably forgiving and easy to execute, making it an ideal choice for grill masters of all skill levels looking for impressive results.
- Impressive Presentation: A whole roasted chicken is always a showstopper, and this beer can preparation results in a beautifully golden-brown bird ready to be the star of any meal.
Ingredients You Need
The quality of your ingredients plays a crucial role in the final taste of your Traeger Grill Beer Can Chicken. Opt for a fresh, high-quality whole chicken, preferably free-range if available, as it often yields better flavor and texture. The beer used in the can also contributes a subtle flavor, so while a simple lager is recommended for its neutrality, a craft beer can introduce interesting nuances.
Traeger Grill Beer Can Chicken

This Traeger beer can chicken is prepared with a sweet-smoky spice blend and slowly cooked over wood-fired heat before being finished at a higher temperature for crisp, well-browned skin. The result is a tender, flavorful whole chicken with a seasoned exterior and juicy interior.
- 1 whole chicken (about 5 pounds, fresh or fully thawed)
- 1 teaspoon onion powder
- 1 can beer (12 ounces, preferably an inexpensive lager)
- 1 teaspoon dry mustard
- 1/2 teaspoon cayenne pepper (or adjust to suit your preferred heat level)
- Olive oil (for coating the chicken)
- 1 teaspoon garlic powder
- 1/4 cup firmly packed brown sugar
- 1 teaspoon ground black pepper
- 2 teaspoons smoked paprika (for pronounced smoky depth)
- 1 teaspoon salt
- 1Preheat the Traeger grill to 275°F. As the grill comes to temperature, combine the rub ingredients in a small bowl and stir until evenly blended.
- 2Remove the giblets from the cavity of the chicken, which are commonly enclosed in a small bag inside. Pat the chicken thoroughly dry with paper towels so the oil and seasoning adhere properly.
- 3Lightly coat the exterior of the chicken, as well as the inside of the cavity, with olive oil. Apply the prepared rub generously over the entire bird, making sure to season both the outside and the cavity well.
- 4Open the beer and pour out or consume about two-thirds of the can. Set the partially filled can directly on the grill grates, then carefully lower the chicken onto the can so it stands upright with the can inserted into the cavity.
- 5Smoke the chicken for approximately 1 1/2 hours, or until the internal temperature in the thickest portion, usually the breast, reaches 150°F. Check the temperature with a meat thermometer for accuracy.
- 6Increase the grill temperature to high, about 450°F, and continue cooking for 15 minutes more. Cook until the internal temperature reaches 175°F.
- 7Carefully remove the chicken from the grill and discard the beer can, taking care because it will be extremely hot. Let the chicken rest for several minutes before carving and serving.
Keywords: Traeger Grill Beer Can Chicken, smoked chicken, grilled chicken, whole chicken, backyard BBQ, easy recipe
Quantities for each ingredient can be found within the detailed recipe card.
Variations
To tailor this Traeger Grill Beer Can Chicken to specific dietary needs or flavor preferences, several exciting variations are possible. For a delicious vegan alternative, consider using a large cauliflower head or a whole portobello mushroom stuffed with seasoned grains and vegetables, and prepare it using a similar smoky, low-then-high heat method on the Traeger. The key is to replicate the moist interior and slightly caramelized exterior through careful cooking.
If you’re following a low-carb lifestyle, a fantastic variation involves spatchcocking the chicken and seasoning it liberally with herbs and spices, then grilling it directly on the grates after an initial period of smoking. This method ensures even cooking and crispy skin without any added sugars, perfect for those watching their carbohydrate intake. You might pair this with a vibrant, low-carb slaw or grilled asparagus for a complete meal.
For those who enjoy a bit of international flair, consider infusing the rub with global spices. A Mediterranean twist could include dried oregano, thyme, lemon zest, and a hint of sumac. Alternatively, an Asian-inspired version might incorporate ginger, garlic, soy sauce (or tamari for gluten-free), and a touch of five-spice powder, all rubbed onto the chicken before grilling. These variations showcase the versatility of this core recipe and allow for endless culinary exploration.
How to Prepare Traeger Grill Beer Can Chicken
Step 1: Setting Up for Success with the Traeger
Begin by preheating your Traeger grill to a steady 275°F (135°C). This lower temperature is crucial for the initial phase of cooking, allowing the chicken to gently cook through and become incredibly tender without drying out. Ensuring the grill reaches and maintains this temperature consistently is key to achieving the desired moistness within the bird. While the grill is heating, take this time to prepare your rub.
In a small bowl, combine all the dry seasonings for your rub. Whisk them together thoroughly until there are no clumps and the mixture is uniform. This ensures that every sprinkle of the rub delivers a balanced flavor profile across the entire chicken. Proper mixing of the dry ingredients is a small but significant step that contributes to the overall success of the seasoning. The aroma released from this blend is the first hint of the deliciousness to come.
Once the grill is at temperature and the rub is mixed, you are ready for the next steps. The initial low and slow cooking is what sets this recipe apart, ensuring a succulent interior that perfectly complements the eventual crispiness of the skin. Patience during this phase is rewarded with unparalleled tenderness in every bite. This careful preparation sets the stage for a truly memorable meal that will impress your guests.
Step 2: Preparing the Star of the Show – The Chicken
Before applying any seasonings, it’s vital to prepare the chicken properly. Carefully remove the whole chicken from its packaging. Open up the cavity and remove any giblets or neck that may be packed inside; these can be saved for making stock or discarded. The cavity must be completely empty to allow for proper airflow and even cooking.
Next, thoroughly pat the entire exterior of the chicken dry with paper towels. This step is absolutely critical for achieving crispy skin. Moisture on the skin will steam rather than crisp, so don’t skimp on this drying process. Get into all the nooks and crannies, ensuring the surface is as dry as possible. This dryness allows the oil and the spice rub to adhere much better, forming that beautiful, flavorful crust we’re aiming for.
A dry chicken is the foundation for great grilled poultry. The contrast between the moist interior and the perfectly rendered, crispy skin is what makes this beer can chicken so satisfying. This attention to detail during the preparation phase directly impacts the final texture and appearance of the finished dish, making it worth the extra effort. Once the chicken is dry, it’s ready to be seasoned and dressed for its grilling journey.
Step 3: Seasoning for Maximum Flavor
With the chicken prepped and dried, it’s time to apply the flavor. Lightly coat the entire exterior of the chicken, including under the skin where possible without tearing it, with olive oil. This oil acts as a binder for the spices, ensuring they adhere evenly to the skin, and also helps the skin to brown beautifully and crisp up during the cooking process. Don’t forget to coat the inside of the cavity as well.
Now, take your pre-mixed dry rub and generously season the chicken. Make sure to coat every surface thoroughly – the breast, thighs, wings, legs, and even the back. Don’t be shy with the rub; a good coating ensures that every bite is packed with that delicious sweet and smoky flavor. Gently work some of the rub into any crevices and folds to ensure complete coverage.
The combination of brown sugar, smoked paprika, garlic powder, onion powder, dry mustard, salt, pepper, and cayenne pepper creates a beautifully balanced seasoning blend. The brown sugar caramelizes beautifully on the grill, the smoked paprika provides that signature smoky depth, and the other spices add savory notes and a touch of warmth. This thorough seasoning is what transforms a simple chicken into an extraordinary meal, ensuring a flavorful experience from the first bite to the last.
Step 4: The Beer Can Setup for Upright Roasting
This is where the “beer can” aspect comes into play, serving a functional purpose beyond just novelty. Take your can of beer – a lager is recommended for its mild flavor that won’t overpower the chicken. Pour off or consume about two-thirds of the beer. You want just enough liquid left to create steam as it heats up inside the chicken, contributing to moisture and flavor, but not so much that it becomes unstable or leaks excessively.
Carefully place the partially filled beer can directly onto the grates of your preheated Traeger grill. This acts as a stable base for the chicken. Now, with great care, lift the seasoned chicken and gently lower it onto the beer can. The chicken should stand upright, with the can inserted into the cavity, creating a stable tripod-like stance. Ensure the bird is balanced and not leaning precariously.
The upright position is critical for even cooking and self-basting. As the beer heats and steams inside the cavity, it infuses the chicken with subtle flavor and keeps the interior moist. Simultaneously, the heat circulation around the entire bird, facilitated by the upright position, ensures that all sides cook evenly, leading to uniformly tender meat and consistently crisp skin. This unique setup is a simple yet highly effective technique for achieving perfectly cooked beer can chicken.
Step 5: The Slow Cook – Building Tenderness
With the chicken standing tall on its beer can on the grill, close the lid of your Traeger. Let the chicken cook at the initial low temperature of 275°F (135°C) for approximately 1.5 to 2 hours. The exact time will depend on the size of your chicken and the consistency of your grill’s temperature. During this stage, the chicken is slowly smoking and gently coming up to temperature.
This low and slow method is paramount for developing incredibly tender and juicy meat. It allows the connective tissues to break down gradually, resulting in a texture that is succulent and fall-off-the-bone tender. Avoid the temptation to open the grill lid too frequently during this phase, as each opening lets out precious heat and smoke, prolonging the cooking time and potentially affecting the outcome. Trust the process and let the Traeger work its magic.
It is highly recommended to use a reliable meat thermometer to check the internal temperature. The thickest part of the thigh (without touching bone) should be approaching the target temperature range for the next stage, typically around 150-155°F (65-68°C) at the end of this slow cook. This slow approach ensures that the internal temperature rises gradually, preventing the exterior from overcooking before the interior is done, and setting the stage for the final crispy skin finish.
Step 6: The High-Heat Finish – Achieving Crispy Perfection
Once the chicken has undergone its slow smoke phase and reached the target internal temperature for this stage, it’s time to elevate the heat. Carefully increase your Traeger grill’s temperature to a high setting, around 450°F (230°C). This dramatic temperature increase is what transforms the skin from semi-crisp to beautifully golden-brown and crackling. It’s a short, intense burst of heat designed to render the fat and create that irresistible texture.
Continue cooking the chicken at this higher temperature for an additional 15-20 minutes, or until the internal temperature in the thickest part of the thigh (again, avoiding bone) reaches an internal temperature of 175°F (80°C) and the skin is visibly golden and crisp. This final blast of heat locks in the juices while achieving a perfect exterior finish. Keep a close eye on it to prevent any burning, as high heat cooks quickly.
The goal here is a beautiful mahogany-like color and a skin that is taut and slightly crunchy. This contrast between the tender, moist meat from the initial slow cook and the perfectly rendered, crispy skin achieved in this final stage is what makes Traeger Grill Beer Can Chicken so delectable. It’s a masterful combination of two cooking methods that ensures a spectacular result. This dual-zone cooking approach is a signature of many successful grilled poultry dishes.
Step 7: Resting and Carving – The Final Touches
After the chicken has reached its final internal temperature and achieved that perfect crispy skin, it’s time to remove it from the grill. Using sturdy grill gloves or thick oven mitts, carefully lift the chicken off the beer can. Be extremely cautious, as both the chicken and the beer can will be very hot. Place the chicken on a clean cutting board or a platter.
This is a crucial step: allow the chicken to rest for at least 10-15 minutes before carving. Tent it loosely with aluminum foil if you wish, but avoid wrapping it tightly, which can steam the crispy skin. Resting allows the juices that have been driven to the center of the meat during cooking to redistribute back throughout the chicken. This redistribution is essential for ensuring that every slice you carve is moist and flavorful, rather than having all the juices run out onto the cutting board.
Once rested, proceed to carve the chicken. You can remove the legs and thighs first, followed by the breast meat. Slice the breast meat against the grain for maximum tenderness. The beer can chicken will carve beautifully, revealing moist, tender meat with the wonderfully seasoned, crisp skin. Serve immediately and enjoy the fruits of your labor, showcasing a perfectly grilled whole chicken that looks and tastes magnificent. This final presentation is always met with applause.
Pro Tips for Traeger Grill Beer Can Chicken
Dry Skin is Key: For the crispiest skin possible, ensure the chicken is patted extremely dry with paper towels after rinsing. Any residual moisture will steam the skin instead of allowing it to crisp up under the heat of the grill. This is arguably the most important tip for achieving that perfect texture.
Don’t Overfill the Beer Can: You only need about 4-6 ounces of liquid in the beer can. Too much liquid can cause instability and excessive steam, which might affect the skin’s crispiness. The purpose is gentle steaming and flavor infusion, not boiling.
Use a Reliable Meat Thermometer: Relying solely on cooking time can be inaccurate due to variations in chicken size and grill temperatures. Always use an instant-read meat thermometer to check the internal temperature of the thickest part of the thigh, ensuring it reaches at least 175°F (80°C) for doneness and optimal juiciness. For the breast, aim for 165°F (74°C).
Resting is Non-Negotiable: After removing the chicken from the grill, let it rest for at least 10-15 minutes before carving. This allows the juices to settle back into the meat, resulting in a more tender and moist final product. Cutting too soon will cause the juices to run out, leaving the meat drier.
Experiment with Rubs: While the provided rub is excellent, don’t hesitate to experiment with your own favorite spice blends. Consider adding smoked paprika for extra smokiness, a touch more cayenne for heat, or even incorporating herbs like rosemary and thyme into the rub for a different flavor profile. The base chicken is a perfect canvas for your creativity.
Serving Suggestions for Traeger Grill Beer Can Chicken
Decoration
Garnish your beautifully roasted Traeger Grill Beer Can Chicken with fresh herbs for an elegant presentation. Sprigs of rosemary, thyme, or parsley can be artfully arranged around the platter, adding a pop of color and a fresh aroma that complements the smoky chicken. A scattering of lemon wedges around the bird also adds visual appeal and offers a bright, citrusy note for those who enjoy it.
Side Dishes
This smoky chicken pairs exceptionally well with classic backyard BBQ accompaniments. Consider serving it with a creamy coleslaw, which offers a refreshing crunch and tanginess that cuts through the richness of the chicken. Roasted potatoes or sweet potato wedges, seasoned and grilled to perfection, also make a fantastic pairing. Another excellent choice is grilled corn on the cob, brushed with butter and a hint of chili powder for an extra layer of flavor.
For a more substantial meal, consider sides like baked beans, mac and cheese, or a hearty potato salad. These traditional choices provide comforting and satisfying elements that round out a full barbecue spread. A simple green salad with a vinaigrette dressing can also offer a lighter, more refreshing counterpoint to the robust flavors of the chicken. The versatility of this dish means it can be dressed up or down depending on the occasion and your preference.
Creative Serving Ideas
Beyond traditional platters, get creative with how you present and serve your beer can chicken. For a more casual affair, carve the chicken and serve it family-style with all the sides arranged on a large wooden board. This communal approach encourages interaction and makes the meal feel more relaxed and inviting. You can also shred or dice the leftover chicken and use it in tacos, sandwiches, or salads for delicious second-day meals.
Consider serving small sliders made with the shredded chicken, topped with a barbecue sauce or a tangy slaw, perfect for appetizers or a party menu. Another idea is to serve individual portions of carved chicken alongside a medley of grilled vegetables, creating a visually appealing and healthy plate. For a more formal setting, present slices of the breast meat fanned out on the plate, accompanied by a smooth sauce and a refined side dish. These ideas showcase the adaptability of this recipe for any dining occasion.
Preparation & Storage
Storing Leftovers
Once your Traeger Grill Beer Can Chicken has cooled down to room temperature (which should be within about two hours of cooking), it’s time to store any leftovers. Transfer the cooled chicken to an airtight container. Ensure the lid is sealed tightly to prevent the meat from drying out in the refrigerator. Stored properly, leftover chicken will maintain its quality and flavor for up to 3 to 4 days.
This makes it incredibly convenient for meal prepping throughout the week. Leftovers can be easily incorporated into various dishes, saving you time and effort. Keeping the chicken in an airtight container is crucial for maintaining its moisture and preventing it from absorbing any unwanted odors from other foods in the refrigerator. This simple step ensures that your delicious leftovers remain as tasty as possible.
When you’re ready to enjoy them, simply retrieve the container from the fridge. The convenience of having pre-cooked, flavorful chicken on hand is invaluable for busy schedules. Whether it’s for a quick lunch or an addition to a weeknight dinner, properly stored leftovers are a testament to the recipe’s lasting appeal and practicality.
Freezing
For longer-term storage, freezing is an excellent option. It’s best to remove the meat from the bones before freezing. Carve or shred the chicken meat into manageable portions. This makes it easier to thaw and use later for specific recipes. Place the meat into freezer-safe bags or airtight containers, removing as much air as possible before sealing. This helps prevent freezer burn and preserves the quality of the chicken.
You can freeze the meat for up to 3 months. Ensure the containers are clearly labeled with the date of freezing. Freezing the meat in portions allows you to thaw only what you need for a particular meal, which is both convenient and economical. This method ensures that you have a ready supply of delicious, smoked chicken available whenever the craving strikes, even outside of grilling season.
Properly packaged frozen chicken can be a lifesaver for quick meals or unexpected guests. The flavor and texture will remain surprisingly good when thawed and reheated correctly. This makes it a smart strategy for maximizing the enjoyment of your Traeger Grill Beer Can Chicken, ensuring no delicious morsel goes to waste.
Reheating
Reheating chicken requires a gentle approach to avoid drying it out. The best method is usually in the oven. Place the desired amount of leftover chicken in an oven-safe dish. You can add a tablespoon or two of chicken broth, water, or even some of the pan juices from when it was originally cooked. Cover the dish loosely with foil to help retain moisture.
Reheat in a preheated oven at a moderate temperature, around 325°F (160°C), until the chicken is heated through. This typically takes about 15-20 minutes, depending on the portion size. Microwaving is another option for smaller portions, but be careful not to overheat, as it can make the chicken tough. If microwaving, cover the dish and heat in short intervals, checking for doneness.
For an even moister result, consider adding a splash of sauce or a bit of extra seasoning before reheating. The key is to heat it gently and evenly to bring it back to a palatable temperature without compromising its texture. Whether you use the oven or microwave, the goal is to revive the chicken’s succulence and flavor, making it almost as good as when it was freshly grilled. The addition of liquid during reheating is a pro tip for ensuring moist results.
Frequently Asked Questions
-
Can I use a different type of beer or liquid in the can?
Yes, absolutely! While a light lager is recommended for its neutral flavor that won’t compete with the chicken’s seasoning, you can experiment with other beverages. A pale ale or even a dark beer can impart subtle flavor nuances, though be mindful that stronger flavors might alter the overall taste profile of the chicken. If you prefer not to use alcohol, you can substitute with chicken broth, apple cider, or even just water. The primary function of the liquid is to create steam, which helps to keep the chicken moist from the inside out and contributes to the self-basting process.
-
What is the best way to ensure the chicken skin is crispy?
Achieving perfectly crispy skin involves a few key steps. Firstly, it’s crucial to thoroughly pat the chicken dry with paper towels before applying any oil or seasoning; this removes surface moisture that can lead to steaming. Secondly, using a bit of olive oil or melted butter on the skin before applying the rub helps the spices adhere and promotes browning. Finally, the high-heat finish towards the end of the cooking process is critical for rendering the fat and crisping up the skin. Ensure your grill is at the recommended high temperature (around 450°F or 230°C) for the final 15-20 minutes to achieve that desired crackling texture. Don’t cover the chicken tightly during this stage, as it can trap steam and soften the skin.
-
How do I know when the chicken is perfectly cooked and safe to eat?
The most reliable method for determining if your chicken is fully cooked and safe to consume is by using a meat thermometer. Insert the thermometer into the thickest part of the thigh, making sure not to touch the bone, as this can give a false reading. The internal temperature should register at least 175°F (80°C) for the thigh. For the breast meat, the safe internal temperature is 165°F (74°C). Cooking the thigh to a slightly higher temperature ensures that the dark meat is tender and juicy, while the breast meat remains moist. Visual cues like clear juices running from the meat when pierced can be helpful, but temperature is the definitive indicator of safety and doneness.
This Traeger Grill Beer Can Chicken works so well because it gives you that classic smoked-chicken payoff without a complicated process. The seasoning is simple, the method is straightforward, and the finished bird looks like something you would proudly bring straight to the center of the table. It is a great option for weekends, family dinners, and casual gatherings when you want something hearty and memorable but still manageable. Once you try the slow cook followed by the hot finish, it is easy to see why this style of grilled whole chicken keeps earning a spot in the rotation. For more inspiration on delicious main courses, explore our collection of dinner recipes.