Easy Asparagus Tart with Mozzarella Cheese – Only 5 Ingredients!
Embark on a culinary adventure with this delightful Asparagus Mozzarella Cheese Tart, a dish that promises to elevate your everyday meals into moments of pure gastronomic pleasure. It’s a symphony of textures and flavors, marrying the crisp, buttery layers of puff pastry with the vibrant freshness of asparagus and the gooey, comforting embrace of melted mozzarella. This tart is more than just a recipe; it’s an invitation to create something beautiful and delicious with minimal fuss, perfect for any occasion.
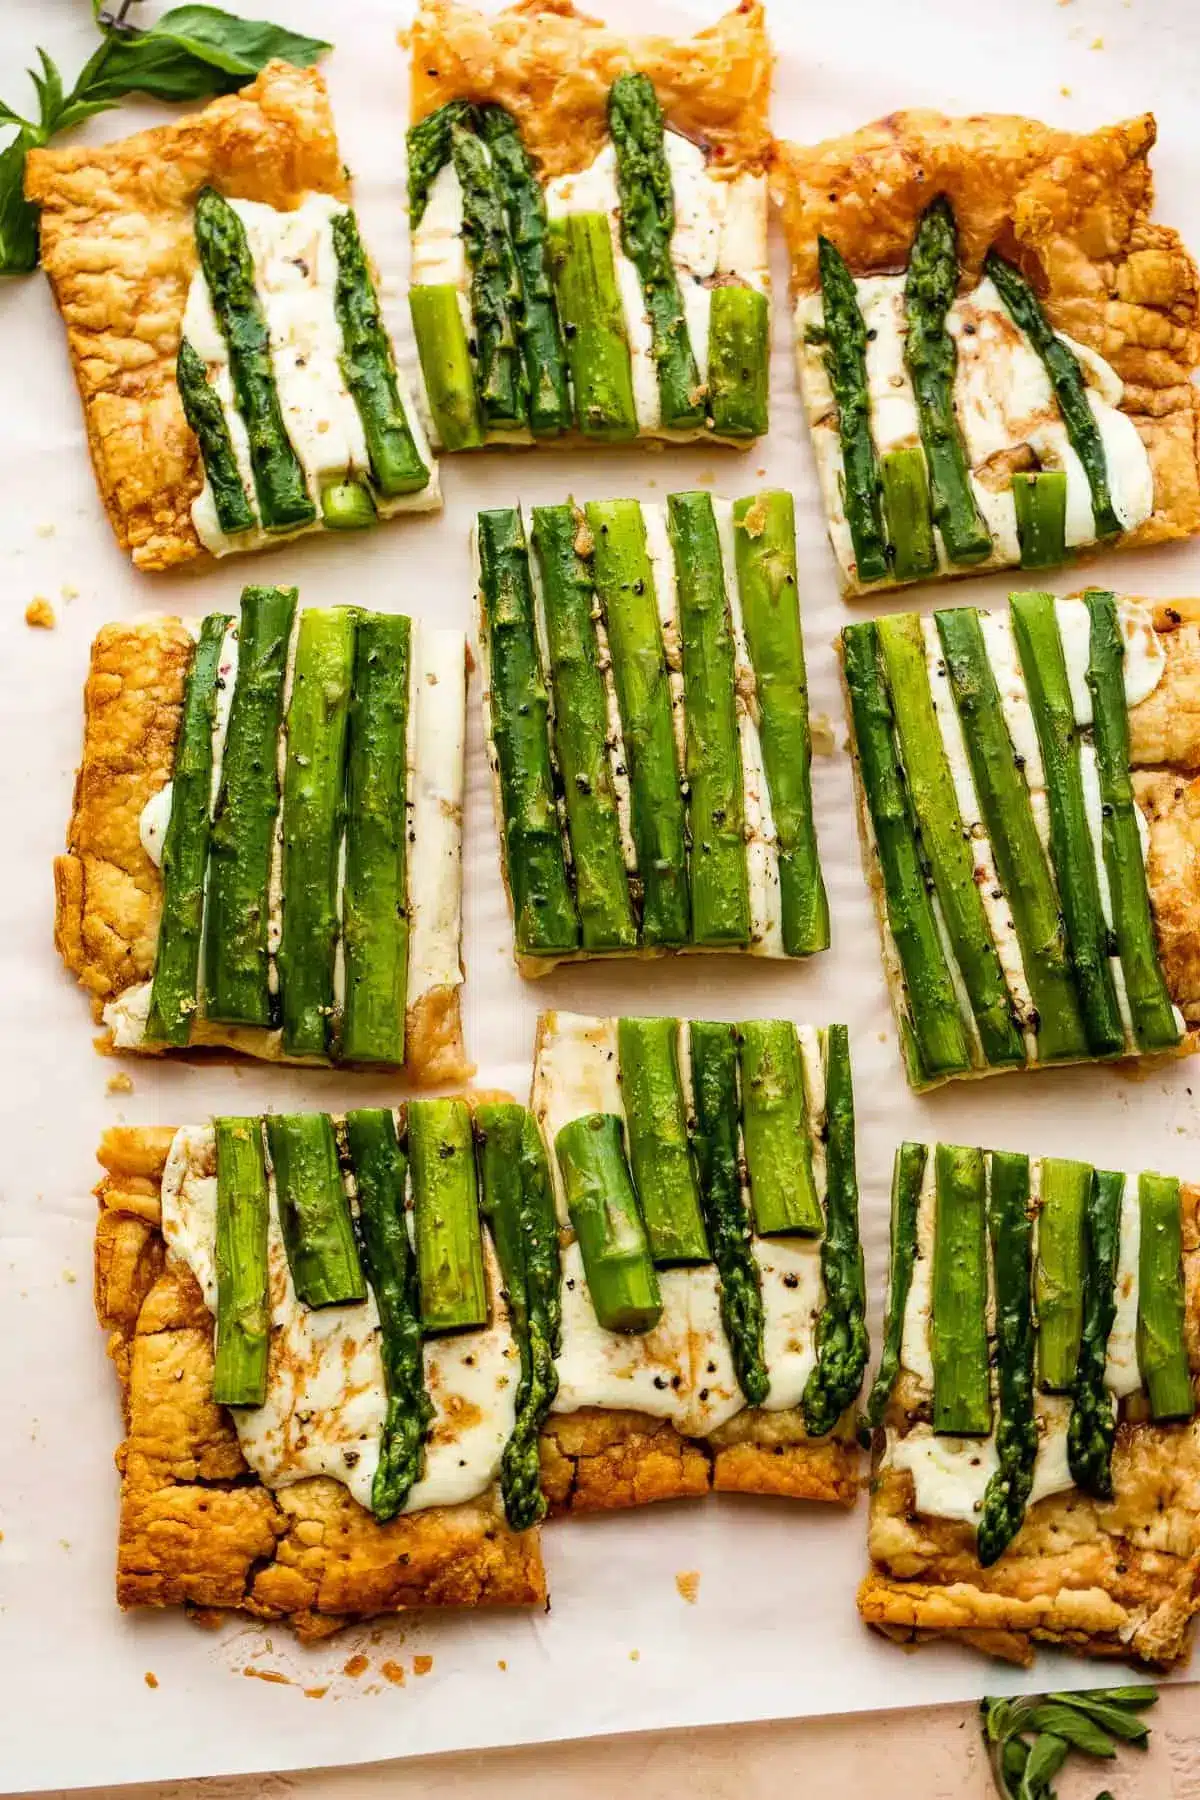
Imagine a golden, flaky crust giving way to tender asparagus spears nestled in a blanket of perfectly melted mozzarella, all finished with a subtle drizzle of balsamic glaze. This visual and gustatory appeal makes it a true showstopper, whether you’re hosting a sophisticated brunch, a casual lunch, or simply looking for an impressive appetizer. The simplicity of its preparation belies the elegance of its final presentation, making it a favorite for both novice and experienced home cooks alike.
Why You Will Love This Recipe
- Exceptional Simplicity: With a mere five core ingredients, this tart is a testament to how quality components can create extraordinary results without complexity. Even the essential salt and pepper are counted, highlighting its minimalist brilliance.
- Remarkable Speed: From the initial prep to the final bake, this entire Asparagus Mozzarella Cheese Tart can grace your table in approximately 30 minutes, making it an ideal solution for busy weeknights or spontaneous gatherings.
- Incredible Versatility: This tart transcends meal categories, seamlessly fitting into brunch spreads, acting as a light and satisfying lunch, or serving as an elegant appetizer before a grander dinner. Its adaptability is a key feature that makes it a go-to recipe.
- Crowd-Pleasing Appeal: The combination of flaky pastry, fresh vegetables, and melted cheese is universally loved, ensuring that this Asparagus Mozzarella Cheese Tart will be a hit with guests of all ages and palates.
- Elegant Presentation: Despite its ease of preparation, the tart boasts a sophisticated appearance that can easily rival those from professional bakeries, offering a visually stunning centerpiece for any dining occasion.
Ingredients You Need
The success of this Asparagus Mozzarella Cheese Tart hinges on the quality of its few, select ingredients. Choosing fresh, vibrant asparagus ensures a delightful snap and bright flavor, while high-quality, fresh mozzarella melts beautifully, providing that irresistible gooeyness. Utilizing good puff pastry is crucial for achieving those coveted flaky layers that are the hallmark of an exceptional tart. The balsamic glaze, though optional, adds a crucial layer of complex sweetness and tang that truly elevates the dish.
Easy Asparagus Tart with Mozzarella Cheese
This easy asparagus tart with mozzarella cheese recipe is quick, easy, and versatile. Serve this savory tart for brunch or lunch, or as an appetizer before dinner.
- 1 pound thin asparagus spears, ends trimmed
- 1 sheet frozen puff pastry, thawed
- 8 ounces fresh mozzarella cheese
- Olive oil, for brushing
- Salt and fresh ground pepper, to taste
- Balsamic glaze, for serving
- 1Preheat oven to 400˚F. Line a baking sheet with parchment paper and set aside.
- 2In a pot or saucepan, bring 8 cups of water to a boil. Stir in 2 tablespoons of salt and add the asparagus spears; boil for 2 to 3 minutes. Drain the asparagus and immediately transfer to ice water to stop the cooking process. Pat dry with paper towels and set aside.
- 3Roll out the puff pastry and set it on a lightly floured surface. Using a rolling pin, roll it out to a rectangle that’s about ½-inch thick.
- 4Transfer the puff pastry to the baking sheet. Prick the puff pastry all over with a fork. Bake for 10 minutes.
- 5Remove from the oven and transfer the puff pastry to a wire rack to cool slightly.
- 6Tear the mozzarella cheese into smaller pieces and arrange it over the puff pastry, leaving about 1-½ inches of uncovered border on all sides.
- 7Arrange the asparagus spears on the pastry. Brush the asparagus with olive oil and season with salt and pepper. Bake for 15 to 18 minutes, or until cheese is melted and puff pastry is crisp and golden brown.
- 8Remove from oven and drizzle with a bit of balsamic glaze. Cut into 8 slices and serve.
Keywords: Asparagus, Mozzarella, Tart, Puff Pastry, Cheese, Appetizer, Brunch, Lunch, Vegetarian
- thin asparagus spears: select fresh, vibrant spears and ensure the woody ends are trimmed for optimal texture and tenderness.
- frozen puff pastry: a good quality frozen puff pastry sheet is essential for achieving light, flaky, and golden-brown layers.
- fresh mozzarella cheese: opt for a whole-milk, fresh mozzarella for the best creamy texture and meltability.
- olive oil: a light brushing of olive oil adds a subtle richness and helps the pastry and asparagus brown beautifully.
- salt and fresh ground pepper: these fundamental seasonings are crucial for enhancing the natural flavors of the asparagus and cheese.
- balsamic glaze: this optional but highly recommended finishing touch provides a wonderful sweet and tangy contrast to the savory tart.
The precise quantities for each ingredient are detailed within the accompanying recipe card, ensuring you have all the necessary measurements for a perfect outcome.
Variations
The inherent versatility of this Asparagus Mozzarella Cheese Tart allows for numerous exciting variations, catering to diverse dietary preferences and taste profiles. One of the most popular adaptations is a Vegan version, which can be achieved by substituting the mozzarella with a high-quality vegan cheese alternative and using a vegan puff pastry. Nutritional yeast can also be added to the vegan cheese to impart a savory, cheesy depth that mimics the original. This approach still delivers a delightful, flaky tart experience that everyone can enjoy.
For those following a Low-Carb lifestyle, this tart presents a unique opportunity for adaptation. While puff pastry is inherently high in carbohydrates, one could experiment with a low-carb crust alternative, such as a crust made from almond flour or a cauliflower crust. The asparagus and cheese combination remains inherently low-carb, making it a fantastic base for creative modifications. This allows for a satisfying and guilt-free enjoyment of the core flavors and textures.
Another delightful variation involves introducing different vegetables or herbs to the mix. Imagine adding thinly sliced cherry tomatoes for a burst of acidity and sweetness, or incorporating sautéed mushrooms for an earthy undertone. Fresh herbs like chives, parsley, or dill sprinkled over the tart before or after baking can introduce a wonderful layer of freshness and aromatic complexity. These additions not only enhance the flavor profile but also add visual appeal, making each tart uniquely your own.
How to Prepare Asparagus Mozzarella Cheese Tart
Step 1: Prepare the Asparagus
The first crucial step in crafting your Asparagus Mozzarella Cheese Tart involves preparing the fresh asparagus. Begin by selecting thin, tender spears, as these will cook more quickly and evenly, yielding the best texture. You will need to trim the woody ends of the asparagus; a simple method is to hold a spear at both ends and gently bend it until it snaps naturally at its breaking point, which indicates where the tough fibers begin.
Once the ends are trimmed, ensure all the spears are of roughly uniform length, which can be achieved by lining them up and making a straight cut across the bottom. This uniformity is key for aesthetically pleasing arrangement on the tart. The next phase involves a brief blanching process. Bring a pot of water to a rolling boil and add a generous amount of salt; this not only seasons the asparagus but also helps preserve its vibrant green color. Carefully add the trimmed asparagus spears to the boiling water.
Allow the asparagus to boil for a very short period, typically just 2 to 3 minutes, until they are crisp-tender and have turned a bright emerald green. The goal here is not to fully cook them, but to give them a head start. Immediately after blanching, plunge the asparagus into a bowl of ice water. This rapid cooling, known as shocking, halts the cooking process instantly, preserving their vibrant color and crisp texture. Once thoroughly chilled, drain the asparagus completely and pat them dry with paper towels. Removing excess moisture is important to prevent a soggy tart later on.
Step 2: Bake the Puff Pastry
While the asparagus is cooling, turn your attention to the foundation of our tart: the puff pastry. Preheat your oven to a relatively high temperature, around 400°F (200°C). This high heat is essential for achieving the signature puff and golden crispness of the pastry. On a lightly floured surface, gently unroll the thawed puff pastry sheet. If it feels too stiff to handle, let it sit at room temperature for a few more minutes to soften slightly, but be careful not to let it get too warm, as this can make it difficult to work with.
Using a rolling pin, carefully roll out the puff pastry to achieve a thickness of about 1/8-inch. Aim for a rectangular shape that will fit comfortably on your baking sheet. Transfer the rolled-out puff pastry to a baking sheet lined with parchment paper. Parchment paper is highly recommended as it prevents sticking and makes cleanup a breeze. Before baking, it’s important to score the pastry. Using the tip of a sharp knife, lightly score a border about 1 to 1.5 inches from the edges all around the pastry. Be careful not to cut all the way through the dough; this scoring will help the edges puff up beautifully, creating a defined crust.
Next, using a fork, prick the entire surface of the pastry within the scored border. This step is crucial; it allows steam to escape during baking, preventing the center of the pastry from puffing up excessively and unevenly. Place the prepared puff pastry into the preheated oven and bake for approximately 10 minutes. You’ll want to watch it closely; the pastry should begin to puff and turn a very pale golden color. Once it has started to puff and is lightly golden, remove it from the oven. This initial bake partially cooks the pastry and sets its structure, preparing it for the toppings.
Step 3: Cool and Prepare for Toppings
After the initial 10-minute bake, carefully remove the partially baked puff pastry from the oven. It will have puffed up significantly, and you’ll notice the scored edges are starting to rise. The goal now is to let it cool slightly before adding the delicious toppings. Transfer the puff pastry, still on its parchment-lined baking sheet, to a wire rack. Allowing it to cool on a wire rack helps to prevent the bottom from becoming soggy, as air can circulate underneath it.
While the pastry is cooling for a few minutes, prepare your mozzarella cheese. If you are using a fresh mozzarella ball packed in water, gently drain it and pat it dry with paper towels to remove excess moisture. Then, tear the mozzarella into bite-sized pieces. Tearing the cheese, rather than slicing, often results in a more rustic and visually appealing distribution, and it allows for better coverage across the pastry base. The size of the pieces can be adjusted according to your preference, but aim for pieces that are not too large to melt evenly.
Once the puff pastry has cooled for about 5-7 minutes, it will still be warm but firm enough to handle the toppings. The slightly cooled pastry provides a stable base for arranging the asparagus and cheese without them sinking too much. This short cooling period ensures that the cheese will melt beautifully without becoming greasy or oily, and the asparagus will retain its fresh appeal. The pastry itself will continue to crisp up as it bakes with the toppings.
Step 4: Assemble the Tart
With the puff pastry slightly cooled and the mozzarella torn, it’s time to assemble your Asparagus Mozzarella Cheese Tart. Begin by evenly distributing the torn pieces of fresh mozzarella cheese all over the surface of the puff pastry. Make sure to cover the entire area within the scored border, leaving the 1 to 1.5-inch border for the crust completely free of cheese. This ensures the crust will puff up properly and provide a nice edge for handling the tart.
The mozzarella acts as a delicious, melty bed for the asparagus spears. Once the cheese is in place, arrange the blanched and dried asparagus spears on top of the mozzarella. You can lay them in a single layer, either parallel to each other or in a more decorative pattern, such as crisscrossed or fanned out. Ensure the asparagus is spread evenly across the surface of the tart for a balanced bite in every slice. The warmth of the slightly pre-baked pastry will begin to soften the mozzarella.
After arranging the asparagus, it’s time to add a touch of richness and seasoning. Lightly brush the asparagus spears with a bit of olive oil. This not only adds a subtle flavor but also helps the seasonings adhere better and encourages a slight charring on the asparagus tips during the final bake. Finally, season the entire surface generously with salt and freshly ground black pepper. The salt will enhance all the flavors, while the pepper will add a pleasant, mild spice. Be mindful not to oversalt, especially if your mozzarella is already salty.
Step 5: Bake to Golden Perfection
Now, your beautifully assembled Asparagus Mozzarella Cheese Tart is ready for its final bake. Carefully place the baking sheet back into the preheated 400°F (200°C) oven. The intense heat will work its magic, transforming the ingredients into a culinary masterpiece. You’ll want to bake the tart for approximately 15 to 18 minutes, but keep a close eye on it as oven temperatures can vary.
The primary indicators of doneness are a puff pastry that is deeply golden brown and wonderfully crisp, and mozzarella cheese that is completely melted, bubbly, and perhaps showing a few golden-brown spots. The asparagus should be tender but still retain a slight bite, vibrant green, and lightly roasted from the heat. If the crust starts to brown too quickly before the cheese is fully melted, you can loosely tent the tart with aluminum foil to protect the edges while the center finishes cooking.
Once the tart reaches this perfect state of golden crispness and bubbly, melted cheese, carefully remove it from the oven. The aroma filling your kitchen at this point will be absolutely irresistible. Allow the tart to rest on the wire rack for a few minutes before the final finishing touches and serving. This resting period allows the molten cheese to set slightly, making it easier to slice cleanly without everything sliding off.
Step 6: Finish and Serve
As your Asparagus Mozzarella Cheese Tart emerges from the oven, radiating warmth and deliciousness, it’s time for the final flourish. The moment of anticipation is nearly over! If you’ve chosen to use it, now is the perfect time to drizzle a bit of balsamic glaze over the top of the tart. The dark, syrupy glaze offers a beautiful visual contrast against the green asparagus and white cheese, and its sweet-tangy flavor profile is a perfect counterpoint to the savory elements of the tart. Use a spoon to create thin, artistic lines of glaze across the surface.
Let the tart rest for about 5 to 10 minutes on the wire rack. This brief resting period is crucial for allowing the cheese to set slightly, making it easier to cut clean, distinct portions. If you cut into it too soon, the molten cheese might ooze out excessively, making for a messier serving experience and potentially compromising the structure of the slices. This patience ensures a more elegant presentation and a cleaner bite.
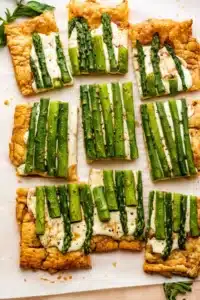
Finally, it’s time to serve your masterpiece. Using a sharp knife or pizza cutter, carefully slice the tart into 8 equal pieces or squares, depending on your preference. Arrange the slices attractively on a serving platter. This Asparagus Mozzarella Cheese Tart is wonderfully versatile and can be enjoyed immediately while warm, making it perfect for brunch, a light lunch, or a delightful appetizer. Its inviting aroma and delicious taste are sure to be a hit.
Pro Tips for Asparagus Mozzarella Cheese Tart
Select the Right Asparagus: For the most tender and flavorful result, opt for thin asparagus spears. Thick stalks can be stringy and may require longer cooking times. Always trim the woody ends; they are tough and unpleasant to eat. The natural snap test is your best guide for finding the perfect breaking point.
Master the Puff Pastry: Ensure your puff pastry is properly thawed but still cold when you work with it; this is key for achieving maximum puff. Handle it gently and avoid overworking it to maintain its delicate layers. Scoring the edges and pricking the center before the first bake are essential steps for a professional finish.
Don’t Overcook the Asparagus Initially: The asparagus is blanched for only a few minutes to achieve a crisp-tender texture and vibrant color. It will continue to cook in the oven. Over-blanching will result in mushy asparagus on your finished tart.
Enhance the Flavor: While the basic recipe is delicious, consider adding extra flavor boosters. A sprinkle of garlic powder or finely minced fresh garlic on top of the cheese before baking can add a wonderful aroma. A squeeze of fresh lemon juice over the finished tart can also provide a bright, zesty lift.
Achieve a Golden Crust: For an even more appealing and golden crust, brush the scored edges of the puff pastry with a beaten egg or a little milk just before the initial 10-minute bake. This egg wash provides a beautiful sheen and deepens the color for a truly professional look.
Serving Suggestions for Asparagus Mozzarella Cheese Tart
Decoration
To elevate the visual appeal of your Asparagus Mozzarella Cheese Tart, consider adding a final touch of freshness and color. A generous drizzle of balsamic glaze is highly recommended, not only for its flavor but also for the beautiful dark contrast it provides against the lighter ingredients. Freshly chopped herbs like chives, parsley, or a sprinkle of dill can add a vibrant green accent and a hint of freshness.
Tiny edible flowers, if available and in season, can also impart a whimsical and elegant touch, making the tart even more suitable for special occasions. A final light dusting of red pepper flakes can offer a subtle hint of color and a touch of warmth for those who enjoy a little spice. The key is to complement, not overwhelm, the existing flavors and textures with your chosen decorative elements.
Side Dishes
This Asparagus Mozzarella Cheese Tart is incredibly versatile and pairs wonderfully with a variety of side dishes. For a complete brunch or lunch experience, consider serving it alongside a fresh green salad tossed with a light vinaigrette; the acidity of the dressing cuts through the richness of the tart beautifully. A simple fruit salad, perhaps featuring berries, melon, and grapes, offers a refreshing and sweet counterpoint to the savory tart.
For a more substantial meal, especially as a light dinner entrée, consider pairing it with a protein such as pan-seared salmon, grilled chicken, or even a simple lentil soup. These complementary dishes add heartiness to the meal without overshadowing the delicate flavors of the tart itself. The goal is to create a balanced plate where each component enhances the overall dining experience.
Creative Serving Ideas
Beyond traditional slicing, get creative with how you present your Asparagus Mozzarella Cheese Tart. Cut it into smaller, bite-sized squares and serve them as elegant appetizers at parties or gatherings. You can even use small, decorative cookie cutters to shape the tart after baking, creating unique geometric or festive designs. For a more rustic presentation, serve wedges directly from the baking sheet, allowing guests to help themselves.
Another charming idea is to serve individual mini tarts. This can be achieved by using small tart pans or by cutting smaller rounds from the puff pastry sheet before assembly. These mini tarts are perfect for individual servings or for a more formal buffet-style presentation. Garnish each mini tart with a single asparagus spear and a tiny dot of balsamic glaze for an exquisite touch.
Preparation & Storage
Storing Leftovers
Should you be fortunate enough to have any Asparagus Mozzarella Cheese Tart remaining, proper storage is key to preserving its delightful qualities. Once the tart has cooled completely, transfer any leftovers to an airtight container. It’s best to store the container in the refrigerator to maintain freshness and prevent spoilage, especially given the presence of cheese and fresh vegetables. Properly stored, the tart should remain enjoyable for one to two days.
It’s important to note that puff pastry, by its nature, tends to lose its crispness and can become somewhat soft or even slightly soggy when stored. While the flavor will still be excellent, the texture may not be as light and flaky as when it was freshly baked. Therefore, it’s advisable to consume leftovers within this timeframe for the best possible experience, focusing on enjoying the remaining deliciousness.
Freezing
Freezing this Asparagus Mozzarella Cheese Tart is an option, though it requires careful consideration regarding texture. It is generally recommended to freeze the tart *before* baking for the best results. To do this, assemble the tart completely as per the recipe, then wrap it tightly in plastic wrap followed by a layer of aluminum foil. Place the well-wrapped tart in the freezer. It can be stored frozen for up to one month.
When you’re ready to bake a frozen tart, remove the foil and plastic wrap and place the tart directly onto a baking sheet lined with parchment paper. You may need to add a few extra minutes to the baking time to ensure it cooks through. Bake at 400°F (200°C) until the pastry is golden brown and the cheese is melted and bubbly. Freezing after baking can result in a less desirable texture for the puff pastry, so pre-baking freezing is the preferred method.
Reheating
To enjoy leftover Asparagus Mozzarella Cheese Tart and recapture some of its original crispness, reheating is the best approach. The ideal method is to reheat the tart in a conventional oven. Preheat your oven to around 350°F (175°C). Place the leftover tart directly on a baking sheet, perhaps lined with parchment paper to catch any drips.
Bake for approximately 8-12 minutes, or until the tart is heated through and the cheese is once again melted and gooey. This method helps to re-crisp the puff pastry and revive the textures that may have softened during refrigeration. Avoid reheating in the microwave if possible, as this will likely make the puff pastry soggy and chewy, detracting from the delightful texture you achieved initially.
Frequently Asked Questions
-
Can I use frozen asparagus instead of fresh?
Yes, you can use frozen asparagus, but it requires careful preparation to avoid a watery tart. Thaw the frozen asparagus completely and then thoroughly pat it dry with paper towels to remove as much moisture as possible. You may want to sauté it briefly in a pan with a little olive oil and seasoning before adding it to the tart. This pre-cooking step helps to drive off excess water and concentrate its flavor. Blanching is not necessary for frozen asparagus, as it has already been blanched during the freezing process.
-
What other cheeses can I use if I don’t have fresh mozzarella?
While fresh mozzarella provides a wonderful creamy melt, you have several other excellent cheese options. Grated Gruyère offers a nutty, slightly sharp flavor that pairs beautifully with asparagus. Smoked cheddar can add a delicious smoky depth. Goat cheese, crumbled over the tart, provides a tangy counterpoint that is quite sophisticated. Even a good quality shredded provolone or a blend of Italian cheeses can work well, offering varying levels of meltiness and flavor profiles.
-
How can I make this tart ahead of time?
You can definitely prepare this Asparagus Mozzarella Cheese Tart ahead of time, with a few adjustments for optimal results. The best way to do this is to prepare the tart up to the point of baking. Assemble the tart on the baking sheet, but do not bake it. Once assembled, cover it tightly with plastic wrap and refrigerate for up to 24 hours. When ready to bake, remove it from the refrigerator, let it sit at room temperature for about 20-30 minutes to take the chill off, and then proceed with baking as directed, noting that it might require a few extra minutes in the oven.