Homemade Vanilla Bean Frappucino – Easy Starbucks Copycat Recipe!
The allure of a perfectly crafted vanilla bean frappuccino, with its creamy texture and sweet, comforting flavor, is undeniable. It’s a treat that transports many of us to our favorite coffee shops, offering a moment of pure indulgence. Recreating that magic at home is not only possible but surprisingly simple with a few key ingredients and a good blender.
This guide will walk you through making a luscious vanilla bean frappuccino that rivals your go-to order, with options to customize it to your exact preferences. Get ready to become your own barista and whip up this delightful drink whenever the craving strikes.
Why You Will Love This Recipe
- Effortless Preparation: This delightful drink comes together in mere minutes, making it perfect for a quick treat or a refreshing pick-me-up.
- Customizable Flavor: While the base is a classic vanilla bean, you have the flexibility to adjust sweetness, add coffee, or experiment with other flavors.
- Creamy, Not Icy Texture: Using quality vanilla bean ice cream ensures a luxuriously smooth and rich consistency that’s a joy to sip.
- Caffeine-Free Option: Enjoy this sweet indulgence without the jitters, making it suitable for any time of day or for those sensitive to caffeine.
- Budget-Friendly: Making your favorite coffeehouse drinks at home significantly cuts down on costs compared to daily cafe visits.
Ingredients You Need
Crafting an exceptional vanilla bean frappuccino hinges on the quality of your ingredients. Opting for good vanilla bean ice cream and a pure vanilla bean powder will elevate the flavor profile significantly, providing a more authentic and nuanced taste than artificial extracts. While alternatives exist, investing in these core components ensures a truly delightful beverage experience.
Vanilla Bean Frappuccino

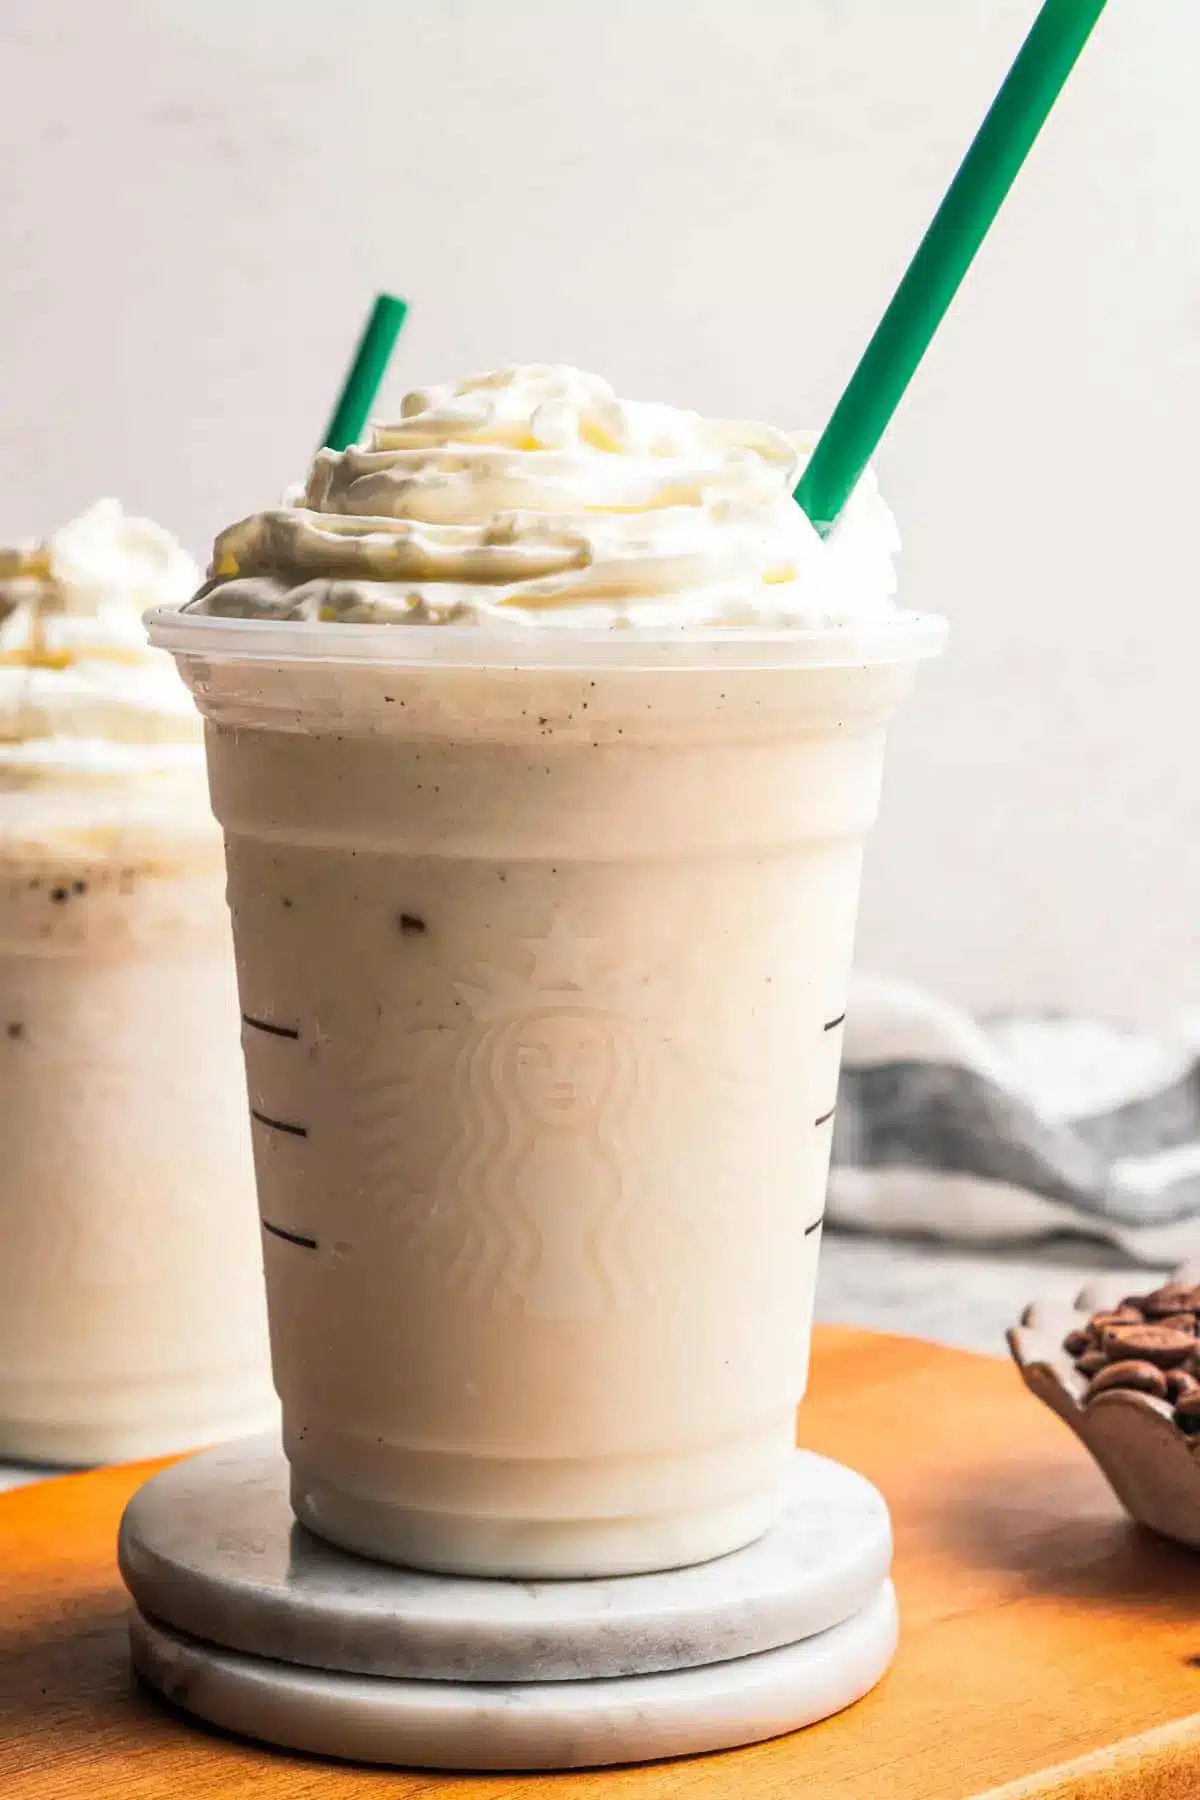
Learn how to make a copycat vanilla bean frappuccino at home with simple ingredients, including creamy vanilla bean ice cream (or make it Starbucks-style without the ice cream!).
- 1 cup whole milk, or 2% milk
- 2 tablespoons vanilla bean powder, or vanilla powder
- 1 scoop (about ⅓ cup) vanilla bean ice cream
- 1 cup ice
- whipped cream, for topping
- 1Combine the ingredients. Add the milk, vanilla bean powder, ice cream, and ice to a blender.
- 2Blend until smooth and creamy.
- 3Serve. Pour into a glass and top with whipped cream. Serve immediately.
Keywords: frappuccino, vanilla, starbucks, iced coffee, coffeehouse, homemade, copycat, dessert, drink, milkshake
The exact quantities for each ingredient, ensuring the perfect balance of flavors and textures, are detailed within the provided recipe card.
Variations
For those seeking a dairy-free delight, transforming this vanilla bean frappuccino into a vegan marvel is wonderfully straightforward. Begin by substituting the whole milk with your favorite plant-based alternative, such as almond, oat, or soy milk, ensuring it’s unsweetened to control the overall sugar content. The vanilla bean ice cream can be replaced with a high-quality vegan vanilla ice cream, often made with coconut milk or cashew bases, which will provide the necessary creaminess and richness. If vegan ice cream isn’t readily available, you can achieve a similar texture by blending frozen bananas or a thick coconut cream with your non-dairy milk and vanilla bean powder, though this will impart a subtle banana or coconut flavor.
To cater to a low-carb lifestyle, significant adjustments are needed, primarily focusing on eliminating sugars. For the milk component, unsweetened almond milk or coconut milk are excellent choices, offering minimal carbohydrate content. The vanilla bean ice cream must be omitted entirely; instead, a sugar-free vanilla syrup or a few drops of high-quality vanilla extract, combined with a sugar-free vanilla protein powder or a thickener like xanthan gum, can provide the desired flavor and consistency. Ensure you use a sweetener that aligns with your low-carb approach, such as erythritol, stevia, or monk fruit, to achieve a pleasant sweetness without the carb load. A touch of heavy cream can also be added for richness, as it is low in carbohydrates and high in fat.
Introducing a coffee kick to this classic vanilla bean frappuccino can transform it into a delightful mocha or a robust espresso beverage. For a mocha twist, add 1-2 tablespoons of unsweetened cocoa powder along with the other ingredients before blending. This will impart a rich chocolate flavor that perfectly complements the vanilla. If you prefer a pure coffeehouse-style frappuccino, incorporate a shot or two of freshly brewed, cooled espresso directly into the blender. This not only adds a jolt of caffeine but also deepens the overall flavor complexity, creating a more sophisticated drink that’s perfect for coffee aficionados.
How to Prepare vanilla bean frappuccino recipe
Step 1: Gathering Your Ingredients and Equipment
Before embarking on the journey to create your perfect vanilla bean frappuccino, it’s essential to gather all the necessary components. This includes ensuring you have high-quality vanilla bean ice cream, a good vanilla bean powder or extract, and your chosen milk – whole milk offers the richest creaminess, but any milk or non-dairy alternative will work. Ice cubes are crucial for achieving that signature frosty texture, so make sure your ice maker is full. You’ll also need your preferred sweetener if you opt for a version that doesn’t rely solely on the ice cream’s sweetness.
Beyond the ingredients, the right equipment is paramount for a smooth blending experience. A high-powered blender is highly recommended; these machines are designed to pulverize ice cubes effectively, ensuring a velvety smooth consistency without any gritty ice shards. If you don’t have a powerful blender, you might need to blend in stages or add slightly less ice to avoid overwhelming a less robust motor. Don’t forget your serving glasses and any decorative toppings you plan to use, like whipped cream or a drizzle of chocolate syrup, to complete the coffeehouse presentation.
Step 2: The Art of Blending the Base
The initial blending phase is where the magic truly begins, setting the stage for the perfect frappuccino texture. Start by carefully adding the liquid ingredients to your blender jug first; this usually means pouring in the milk of your choice. Following the milk, add your vanilla bean ice cream. If you’re using vanilla bean powder or extract, this is the time to introduce it, ensuring an even distribution of that delightful vanilla essence throughout the mixture.
Next, it’s time for the ice. Add the ice cubes to the blender. The amount of ice can be adjusted based on your preference for thickness; more ice will result in a thicker, icier drink, while less ice will yield a creamier, more milkshake-like consistency. It’s often a good idea to start with the recommended amount and then add more if you desire a denser beverage after the first blend. Secure the lid firmly on your blender, ready for the next crucial step.
Step 3: Achieving Perfect Smoothness
With all the ingredients loaded into the blender, the next step is to engage the blending power and transform them into a cohesive, smooth concoction. Begin blending on a low speed to initially break down the larger ice chunks and incorporate the ingredients. As the mixture starts to combine, gradually increase the blender’s speed to high. Continue blending until the frappuccino reaches your desired consistency – this typically means there are no visible ice chunks, and the mixture is uniformly smooth and creamy, resembling soft-serve ice cream.
This process may take anywhere from 30 seconds to a couple of minutes, depending on the power of your blender. If the mixture appears too thick and the blender is struggling, you can add a small splash more milk, just a tablespoon at a time, to help it move. Conversely, if it seems too thin, you can add a few more ice cubes and blend again until the desired thickness is achieved. Scrape down the sides of the blender with a spatula if needed to ensure all ingredients are incorporated into the blend.
Step 4: The Sweetness Check and Adjustment
Once the frappuccino has achieved a beautifully smooth consistency, it’s vital to pause and taste-test for sweetness. The sweetness level can vary greatly depending on the vanilla bean ice cream used and personal preference. Carefully remove the blender lid and use a spoon to sample a small amount of the blended mixture. Consider if the vanilla flavor is pronounced enough and if the overall sweetness is to your liking.
If the frappuccino isn’t sweet enough for your palate, this is the opportune moment to add your preferred sweetener. This could be granulated sugar, a liquid sweetener like agave or maple syrup (though these will alter the flavor slightly), or a sugar-free alternative if you’re aiming for a lower-sugar option. Add the sweetener gradually, blending for a few more seconds after each addition, and tasting again until the perfect balance of sweet and vanilla is achieved. Remember, it’s easier to add more sweetener than to take it away.
Step 5: The Starbucks-Style Variation (No Ice Cream)
For those who wish to replicate the authentic Starbucks experience without using ice cream, a special Frappuccino base syrup is key. To create this base, you’ll need to combine 1 cup of water, 1 cup of granulated sugar, and 1 teaspoon of xanthan gum in a blender. Xanthan gum acts as a thickening agent, crucial for achieving that signature syrupy texture that Starbucks uses. Blend these ingredients until the mixture is completely smooth and uniform, ensuring the xanthan gum is fully incorporated.
Once your Frappuccino base syrup is ready, you will use approximately ¼ cup of this syrup in place of the vanilla bean ice cream called for in the main recipe. Combine this syrup with the milk, vanilla bean powder, and ice in your blender. Proceed with the blending process as outlined in steps 2 and 3, ensuring everything is combined into a smooth and creamy consistency. This method yields a frappuccino that is closer in texture to the commercial version, offering a lighter yet still satisfying drink.
Step 6: Presentation and Garnishes
The final step in creating your homemade vanilla bean frappuccino is the presentation, which significantly enhances the overall enjoyment of the beverage. Select a tall, clear glass to showcase the beautiful creamy color of your drink. If you’ve opted for the Starbucks-style variation without ice cream, the color might be slightly lighter than if using a rich vanilla bean ice cream, but it will still be appealing.
Generously top the frappuccino with a swirl of whipped cream; this is a classic and essential garnish that adds a delightful richness and visual appeal. For an extra touch of elegance, you can dust the top of the whipped cream with a pinch of vanilla bean powder, a sprinkle of cinnamon, or even a light dusting of cocoa powder. A colorful reusable straw adds a final flourish, making your homemade creation feel like a true treat from your favorite coffee shop. Serve immediately to enjoy its optimal chilled and creamy texture.
Pro Tips for vanilla bean frappuccino recipe
Use High-Quality Vanilla Bean Powder: For the most authentic and intense vanilla flavor, opt for genuine vanilla bean powder instead of extract. The tiny specks of vanilla bean visible in the drink are not only visually appealing but also contribute to a superior taste experience, offering a more complex and less one-dimensional sweetness than artificial vanilla flavorings.
Adjust Ice for Thickness: The key to a perfect frappuccino texture lies in the ice-to-liquid ratio. If you prefer a thicker, more shake-like consistency, don’t hesitate to add a little extra ice. Conversely, if you desire a thinner, more drinkable beverage, reduce the amount of ice or add a touch more milk during the blending process.
Chill Your Glass: For an extra-special touch that keeps your frappuccino colder for longer, consider chilling your serving glass in the freezer for about 15-20 minutes before pouring. This simple step helps maintain the drink’s frosty temperature, ensuring that every sip is as refreshing as the first, preventing premature melting and dilution.
Sweeten to Taste: The sweetness of vanilla bean ice cream can vary significantly between brands. It’s always wise to taste your frappuccino mixture before serving and adjust the sweetness as needed. Add your preferred sweetener gradually, blending briefly after each addition, until you achieve your ideal level of sweetness without making it cloyingly sweet.
Consider a Homemade Frappuccino Base: If you find yourself making frappuccinos regularly or want to achieve the closest possible replica to the coffee shop version without using ice cream, consider making a larger batch of the homemade Frappuccino base syrup. Store it in an airtight container in the refrigerator, ready to be used whenever a frappuccino craving strikes, saving you time and effort on busy days.
Serving Suggestions for vanilla bean frappuccino recipe
Decoration
Elevate your vanilla bean frappuccino from a simple drink to a work of art with thoughtful decorations. A generous swirl of freshly whipped cream is the classic choice, providing a creamy, airy counterpoint to the chilled drink. For an extra touch of visual appeal and flavor, consider dusting the whipped cream with a fine sprinkle of vanilla bean powder, a delicate dusting of cinnamon, or even a light scattering of shaved white chocolate. A drizzle of caramel or chocolate sauce over the whipped cream can add another layer of indulgence and visual richness.
Side Dishes
While a vanilla bean frappuccino is often enjoyed on its own as a delightful treat, it pairs wonderfully with a variety of complementary side dishes. Light and airy baked goods are particularly good companions; think of a slice of soft lemon bread, a moist marble cake, or a crumbly scone. For a slightly more substantial pairing, consider a few funfetti cookies that echo the celebratory feel of the drink, or even a delicate berry tart. The subtle flavors of these desserts won’t overpower the delicate vanilla notes of the frappuccino.
Creative Serving Ideas
Beyond the traditional tall glass, get creative with how you serve your vanilla bean frappuccino to make the experience even more memorable. For a fun, family-friendly option, serve them in mason jars with colorful striped straws, perhaps even adding a decorative ribbon around the jar. If you’re hosting a party or a special occasion, consider creating mini-frappuccinos in shot glasses or small dessert cups as an elegant after-dinner treat or a sophisticated welcome drink for guests. For a more adventurous presentation, you could even try layering the frappuccino with a rich coffee liqueur or a smooth chocolate ganache at the bottom of the glass before pouring in the blended mixture.
Preparation & Storage
Storing Leftovers
Frappuccinos are best enjoyed immediately after preparation, as their creamy, icy texture is at its peak when freshly blended. If you do find yourself with leftovers, it’s important to manage expectations regarding quality. Storing a frappuccino in the refrigerator will cause the ice to melt, resulting in a watery, separated liquid that loses its characteristic smooth consistency and delightful chill. Similarly, freezing it will likely create large ice crystals, altering the texture significantly when thawed, making it an unappealing slushy rather than a creamy beverage.
Freezing
Due to the nature of blended ice and dairy (or dairy alternatives), freezing a prepared vanilla bean frappuccino is generally not recommended for optimal enjoyment. The process of freezing and subsequent thawing will inevitably break down the emulsion, leading to a grainy or icy texture that detracts from the smooth, velvety mouthfeel that makes this drink so appealing. If you anticipate having leftovers, it is far better to halve the recipe from the outset to ensure you have just the right amount for immediate consumption, thereby avoiding the disappointment of a compromised texture.
Reheating
The concept of “reheating” a frappuccino doesn’t apply in the traditional sense, as these beverages are meant to be served cold and frosty. There is no method of reheating that will restore the drink to its original creamy, blended texture once it has melted or become icy from improper storage. Therefore, the most effective approach is to consume the frappuccino immediately after blending or to plan your preparation to only make as much as you intend to drink at that moment.
Frequently Asked Questions
-
Can I make this vanilla bean frappuccino caffeine-free?
Absolutely! The recipe as written, using vanilla bean ice cream and vanilla bean powder, is naturally caffeine-free. This makes it a perfect choice for enjoying any time of day, whether you’re looking for a sweet treat in the morning, afternoon, or evening, without worrying about caffeine’s stimulating effects. If you’re craving that coffeehouse vibe but want to avoid caffeine, this recipe is your ideal solution.
-
What is the best milk to use for the creamiest texture?
For the absolute creamiest texture, whole milk is generally the top recommendation. Its higher fat content contributes to a richer, more luxurious mouthfeel that closely mimics the creaminess of coffee shop beverages. However, if whole milk isn’t your preference or you have dietary restrictions, other milk alternatives can also yield excellent results. 2% milk will still provide good creaminess, while non-dairy options like oat milk or soy milk are also great choices for achieving a smooth and satisfying frappuccino.
-
How can I make my homemade frappuccino thicker without adding more ice?
If you find your frappuccino isn’t as thick as you’d like and you want to avoid adding more ice, there are a couple of effective strategies. You can increase the amount of vanilla bean ice cream used, as its frozen, creamy nature is a primary contributor to thickness. Alternatively, consider using a small amount of a thickening agent like xanthan gum – typically, ¼ to ½ teaspoon is sufficient – which is what commercial recipes often use to achieve that signature syrupy consistency. Ensure it’s blended thoroughly for a smooth result.