
Easy Strawberry Lemon Bars
Have you ever tasted a dessert that perfectly balances sweet and tangy, a symphony of flavors that dance on your palate? If your answer is a resounding “not yet,” then prepare yourself to be delighted by the exquisite Strawberry Lemon Bars. These aren’t merely a confection; they are an experience, designed to illuminate your day with their vibrant and refreshing taste sensations. The instant you savor a piece, a wave of luscious strawberry sweetness washes over you, beautifully complemented by the invigorating zest of lemon.
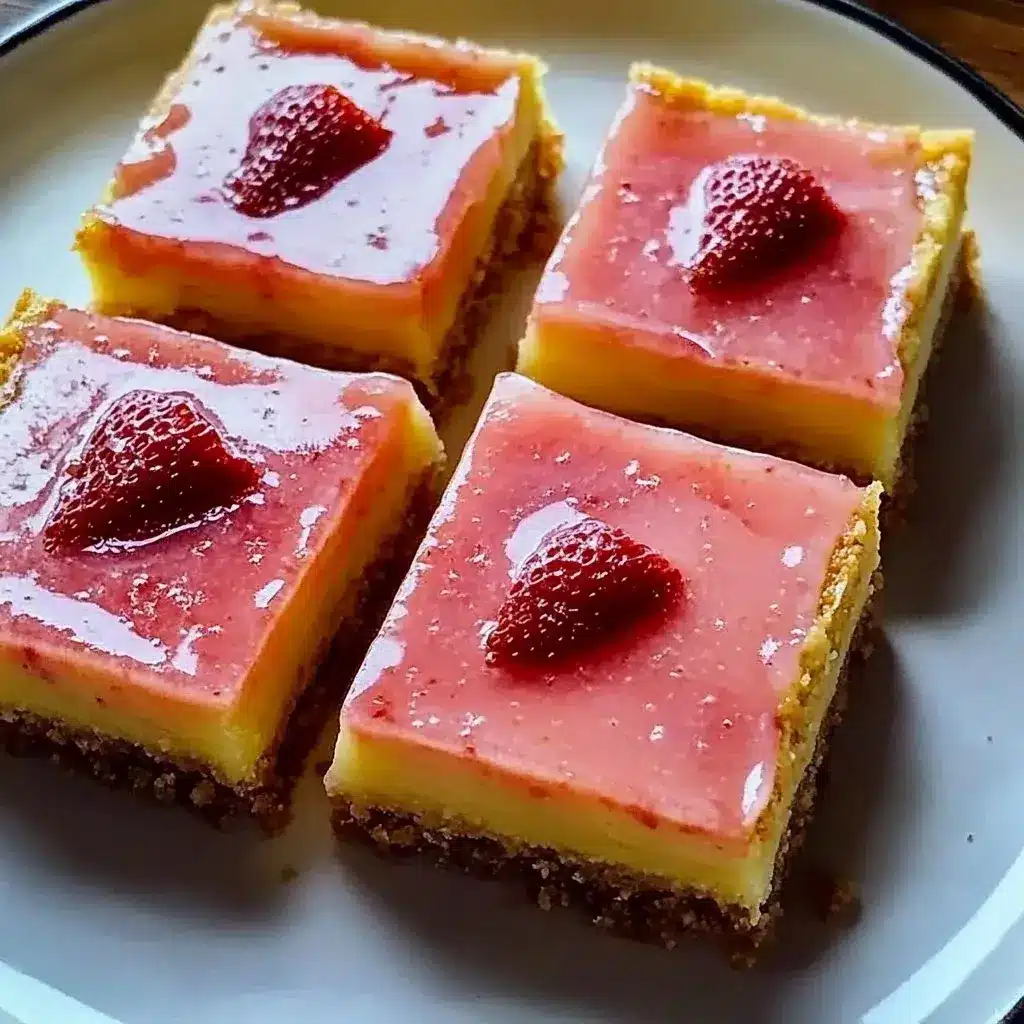
What truly elevates Strawberry Lemon Bars to a realm of their own is their masterful fusion of contrasting yet harmonious elements. A rich, buttery crust forms a delightful foundation, providing a comforting depth that cradles the smooth, creamy lemon filling, which offers a bright, citrusy punch. This makes them an absolutely perfect choice for any occasion, from relaxed summer picnics to more elegant holiday gatherings. The crowning glory, fresh strawberries adorning the top, adds not only a stunning visual appeal but also a fragrant aroma that is simply irresistible.
Why You Will Love This Recipe
- Effortless Preparation: With a few simple ingredients and clear instructions, you can create a show-stopping dessert even if you’re a beginner baker.
- Incredible Flavor Combination: The delightful interplay between sweet strawberries and zesty lemon creates a taste sensation that is both refreshing and satisfying.
- Visually Stunning: The vibrant colors of the lemon filling and strawberry topping make these bars a feast for the eyes, perfect for any special occasion.
- Versatile Delight: Enjoy these bars year-round; they are a perfect treat for summer gatherings or a bright spot during colder months.
- Customizable Creation: Easily adapt the recipe to suit dietary needs or personal preferences, making them accessible and enjoyable for everyone.
Ingredients You Need
The success of any remarkable dessert hinges on the quality of its ingredients. For these Strawberry Lemon Bars, selecting fresh, ripe strawberries and bright, aromatic lemons will truly elevate the final flavor profile. Using good quality butter and fine granulated sugar also ensures a perfect crust and a silky smooth filling. The simple elegance of these components is key to achieving that signature sweet and tangy balance that makes this treat so beloved.
Strawberry Lemon Bars

A perfect balance of sweet and tangy, these Strawberry Lemon Bars feature a buttery crust topped with creamy lemon filling and fresh strawberry glaze. They are simple to make and perfect for any occasion.
- 1 cup unsalted butter, melted
- 1 cup all-purpose flour
- 1/2 cup powdered sugar
- 1/4 teaspoon salt
- 1 cup granulated sugar
- 2 large eggs
- 1/4 cup fresh lemon juice
- 1 tablespoon lemon zest
- 1 cup fresh strawberries, pureed
- 1/4 cup gelatin (optional for thicker glaze)
- Powdered sugar for dusting
- 1Prepare Ingredients: Gather all ingredients, ensuring butter is at room temperature. Pre-measure lemon juice, zest, and strawberries.
- 2Make the Crust: Melt butter in a saucepan until nutty brown. In a bowl, combine flour, powdered sugar, and salt. Stir in brown butter until crumbly. Press into a greased baking dish. Bake at 350°F (175°C) for 15 minutes until golden.
- 3Make the Filling: Whisk together granulated sugar, eggs, lemon juice, and lemon zest until fluffy. Pour over the hot crust. Bake for 20-25 minutes until set.
- 4Glaze and Serve: Cool bars at room temperature, then chill for 2 hours until set. Mix pureed strawberries with gelatin (if using) and spread over the lemon layer. Chill for another hour until glaze is set. Slice into bars and dust with powdered sugar before serving.
Keywords: Baking, dessert, Fruity Treats, Strawberry Lemon Bars, Sweet and Tangy, lemon, strawberry, bars
- unsalted butter: for a rich, buttery crust and a smooth consistency in the filling.
- all-purpose flour: the base for a tender and slightly crumbly crust.
- powdered sugar: adds a delicate sweetness to the crust and helps with its texture.
- salt: a small pinch enhances all the other flavors and balances the sweetness.
- granulated sugar: provides the primary sweetness for the tangy lemon filling.
- large eggs: bind the filling ingredients together and contribute to its creamy texture.
- fresh lemon juice: the star ingredient for that essential bright, tart lemon flavor.
- lemon zest: intensifies the lemon aroma and adds an extra layer of citrus punch.
- fresh strawberries, pureed: creates a vibrant and sweet topping, complementing the lemon beautifully.
- gelatin (optional): can be used to thicken the strawberry glaze for a more set and refined finish.
- extra powdered sugar: for dusting, adding a final touch of elegance and sweetness.
Detailed quantities and specific measurements for each ingredient can be found in the accompanying recipe card, ensuring accuracy for a perfect bake every time.
Variations
Looking to put a unique spin on this classic treat? Consider a berry twist by incorporating other fruits alongside or instead of strawberries. Raspberries offer a tartness that pairs wonderfully with lemon, while blueberries provide a burst of sweetness and a beautiful deep blue hue.
For those embracing a lower-carbohydrate lifestyle, you can easily adapt these bars. Opt for a crust made with almond flour and a sugar substitute like erythritol or stevia. The lemon filling can also be sweetened with these alternatives, ensuring you still get that delightful tangy goodness without the sugar spike.
Another exciting variation involves adding a hint of tropical flavor. Introduce a tablespoon or two of shredded coconut into the crust mixture before baking for a subtle coconut aroma and a delightful chewy texture. This offers an unexpected yet delicious dimension to the familiar strawberry lemon profile.
How to Prepare Strawberry Lemon Bars
Step 1: Crafting the Perfect Crust
The foundation of any great bar is its crust, and for these Strawberry Lemon Bars, we’re aiming for a delightfully buttery and slightly crisp texture. Begin by melting one cup of unsalted butter over medium heat in a saucepan. Allow the butter to cook gently until it turns a beautiful nutty brown, a process known as browning the butter. This step imparts a wonderfully complex, toasted flavor that will significantly enhance the crust.
While the butter is browning, prepare your dry ingredients in a large mixing bowl. Combine one cup of all-purpose flour with half a cup of powdered sugar and a quarter teaspoon of salt. Whisk these together thoroughly to ensure even distribution. Once the brown butter has cooled slightly, pour it into the dry ingredients.
Stir the mixture until it just comes together, forming a crumbly dough. Be careful not to overmix, as this can lead to a tough crust. The consistency should be like damp sand, holding together when squeezed. This rustic texture is precisely what we’re aiming for, providing a satisfying contrast to the smooth filling.
Step 2: Baking and Preparing the Lemon Filling
Preheat your oven to 350 degrees Fahrenheit (175 degrees Celsius) and lightly grease an 8×8 inch baking dish. This size is ideal for achieving bars of a perfect thickness. Take the crumbly crust mixture and press it firmly and evenly into the bottom of the prepared dish. Ensure there are no gaps and that the surface is as flat as possible for uniform baking. A flat bottom is crucial for slicing the bars neatly later on.
Bake the crust for approximately 15 minutes, or until it’s lightly golden brown around the edges. While the crust is in the oven, you can begin preparing the luscious lemon filling. In a separate medium bowl, whisk together one cup of granulated sugar, two large eggs, a quarter cup of fresh lemon juice, and one tablespoon of lemon zest. Whisk vigorously until the mixture is smooth, well-combined, and slightly fluffy.
The zest from fresh lemons is essential here; it releases potent aromatic oils that contribute immensely to the overall citrus fragrance and flavor. Bottled lemon juice can be a substitute in a pinch, but the vibrancy of fresh citrus cannot be fully replicated. Using freshly squeezed juice and zest will ensure the most authentic and bright lemon taste in your bars.
Step 3: Combining and Baking the Filling
Once the crust has finished its initial bake and is lightly golden, carefully remove it from the oven. You want to pour the lemon filling over the hot crust immediately. This helps to set the filling quickly and ensures a cohesive final bar. Gently and evenly pour the whisked lemon mixture over the warm crust, making sure to cover the entire surface. Do this with a steady hand to avoid disturbing the crust too much.
Return the baking dish to the preheated oven. Bake for an additional 20 to 25 minutes. You’ll know the filling is ready when the edges are set and the center appears slightly jiggly but not liquid. It will continue to set as it cools. Avoid overbaking, as this can result in a rubbery texture; the filling should be tender and creamy.
The transformation occurring in the oven is remarkable. The heat from the oven works with the lemon juice and eggs to create a beautifully smooth custard-like layer. The aroma that fills your kitchen at this stage is simply divine, a preview of the delightful taste that awaits. This baking process is critical for achieving the perfect texture and flavor balance.
Step 4: Cooling and Setting the Bars
After the second bake, carefully remove the Strawberry Lemon Bars from the oven. It’s crucial to allow them to cool completely at room temperature before attempting to chill them. This gradual cooling process helps prevent the filling from cracking and ensures a more even set. Place the dish on a wire rack and let it sit for at least an hour, allowing the internal temperature to come down.
Once the bars have reached room temperature, cover the dish loosely with plastic wrap or foil. Transfer them to the refrigerator and chill for a minimum of two hours, or preferably longer. This chilling period is absolutely essential for the filling to firm up properly, making the bars easier to slice and improving their overall texture. Patience here will be richly rewarded with perfectly set bars.
The chilling process allows the flavors to meld and develop further. The tartness of the lemon mellows slightly, and the sweetness becomes more pronounced. A fully chilled bar will have a delightful firmness that is characteristic of classic lemon bars, making them a joy to eat and serve.
Step 5: Preparing and Applying the Strawberry Glaze
While the lemon bars are chilling, you can prepare the vibrant strawberry glaze. Take one cup of fresh strawberries, ensuring they are ripe and sweet. Puree them in a blender or food processor until you achieve a smooth consistency. If you prefer a thicker, more jam-like glaze, this is where the optional quarter cup of gelatin comes in.
Gently warm the strawberry puree in a small saucepan. If using gelatin, sprinkle it over the warm puree and whisk continuously until it’s fully dissolved and integrated. Be careful not to overheat the mixture; you just want it warm enough to dissolve the gelatin smoothly. This step is crucial for achieving a glaze that holds its shape and doesn’t run when sliced.
Once the lemon bars have chilled and are firm, gently spread the strawberry glaze evenly over the top. Use an offset spatula or the back of a spoon to create a smooth, uniform layer. Ensure the glaze reaches the edges of the bars for a beautifully finished look. This vibrant red layer not only adds a burst of berry flavor but also creates a stunning visual contrast against the pale yellow filling.
Step 6: Final Chill and Serving
After applying the strawberry glaze, return the Strawberry Lemon Bars to the refrigerator for at least another hour, or until the glaze has set completely. This final chilling period is important to ensure the entire bar is firm and cohesive, making it easy to cut into neat portions. The flavors will continue to develop and meld during this time, enhancing the overall taste experience.
Once fully chilled and set, it’s time to slice the bars. For the cleanest cuts, use a sharp knife dipped in hot water and wiped dry between each slice. This technique prevents the glaze and filling from sticking to the knife and smearing. Slice them into squares, typically yielding about 12 bars, depending on your desired size.
For a final touch of elegance and sweetness, dust the tops of the sliced bars generously with powdered sugar just before serving. This adds a beautiful snowy finish and a delicate sweetness that perfectly complements the tartness of the lemon and the sweetness of the strawberry. These bars are a testament to simple ingredients creating extraordinary results.
Pro Tips for Strawberry Lemon Bars
Use Fresh Ingredients for Optimal Flavor: The saying “fresh is best” is particularly true for this recipe. Always opt for freshly squeezed lemon juice and zest; it offers a brightness and aroma that bottled juice simply cannot match. Similarly, ripe, sweet strawberries will yield the most flavorful puree for your glaze.
Don’t Skip the Chilling Times: While it might be tempting to rush the process, allowing adequate chilling time is absolutely crucial. Chilling allows the bars to set properly, making them easy to slice and improving their texture. The lemon filling needs time to firm up, and the glaze needs to set completely for a clean cut.
Master the Brown Butter Technique: Browning the butter for the crust is a simple yet impactful step that adds a wonderful nutty depth. Watch it carefully to prevent burning; it should turn a golden amber color with a fragrant aroma. This small effort makes a significant difference in the crust’s flavor profile.
Achieve a Smooth Filling: Ensure your eggs are whisked thoroughly with the sugar, lemon juice, and zest. This emulsifies the mixture properly, leading to a smooth, creamy filling rather than one that might be watery or curdled. The whisking action also incorporates a bit of air, contributing to a lighter texture.
Perfect Slicing Technique: For the cleanest possible slices, use a long, sharp knife. Dipping the knife in hot water and wiping it dry between each cut will prevent the filling and glaze from sticking. This ensures your bars look as professional as they taste, making for a beautiful presentation.
Serving Suggestions for Strawberry Lemon Bars
Decoration
A light dusting of powdered sugar offers an elegant and classic finish, reminiscent of fresh snow. For an extra touch of color and freshness, garnish each bar with a small, fresh mint leaf. A tiny dollop of whipped cream or a single perfect strawberry slice perched on the side also adds a delightful visual appeal and an extra layer of indulgence.
Side Dishes
These bars are a perfect standalone dessert, but they pair wonderfully with a scoop of creamy vanilla bean ice cream or a dollop of lightly sweetened whipped cream. For a refreshing beverage pairing, consider serving them with a tall glass of homemade lemonade or a light, sparkling herbal tea to complement the citrus notes.
Creative Serving Ideas
Arrange these bars on a tiered dessert stand for a truly impressive display at parties or gatherings. You can also serve them individually in small paper liners for easy grab-and-go enjoyment at picnics or potlucks. Consider a “dessert flight” by pairing them with other small treats like miniature pancakes or cookies for a more varied sweet experience.
Preparation & Storage
Storing Leftovers
To keep your Strawberry Lemon Bars tasting their best, store them in an airtight container in the refrigerator. They will maintain their delightful texture and flavor for up to 5 days. Ensure they are completely cooled before sealing the container to prevent condensation, which can make the crust soggy.
Freezing
Strawberry Lemon Bars freeze exceptionally well, making them an ideal make-ahead dessert. Cut the bars into individual portions and place parchment paper between each layer to prevent sticking. Wrap them tightly in plastic wrap, followed by a layer of aluminum foil or place them in a freezer-safe container. They can be stored in the freezer for up to three months.
Reheating
For the best texture, thaw frozen bars overnight in the refrigerator. If you prefer them slightly warm, you can gently reheat them in a low-temperature oven (around 250°F or 120°C) for about 5-10 minutes, or until just warmed through. Alternatively, a few seconds in the microwave can suffice, but be cautious to avoid overheating, which can affect the texture of the filling.
Frequently Asked Questions
-
Can I make the crust gluten-free?
Absolutely! To make your Strawberry Lemon Bars gluten-free, simply substitute the all-purpose flour in the crust with a good quality gluten-free all-purpose flour blend. Many blends work well, but you might need to slightly adjust the liquid content or baking time depending on the specific flour you use. Always ensure your gluten-free flour blend is designed for baking to achieve the best texture and structure for your crust. You might find that some gluten-free flours result in a slightly different, but equally delicious, texture.
-
What is the best way to ensure the lemon filling sets properly?
Proper setting of the lemon filling relies on a few key factors: ensuring the eggs are well whisked with the sugar and lemon juice, baking until the edges are set and the center is only slightly jiggly, and crucially, allowing ample chilling time. The chilling process is where the magic truly happens, allowing the filling to firm up to that perfect, sliceable consistency. Avoid overbaking, as this can lead to a rubbery texture, and don’t rush the cooling and chilling stages, as they are indispensable for achieving the desired texture.
-
How can I prevent the strawberry glaze from becoming too runny?
If you’re finding your strawberry glaze is consistently too runny, using the optional gelatin is the most effective method. Ensure you dissolve the gelatin completely in the warmed strawberry puree, whisking constantly until there are no clumps. If you prefer not to use gelatin, you can achieve a thicker glaze by simmering the pureed strawberries gently for a few minutes until some of the liquid evaporates, concentrating the fruit’s natural pectin and sugars. Another trick is to slightly increase the amount of pureed strawberries for a denser fruit layer.