Whole Orange Cake Recipe – Rind and All!

Embracing the vibrant zest of citrus, this whole orange cake recipe offers a delightful departure from the ordinary. It’s a celebration of simple ingredients transformed into something truly spectacular, perfect for any occasion that calls for a touch of sunshine.
The magic lies in its unique preparation method, utilizing the entire orange, peel and all, to infuse every bite with an intense, authentic citrus flavor. This approach not only maximizes taste but also minimizes waste, making it an eco-conscious and incredibly delicious choice for bakers of all levels.
Why You Will Love This Recipe
- Intense Citrus Flavor: Experience the full, bright taste of oranges, amplified by using the whole fruit, including the peel, in the batter and glaze. This ensures a deep, satisfying citrus essence that is both refreshing and complex.
- Incredibly Moist Texture: Thanks to the natural oils in the orange peel and a thoughtfully balanced batter, this cake boasts a wonderfully moist crumb that stays tender for days. It’s a delight to bite into, avoiding any hint of dryness.
- Effortless Preparation: The convenience of a blender or food processor means minimal fuss and maximum flavor extraction. Most of the work is done by the appliance, streamlining the baking process considerably.
- Simple, Pantry-Friendly Ingredients: You’ll likely find most of the necessary components already in your kitchen, making this an accessible treat to whip up on a whim. It proves that exceptional desserts don’t require exotic or hard-to-find items.
- Visually Appealing Presentation: With its golden hue and a glistening citrus glaze, this cake is a beautiful centerpiece. A dusting of powdered sugar adds a final elegant touch, making it perfect for special gatherings or a simple afternoon indulgence.
Ingredients You Need
The beauty of this whole orange cake lies in its straightforward ingredient list, proving that exceptional desserts can be crafted from readily available pantry staples. Focusing on quality, especially with the oranges, will elevate the final product, ensuring a vibrant and pure citrus experience. We encourage you to select fresh, firm oranges for the best flavor profile and easiest preparation.
Easy Whole Orange Cake

This vibrant orange cake recipe uses the entire orange, peel and all! The batter is easily prepared in a blender, resulting in a super moist cake that's bursting with sweet citrus flavor, especially after being drenched in a tangy glaze. Perfect for spring or any occasion.
- For the cake:
- 2 large seedless oranges, preferably organic
- ¾ cup unsalted butter, softened
- 1 cup granulated sugar
- ¼ cup brown sugar
- 3 large eggs, room temperature
- 2 cups all purpose flour
- 2 teaspoons baking powder
- ¼ teaspoon salt
- For the orange glaze:
- ¼ cup freshly squeezed orange juice
- 2 tablespoons granulated sugar
- Additional:
- Powdered sugar, for dusting
- 1Prepare to bake: Preheat oven to 350ºF (175ºC). Line an 8-inch cake pan with parchment paper, covering the bottom and sides.
- 2Blend the oranges: Wash and scrub the oranges. Cut into smaller pieces and remove any seeds. Place the orange pieces, including the peel, into a food processor and blend until smooth. If the white pith is very thick or bitter, peel the oranges first, trim away some of the pith, then add the peel back in before blending.
- 3Add the remaining ingredients: To the food processor, add the softened butter, granulated sugar, brown sugar, and eggs. Process until smooth.
- 4Stir in dry ingredients: Add the all-purpose flour, baking powder, and salt to the food processor and stir until just combined. It's okay if you see small flecks of butter in the batter.
- 5Bake the cake: Pour the prepared cake batter into the lined cake pan. Bake for 50 minutes, or until a wooden skewer inserted into the center comes out clean.
- 6Make the glaze: While the cake is baking, combine the orange juice and sugar in a small saucepan. Simmer over medium heat for 4 to 5 minutes, or until the mixture reaches a syrupy consistency.
- 7Glaze the cake: Remove the cake from the oven. While it's still warm, brush the prepared orange glaze evenly over the top of the cake, allowing it to soak in.
- 8Cool and serve: Set the cake aside to cool completely before slicing and serving. Dust with powdered sugar if desired.
Keywords: orange cake, whole orange cake, citrus cake, blender cake, moist cake, easy dessert, vegetarian, German cuisine
Quantities for each ingredient are detailed in the recipe card for your convenience.
Variations
For those seeking a vegan delight, the transformation is remarkably simple. Replace the butter with a high-quality vegan butter substitute or a neutral-flavored oil like coconut or avocado oil. The eggs can be substituted with flax eggs; simply combine 3 tablespoons of ground flaxseed with 9 tablespoons of water and let it sit for about 10 minutes until it thickens. Ensure your baking powder is vegan as well, and the cake will still achieve that wonderful moistness and citrus punch.
If a low-carb or keto-friendly version is desired, consider swapping the all-purpose flour with an almond flour or a coconut flour blend. You’ll need to adjust the liquid content slightly, as these flours absorb moisture differently. For sweeteners, utilize a sugar substitute like erythritol or xylitol, ensuring they are suitable for baking and provide the sweetness without the carbohydrates. The oranges themselves will contribute some natural sweetness, so taste the batter and adjust as needed.
To enhance the aromatic qualities and complexity of the orange flavor, consider incorporating orange zest into the batter. Zesting one or two additional oranges and rubbing the zest into the sugar before adding it to the blender can release more of the aromatic oils. This extra step adds a fragrant depth that complements the juice and the whole fruit beautifully, offering a more nuanced citrus experience without altering the core recipe structure.
Another delightful variation involves adding warming spices that pair exceptionally well with citrus. A touch of cinnamon, a hint of nutmeg, or even a pinch of cardamom can add a new dimension to the cake. These spices complement the bright orange flavor, adding a cozy and comforting undertone, especially perfect for cooler weather or a festive holiday gathering. Be mindful not to overpower the delicate citrus notes; a small amount is usually sufficient.
For an added textural element and a nutty undertone, consider folding in some finely chopped almonds or walnuts into the batter just before pouring it into the pan. These nuts can be lightly toasted beforehand to further enhance their flavor and crunch. This addition creates a lovely contrast to the tender cake and adds a sophisticated touch, making it feel even more artisanal and special.
Experimenting with different types of oranges can also yield subtly different flavor profiles. While seedless varieties are recommended for ease, using a mix of sweet oranges like Valencia or Cara Cara with a touch of blood orange can introduce beautiful color variations and slightly different citrus notes. Remember to remove seeds if using oranges other than designated seedless types to maintain a smooth batter.
The glaze can also be a point of creative variation. Instead of just orange juice and sugar, you could infuse the glaze with a splash of Grand Marnier or Cointreau for an adult twist, or add a tiny bit of ginger juice for a subtle spicy kick. A few drops of food-grade rosewater could also add an unexpected floral note that pairs surprisingly well with orange.
Consider a simple citrus syrup soak applied to the cake while it’s still warm, before the glaze. This could be made from orange juice, sugar, and perhaps a splash of lemon or lime juice for added brightness. Such a soak ensures an incredibly moist cake that practically melts in your mouth, enhancing the citrus infusion even further and creating a truly decadent dessert experience.
For a richer, more decadent flavor profile, you could incorporate a tablespoon or two of almond extract into the batter. This extract beautifully complements the orange and adds a sophisticated layer of flavor that hints at marzipan. When using almond extract, it’s often best to reduce the amount of orange juice slightly to maintain the desired cake consistency.
Finally, think about introducing dried fruits to the batter, such as finely chopped apricots or cranberries. These add little pockets of sweetness and a slightly chewy texture that contrasts wonderfully with the cake’s moist crumb. Ensure the dried fruits are plumped in a little warm liquid before chopping and adding to prevent them from drawing moisture from the cake.
How to Prepare whole orange cake recipe
Step 1: Preparing the Oranges for Blending
Begin by selecting two large, seedless oranges, preferably organic. Organic is recommended because the peel will be used, and you want to minimize any potential pesticide residue. Thoroughly rinse and scrub the oranges under running water to ensure they are clean. Then, cut the oranges into manageable quarters. This makes it easier for your food processor or blender to process them efficiently.
If your oranges have seeds, carefully remove them at this stage. While the recipe calls for seedless oranges, it’s always wise to double-check. The presence of seeds can result in a slightly bitter taste and an unpleasant texture in the final cake. For optimal results, ensure no seeds remain. The pith, the white spongy layer beneath the peel, can sometimes be bitter. If you notice it is particularly thick or you are concerned about bitterness, you can trim away some of this pith before proceeding.
This careful preparation of the oranges ensures that the resulting batter will be smooth and free from any unwanted bitterness. The goal is to harness the bright, sweet essence of the orange flesh and its aromatic peel, creating a perfectly balanced flavor profile for your cake. This foundational step is crucial for the success of this unique whole-fruit baking method.
Step 2: Blending the Wet Ingredients
Place the prepared orange quarters into your food processor or a high-powered blender. Ensure the lid is securely fastened before you begin to blend. Process the oranges until they are thoroughly pureed and smooth. This might take a minute or two, depending on the power of your appliance. Scrape down the sides of the processor or blender as needed to ensure all the orange pieces are incorporated.
Once the oranges are smooth, add the softened unsalted butter to the food processor. The butter should be at room temperature so it blends seamlessly with the other ingredients. Next, add the granulated sugar and the brown sugar. The combination of both sugars contributes to the cake’s moisture and flavor depth, providing a delightful caramel note from the brown sugar. Finally, add the three large eggs, which should also be at room temperature to ensure they emulsify properly with the butter and sugar.
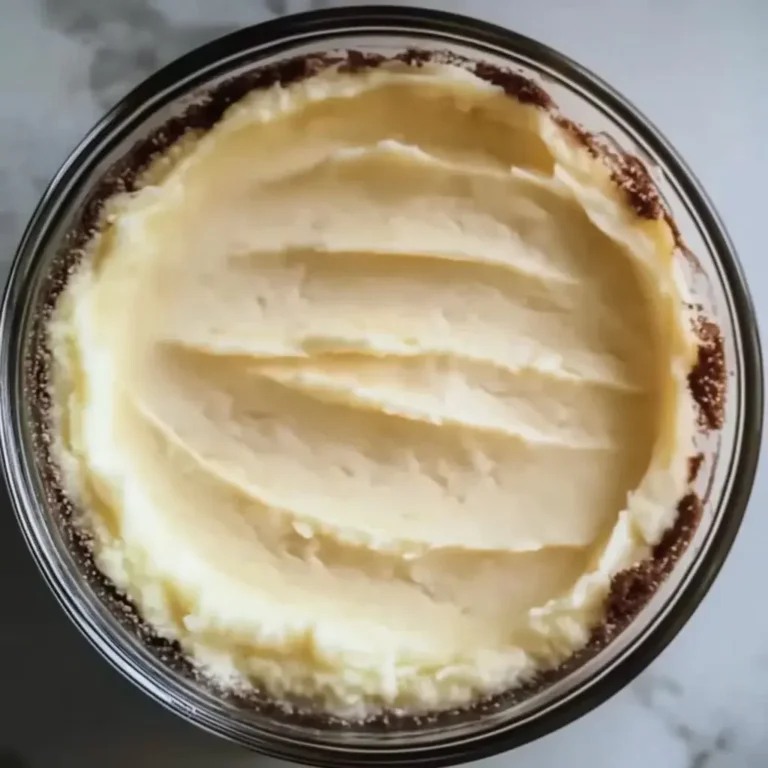
Process this mixture until it is completely smooth and well combined. You are looking for a homogeneous batter where all the wet ingredients are fully incorporated. Don’t worry if you see small flecks of butter; they are completely normal and will melt into the cake during baking, contributing to its tender texture. This thorough blending ensures that the flavors are evenly distributed throughout the cake.
Step 3: Incorporating the Dry Ingredients
Now, it’s time to add the dry ingredients to the food processor containing the blended wet ingredients. Measure out the all-purpose flour carefully. It’s best to spoon the flour into your measuring cup and level it off with a straight edge rather than scooping directly from the bag, as this prevents over-measuring and results in a lighter cake. Add the baking powder, which acts as the primary leavening agent, ensuring your cake rises beautifully.
Sprinkle in the salt, which balances the sweetness and enhances all the other flavors in the cake. You can stir these dry ingredients together in a separate bowl before adding them to the food processor, or you can add them directly. Process the mixture on a low speed just until the flour is incorporated and no dry streaks remain. Be careful not to overmix at this stage, as overmixing can develop the gluten in the flour, leading to a tougher cake.
The batter should be thick and smooth. If it seems too thick, you can add a tablespoon or two of milk or more orange juice, but this is usually not necessary. Ensure you scrape down the sides of the processor one last time to get all the batter incorporated. The consistency is key for a perfectly baked cake, and this step ensures it’s just right.
Step 4: Baking the Cake to Perfection
Preheat your oven to 350°F (175°C) well in advance of preparing the batter. Line an 8-inch round cake pan with parchment paper, ensuring it covers the bottom and sides. This parchment paper will help prevent the cake from sticking and make it easier to remove once baked. Pour the prepared cake batter evenly into the prepared cake pan. Gently spread the top with a spatula to ensure an even layer.
Place the cake pan in the preheated oven. Bake for approximately 50 minutes. The baking time can vary slightly depending on your oven, so it’s a good idea to start checking for doneness around the 45-minute mark. The cake is ready when a wooden skewer or toothpick inserted into the center comes out clean, with no wet batter attached.
The aroma that fills your kitchen as the cake bakes is truly delightful, a testament to the fresh oranges used. Once baked, remove the cake from the oven and let it sit in the pan for about 10 minutes. This brief resting period helps the cake to set further, making it easier to handle before the glaze is applied. Be patient, as the transformation is almost complete.
Step 5: Preparing and Applying the Orange Glaze
While the cake is still warm from the oven, prepare the simple yet delicious orange glaze. In a small saucepan, combine the freshly squeezed orange juice and the granulated sugar. Use fresh juice for the best flavor, as it will be more vibrant and less processed than bottled varieties. Place the saucepan over medium heat and stir constantly.
Continue to heat the mixture, stirring, until the sugar has completely dissolved and the liquid begins to thicken slightly. This should take about 4 to 5 minutes. You are looking for a syrupy consistency that will coat the back of a spoon. Be careful not to overcook it, as it can become too thick or even caramelized. The glaze should be pourable but substantial enough to adhere to the cake.
Once the glaze has reached the desired consistency, remove the saucepan from the heat. While the cake is still in its pan and warm, generously brush the prepared orange glaze evenly over the entire top surface. The warmth of the cake will help the glaze to soak in, creating a wonderfully moist and flavorful layer that complements the cake’s crumb. This step is crucial for maximizing the citrus flavor and ensuring a beautiful finish.
Step 6: Cooling and Finishing Touches
After brushing the glaze over the warm cake, allow it to cool completely in the pan on a wire rack. This cooling process is essential for several reasons. Firstly, it allows the glaze to set properly and seep further into the cake, enhancing its moistness and flavor. Secondly, a completely cooled cake is much more stable and less prone to crumbling when you slice it.
Once the cake has cooled thoroughly, carefully invert it onto a serving plate or transfer it from the pan. If you lined the pan with parchment paper, peeling it off should be a breeze. For an extra touch of elegance and a classic finish, dust the top of the cooled cake with powdered sugar using a fine-mesh sieve. This creates a beautiful, snow-like contrast against the golden cake and the citrus glaze.
Slice the cake using a sharp knife and serve. The combination of the tender, moist cake, the intense orange flavor, and the sweet glaze is absolutely divine. This cake is a perfect treat for breakfast, brunch, dessert, or even as a delightful afternoon snack, easily becoming a favorite in your baking repertoire.
Pro Tips for whole orange cake recipe
- Select the Right Oranges: Opt for oranges with thin peels, such as Valencia or Cara Cara. These varieties tend to have less of the bitter white pith, which can affect the final flavor of your cake. Thoroughly wash the oranges before use, as the peel is integral to the recipe.
- Handle the Pith Carefully: If your chosen oranges have a thick white pith, it’s advisable to trim some of it away before blending. A sharp knife can be used to carefully remove excess pith, ensuring a smoother texture and minimizing any potential bitterness in the cake.
- Don’t Overmix the Batter: Once you add the dry ingredients to the wet ingredients, mix only until just combined. Overmixing can develop the gluten in the flour, resulting in a tougher cake. A few small lumps are perfectly acceptable.
- Butter Flecks are Okay: It’s normal to see small flecks of butter remaining in the batter after processing. These will melt during baking and contribute to the cake’s moistness. There’s no need to worry about achieving a perfectly smooth, uniform batter at this stage.
- Cool Completely Before Slicing: Patience is key! Allow the cake to cool entirely before slicing. This ensures the cake has set properly, making it easier to cut clean slices and preventing it from falling apart. The glaze also needs time to set.
- Measure Flour Correctly: Spoon flour into your measuring cup and level it off with a straight edge. Scooping directly from the bag can lead to too much flour, resulting in a dry cake. Accurate measurement is crucial for the perfect cake texture.
Serving Suggestions for whole orange cake recipe
Decoration
The most classic and elegant decoration is a simple dusting of powdered sugar over the cooled cake. Use a fine-mesh sieve to create an even, delicate layer that contrasts beautifully with the golden-brown cake and glistening glaze. For a more vibrant presentation, consider garnishing the top with thin slices of candied orange peel or fresh orange segments. A scattering of toasted slivered almonds also adds a touch of texture and visual appeal.
Side Dishes
This vibrant orange cake pairs wonderfully with a dollop of lightly sweetened whipped cream or crème fraîche, adding a creamy contrast to its citrus notes. A scoop of vanilla bean ice cream or a refreshing lemon sorbet would also be a delightful accompaniment, enhancing the dessert experience. For a more substantial offering, consider serving it alongside fresh berries, such as raspberries or strawberries, their tartness balancing the cake’s sweetness.
Creative Serving Ideas
Transform slices of this cake into mini trifle parfaits by layering crumbled cake with custard, whipped cream, and fresh orange segments in individual glasses. You could also serve it warm with a drizzle of warm honey or a light caramel sauce for an extra layer of indulgence. For a sophisticated brunch offering, pair a slice with a glass of bubbly Prosecco or a refreshing mimosa, creating a festive start to the day.
Preparation & Storage
Storing Leftovers
This whole orange cake is remarkably forgiving when it comes to storage, maintaining its moistness for several days. Once completely cooled, store the cake in an airtight container at room temperature. It will remain delicious for up to 3 days, making it perfect for enjoying over a long weekend or for packing into lunches. Ensure the container is truly airtight to prevent the cake from drying out.
Freezing
For longer-term preservation, this cake freezes exceptionally well, either as a whole cake or in individual slices. Wrap the cooled cake tightly in a double layer of plastic wrap, ensuring no air can penetrate. You can then add an outer layer of aluminum foil for extra protection against freezer burn. Freeze for up to 2 months. Properly wrapped, it retains its excellent texture and flavor.
Reheating
If you’ve frozen your cake, the best way to reheat it is to allow it to thaw completely at room temperature. This process usually takes a few hours, depending on the size of the cake or slice. Once thawed, if you prefer a slightly warmed cake, you can gently reheat individual slices in a low oven (around 300°F or 150°C) for 5-10 minutes, or until just warmed through. Avoid microwaving, as this can alter the texture unfavorably.
Frequently Asked Questions
-
Can I use a different type of citrus fruit for this recipe?
While this recipe is specifically designed for oranges, you can certainly experiment with other citrus fruits like lemons or limes. However, keep in mind that the acidity and sugar content can vary significantly between fruits. You might need to adjust the amount of sugar in the batter and glaze to achieve a balanced flavor. Lemon or lime zest can be used in conjunction with or in place of orange zest for a different flavor profile. For instance, a whole lemon cake would offer a tangier, more zesty experience, and would be fantastic as a dessert option.
-
Why is my cake dry, even though I followed the recipe?
A dry cake can often be attributed to over-baking or inaccurate flour measurement. Ensure you are using the spoon-and-level method for measuring flour, as scooping directly from the bag can pack too much flour into the cup. Also, pay close attention to the baking time; ovens can vary, so start checking for doneness a few minutes before the suggested time. Inserting a skewer into the center should yield moist crumbs, not a completely dry surface. The addition of glaze also significantly contributes to moisture, so ensure it’s applied while the cake is still warm.
-
Can I make this cake gluten-free?
Yes, you can absolutely make this cake gluten-free by substituting the all-purpose flour with a high-quality gluten-free all-purpose flour blend. Look for a blend that contains xanthan gum, as this will help bind the cake and provide structure in place of gluten. You may need to adjust the liquid content slightly, as gluten-free flours can absorb moisture differently. Baking time might also vary, so monitor the cake closely for doneness. A gluten-free version of this cake would be a wonderful addition to any breakfast spread or lunch dessert.