Irresistible Strawberry Yogurt Bark
Have you ever craved a sweet treat that feels indulgent but is also good for you? Look no further than Strawberry Yogurt Bark! This delightful snack marries the creaminess of Greek yogurt with the natural sweetness of strawberries, creating a freeze-dried dessert that’s both satisfying and nutritious.
What truly makes Strawberry Yogurt Bark special is its versatility. You can enjoy it as a quick breakfast, a mid-afternoon snack, or a post-dinner dessert without any guilt. With its beautiful pink hue and crunchy almond topping, this dish is visually appealing and makes a fantastic treat for gatherings, parties, or simply a cozy night in.
Why You Will Love This Recipe
- Healthy Indulgence: Enjoy a guilt-free dessert packed with protein from Greek yogurt and the natural goodness of fresh strawberries, offering a balance of taste and nutrition that satisfies your sweet cravings without the usual sugar overload.
- Effortless Preparation: This recipe is incredibly straightforward, requiring minimal hands-on time and no complicated cooking techniques, making it perfect for busy weeknights or for involving children in the kitchen.
- No Oven Required: Beat the heat and skip the oven altogether! This no-bake wonder is ideal for warm weather or when you simply want a refreshing treat that requires only your freezer.
- Completely Customizable: The beauty of this bark lies in its adaptability; feel free to swap out fruits, nuts, or even yogurt flavors to create a personalized treat that suits your unique palate and dietary needs.
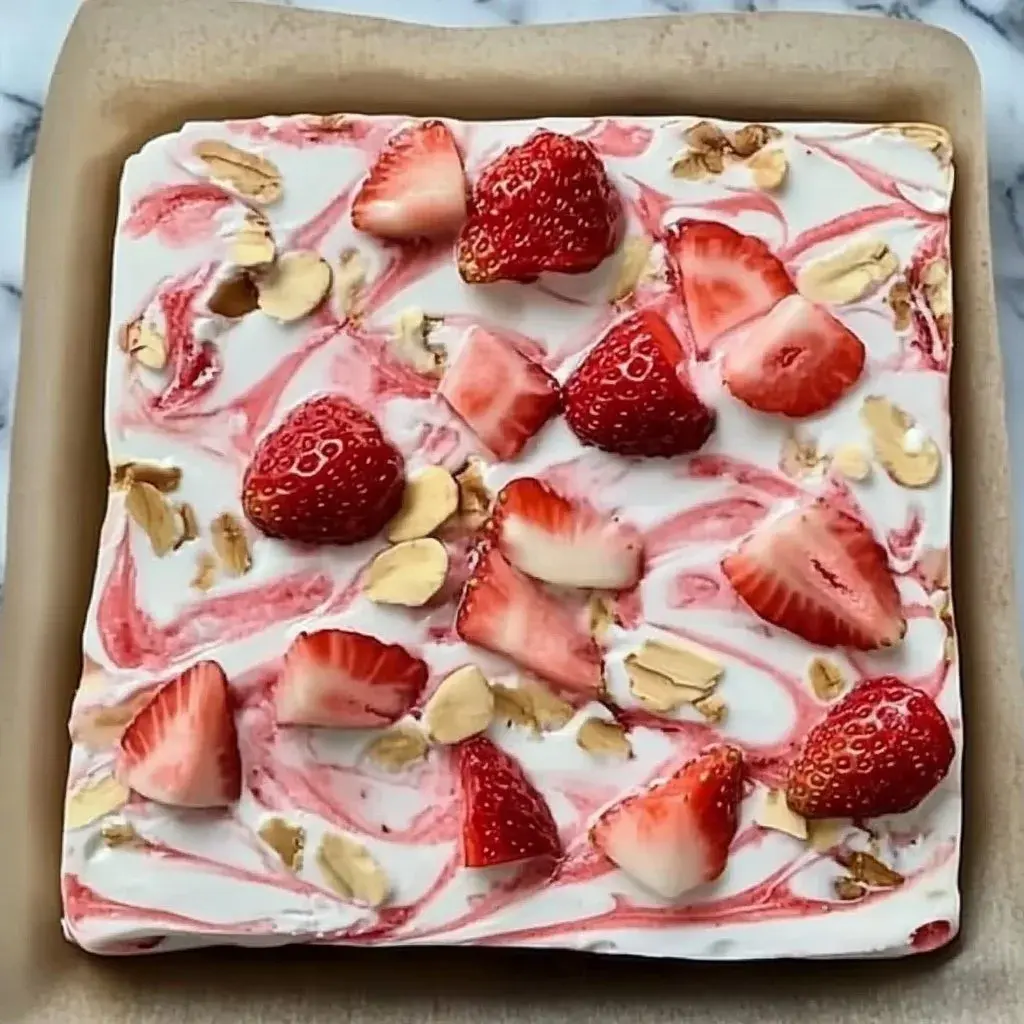
- Visually Stunning: The vibrant swirls of strawberry and creamy yogurt, combined with the textural contrast of nuts, create a treat that is as pleasing to the eyes as it is to the taste buds, making it a delightful addition to any spread.
Ingredients You Need
The success of your Strawberry Yogurt Bark hinges on the quality of the ingredients you choose. Opting for full-fat Greek yogurt provides the creamiest texture and best structure, ensuring your bark sets up beautifully without becoming icy. Fresh, ripe strawberries are key for both the mashed swirl and the delightful topping, offering natural sweetness and vibrant color.
Strawberry Yogurt Bark

A delightful combination of Greek yogurt and strawberries, this Strawberry Yogurt Bark is a healthy snack that's easy to prepare and highly customizable.
- 2 cups Greek yogurt (Use full-fat for the best texture.)
- 1 cup mashed strawberries
- 1 cup sliced fresh strawberries
- ½ cup sliced almonds
- 1Begin by gathering all the necessary ingredients: Greek yogurt, mashed strawberries, sliced fresh strawberries, and sliced almonds.
- 2In a large bowl, take the Greek yogurt and spread a thick layer directly into a baking pan or tray, about ½ inch thick.
- 3Gently swirl in the mashed strawberries into the Greek yogurt with a knife or spatula to create a marbled effect.
- 4Sprinkle the sliced strawberries evenly across the top of the yogurt mixture, followed by the sliced almonds.
- 5Place the pan in your freezer and let it sit for about 4 to 6 hours until the mixture is completely solid.
- 6Once frozen, allow the pan to sit for about 5 minutes at room temperature before breaking the bark into pieces.
- 7Serve your fresh Strawberry Yogurt Bark in a chilled bowl and enjoy!
- 8Store any leftovers in an airtight container in the freezer for up to two weeks.
Keywords: Easy Recipe, Frozen Dessert, Healthy Snack, No-Bake Dessert, Strawberry Yogurt Bark
- greek yogurt: Use full-fat for the best creamy texture and stability.
- mashed strawberries: These create a beautiful swirl and infuse the yogurt with intense berry flavor.
- sliced fresh strawberries: These add delightful pockets of fresh fruit and visual appeal to the top layer.
- sliced almonds: Provide a satisfying crunch and nutty complement to the sweet and tangy flavors.
You’ll find precise quantities listed within the provided recipe card, guiding you to the perfect balance of ingredients for your delicious batch of Strawberry Yogurt Bark.
Variations
For those seeking a completely plant-based option, transforming Strawberry Yogurt Bark into a vegan delight is wonderfully simple. Begin by selecting a high-quality, unsweetened plant-based yogurt, such as coconut, almond, or soy yogurt, ensuring it has a thick, creamy consistency similar to Greek yogurt. You can then sweeten this base with a touch of maple syrup or agave nectar, adjusting to your preferred sweetness level, before proceeding with the fruit and nut additions.
If you’re looking to reduce carbohydrates without sacrificing flavor, consider a low-carb rendition. Opt for a plain, unsweetened Greek yogurt, or a low-carb plant-based alternative. Instead of traditional honey or maple syrup, you can use a keto-friendly sweetener like erythritol or stevia, ensuring it dissolves well. For the toppings, focus on low-sugar fruits like raspberries or blackberries, and consider using chopped pecans or walnuts, which are naturally lower in carbs and offer a satisfying crunch.
A decadent twist can be achieved by introducing chocolate into the mix. After swirling in the mashed strawberries, you can drizzle melted dark chocolate over the yogurt base, creating a rich, marbled effect. Alternatively, once the bark is frozen and broken into pieces, you can lightly drizzle melted chocolate over the individual segments for an extra layer of indulgence. Adding mini dark chocolate chips directly onto the yogurt before freezing also provides delightful little bursts of chocolatey goodness.
How to Prepare Strawberry Yogurt Bark
Step 1: Prepare Your Ingredients and Workspace
Begin by gathering all the components necessary for your Strawberry Yogurt Bark. This includes ensuring you have your full-fat Greek yogurt ready, as its thickness is crucial for the bark’s structure. You’ll also need your strawberries, both for mashing into a flavorful puree and for slicing to create beautiful topping accents. Don’t forget your chosen nuts, such as sliced almonds, which will add a delightful crunch.
Prepare your workspace by lining a baking sheet or a shallow pan with parchment paper or a silicone baking mat. This non-stick surface is essential to prevent the yogurt bark from adhering to the pan, allowing for easy removal once it’s frozen. Ensure the pan or baking sheet is flat, as this will help create an even layer of yogurt bark.
If you’re mashing your strawberries by hand, a fork or a potato masher will work perfectly. For a smoother puree, a small food processor or blender can be used. Make sure your sliced strawberries are bite-sized and your nuts are ready to be sprinkled. Having everything prepped and within reach will make the assembly process smooth and enjoyable, minimizing the time the yogurt is out of the freezer.
Step 2: Create the Yogurt Base
Take your thick Greek yogurt and spread it evenly across the prepared parchment-lined baking sheet or pan. Aim for a layer that is approximately ½ inch thick. This thickness is ideal as it ensures the bark is substantial enough to break into satisfying pieces without being too thin or too difficult to freeze solid. Using a spatula or the back of a spoon can help achieve a smooth, uniform layer, although some rustic imperfections are perfectly fine and add to the homemade charm.
Ensure the yogurt is spread relatively evenly across the entire surface of the pan. This consistency will lead to a more uniform freezing time and make breaking the bark into pieces much easier later on. If your yogurt is particularly stiff, you might need to gently coax it into spreading; if it’s slightly too soft, a few extra minutes in the freezer before spreading might help achieve the desired consistency.
The quality of the Greek yogurt plays a significant role here. Full-fat varieties tend to be thicker and richer, providing the best structure for your bark. Non-fat or low-fat yogurts can be more watery and might result in a bark that doesn’t set as firmly, potentially leading to a icier texture. So, investing in good quality, full-fat Greek yogurt is a worthwhile step for optimal results.
Step 3: Swirl in the Strawberry Puree
Now it’s time to add the vibrant flavor and color of strawberries. Spoon dollops of your mashed strawberry puree evenly over the thick layer of Greek yogurt spread on the baking sheet. The amount of puree you use is a matter of personal preference; more puree will result in a more pronounced strawberry flavor and a more intensely colored swirl.
Using a toothpick, skewer, or the tip of a knife, gently swirl the mashed strawberries into the yogurt base. Be careful not to over-mix, as the goal is to create beautiful marbled patterns rather than a uniformly pink yogurt. Gentle, artistic strokes will yield the most visually appealing results, creating delicate veins of pink throughout the creamy white yogurt.
Consider the consistency of your mashed strawberries. If they are very watery, it’s best to drain off some of the excess liquid before swirling to prevent the yogurt from becoming too diluted. This swirling technique not only adds a beautiful aesthetic but also ensures that each bite will offer a delightful combination of tangy yogurt and sweet strawberry.
Step 4: Add the Toppings
With the strawberry swirl in place, it’s time to add the delightful textural elements. Evenly distribute the sliced fresh strawberries over the surface of the yogurt and swirled puree. These pieces will partially embed themselves into the yogurt, providing bursts of fresh berry flavor and a lovely visual contrast when the bark is broken apart.
Next, sprinkle your chosen nuts, such as the sliced almonds, generously over the entire surface. Ensure an even distribution so that each piece of bark will have a satisfying crunch. You can press the nuts down slightly into the yogurt to help them adhere better during the freezing process. The combination of the soft yogurt, the slightly firm strawberries, and the crunchy nuts creates a truly multi-textural experience.
Feel free to get creative with your toppings. Other great options include pumpkin seeds, sunflower seeds, shredded coconut, or even a sprinkle of chia seeds for added nutritional benefits. You could also add a very light drizzle of honey or a sugar-free syrup at this stage for extra sweetness, though it’s often unnecessary given the sweetness of the strawberries.
Step 5: Freeze Until Solid
Carefully transfer the prepared baking sheet or pan into the freezer. It’s crucial to ensure the pan remains as level as possible during this stage to prevent the yogurt from slanting and creating an uneven layer. Allow the bark to freeze undisturbed for a significant period. The recommended freezing time is typically between 4 to 6 hours, but this can vary depending on the thickness of your bark and the temperature of your freezer.
The goal is for the entire mixture to become completely solid. You can test for doneness by gently pressing on the surface; it should feel hard and unyielding. Another effective test is to insert a toothpick into the center of the bark; if it comes out clean and without any melty yogurt adhering to it, your bark is ready to be broken into pieces.
Avoid the temptation to check on the bark too frequently, as opening and closing the freezer door can prolong the freezing process. Patience is key here. If you’re in a hurry, you might find that a very thin layer will freeze faster, but it might also be more prone to breaking into small shards rather than satisfying chunks. A 1/2-inch thickness is generally ideal for a good balance of freezing time and texture.
Step 6: Break and Serve
Once your Strawberry Yogurt Bark is thoroughly frozen, remove the pan from the freezer. To make it easier to break into pieces, let it sit at room temperature for about 5 to 10 minutes. This short thawing period slightly softens the edges without allowing the bark to melt significantly, making it much easier to handle and break cleanly.
Once slightly softened, you can break the bark into pieces. You can use your hands for a more rustic, uneven break, or use a sharp knife to cut it into more uniform shapes. If using a knife, you might need to gently score the bark first. The parchment paper or silicone mat makes it easy to lift the entire frozen slab off the pan before breaking.
Admire your beautiful creation! The vibrant pink swirls, the pops of red strawberries, and the crunchy almonds should be visible. These pieces are now ready to be enjoyed immediately. For the best experience, serve them chilled. If you’re not serving it all at once, follow the storage instructions to keep it fresh for future enjoyment.
Pro Tips for Strawberry Yogurt Bark
Tip: Use Full-Fat Greek Yogurt for Optimal Texture. The higher fat content in full-fat Greek yogurt provides a creamier mouthfeel and ensures that the bark sets up firm and doesn’t become icy or brittle. It acts as a stable base that holds the other ingredients beautifully. Low-fat or non-fat versions can sometimes result in a less satisfying texture, so opt for the richest option available.
Tip: Drain Excess Liquid from Strawberries. Whether you are mashing fresh strawberries or using frozen ones (after thawing), it’s important to drain off any excess liquid. Too much moisture can lead to a watery bark or make the freezing process take longer, potentially impacting the final texture. Patting them dry with a paper towel is a good practice.
Tip: Don’t Over-Mix the Swirls. When swirling the mashed strawberries into the yogurt, aim for a marbled effect rather than a uniform color. Gentle, artistic strokes with a toothpick or knife create beautiful patterns that are visually appealing. Over-mixing will result in a duller pink color and a less exciting appearance.
Tip: Freeze on a Level Surface. Ensuring your baking sheet or pan is perfectly level in the freezer is critical. If it’s tilted, the yogurt will pool on one side, creating an uneven layer. This can lead to some parts freezing faster than others and make breaking the bark into consistent pieces more challenging.
Tip: Allow for a Slight Thaw Before Breaking. Once frozen solid, let the bark sit at room temperature for about 5-10 minutes before attempting to break it. This brief period of thawing slightly softens the edges, making it easier to snap into pieces cleanly without shattering. It prevents the bark from being too brittle and difficult to manage.
Serving Suggestions for Strawberry Yogurt Bark
Decoration
Elevate the visual appeal of your Strawberry Yogurt Bark by incorporating thoughtful decorations. Before freezing, you can sprinkle edible flowers, such as rose petals or lavender buds, for an elegant touch. A light dusting of finely shredded coconut or a few extra artfully placed berry slices can also enhance its charm. For a touch of sparkle, consider a very light sprinkle of edible glitter just before it goes into the freezer.
Side Dishes
Strawberry Yogurt Bark pairs wonderfully with a variety of simple accompaniments. Serve it alongside fresh fruit salad for a vibrant and refreshing dessert platter. A small bowl of crunchy granola can transform it into a delightful breakfast or brunch option, offering a lovely contrast in textures. For a lighter pairing, a glass of sparkling water with a hint of mint or cucumber complements its fruity notes without overpowering them.
Creative Serving Ideas
Beyond simply breaking it into pieces, get creative with how you present your bark. Chop the frozen bark into tiny, bite-sized pieces and use them as a whimsical topping for smoothies or acai bowls. You can also arrange larger pieces artfully on a chilled platter, perhaps interspersed with fresh berries and mint sprigs. For a special occasion, consider using cookie cutters on slightly softened bark to create fun shapes before refreezing, making it a playful treat for children’s parties.
Preparation & Storage
Storing Leftovers
To preserve the delightful texture and flavor of your Strawberry Yogurt Bark, proper storage is key. Once broken into pieces, transfer the leftover bark into an airtight container. Ensure the container is truly airtight to prevent freezer burn and the absorption of any unwanted odors from other items in your freezer. Placing a piece of parchment paper between layers of bark can prevent them from sticking together.
Store the container in the coldest part of your freezer. This will help maintain its firm, frozen state for as long as possible. With proper storage, your Strawberry Yogurt Bark can remain a delicious and refreshing treat for up to two weeks. Always check for any signs of spoilage, although due to its frozen nature, this is rare if stored correctly.
If you anticipate not finishing it within two weeks, consider dividing it into smaller portions in freezer-safe bags or containers, which can help maintain quality over a slightly longer period. Remember that while it remains safe to eat, the texture might subtly change over extended storage times.
Freezing
The entire process of making Strawberry Yogurt Bark relies on freezing. After assembling the yogurt base, swirling in the puree, and adding toppings, the pan or baking sheet is placed into a freezer set to its coldest setting. The duration required for freezing is typically 4 to 6 hours, but this is an estimate, and the key indicator is that the bark must be completely solid. Ensuring it is frozen solid is crucial for it to break cleanly and maintain its structural integrity when served.
It’s important to keep the freezer as consistently cold as possible during this time. Avoid placing it near the freezer door, where it might be exposed to warmer air each time the door is opened. Placing it in the back of the freezer generally ensures more stable and colder temperatures. If your freezer has a “fast freeze” or “super freeze” function, utilizing that can expedite the process, but be mindful that it might make the bark excessively hard and difficult to break initially.
Freezing is what transforms the liquid yogurt mixture into a solid, snackable treat. The water content in the yogurt and strawberries freezes, creating a firm yet brittle structure that can be broken apart. The goal is a clean freeze that encapsulates the flavors and textures without becoming overly icy or watery, which is why using thick Greek yogurt and draining excess moisture from fruits are important pre-freezing steps.
Reheating
Reheating is not applicable to Strawberry Yogurt Bark, as it is a frozen treat meant to be enjoyed cold. There is no process of warming it up, as this would cause it to melt into a liquid state. The entire appeal of this dessert lies in its frozen, refreshing quality, similar to ice cream or sorbet, but with a different texture and nutritional profile.
If your bark has melted due to an extended period at room temperature or a power outage, it can often be refrozen. However, be aware that refreezing may alter the texture, potentially making it icier or less smooth than the original batch. While it will likely still be edible and enjoyable, it might not have the same premium quality as freshly made and frozen bark.
When you want to serve it, the only “preparation” involving temperature is allowing it to sit at room temperature for a brief period, about 5-10 minutes, before breaking it. This is not reheating; it’s a controlled softening to facilitate breaking and eating. The goal is always to serve it in its best, firm, frozen state, so keeping it frozen until just before serving is paramount.
Frequently Asked Questions
-
Can I use frozen strawberries?
Yes, absolutely! Frozen strawberries can be used effectively in this recipe, offering convenience and year-round availability. It is crucial, however, to thaw them completely before use. Once thawed, drain them thoroughly to remove any excess moisture, and gently pat them dry with paper towels. This step is vital to prevent your yogurt bark from becoming watery and to ensure it freezes to the correct consistency. If using frozen strawberries for the mashed component, blend them until smooth and then drain any excess liquid. For the sliced topping, ensure they are not overly mushy after thawing, as this can affect the texture. -
How do I know when the bark is frozen solid?
You’ll know your Strawberry Yogurt Bark is frozen solid when it’s firm to the touch and doesn’t yield to gentle pressure. A reliable test is to insert a toothpick or a small knife into the thickest part of the bark; if it goes in cleanly and comes out without any yogurt sticking to it, it means the mixture has fully solidified. If there’s any softness or stickiness, it needs more time in the freezer. The freezing time can vary based on your freezer’s temperature and the thickness of your bark, so always rely on these physical checks rather than just the clock. -
Can I make this ahead of time?
Yes, Strawberry Yogurt Bark is an excellent make-ahead treat. In fact, it’s designed to be prepared in advance and stored in the freezer. You can make it up to two weeks before you plan to serve it, making it perfect for parties, snacks, or quick desserts. Once it’s fully frozen and broken into pieces, store it in an airtight container in the freezer to maintain its quality. This allows you to have a healthy, homemade frozen treat ready whenever a craving strikes or guests arrive unexpectedly.