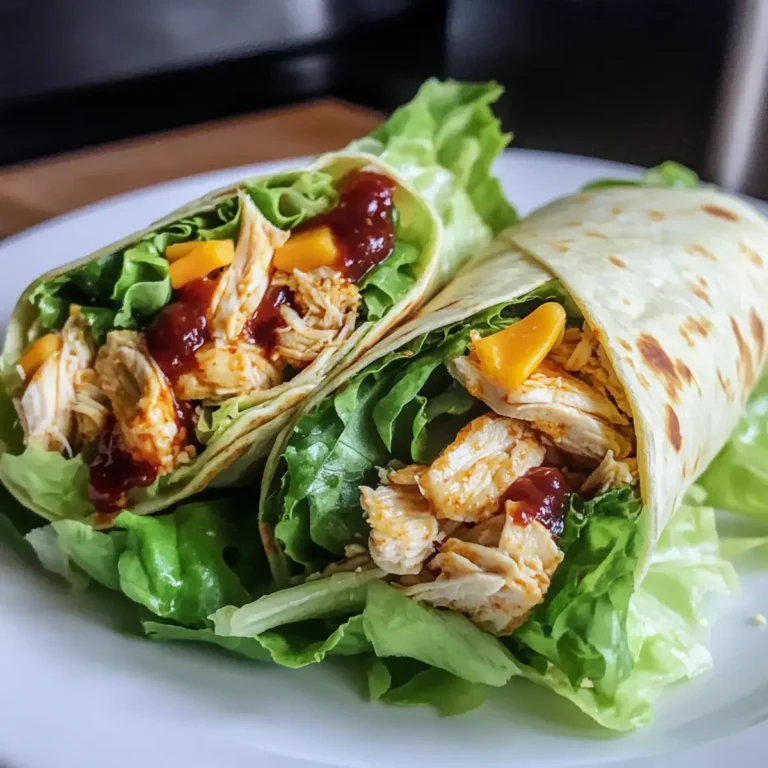
Crispy Baked Spinach Artichoke Stuffed Mushrooms Easy Perfect Parmesan Crust Recipe

“Wait, you’re telling me this is just mushrooms?” My friend asked, eyeing the plate skeptically as I pulled the tray from the oven. Honestly, I wasn’t sure myself when I threw these together on a hectic evening when the fridge was looking pretty bare.
I’d meant to make something quick—maybe a simple pasta or a salad—but then I spotted a bag of baby bella mushrooms and some leftover spinach-artichoke dip from a party the weekend before. The next thing I knew, I was scooping that creamy mixture into mushroom caps and topping them with a generous sprinkle of parmesan.
Why You Will Love This Recipe
- Quick Preparation: Dinner is on the table in less than 30 minutes, making it perfect for busy weeknights.
- Simple Ingredients: You likely already have most of these pantry staples on hand, minimizing grocery store trips.
- Perfect for Entertaining: These delightful bites disappear fast, whether it’s a cozy dinner or a casual get-together.
- Crowd-Pleaser: The irresistible combination of creamy filling and crunchy parmesan crust wins over everyone.
- Unbelievably Delicious: The contrast between the tender mushroom and the crisp cheese topping creates a truly satisfying bite.
The kitchen smelled like a cozy Italian trattoria, and despite my low expectations, the crispy baked spinach artichoke stuffed mushrooms with parmesan crust turned out to be a knockout. The mushrooms were tender but held a nice bite, and the parmesan crust added this golden, crunchy finish that made every mouthful feel like a little celebration. Since that night, I’ve made these mushrooms more times than I can count—sometimes as an appetizer, other times as a simple dinner side that steals the spotlight.
They’re the kind of recipe that sneaks up on you, turning a chaotic evening into a comforting pause. What stuck with me, beyond the flavors, was how something so simple could feel a bit special—like the perfect little bite to reset a frazzled day. If you’re looking for a dish that’s easy, surprisingly satisfying, and loaded with that creamy spinach artichoke goodness but with a crispy twist, this recipe is worth a spot in your rotation.
It’s not just a side dish; it’s a little bite of comfort food with a slightly fancy edge—perfect for turning simple ingredients into something memorable. If you enjoy recipes like the creamy one-pot chicken alfredo or need a fantastic appetizer to pair with your main dish, these mushrooms fit the bill beautifully.
Ingredients You Need
This recipe uses straightforward, wholesome ingredients that come together to deliver rich flavor and a satisfying texture without any complicated prep. Most of these are pantry staples or easy to find in your fridge, ensuring a convenient cooking experience every time.
Crispy Baked Spinach Artichoke Stuffed Mushrooms with Parmesan Crust

These crispy baked spinach artichoke stuffed mushrooms feature a creamy filling topped with a golden parmesan crust, perfect as an appetizer or side dish that's quick and satisfying. They offer a unique twist on traditional stuffed mushrooms with a delightful texture contrast.
- 20 medium baby bella mushrooms, wiped clean and stems removed
- 2 cups fresh spinach, chopped (or frozen, drained well)
- 1 cup artichoke hearts, chopped (canned or jarred, drained)
- 4 ounces cream cheese, softened
- 1/4 cup sour cream (or Greek yogurt as substitute)
- 3/4 cup grated parmesan cheese, divided
- 2 cloves garlic, minced
- 2 tablespoons olive oil
- Salt, to taste
- Black pepper, to taste
- Pinch of red pepper flakes (optional)
- 1 teaspoon Italian seasoning
- 1Preheat oven to 400°F (200°C). Arrange cleaned mushroom caps on a baking sheet, hollow side up. Drizzle with 1 tablespoon olive oil and sprinkle with a pinch of salt. Roast for about 10 minutes until they begin to soften and release moisture.
- 2While mushrooms roast, heat 1 tablespoon olive oil in a skillet over medium heat. Add minced garlic and cook for 30 seconds until fragrant. Add chopped spinach and cook until wilted, about 2 minutes. Remove from heat and let cool slightly.
- 3In a medium bowl, combine cooked spinach and garlic, chopped artichoke hearts, softened cream cheese, sour cream, 1/2 cup grated parmesan, Italian seasoning, salt, pepper, and red pepper flakes if using. Stir until smooth and creamy. Adjust seasoning to taste.
- 4Stuff each mushroom cap evenly with the spinach artichoke mixture, forming a generous mound but not overfilling.
- 5Sprinkle the remaining 1/4 cup parmesan cheese evenly over the stuffed mushrooms to form the crust.
- 6Bake for 15-18 minutes until cheese is bubbling and golden brown. For extra crispiness, broil for the last 1-2 minutes, watching carefully to avoid burning.
- 7Remove from oven and let rest for 5 minutes before serving.
Keywords: stuffed mushrooms, spinach artichoke dip, parmesan crust, baked mushrooms, appetizer, easy recipe, vegetarian, gluten-free
- baby bella mushrooms: about 20 medium-sized caps, wiped clean and stems removed (firm and fresh for best results)
- fresh spinach: 2 cups, chopped (you can swap with frozen, just drain well)
- artichoke hearts: 1 cup, chopped (canned or jarred work great; drain excess liquid)
- cream cheese: 4 ounces, softened (brands like Philadelphia give the best creamy texture)
- sour cream: ¼ cup (adds tang and creaminess; Greek yogurt works as a lighter substitute)
- grated parmesan cheese: ¾ cup, divided (freshly grated creates the best crust)
- minced garlic: 2 cloves (for that punch of flavor)
- olive oil: 2 tablespoons (for roasting mushrooms and enhancing flavor)
- salt and black pepper: to taste
- red pepper flakes: a pinch (optional, for a subtle kick)
- Italian seasoning: 1 teaspoon (adds herbaceous notes that blend everything nicely)
The quantities for these ingredients are detailed in the recipe card, ensuring you have everything you need for perfect execution. Feel free to adjust spices to your personal preference; this recipe is quite forgiving.
Variations
This recipe is wonderfully flexible, so you can easily tailor it to your taste or dietary needs. Gluten-free is a breeze as the recipe naturally avoids gluten, but always double-check your parmesan and seasonings to be completely certain.
For a vegan rendition, swap the cream cheese and sour cream with their plant-based counterparts, and use nutritional yeast instead of parmesan to achieve that delightful cheesy flavor. This modification makes the dish accessible to a wider range of diets without sacrificing taste.
If you crave a bit of heat, introduce a spicy kick by adding chopped jalapeños or a dash of hot sauce directly into the filling for a lively warmth that complements the creamy elements. A cheesy upgrade is also simple; mix shredded mozzarella or fontina into the filling for extra gooeyness and richness.
Consider a seasonal twist by substituting fresh kale or Swiss chard for spinach in colder months, ensuring they are well-sautéed and thoroughly drained to maintain the filling’s integrity. I once tried adding crumbled cooked bacon bits into the filling, which added a smoky crunch that was pretty addictive. Also, for a different texture, some panko breadcrumbs mixed with parmesan on top can add a lighter, crispier crust.
These variations allow you to adapt the dish for different occasions and dietary preferences, making it a truly versatile recipe. Whether you’re catering to vegetarians, vegans, or simply looking to add a new flavor profile, these adaptations ensure the dish remains exciting and inclusive. Experimenting with different herbs or even a touch of lemon zest can also elevate the overall taste experience.
How to Prepare spinach artichoke stuffed mushrooms
Step 1: Prepare the Mushrooms
Preheat your oven to 400°F (200°C), a crucial step for achieving that perfect crispy parmesan topping. Arrange your cleaned mushroom caps on a rimmed baking sheet, ensuring they are hollow side up. Drizzle them lightly with 1 tablespoon of olive oil and sprinkle them with a pinch of salt; this seasoning enhances their natural flavor.
Roast the mushrooms for about 10 minutes until they begin to soften and release some of their moisture. This initial roasting step is vital; it helps to dry out the mushroom caps slightly, preventing a watery filling and ensuring a crispier final product. It also concentrates the inherent earthy flavor of the mushrooms, making them a more robust base for the filling.
While the mushrooms are in their first roast, you can begin preparing the delicious spinach and artichoke filling. Having everything ready to go ensures a smooth transition to the next stage of cooking. This multitasking approach is key to efficient preparation and a timely meal. Pay attention to the texture of the mushrooms; they should be tender but not mushy at this stage. If they release a lot of liquid, gently drain it off before proceeding.
Step 2: Cook the Spinach and Garlic
Heat the remaining tablespoon of olive oil in a skillet over medium heat. Add the minced garlic and cook for about 30 seconds until it becomes fragrant, being careful not to let it burn. The aroma of sautéed garlic is the first hint of the deliciousness to come.
Toss in the chopped fresh spinach and cook until it wilts down, which usually takes about 2 minutes. If you are using frozen spinach, ensure it has been thoroughly thawed and squeezed dry to remove excess water. This step is critical to prevent the filling from becoming too watery, which could affect the final texture and crispiness.
Remove the skillet from the heat and allow the spinach and garlic mixture to cool slightly. This cooling period makes it easier and safer to handle when you combine it with the other filling ingredients. The slightly cooled mixture ensures the cream cheese melts perfectly without becoming oily.
Step 3: Mix the Creamy Filling
In a medium-sized mixing bowl, combine the cooked spinach and garlic mixture. Add the chopped artichoke hearts, softened cream cheese, and sour cream to the bowl. Make sure your cream cheese is truly softened to room temperature for the smoothest blend; this prevents any lumps in your filling.
Stir in ½ cup of the grated parmesan cheese, the Italian seasoning, salt, and black pepper. If you are using red pepper flakes for a touch of heat, add them now. Stir everything together vigorously until the mixture is smooth and creamy, ensuring all ingredients are well incorporated. Taste and adjust the seasoning as needed; you want a balanced flavor profile with notes of tang, salt, and herbs.
The consistency of the filling should be thick enough to hold its shape when spooned into the mushroom caps. If it seems too loose, you can add a tablespoon or two more of cream cheese or a sprinkle of breadcrumbs (if not aiming for gluten-free). This step is where the magic truly happens, bringing together the classic spinach artichoke flavors.
Step 4: Stuff the Mushroom Caps
Using a spoon or a small scoop, generously fill each of the pre-roasted mushroom caps with the prepared spinach artichoke mixture. Aim for a nice, mounded portion in each cap, but be careful not to overfill. Overfilling can cause the filling to spill out during baking, leading to a mess and potentially a less attractive presentation.
Ensure each mushroom is equally filled to provide a consistent experience with every bite. The goal is to have the filling sit slightly proud of the mushroom cap, creating a tempting mound that will bake to golden perfection. This careful stuffing process contributes to the overall appeal of the finished dish.
Once all the mushroom caps are filled, they are ready for their final topping. This stage is crucial for developing the signature crispy parmesan crust that makes these stuffed mushrooms so irresistible. The visual appeal at this stage is already promising, hinting at the deliciousness to come.
Step 5: Top with Parmesan Crust
Sprinkle the remaining ¼ cup of grated parmesan cheese evenly over the top of each stuffed mushroom cap. This parmesan layer is what will transform into that coveted golden, crispy crust during baking. Don’t be shy with the cheese; a good coating ensures maximum crispiness and flavor.
Press the cheese down gently to help it adhere to the filling, ensuring it bakes into a cohesive crust rather than falling off. The texture of the parmesan is key here; freshly grated cheese melts and browns much better than pre-grated, leading to superior crispiness.
This topping step is simple but incredibly effective in elevating the dish from a simple stuffed mushroom to a truly special appetizer or side. The glistening cheese topping is a visual promise of the delicious crunch to come.
Step 6: Bake to Golden Perfection
Place the baking sheet with the prepared stuffed mushrooms back into the preheated 400°F (200°C) oven. Bake for 15 to 18 minutes, or until the parmesan cheese is bubbling and has turned a beautiful golden brown color. Keep an eye on them during the last few minutes of baking.
For an extra crispy crust, you can carefully broil the mushrooms for the last 1 to 2 minutes of baking, but watch them extremely closely to prevent any chance of burning. Broiling adds an intense heat that can quickly crisp up the cheese, but it requires vigilance. The goal is a deep golden hue, not charring.
Once they’re perfectly golden and bubbly, remove the tray from the oven. Let the stuffed mushrooms rest for about 5 minutes before serving. This brief resting period allows the filling to set slightly, making them easier to handle and eat without losing their structure. They are best served warm, allowing the creamy interior and crispy topping to be enjoyed at their peak.
Pro Tips for spinach artichoke stuffed mushrooms
Don’t Skip Pre-Roasting: One trick I learned the hard way is not to skip pre-roasting the mushroom caps. If you stuff raw mushrooms directly, they tend to release too much water during baking, which waters down the filling and soggifies the crust. The short roast dries them out just enough and concentrates their flavor, making a significant difference.
Finely Chop for Uniformity: Another tip: finely chopping the artichokes and spinach (or pulsing briefly in a food processor) gives a more uniform filling texture, which holds together better after baking. You want that creamy bite, not big chunks falling apart. This technique ensures a consistent texture in every single mushroom.
Freshly Grated Cheese is Key: When sprinkling the parmesan crust, freshly grated cheese melts and browns much better than pre-grated. If you only have pre-grated, consider mixing it with a tiny bit of olive oil or melted butter to help it crisp up. The quality of your cheese directly impacts the final crust.
Multitask Efficiently: Timing-wise, multitasking helps—for example, while the mushrooms roast the first time, sauté the spinach and garlic to keep things moving. Also, don’t rush the resting step post-bake; it makes a big difference in texture and ease of eating. Streamlining your process leads to quicker, more enjoyable cooking.
Avoid Overfilling: Finally, a common mistake is overfilling the mushrooms, which can cause filling to spill and create a soggy crust. Aim for a modest mound that bakes up nicely; it’s better to have slightly less filling than to risk a messy, less crispy result. Focus on balance and presentation for the best outcome.
Serving Suggestions for spinach artichoke stuffed mushrooms
Decoration
To elevate the presentation of your spinach artichoke stuffed mushrooms, a simple garnish can make a big impact. A sprinkle of freshly chopped parsley adds a bright green contrast and a hint of freshness. For a touch of elegance, a drizzle of balsamic glaze offers a beautiful dark swirl and a sweet-tangy counterpoint to the creamy filling. Consider adding a few toasted pine nuts for a sophisticated crunch and visual appeal.
Side Dishes
These delightful stuffed mushrooms are incredibly versatile and pair well with a variety of main courses. They make a fantastic accompaniment to grilled chicken or fish, adding a burst of flavor and texture to the plate. For a vegetarian main, consider serving them alongside a hearty lentil soup or a vibrant quinoa salad. They also complement pasta dishes beautifully; perhaps a simple cajun chicken pasta or a light lemon-butter linguine would be perfect.
Creative Serving Ideas
Transform these stuffed mushrooms into a star appetizer for your next gathering. Arrange them artfully on a platter with a few sprigs of fresh rosemary for an aromatic touch. For a more casual affair, serve them buffet-style with toothpicks for easy grabbing. They are also a wonderful addition to a charcuterie board, offering a warm, savory element alongside cheeses, meats, and crackers. Imagine them alongside some swirled garlic herb and cheese bread for a truly indulgent spread.
Preparation & Storage
Storing Leftovers
Leftovers can be stored in an airtight container in the refrigerator for up to 3 days. Ensure they have cooled completely before sealing the container to prevent condensation, which can make the crust soggy. Properly stored, they retain much of their flavor and texture.
It’s important to note that while they can be stored, the crispiness of the parmesan topping may diminish over time. However, they remain delicious and are easily revived. The creamy filling tends to meld even further with the mushroom, creating a richer flavor profile upon reheating.
Always check for signs of spoilage before consuming leftovers, such as unusual odors or textures. When in doubt, it’s best to discard them to ensure food safety. Enjoying them within the recommended timeframe guarantees the best eating experience.
Freezing
Freezing these stuffed mushrooms is possible but not ideal, as the texture of the mushrooms may suffer upon thawing and reheating. If you choose to freeze them, it’s best to do so before baking. Arrange the unbaked stuffed mushrooms on a baking sheet and freeze until solid, then transfer them to a freezer-safe bag or container.
When you are ready to cook them from frozen, place them directly onto a baking sheet and bake at a slightly lower temperature, perhaps 375°F (190°C), for an extended period, adding about 5-10 minutes to the original baking time. Monitor them closely to ensure they cook through and the topping browns nicely. The moisture released from the mushrooms during baking can be a challenge.
Alternatively, you could bake them completely, let them cool, and then freeze them. Reheating might then involve a gentle bake to restore crispness. However, for optimal texture and flavor, consuming them fresh is always the preferred method.
Reheating
To reheat, the best method to maintain crispness is to place the leftover stuffed mushrooms on a baking sheet in a preheated oven at 350°F (175°C) for about 10 minutes. This gentle heat helps to warm them through and revive the crispy parmesan crust. Avoid using the microwave if crispiness is a priority, as it tends to make the topping soggy and the mushrooms soft.
If you only have a few mushrooms to reheat, you can use an air fryer at a similar temperature for a slightly shorter time, keeping a close eye on them. The goal is to bring them back to their former glory without overcooking or drying them out. The brief reheating time ensures the creamy filling stays luscious.
For best results, reheat only the amount you plan to consume immediately. Enjoying them warm allows you to experience the delightful contrast between the creamy interior and the crisp exterior, just as they were when first baked. This simple reheating process makes them a convenient make-ahead dish.
Frequently Asked Questions
-
Can I use white button mushrooms instead of baby bellas?
Yes, white button mushrooms can be used as a substitute for baby bella mushrooms, and they are often more readily available. However, baby bellas possess a firmer texture and a more robust, earthy flavor that holds up exceptionally well during the baking process. This deeper flavor profile can contribute significantly to the overall richness of the dish. If you opt for white button mushrooms, select ones that are fresh, firm, and of a similar medium size to ensure even cooking and filling distribution. You might find that they release slightly more moisture, so pre-roasting them thoroughly becomes even more critical to avoid a soggy outcome and to concentrate their milder taste.
-
Is it possible to make these ahead of time?
Absolutely! These spinach artichoke stuffed mushrooms are excellent candidates for make-ahead preparation, which can significantly reduce stress when entertaining or preparing a meal. You can prepare and stuff the mushroom caps completely a few hours before you plan to bake them. Store the filled mushrooms in a single layer on a baking sheet, cover them loosely with plastic wrap, and refrigerate them. It is recommended to bake them just before serving to achieve the best texture, especially for the crisp parmesan crust. If making them the day before, consider adding an extra minute or two to the baking time, as they will be starting from a colder temperature. This advance preparation allows you to focus on other aspects of your meal or hosting duties.
-
How do I make the parmesan crust extra crispy?
To achieve an exceptionally crispy parmesan crust, several factors come into play, starting with the quality of your cheese. Always use freshly grated parmesan cheese; it melts more evenly and browns to a delightful crispness compared to pre-shredded varieties, which often contain anti-caking agents. Ensure the parmesan is sprinkled evenly and generously over the filling. For an extra boost of crispiness, finish the mushrooms under the broiler for the last 1-2 minutes of baking, but exercise extreme caution as broilers can quickly turn cheese from golden to burnt. Watching them constantly is paramount during this final stage. Also, ensure the mushrooms themselves are not releasing excessive moisture, as this can steam the cheese and prevent it from crisping up properly.