Ultimate Rachel Sandwich with Delicious Creamy Coleslaw
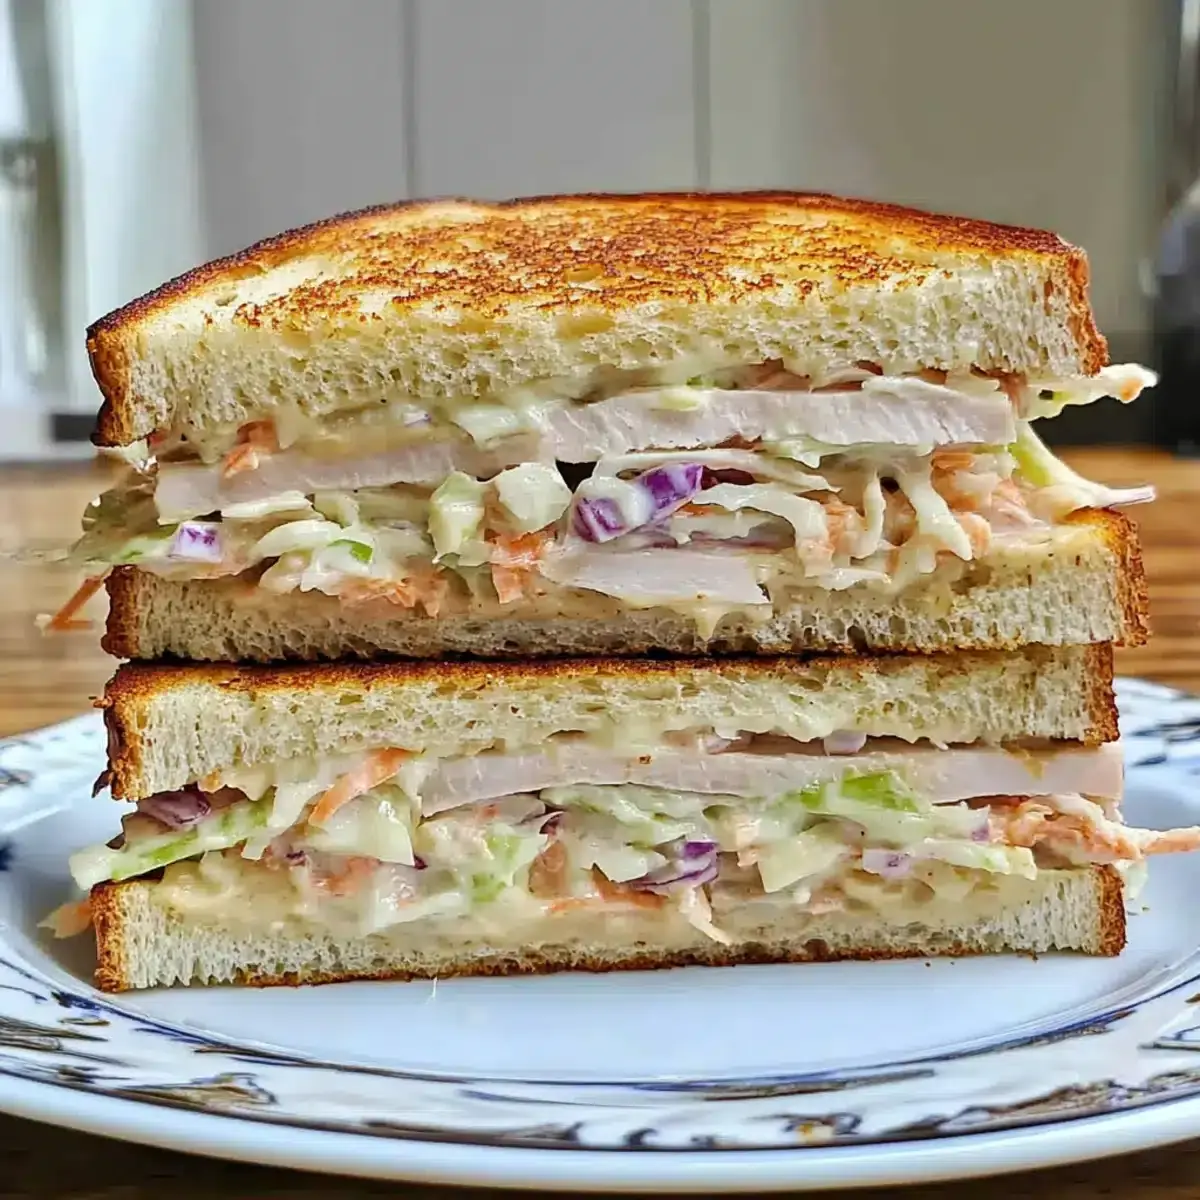
As the warmth of the sun beckons us outdoors, the craving for a refreshing and satisfying meal becomes irresistible. The Rachel Sandwich emerges as a star player, offering a delightful twist on classic sandwich artistry. This creation masterfully combines tender sliced turkey, melting Swiss cheese, and the vibrant crunch of homemade coleslaw, crafting an experience that’s both comforting and exciting.
It’s a testament to how simple ingredients can come together to form something truly spectacular, perfect for those seeking a quick yet impressive lunch or a light, flavorful dinner. The beauty of this sandwich lies not just in its taste but also in its incredible ease of preparation, allowing you to savor more moments of your day.
Why You Will Love This Recipe
- Quick Preparation: Enjoy a delicious and satisfying meal in just about 5 minutes, making it ideal for busy schedules and spontaneous cravings.
- Flavor Symphony: The combination of savory turkey, creamy Swiss cheese, and the tangy crunch of coleslaw creates a balanced and incredibly appealing taste profile.
- Customizable Base: Whether you prefer the heartiness of whole grain, the texture of whole wheat, or the tang of sourdough, the bread choice allows for personalization.
- Versatile Appeal: This sandwich is perfect for a solo lunch, a delightful picnic addition, or even a charming option for a casual get-together.
- Satisfying Texture: The interplay between the soft bread, melty cheese, tender turkey, and crisp coleslaw ensures a delightful textural experience with every bite.
Ingredients You Need
Choosing the right ingredients is the cornerstone of any exceptional dish, and the Rachel Sandwich is no exception. Opting for fresh, high-quality components will truly elevate this simple yet sophisticated sandwich. The foundation of your sandwich—the bread—should be sturdy enough to hold the generous fillings without falling apart. Freshly sliced deli turkey offers a savory depth, while good quality Swiss cheese provides that essential creamy, nutty flavor and melty texture.
The star of the show, beyond the main proteins, is the homemade coleslaw, which brings a crucial element of freshness and crunch. Ensuring your coleslaw dressing is perfectly balanced will make a world of difference in the final taste. Don’t underestimate the power of butter for toasting; it’s the secret to achieving that irresistible golden-brown exterior and a slight crispness that complements the soft interior.
The Rachel Sandwich

A delightful twist on a classic sandwich, combining sliced turkey, creamy Swiss cheese, and crunchy homemade coleslaw for a quick and satisfying meal. Perfect for lunch or a light dinner, this sandwich offers versatility with bread choices and is a crowd-pleasing dish.
- For the Bread: 2 slices thick bread (whole grain, whole wheat, or sourdough recommended)
- For the Filling: 0.25 pound sliced turkey, 4 slices Swiss cheese, 1 cup homemade coleslaw (or pre-shredded mix for convenience)
- For the Dressing: Thousand Island dressing (optional, to taste)
- For Toasting: 1 tablespoon butter
- 1Melt 1 tablespoon of butter in a skillet over medium heat.
- 2Add two slices of bread to the skillet and toast for 2-3 minutes until golden brown on one side.
- 3Flip the bread, place two slices of Swiss cheese on each piece, cover the skillet with a lid, and cook for about 2 minutes until the cheese is melted and gooey.
- 4Carefully remove the toasted bread from the skillet. On one slice, layer the sliced turkey evenly, followed by a generous scoop of homemade coleslaw. Drizzle with Thousand Island dressing, if desired.
- 5Top with the second slice of bread, cheese side down, press down slightly, and slice in half. Serve immediately.
Keywords: Rachel sandwich, turkey sandwich, Swiss cheese, coleslaw, quick lunch, easy dinner, homemade sandwich, toasted sandwich
These are the core components that come together to create the magic of the Rachel Sandwich, with precise quantities detailed within the recipe card for your convenience.
Variations
The beauty of the Rachel Sandwich lies in its adaptability, allowing for a world of delicious modifications to suit different palates and dietary needs. One popular variation involves a delightful vegan twist, where plant-based turkey alternatives or grilled portobello mushrooms can stand in for the traditional meat, paired with a dairy-free Swiss-style cheese and a creamy, cashew-based coleslaw dressing. This version caters beautifully to those seeking a plant-powered meal without compromising on flavor or texture, proving that deliciousness knows no bounds.
For those following a low-carb lifestyle, significant adjustments can be made to transform this sandwich into a carb-conscious delight. Instead of traditional bread, consider using large lettuce leaves like butter or romaine as wraps, or opt for a “bunless” approach by serving the fillings atop a bed of mixed greens. A thick slice of grilled eggplant or zucchini can also serve as a flavorful, low-carb “bread” alternative, offering a unique earthy note.
Another exciting avenue for variation is introducing a spicy kick or a smoky undertone. A smear of chipotle mayo or a few slices of jalapeño can introduce a pleasant heat that contrasts wonderfully with the creamy Swiss cheese and cool coleslaw. Alternatively, adding a layer of crispy bacon or a drizzle of smoked paprika-infused Thousand Island dressing can impart a delicious smoky depth, making each bite an adventure.
Exploring different cheese types can also lead to fascinating flavor profiles. While Swiss is classic, a sharp cheddar can offer a bolder tang, a Gruyère can introduce nutty complexity, or even a mild provolone can provide a smooth, mellow profile. Each cheese choice subtly shifts the overall character of the sandwich, allowing for endless experimentation.
Finally, for a touch of Mediterranean flair, consider adding roasted red peppers, a sprinkle of oregano to the coleslaw, or even a dollop of hummus. These additions can transport the Rachel Sandwich to new culinary territories, showcasing its incredible versatility and potential for fusion flavors, proving it’s more than just a sandwich – it’s a canvas for creativity.
How to Prepare rachel sandwich
Step 1: Preparing the Toasting Surface
The journey to a perfect Rachel Sandwich begins with ensuring your skillet is ready to work its magic. Place a medium-sized skillet on your stovetop over medium heat, allowing it to warm up gradually. This controlled heating is crucial for achieving an even golden-brown crust on your bread without burning the delicate butter.
Once the skillet is warm, add one tablespoon of butter. Let the butter melt completely, coating the bottom of the pan evenly. You’ll notice it begin to shimmer and perhaps form small, gentle bubbles around the edges. This is the ideal stage to proceed, as the melted butter will become the key to a wonderfully crisp and flavorful toasted exterior for your bread.
Observe the butter closely as it melts. Avoid letting it get too hot, which can lead to a burnt taste and a less appealing color on your bread. The goal is a rich, golden sheen that promises a satisfying crunch, so keeping an eye on the heat and the butter’s consistency is paramount at this initial stage of preparation.
Step 2: Toasting the Bread to Golden Perfection
With your skillet perfectly buttered and heated, it’s time to introduce the bread to its toasting transformation. Carefully place two slices of your chosen thick bread into the warm skillet. Ensure they lie flat without overlapping, allowing each slice to receive maximum heat for an even toasting process. This step is where the bread begins to acquire its delightful crispness and a beautiful golden hue.
Allow the bread to toast undisturbed for approximately 2 to 3 minutes on the first side. During this time, you’ll start to smell that inviting aroma of toasting bread filling your kitchen. You can gently lift a corner to check its progress, looking for a rich, golden-brown color that indicates it’s ready for the flip.
Once the underside is perfectly toasted, carefully flip each slice of bread using a spatula. Continue to toast the second side for another 2 to 3 minutes, or until it also achieves a similar beautiful golden-brown finish. The aim is for a delightful contrast between the crispy exterior and the soft interior that awaits the fillings, making this toasting step absolutely essential.
Step 3: Melting the Swiss Cheese
Now that your bread slices are beautifully toasted on both sides, it’s time to introduce the creamy star: Swiss cheese. Flip the toasted bread slices so that the toasted sides are now facing upwards in the skillet. This positioning ensures the cheese will melt directly onto the warm, crispy surface.
Immediately place two slices of Swiss cheese onto the surface of each bread slice. Arrange them so they cover the bread generously, allowing for that desirable gooeyness. The residual heat from the skillet and the bread will begin the melting process, but to expedite this and ensure uniformity, it’s best to cover the skillet.
Cover the skillet with a lid or aluminum foil. This traps the heat and steam, creating a mini oven effect that melts the Swiss cheese beautifully. Let it cook for about 2 minutes, or until the cheese is thoroughly melted, gooey, and perhaps beginning to slightly ooze over the edges of the bread, creating that irresistible cheesy pull.
Step 4: Assembling the Flavorful Fillings
With your bread perfectly toasted and the cheese beautifully melted, it’s time to bring all the delicious components together. Carefully remove the two pieces of bread, now adorned with melted Swiss cheese, from the skillet. Place them on a clean surface, with the cheese side facing up.
On one of the cheese-topped bread slices, begin layering your fillings. Start with an even distribution of the sliced turkey, ensuring there’s a good amount for a satisfying protein punch in every bite. Over the turkey, generously spoon your homemade coleslaw, adding that essential crunch and refreshing tang that defines the Rachel Sandwich.
If you’re using Thousand Island dressing, this is the perfect moment to add it. Drizzle a moderate amount over the coleslaw, or spread it onto the second slice of bread if you prefer. This optional step adds an extra layer of creamy, tangy flavor that beautifully complements the other ingredients, completing the assembly of your flavorful sandwich.
Step 5: The Grand Finale and Serving
You’re in the home stretch now, with all the delicious components ready to be united into the final, glorious Rachel Sandwich. Take the second slice of bread, which has the melted cheese facing upwards, and carefully place it on top of the filling-laden slice. Gently press down on the top slice of bread. This helps to meld the fillings together and ensures the sandwich holds its shape, making it easier to handle and eat.
For a professional presentation and easier enjoyment, use a sharp knife to slice the sandwich in half. A diagonal cut often showcases the beautiful layers of turkey, coleslaw, and melted cheese most effectively. This also makes it more manageable to take that first delightful bite.
Serve your masterpiece immediately. The magic of the Rachel Sandwich is best experienced when it’s warm, the cheese is still gooey and stretchy, and the bread is perfectly crisp. This ensures that all the flavors and textures are at their peak, offering a truly satisfying culinary moment.
Pro Tips for rachel sandwich
Use Quality Bread: The foundation of a great sandwich is the bread. Opt for thick-cut, sturdy bread like whole grain, whole wheat, or sourdough. These varieties hold up better to the fillings and toasting, preventing a soggy or broken sandwich. Freshness is key, so choose bread from a reputable bakery or a brand you trust for the best flavor and texture.
Perfectly Melted Cheese: To achieve that ideal gooey cheese pull, always cover the skillet while the cheese is melting. This traps the heat and steam, ensuring the Swiss cheese melts evenly and thoroughly without burning the bread. Keep an eye on it; you want it melted, not browned and brittle.
Even Layering is Key: Distribute your turkey and coleslaw evenly across the bread. This ensures that every bite contains a balanced ratio of flavors and textures. Avoid piling the coleslaw too high in the center, which can lead to overflow and a less tidy eating experience.
Don’t Skip the Butter: Butter is essential for that signature golden-brown, crispy exterior. It not only adds a rich flavor but also contributes significantly to the sandwich’s delightful crunch. Ensure the butter is melted and coats the pan before adding the bread for uniform toasting.
Coleslaw Consistency Matters: For the best textural experience, your coleslaw shouldn’t be overly wet. If you’re making it from scratch, allow it to drain for a few minutes before assembling the sandwich. This prevents the bread from becoming soggy and maintains that satisfying crunch. Consider adding a touch of crunch with finely chopped celery or a few toasted sunflower seeds.
Serve Fresh for Maximum Enjoyment: While leftovers can be reheated, the Rachel Sandwich is at its absolute best when served immediately after preparation. The contrast between the warm, melty cheese, the crisp toast, and the cool, crunchy coleslaw is most pronounced when fresh. This ensures an optimal dining experience every time.
Serving Suggestions for rachel sandwich
Decoration
While the Rachel Sandwich is a star on its own, a few decorative touches can elevate its presentation. A simple sprinkle of fresh chives or parsley over the top before serving adds a vibrant pop of green and a hint of fresh aroma. For a touch more elegance, a delicate swirl of extra Thousand Island dressing on the plate can serve as a visual anchor and an invitation for more flavor. A small toothpick with a colorful garnish, like a tiny paper umbrella or a decorative olive, can also add a playful touch, especially for casual gatherings.
Side Dishes
The Rachel Sandwich pairs beautifully with a variety of complementary side dishes that enhance its flavors and textures. A classic creamy tomato soup offers a comforting and warming contrast, its rich acidity cutting through the richness of the sandwich. For a lighter option, a simple green salad with a vinaigrette dressing provides a refreshing counterpoint to the sandwich’s heartier components, adding a welcome crispness. Crispy potato chips or homemade fries offer a delightful textural contrast, their salty crunch echoing the toasted bread.
A simple cup of fresh fruit salad can provide a sweet and palate-cleansing element, especially welcome on warmer days. Pickles, particularly dill pickle spears or cornichons, offer a tangy and briny zest that acts as a perfect palate cleanser between bites, sharpening the overall dining experience. Even a small additional bowl of coleslaw on the side can amplify that signature crunchy element, ensuring every bite is as delightful as the last.
Creative Serving Ideas
Think beyond the plate for truly memorable serving experiences. Consider serving the Rachel Sandwich as part of a themed lunch buffet, perhaps alongside other classic deli-style sandwiches and salads for a “build-your-own” deli experience. For a more refined occasion, present the sandwich cut into smaller, bite-sized portions as an appetizer, perfect for mingling guests.
Another creative idea is to offer a “sandwich flight,” featuring miniature versions of the Rachel alongside other sandwich variations, allowing guests to sample a range of flavors. For a family picnic or outdoor gathering, pack the sandwich components separately and assemble them on-site for maximum freshness and visual appeal. You could even arrange the ingredients artfully on a platter, letting guests construct their perfect Rachel Sandwich with all the choices laid out.
For an added touch of fun, serve the sandwich with a selection of gourmet potato chips or artisanal pickles, presenting them in stylish containers. Consider pairing it with a craft beer or a refreshing homemade iced tea to complete the beverage selection, making the entire meal an experience to remember. These ideas transform a simple sandwich into a culinary event.
Preparation & Storage
Storing Leftovers
Should you be fortunate enough to have leftover Rachel Sandwiches, proper storage is key to maintaining their deliciousness for a future meal. It’s best to store the assembled sandwich in an airtight container. This prevents the bread from drying out and protects it from absorbing any unwanted odors from other foods in the refrigerator. Aim to consume leftovers within 2 to 3 days for optimal quality and taste.
For the absolute best results, consider separating the coleslaw from the sandwich before storing if you anticipate storing it for more than a day. Coleslaw can release moisture, potentially making the bread soggy over time. Storing the coleslaw in a small separate container alongside the sandwich will help preserve its crisp texture until you are ready to reheat and enjoy.
When storing, ensure the sandwich is completely cooled before sealing the container. Placing a warm sandwich in an airtight container can create condensation, which also compromises the bread’s crispness. These simple steps will ensure your leftovers are as enjoyable as the freshly made sandwich.
Freezing
The Rachel Sandwich is a fantastic candidate for freezing, especially for those who love to meal prep or want to have a quick, satisfying meal on hand. To freeze successfully, it’s recommended to freeze the sandwich before it’s fully assembled, or at least without the coleslaw if possible, to prevent sogginess upon thawing.
Wrap the sandwich components tightly. If freezing an assembled sandwich (though not ideal for coleslaw), wrap it first in plastic wrap, ensuring no air pockets remain. Follow this with a layer of aluminum foil or place it in a freezer-safe bag for an extra layer of protection against freezer burn. Properly frozen, the sandwich can maintain good quality for up to 1 month.
When you’re ready to enjoy your frozen creation, it’s crucial to thaw it properly. The best method is to move the sandwich from the freezer to the refrigerator overnight. This slow thawing process helps to maintain the structure of the bread and fillings. Avoid thawing at room temperature, which can promote bacterial growth and affect the texture.
Reheating
Reheating a Rachel Sandwich requires a touch of care to revive its delightful texture and warmth. The goal is to re-crisp the bread and ensure the cheese is melted and gooey once again. The most effective method is to use a skillet over medium heat, similar to the initial preparation.
Place the thawed sandwich (or the frozen sandwich after overnight thawing in the fridge) into a dry, preheated skillet. You can add a tiny bit of butter or oil if desired, but it’s often not necessary if the pan is non-stick. Cook for a few minutes on each side, pressing down gently with a spatula. This process will reactivate the crispness of the bread and re-melt the cheese beautifully.
Alternatively, you can reheat it in a toaster oven or a conventional oven preheated to around 350°F (175°C). Place the sandwich on a baking sheet and heat for about 5-10 minutes, or until the cheese is fully melted and the bread is toasted to your liking. Whichever method you choose, avoid microwaving, as this tends to make the bread rubbery and the cheese unevenly melted.
Frequently Asked Questions
-
What type of bread is best for a Rachel Sandwich, and how does it affect the final taste and texture?
The ideal bread for a Rachel Sandwich is thick and sturdy to support the generous fillings and the toasting process. Popular choices include whole grain, whole wheat, and sourdough. Whole grain and whole wheat breads offer a heartier texture and nutty undertones, adding fiber and substance. Sourdough bread introduces a delightful tang that beautifully complements the savory turkey and Swiss cheese, providing a unique flavor profile. The thickness is crucial; thin bread can become soggy or tear under the weight of the ingredients, while a substantial slice ensures a satisfying crunch when toasted and a robust base for the sandwich’s components, making it a far more enjoyable eating experience overall.
-
How can I ensure my coleslaw stays crunchy when making or storing the Rachel Sandwich, and what are some tips to revive soggy coleslaw?
To maintain coleslaw crunch, it’s best to add it to the sandwich just before serving. If making coleslaw ahead of time for storage, ensure it’s well-drained of excess liquid before refrigerating. When assembling, avoid letting the coleslaw sit on the sandwich for extended periods, especially if it’s warm. If your coleslaw has become soggy, you can try gently squeezing out excess moisture using a clean kitchen towel or paper towels. Adding a few finely chopped nuts or seeds, like sunflower or pumpkin seeds, can also reintroduce a pleasing crunch and textural element to revive the coleslaw, making it enjoyable once more.
-
Can the Rachel Sandwich be made ahead of time for parties or meal prep, and what are the best methods for preparation and reheating to ensure quality?
Yes, the Rachel Sandwich can be partially prepared for events or meal prep, but it’s crucial to assemble and toast just before serving for optimal texture. You can prepare the coleslaw up to 2-3 days in advance and store it in an airtight container in the refrigerator. The turkey and cheese can be sliced and kept ready. For assembly, toast the bread and melt the cheese right before you plan to eat, then add the turkey and coleslaw. If you need to make full sandwiches ahead, it’s best to store them unassembled and reheat components like toasted bread and melted cheese just before serving, perhaps by lightly toasting the bread again in a skillet.