Irresistible Pink Lemonade Thumbprint Cookies Recipe
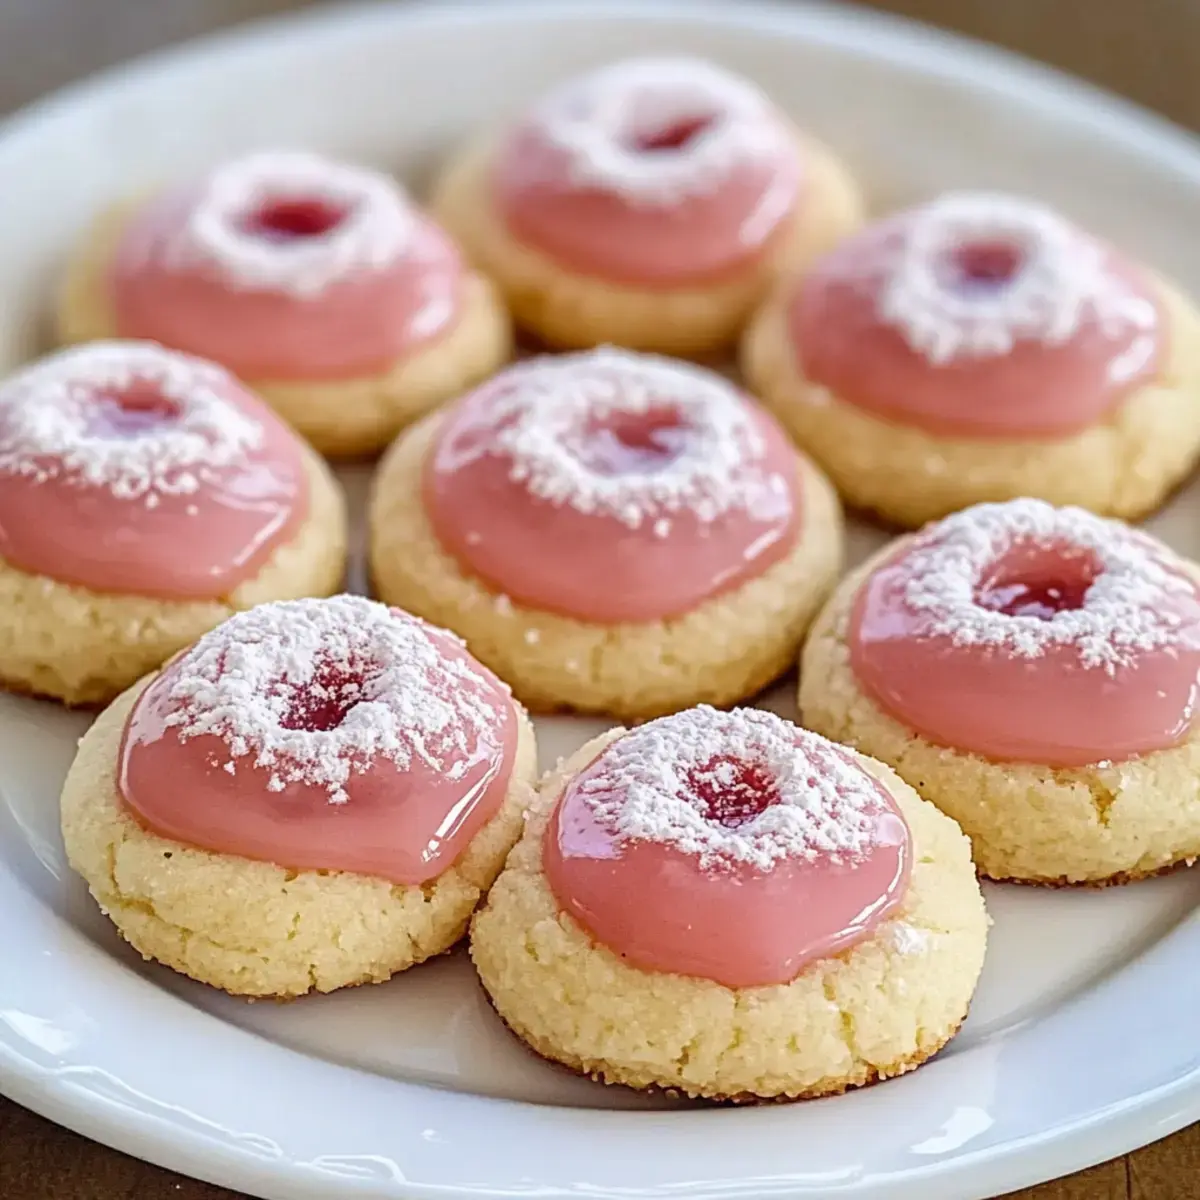
As I stood in my kitchen, the warm air filled with a zesty aroma reminiscent of sun-drenched summer days, it hit me—nothing says celebration quite like Pink Lemonade Thumbprint Cookies. These delightful treats meld the sweetness of shortbread with a burst of tangy lemon and juicy raspberry glaze, making them perfect for everything from casual picnics to festive gatherings.
Not only are they a cheerful addition to any dessert table, but they’re also easy to make, inviting both seasoned bakers and cooking newbies alike to dive in. With the added perk of being freezer-friendly, these cookies are sure to brighten your day and impress your guests. Curious how to whip up these charming delights? Let’s get baking!
Why You Will Love This Recipe
- Vibrant Colors: These cookies boast a delightful pink hue from fresh raspberries, making them visually appealing and perfect for any occasion that calls for a pop of color.
- Sweet and Tangy Balance: A unique marriage of sweet shortbread and zesty lemon creates a flavor explosion that is both refreshing and utterly delightful, keeping you coming back for more.
- Effortless Preparation: With simple, straightforward steps, even beginner bakers can master these cookies, similar to how one might approach other easy recipes like no-bake mango truffles or a classic breakfast casserole.
- Incredible Versatility: Feel free to experiment with different fruit glazes, such as strawberries or blueberries, much like you might explore variations in other cookie recipes, ensuring endless possibilities.
- Perfect for Sharing: Their charming appearance and irresistible taste make them an instant hit at parties, summer picnics, or family gatherings, guaranteeing there’s always room for this delightful dessert.
Ingredients You Need
The quality of your ingredients plays a pivotal role in the final taste and texture of these Pink Lemonade Thumbprint Cookies. Opting for fresh, vibrant ingredients, particularly the lemon and raspberries, will truly elevate the flavor profile. Even simple substitutions, like using vegan butter or a gluten-free flour blend, can ensure everyone can enjoy these delightful treats without compromise.
Pink Lemonade Thumbprint Cookies

Delightful Pink Lemonade Thumbprint Cookies combine sweet shortbread with tangy lemon and raspberry glaze, perfect for celebrations. These vibrant cookies are visually appealing, easy to make, and offer a refreshing sweet and tangy flavor. They are a versatile recipe that can be enjoyed by everyone.
- Cookie Dough:
- 2 cups all-purpose flour (Substitute with gluten-free flour for a gluten-free option.)
- 1/2 cup confectioners’ sugar (Try powdered erythritol for a low-sugar alternative.)
- 1/4 teaspoon kosher salt (Regular table salt can work just fine.)
- 1 cup butter (Use vegan butter for a dairy-free option.)
- 1 tablespoon lemon zest (Lime zest can be used for a refreshing twist.)
- 1 tablespoon lemon juice (Always opt for fresh lemon juice for the best taste.)
- Pink Glaze:
- 1 cup raspberries (Experiment with strawberries or blueberries for different flavors.)
- 1/2 cup confectioners’ sugar (Use powdered erythritol for a low-sugar version.)
- 1 tablespoon lemon juice (Balances sweetness and enhances flavor.)
- 1Preheat Oven: Preheat your oven to 325°F (163°C). Line baking sheets with parchment paper.
- 2Mix Dry Ingredients: In a medium bowl, whisk together the flour, 1/2 cup confectioners’ sugar, and kosher salt until well blended.
- 3Cream Butter Mixture: In a large mixing bowl, beat the room-temperature butter with 1/4 cup confectioners’ sugar, lemon zest, and lemon juice until light and fluffy (about 3-5 minutes).
- 4Combine Mixtures: Gradually mix the dry ingredients into the creamed butter mixture until just combined. Do not overmix.
- 5Shape and Chill Dough: Roll the dough into 1-inch balls and place them on a plate or baking sheet. Chill in the freezer for 12 to 15 minutes.
- 6Bake Cookies: Space the chilled dough balls evenly on the prepared baking sheets. Bake for 10 minutes. Remove from the oven and use the back of a teaspoon to create indentations in the center of each cookie. Return to bake for an additional 16 to 18 minutes, or until the edges are lightly golden.
- 7Cool Cookies: Once baked, remove from the oven and let them cool on the baking sheets for about 5 minutes. Then, transfer them to a wire rack to cool completely.
- 8Prepare Glaze: While the cookies cool, whisk together 1 cup confectioners’ sugar, 1 tablespoon lemon juice, and a handful of mashed raspberries in a bowl until smooth and thick enough to drizzle but still spreadable.
- 9Glaze Cookies: Once the cookies are completely cooled, carefully fill each indentation with the raspberry glaze. Allow the glaze to set for at least 10-15 minutes.
Keywords: Cookies, Thumbprint Cookies, Lemon, Raspberry, Pink Lemonade, Dessert, Baking, Sweet, Tangy, Vegetarian
Quantities for each ingredient are detailed in the recipe card provided above, ensuring you have all the precise measurements needed for success.
Variations
Feel free to get creative and personalize your Pink Lemonade Thumbprint Cookies with these delightful twists that cater to various dietary needs and flavor preferences. These variations ensure there’s a perfect cookie for everyone.
Gluten-Free Delight: Substitute all-purpose flour with a high-quality gluten-free all-purpose flour blend. Ensure the blend contains xanthan gum for proper binding and texture, allowing everyone to indulge in these wonderful cookies.
Low-Sugar Option: Use powdered erythritol or a similar granulated sugar substitute in place of confectioners’ sugar. This reduces the overall sugar content while maintaining a delightful sweetness, perfect for those mindful of their sugar intake.
Berry Swaps: Swap raspberries for fresh strawberries or blueberries in the glaze for a fun flavor and color twist. Each berry brings a unique sweetness and tartness, opening up a world of delicious possibilities.
Citrus Zing: Try using lime zest and juice instead of lemon for a bright, tropical twist that will invigorate your senses. This substitution offers a different but equally delightful zesty profile that is wonderfully refreshing.
Nutty Crunch: Add finely chopped pecans or walnuts into the cookie dough for an added layer of texture and rich flavor. These nuts complement the buttery shortbread beautifully, providing a satisfying crunch.
Vegan Transformation: Replace the butter with solid coconut oil or a vegan butter alternative and use a flax egg (1 tablespoon ground flaxseed mixed with 3 tablespoons water, let sit for 5 minutes) to bind the dough. These simple swaps create a decadent vegan treat that is just as delicious.
How to Prepare Pink Lemonade Thumbprint Cookies
Step 1: Prepare Your Baking Station and Preheat the Oven
Begin this delightful baking adventure by preheating your oven to the precise temperature of 325°F (163°C). This crucial first step ensures that your Pink Lemonade Thumbprint Cookies will bake evenly from the moment they enter the heat. While the oven reaches its ideal warmth, take this time to prepare your baking sheets by lining them with parchment paper.
Parchment paper is your best friend here, creating a non-stick surface that guarantees easy removal of your cookies once they’re baked to perfection. This also significantly simplifies the cleanup process, allowing you more time to enjoy your freshly baked creations. Having everything ready means a smoother baking experience.
Ensure your oven rack is positioned in the center of the oven to promote uniform heat circulation. This thoughtful preparation ensures that your cookies will achieve that coveted golden-brown edge and perfectly tender center.
Step 2: Meticulously Combine the Dry Ingredients
In a medium-sized mixing bowl, carefully combine the all-purpose flour, precisely ½ cup of confectioners’ sugar, and the ¼ teaspoon of kosher salt. Whisk these dry components together with a light hand until they are thoroughly blended and form a homogeneous mixture.
This step is absolutely fundamental as it lays the groundwork for the cookie’s structure and texture. A well-combined dry mixture prevents pockets of unmixed sugar or salt, ensuring a consistent flavor throughout every single cookie. The fine texture of confectioners’ sugar contributes to the tender crumb of the shortbread base.
Take your time to ensure there are no lumps of confectioners’ sugar. A uniform blend is key to achieving the delicate, melt-in-your-mouth quality that makes these cookies so irresistible. This foundation sets the stage for the rich buttery and citrus notes that are to come.
Step 3: Cream the Butter Mixture to Airy Perfection
Now, in a larger mixing bowl, the magic truly begins as you cream together the softened butter with the remaining ¼ cup of confectioners’ sugar, the vibrant lemon zest, and the fresh lemon juice. Beat this mixture using an electric mixer on medium speed for approximately 3 to 5 minutes.
The goal here is to achieve a mixture that is exceptionally light and fluffy, almost cloud-like in its consistency. This aeration process is vital for creating tender cookies; the air incorporated into the butter and sugar mixture will expand during baking. The aroma of fresh lemon zest will begin to fill your kitchen, a tantalizing preview of the cookie’s flavor.
Ensure your butter is truly at room temperature – not melted, but soft enough to yield to gentle pressure. This allows it to emulsify properly with the sugar and lemon juice, creating the rich, creamy base that defines shortbread-style cookies. Properly creamed butter is a hallmark of great cookies.
Step 4: Gently Unify the Dough Components
Gradually introduce the meticulously combined dry ingredients into the fluffy creamed butter mixture. Mix these components together on a low speed until they are just combined, taking great care not to overmix the dough.
Overmixing can develop the gluten in the flour, leading to tougher cookies. The dough should begin to come together, forming larger clumps, but it should still retain a slightly crumbly appearance rather than becoming a smooth, cohesive ball at this stage. This balance is precisely what contributes to the tender, delicate bite of the Pink Lemonade Thumbprint Cookies.
The texture at this point should be workable but not sticky. If the dough seems excessively dry, you can add another teaspoon of lemon juice or a tablespoon of milk to help bind it. Conversely, if it’s too wet, a touch more flour can be incorporated sparingly. Proper dough consistency is key for easy shaping.
Step 5: Shape and Chill the Dough for Optimal Results
Take small portions of the dough and gently roll them between your palms to form uniform balls, each about 1 inch in diameter. Place these perfectly formed balls onto a plate or a baking sheet lined with parchment paper. It’s important that these balls are consistent in size for even baking.
Once shaped, transfer the plate or baking sheet with the dough balls into the freezer. Allow them to chill for a minimum of 12 to 15 minutes. This chilling process is a critical step; it firms up the dough, making it much easier to handle and, more importantly, it helps the cookies maintain their intended shape and prevents them from spreading excessively during the baking process.
A well-chilled cookie dough bakes up beautifully with defined edges and a desirable thickness. This brief period in the freezer ensures that your Pink Lemonade Thumbprint Cookies will bake up as round, delightful little spheres, ready to be adorned with their vibrant glaze.
Step 6: Bake the Cookies and Create the Indentations
Carefully arrange the chilled dough balls on your prepared baking sheets, ensuring they are spaced evenly apart to allow for slight expansion. Place the baking sheets into the preheated oven and bake for exactly 10 minutes.
After this initial 10-minute bake, carefully remove the baking sheets from the oven. Using the back of a small teaspoon or a melon baller, gently press down into the center of each cookie to create a distinct indentation. This well is where your beautiful pink glaze will nestle later. Be sure not to press all the way through the cookie.
Return the baking sheets to the oven and continue baking for an additional 16 to 18 minutes. The cookies are ready when the edges have just begun to turn a light golden brown. This precise timing ensures the centers remain tender while the edges provide a delightful slight crispness, contributing to the cookie’s overall wonderful texture.
Step 7: Allow the Cookies to Cool
Once the cookies have achieved that perfect golden edge, carefully remove the baking sheets from the oven. Let the Pink Lemonade Thumbprint Cookies cool on the hot baking sheets for approximately 5 minutes. This brief resting period allows the cookies to firm up slightly, making them more stable and less prone to breaking.
After this initial cooling on the sheet, carefully transfer each cookie to a wire cooling rack. Allow them to cool completely before proceeding to the next step of glazing. Cooling on a wire rack ensures air circulates around the cookies, preventing the bottoms from becoming soggy and helping them achieve their final texture.
Patience at this stage is key; attempting to glaze warm cookies can result in the glaze melting and sliding off, or the cookies crumbling. A fully cooled cookie provides the perfect canvas for the vibrant raspberry glaze.
Step 8: Prepare the Luscious Pink Glaze
While your delicate cookies are cooling to room temperature, it’s time to prepare the vibrant pink glaze that gives these treats their name. In a small bowl, whisk together 1 cup of confectioners’ sugar, 1 tablespoon of fresh lemon juice, and a generous handful of mashed fresh raspberries.
The raspberries should be mashed until they are fairly smooth, and their vibrant color will naturally tint the glaze a beautiful shade of pink. Whisk until the mixture is smooth, thick enough to drizzle or spread, but still fluid enough to coat the back of a spoon without being too runny. This consistency is vital for the glaze to hold its shape in the cookie’s indentation.
Taste the glaze and adjust the sweetness or tanginess as desired. If it’s too thick, a tiny splash more lemon juice will loosen it; if it’s too thin, a little more confectioners’ sugar will thicken it. This vibrant glaze is the crowning glory for your delightful Pink Lemonade Thumbprint Cookies.
Step 9: Adorn the Cookies with Glaze
Once you’ve confirmed that your Pink Lemonade Thumbprint Cookies are completely cool to the touch, you can begin the final decorative step. You may optionally dust them lightly with a whisper of additional powdered sugar for an extra touch of elegance, mimicking a dusting of snow.
Using a small spoon or a piping bag with a fine tip, carefully fill each of the indentations with the prepared raspberry glaze. Aim for a generous amount that fills the well without overflowing too much down the sides of the cookie, creating a beautiful, jewel-like appearance. The contrast between the pale cookie and the bright pink glaze is visually stunning.
Allow the glaze to set for at least 10 to 15 minutes before you attempt to move or serve the cookies. This setting time is essential for the glaze to firm up slightly, ensuring it stays beautifully in place and doesn’t smudge. This final flourish is what truly makes these cookies a celebration in every bite.
Pro Tips for Pink Lemonade Thumbprint Cookies
Room Temperature Ingredients are Key: For the most tender and easily incorporated dough, ensure your butter and any eggs (if applicable in other cookie recipes) are at room temperature. This allows them to cream together beautifully, creating an aerated base that leads to lighter cookies.
Avoid Overbaking at All Costs: Keep a vigilant eye on your Pink Lemonade Thumbprint Cookies as they bake. They are perfect when the edges are just lightly golden. Overbaking will result in dry, hard cookies, whereas a slightly shorter bake time ensures they remain delightfully moist and tender. The cookies will continue to cook slightly as they cool on the baking sheet.
The Importance of Chilling the Dough: Never skip the chilling step before baking! This crucial stage not only makes the dough easier to handle and shape but also significantly prevents excessive spreading. A chilled dough bakes up firmer and retains its intended shape, resulting in those perfectly rounded cookies you desire.
Crafting Perfect Indentations: Create the thumbprint indentations immediately after the first baking period while the cookies are still warm and pliable. If the cookies cool too much, the dough will become firmer, and it will be more difficult to create a clean, well-defined space for the glaze without cracking the cookie.
Achieve Ideal Glaze Consistency: The glaze should be thick enough to hold its shape within the indentation but thin enough to pour or spread smoothly. If your glaze is too runny, gradually add more confectioners’ sugar, a teaspoon at a time, until the desired consistency is reached. If it’s too thick, a tiny splash of lemon juice or milk can loosen it up perfectly.
Experiment with Fruit Flavors: Don’t be afraid to mix and match your favorite fruits for the glaze. While raspberries are classic, strawberries, blueberries, or even a blend of berries can offer a fun and delicious twist to the traditional Pink Lemonade Thumbprint Cookies, creating unique flavor profiles.
Serving Suggestions for Pink Lemonade Thumbprint Cookies
Decoration
Enhance the visual appeal of your Pink Lemonade Thumbprint Cookies with simple yet elegant decorative touches. A delicate dusting of powdered sugar mimics a light snowfall, adding a touch of whimsy. For a more elaborate look, you could pipe a thin swirl of white chocolate or cream cheese frosting around the edge of the glaze, creating a charming contrast.
Consider adding a tiny edible flower, a candied lemon peel sliver, or a sprinkle of edible glitter to the wet glaze for extra sparkle and flair. These small additions can transform ordinary cookies into extraordinary edible art, perfect for special occasions.
Alternatively, you can incorporate finely chopped pistachios or desiccated coconut around the edges of the cookie before the glaze sets. This adds both texture and a subtle flavor enhancement that complements the zesty and sweet notes of the cookie.
Side Dishes
When serving these delightful cookies, consider pairing them with beverages and other light accompaniments that complement their bright flavors. A pitcher of homemade lemonade, perhaps with a hint of mint or basil, would be a natural and refreshing choice. For a more sophisticated option, consider a sparkling rosé or a light, crisp white wine like a Sauvignon Blanc.
A simple, fresh fruit salad featuring berries, melon, and citrus segments would provide a healthy and colorful counterpoint to the sweetness of the cookies. Another excellent pairing is a light, fluffy whipped cream or a dollop of crème fraîche, which adds a creamy texture and balances the tanginess of the lemon and raspberry.
For a more substantial pairing, a small cheese board featuring soft, creamy cheeses like brie or goat cheese, served with crackers and some honey, can create a delightful sweet and savory contrast. The richness of the cheese harmonizes beautifully with the bright, fruity notes of the cookies, making for a truly memorable experience.
Creative Serving Ideas
Elevate your cookie presentation by arranging them on a tiered dessert stand, interspersed with fresh berries and mint sprigs, creating a visually stunning centerpiece. For a whimsical touch, serve them in individual clear cellophane bags tied with a colorful ribbon, perfect for party favors or bake sales. This makes them easy to transport and share.
Consider creating a “cookie bar” where guests can select their favorite cookies, perhaps alongside other treats like brownies or cupcakes. This interactive approach adds an element of fun and allows everyone to customize their dessert experience. The Pink Lemonade Thumbprint Cookies, with their distinct flavor and appearance, will undoubtedly be a standout.
For themed parties, such as a summer picnic or a bridal shower, incorporate decorative elements that match the cookie’s aesthetic. Think mason jars filled with cookies, adorned with gingham ribbons, or nestled in a rustic wooden crate. This thoughtful presentation enhances the overall ambiance and makes the cookies an even more delightful part of the celebration.
Preparation & Storage
Storing Leftovers
Once your delicious Pink Lemonade Thumbprint Cookies have been enjoyed, properly storing any leftovers is crucial for maintaining their delightful texture and flavor. The best method is to store them in an airtight container at room temperature. This prevents them from drying out and absorbing unwanted odors from other foods.
Ensure the cookies are completely cooled before sealing them in the container. Storing them while still warm can create condensation inside the container, leading to a soggy cookie. When stored correctly, these cookies typically remain fresh and enjoyable for up to 3 to 4 days.
If you live in a particularly humid climate, it might be beneficial to place a small, food-safe silica gel packet or a piece of plain parchment paper inside the container to help absorb excess moisture. This small precaution can go a long way in preserving the cookie’s crispness.
Freezing
Pink Lemonade Thumbprint Cookies freeze exceptionally well, making them a fantastic option for baking ahead of time. For the best results, freeze the cookies before glazing, or ensure the glaze is completely set and hardened.
Place the cooled, unglazed, or fully glazed cookies in a single layer on a baking sheet and freeze until they are firm to the touch. This prevents them from sticking together. Once frozen solid, carefully transfer the cookies into a freezer-safe airtight container or a heavy-duty freezer bag, separating layers with parchment paper to prevent breakage.
When stored properly, these cookies can maintain their quality in the freezer for up to 2 to 3 months. This makes them an ideal treat to have on hand for unexpected guests or when you simply crave a homemade cookie without the immediate baking effort. The shortbread base holds up beautifully to freezing.
Reheating
To enjoy your Pink Lemonade Thumbprint Cookies with that freshly baked warmth and tender texture, a brief reheating can work wonders. For a gentle warming, place a few cookies on a microwave-safe plate and heat them in the microwave on low power for short intervals, about 10 to 15 seconds at a time.
Be cautious not to overheat, as this can lead to a chewy or tough texture. The goal is simply to bring them back to a pleasant, slightly warm state that enhances their aroma and flavor. This is especially effective for cookies that have been stored for a few days or thawed from frozen.
Alternatively, if you prefer a crispier texture, you can briefly warm them in a toaster oven or a conventional oven set to a low temperature (around 300°F or 150°C) for just a few minutes. Keep a close watch to prevent them from burning. This method is particularly good for bringing back a slight crispness to the edges.
Frequently Asked Questions
-
How do I choose the ripest raspberries for the glaze to ensure the best color and flavor?
Absolutely! When selecting raspberries for your glaze, look for plump berries that boast a deep, vibrant red color. They should feel firm yet yield slightly to gentle pressure, indicating peak ripeness and sweetness. Avoid any raspberries that show dark spots, bruising, or signs of mold, as these are indicators of overripeness and can affect both the flavor and the appearance of your glaze. Fresh, high-quality raspberries are essential for achieving that perfect, bright pink hue and delicious tartness that defines this recipe.
-
What is the most effective way to store Pink Lemonade Thumbprint Cookies to maintain their freshness and texture?
For optimal freshness, it is best to store your Pink Lemonade Thumbprint Cookies in an airtight container at room temperature. This method prevents them from drying out and protects them from absorbing any unwanted aromas from other foods in your kitchen. When stored this way, they typically remain delightfully fresh for up to 3 days. If you wish to extend their shelf life slightly, you can refrigerate them for up to 5 days, ensuring they are still properly sealed in an airtight container or tightly wrapped to prevent dehydration.
-
Can I freeze these cookies, and if so, what is the best method for freezing and thawing them?
Yes, you can absolutely freeze these delightful Pink Lemonade Thumbprint Cookies! For the best results, it’s recommended to freeze them either before glazing or once the glaze has completely set and hardened. Place the cooled cookies in a single layer on a baking sheet and freeze until they are firm to the touch; this prevents them from sticking together. Once firm, transfer them to a freezer-safe airtight container or a heavy-duty freezer bag, with parchment paper separating layers to prevent damage. Properly stored, they can be frozen for up to 3 months. To enjoy them, thaw them at room temperature, or for a warm treat, microwave for 10-15 seconds after thawing.