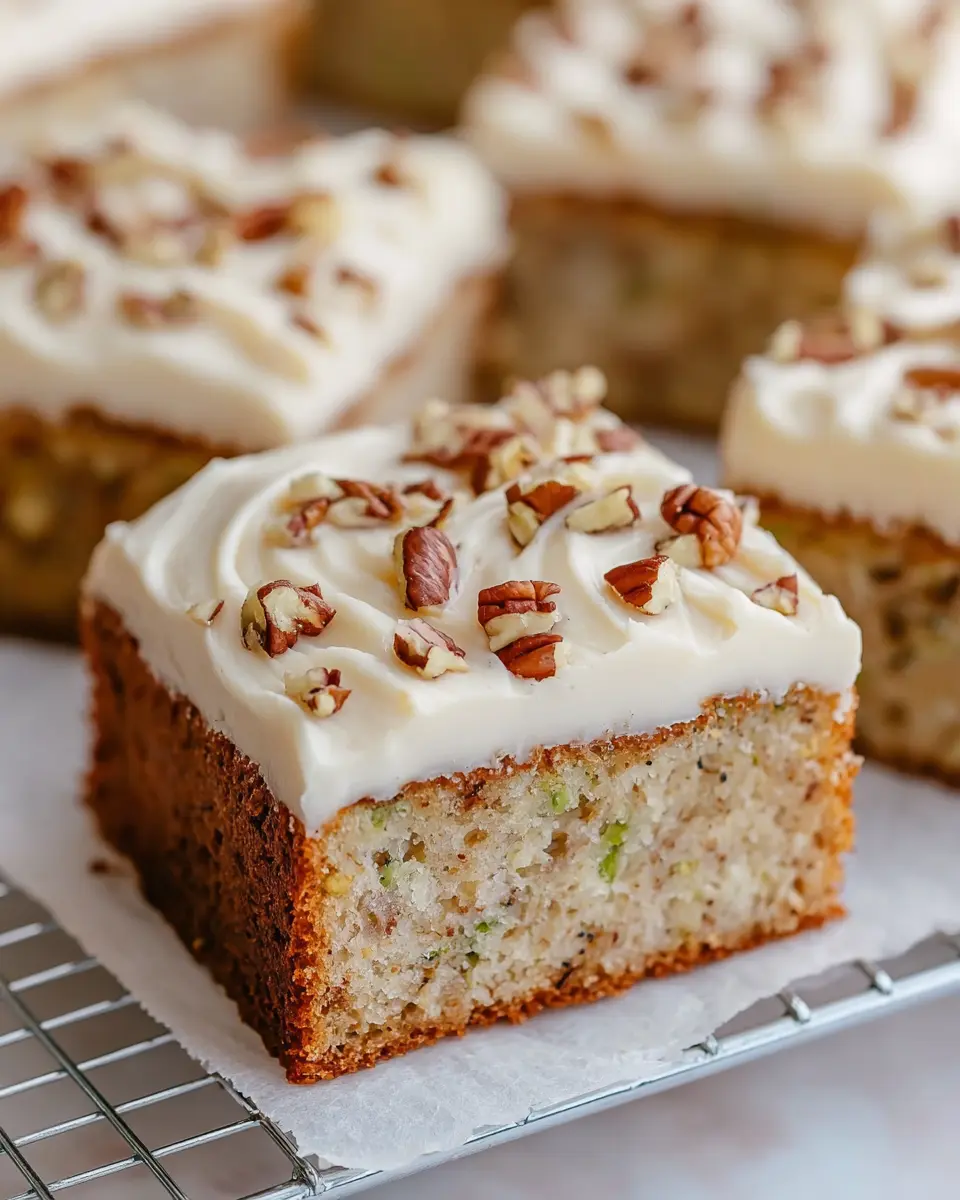
Moist Pineapple Zucchini Cake
There’s a certain magic in baking a cake that is both incredibly delicious and surprisingly simple to make, and this Pineapple Zucchini Cake certainly fits that description. Its moist crumb, infused with the warm spice of cinnamon and the tropical essence of pineapple, makes it an instant favorite for any occasion.
The inclusion of fresh zucchini is a clever secret, contributing to an unbelievably tender texture without imparting any discernible vegetable flavor. Topped with a luscious cream cheese frosting, this cake is the perfect balance of sweet, tangy, and comforting, making it a true crowd-pleaser for both casual gatherings and special celebrations.
Why You Will Love This Recipe
- Effortless Preparation: This cake requires minimal fuss, making it accessible even for novice bakers. It comes together in one bowl for the batter, simplifying the baking process considerably.
- Moist and Tender Crumb: The combination of grated zucchini and well-drained pineapple ensures an exceptionally moist and tender cake that stays delightful even after a few days. This makes it an excellent choice for make-ahead events.
- Balanced Sweetness: Unlike overly sweet cakes, this recipe strikes a perfect harmony between the natural sweetness of pineapple, the warmth of cinnamon, and the subtle tang of cream cheese frosting.
- Versatile Appeal: It’s robust enough for a potluck dessert table but also comforting enough for an everyday treat. The flavors are familiar yet exciting, appealing to a wide range of palates.
- Beginner-Friendly: With clear instructions and common pantry ingredients, this cake is an ideal project for anyone looking to bake something impressive without needing advanced skills or equipment.
Ingredients You Need
The success of any baked good hinges on the quality of its ingredients. For this Pineapple Zucchini Cake, opting for fresh, good-quality produce and pantry staples will elevate its final taste and texture. Grating your zucchini fresh and draining your pineapple thoroughly are small steps that make a significant difference in achieving that perfect moist, yet not soggy, crumb.
Moist Pineapple Zucchini Cake with Cream Cheese Frosting

A tender, beginner-friendly dessert with warm cinnamon flavor, light tropical sweetness, and a silky cream cheese frosting. This one-pan cake is moist, spiced, and balanced with fruity sweetness, making it perfect for potlucks, family gatherings, or a casual weekend treat.
- 1 1/4 cups granulated sugar
- 2 cups grated zucchini (from about
- 2 medium zucchini)
- 1/2 cup sweetened shredded coconut
- 1 1/2 cups all-purpose flour
- 2 teaspoons baking soda
- 2 teaspoons ground cinnamon
- 1 teaspoon kosher salt
- 2 large eggs
- 3 tablespoons vegetable oil (or another neutral oil such as canola)
- 2 teaspoons vanilla essence
- 1 can (20 ounces) crushed pineapple, thoroughly drained
- 8 ounces cream cheese, softened
- 4 tablespoons unsalted butter, at room temperature
- 16 ounces icing sugar
- 2 teaspoons vanilla essence
- Milk or pineapple juice, as needed for thinning
- Optional garnish: Chopped pecans or walnuts, preferably toasted
- 1Preheat the oven to 350°F (175°C). Lightly coat a 9x13-inch baking pan with nonstick spray.
- 2In a large bowl, whisk together the flour, sugar, shredded coconut, baking soda, salt, and cinnamon until evenly combined.
- 3In a separate medium bowl, whisk the eggs with the oil and vanilla essence. Add this mixture to the dry ingredients, then fold in the grated zucchini and drained crushed pineapple. The batter may seem somewhat dry at first, but it should loosen as the fruit and vegetables are incorporated. If it still appears overly stiff after mixing, add a small splash of reserved pineapple juice.
- 4Transfer the batter to the prepared pan and spread it evenly. Bake for 33 to 35 minutes, or until a wooden pick inserted in the center emerges with moist crumbs and the cake begins to pull slightly away from the sides of the pan.
- 5Place the pan on a wire rack and let the cake cool completely.
- 6For the frosting, beat the softened cream cheese and room-temperature butter in a stand mixer or with an electric hand mixer until smooth and well blended, about 5 minutes, scraping down the bowl as needed.
- 7Reduce mixer speed to low and gradually add the icing sugar, mixing until fully incorporated and smooth. Add the vanilla essence, then raise the speed to medium and beat for about 5 more minutes, scraping the sides and bottom of the bowl as necessary. Thin the frosting with a little milk or pineapple juice only if needed for a spreadable consistency.
- 8Spread the finished frosting evenly over the cooled cake. Scatter chopped pecans or walnuts over the top, if using.
- 9Slice and serve.
Keywords: Pineapple Zucchini Cake, Zucchini Cake, Pineapple Cake, Cream Cheese Frosting, Moist Cake, Sheet Cake, Fall Baking, Summer Baking, Easy Cake Recipe
You’ll find all the specific quantities and measurements detailed within the recipe card, ensuring you have exactly what you need for baking perfection.
Variations
The beauty of this Pineapple Zucchini Cake lies not only in its original delightful flavor but also in its adaptability. You can easily tailor it to suit different dietary preferences or flavor profiles, ensuring everyone can enjoy a slice of this moist, spiced goodness.
For a vegan version, the eggs can be replaced with a flax egg (1 tablespoon flaxseed meal mixed with 3 tablespoons water, left to sit for 5 minutes) or a commercial egg replacer. The butter in the frosting can be swapped for a dairy-free butter substitute, and ensure your cream cheese is a vegan variety. Coconut milk can sometimes be used in place of dairy milk for thinning the frosting if needed, though a touch of water works perfectly well too.
If you are looking for a lower-carb option, consider using a blend of almond flour and coconut flour in place of all-purpose flour. You may need to adjust the liquid content slightly as these flours absorb moisture differently. For the frosting, a sugar-free cream cheese and a sugar substitute like erythritol or stevia can be used. Be mindful that sugar substitutes can sometimes have a slightly different texture or aftertaste.
To add an extra layer of tropical flair, you could incorporate some finely chopped macadamia nuts into the batter or sprinkle them on top of the frosting. Another enjoyable twist involves adding a teaspoon of rum extract to the batter for a hint of grown-up flavor that complements the pineapple beautifully. This transforms it into a more sophisticated dessert, perfect for a special occasion.
How to Prepare Pineapple Zucchini Cake
Step 1: Oven and Pan Preparation
Begin by preheating your oven to the specified temperature, typically around 350°F (175°C). This crucial first step ensures that the oven is at the correct and stable heat when the cake batter is ready to bake, promoting even cooking and proper rise. A properly preheated oven is the foundation for successful baking, preventing dense spots or undercooked centers.
Next, prepare your 9×13-inch baking pan. A light coating of nonstick cooking spray is usually sufficient to prevent the cake from sticking. For extra assurance, you can also lightly grease the pan with butter or oil and then dust it with a thin layer of flour, tapping out any excess. This dual approach guarantees that the finished cake will release cleanly from the pan, preserving its neat appearance.
Ensuring the pan is properly greased and floured will save you a lot of potential frustration later, especially when it comes to unmolding or slicing the cake neatly. It’s a simple yet vital part of the baking process that contributes significantly to the final presentation of your delicious Pineapple Zucchini Cake. This foundational step sets the stage for a smooth and enjoyable baking experience from start to finish.
Step 2: Combining Dry Ingredients
In a generously sized mixing bowl, combine all the dry ingredients. This typically includes all-purpose flour, granulated sugar, sweetened shredded coconut, baking soda, ground cinnamon, and kosher salt. Whisking these ingredients together thoroughly ensures that all the components are evenly distributed throughout the mixture.
Even distribution is key for consistent flavor and texture in the final cake. It guarantees that pockets of baking soda or salt are avoided, and the warm cinnamon spice permeates every bite. The shredded coconut adds subtle texture and a delicate tropical note that harmonizes beautifully with the pineapple in the batter. Making sure these dry elements are well-mixed before introducing wet ingredients helps in creating a cohesive batter.
This step is more than just combining ingredients; it’s about creating a stable base for the cake. The flour provides structure, the sugar adds sweetness and moisture, and the leavening agents like baking soda will react to give the cake its rise. Properly blending these dry components lays the groundwork for a perfectly baked, delightful Pineapple Zucchini Cake that is sure to impress.
Step 3: Incorporating Wet Ingredients and Fold-Ins
In a separate, medium-sized bowl, whisk together the eggs, vegetable oil, and vanilla essence. The oil contributes significantly to the cake’s moisture, ensuring a tender crumb that stays soft even after cooling. Vanilla essence rounds out the flavors, providing that classic comforting bakery aroma and taste.
Pour this wet mixture into the bowl containing the combined dry ingredients. Gently fold the ingredients together until they are just combined; overmixing can lead to a tough cake. Next, carefully fold in the grated zucchini and the thoroughly drained crushed pineapple. The zucchini adds a wonderful moistness without any noticeable vegetable taste, while the pineapple provides bursts of sweet, tropical flavor.
Do not be alarmed if the batter appears a bit stiff or thick initially. The moisture content from the zucchini and pineapple will gradually release and loosen the batter as you continue to fold. If, after incorporating these wet elements, the batter still seems excessively stiff, you can add a very small splash of reserved pineapple juice or milk to achieve a more manageable, yet still substantial, consistency. This careful incorporation ensures the cake bakes up beautifully moist and flavorful, a testament to the unique combination of ingredients.
Step 4: Baking the Cake
Once the batter is evenly mixed, transfer it into the prepared 9×13-inch baking pan. Spread the batter evenly across the pan using a spatula to ensure a level surface for baking. An even distribution of batter promotes uniform cooking, preventing some areas from baking faster than others and resulting in a consistently textured cake.
Place the pan into the preheated oven and bake for the specified time, typically around 33 to 35 minutes. The cake is done when a wooden pick or a thin knife inserted into the center comes out with moist crumbs attached, rather than wet batter. You should also observe that the edges of the cake are beginning to pull away slightly from the sides of the pan, a visual cue indicating it’s ready.
The top of the cake should feel springy to the touch, another indicator of doneness. Avoid the temptation to overbake, as this can lead to a dry cake. Once baked, carefully remove the pan from the oven and place it on a wire rack. Allowing the cake to cool completely in the pan is a critical step before frosting, ensuring the frosting adheres properly and doesn’t melt into a soupy mess.
Step 5: Cooling the Cake Completely
This step is absolutely paramount for achieving a beautiful and professional-looking finished cake. After removing the cake from the oven, allow it to cool in the baking pan on a wire rack for at least 20-30 minutes. This initial cooling period allows the cake to set slightly and prevents it from breaking when you try to remove it from the pan, if you choose to do so.
After this initial cooling, you can carefully invert the cake onto the wire rack to cool completely. If you are frosting directly in the pan, ensure it has cooled sufficiently before proceeding. Warmth is the enemy of cream cheese frosting; even a slight residual heat from the cake can cause the frosting to melt, slide, and lose its intended smooth, creamy texture. Patience here will be rewarded with a perfectly frosted and visually appealing cake.
The process of cooling can take upwards of an hour, depending on your kitchen’s temperature and humidity. Resist the urge to rush this stage. A fully cooled cake is not only easier to frost but also results in a better texture and flavor, as all the ingredients have settled and melded beautifully. This patient approach is what separates a good cake from a truly exceptional one.
Step 6: Preparing and Applying the Frosting
While the cake is cooling, prepare the luscious cream cheese frosting. In a medium bowl, beat together the softened cream cheese and room-temperature unsalted butter until they are completely smooth and well combined. Using softened ingredients ensures that they emulsify beautifully, creating a silky-smooth frosting without any lumps.
Gradually add the icing sugar, mixing on low speed until it’s fully incorporated. Then, add the vanilla essence for that classic sweet aroma and taste. If the frosting seems too thick or stiff to spread easily, you can add a tiny splash of milk or pineapple juice, mixing until you achieve a smooth, spreadable consistency. Be cautious not to add too much liquid, as this can make the frosting too runny.
Once the cake has cooled completely, spread the frosting evenly over the top. For an optional but highly recommended finish, sprinkle toasted chopped pecans or walnuts over the frosting. These nuts add a delightful crunchy texture that contrasts beautifully with the soft cake and creamy frosting, elevating the overall sensory experience of this already spectacular dessert. This final touch brings the Pineapple Zucchini Cake to its full, delicious potential.
Pro Tips for Pineapple Zucchini Cake
Drain Your Pineapple Wisely: The key to a moist, tender crumb that isn’t waterlogged lies in thoroughly draining your crushed pineapple. Squeeze out as much liquid as possible using a fine-mesh sieve or by pressing it against the side of a bowl. This concentrates the pineapple’s flavor without adding excess moisture to the batter.
Grate Zucchini for Optimal Moisture: When grating zucchini, use the small holes of a box grater. Avoid squeezing out all of its natural moisture; this is where the cake gets its signature tenderness and moisture without tasting overtly of vegetables. The fine shreds integrate seamlessly into the batter.
Frosting Perfection: Ensure your cream cheese and butter are at true room temperature, not just slightly soft. This allows them to cream together smoothly, creating a lump-free frosting. Gradually adding icing sugar also helps achieve a stable, spreadable consistency.
Don’t Overmix the Batter: Once the wet and dry ingredients are combined, mix only until just incorporated. Overmixing can develop the gluten in the flour excessively, leading to a tougher cake. Gently folding is the way to go for a tender crumb.
Cooling is Crucial: Patience is a virtue when it comes to cooling the cake before frosting. A warm cake will melt the cream cheese frosting, leading to a messy, uneven finish. Letting it cool completely ensures a clean, beautiful presentation and optimal frosting texture.
Serving Suggestions for Pineapple Zucchini Cake
Decoration
The visual appeal of your Pineapple Zucchini Cake can be greatly enhanced with thoughtful decoration. A generous layer of the smooth cream cheese frosting is the foundation, providing a canvas for further embellishment. If you’ve opted for nuts, a scattering of toasted chopped pecans or walnuts over the frosting adds both texture and an attractive, rustic look. For an even more festive presentation, consider adding a sprinkle of finely shredded toasted coconut on top of the nuts for an extra tropical hint. Alternatively, a light dusting of powdered sugar through a stencil can create elegant patterns, or a few delicate pineapple slices arranged artfully on top can tie the flavors together visually.
Side Dishes
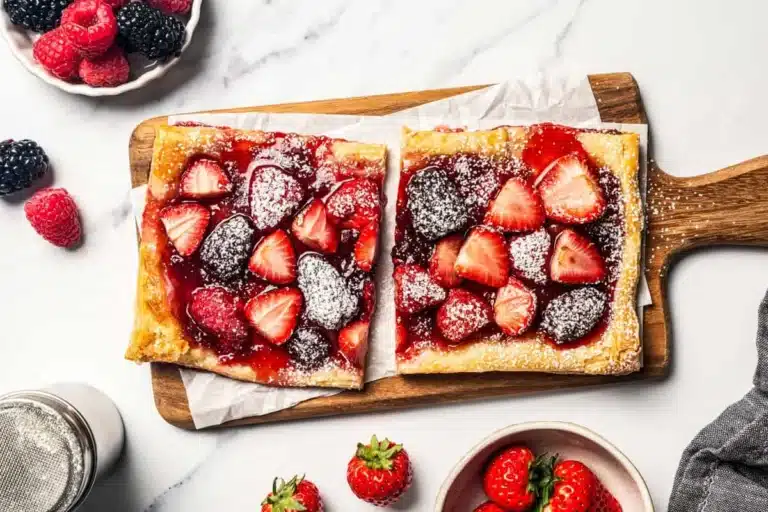
While this cake is a perfect standalone dessert, certain accompaniments can elevate the serving experience. A simple dollop of whipped cream, either plain or lightly sweetened, offers a lighter contrast to the rich frosting if desired. For a more refreshing element, a side of fresh berries like raspberries or strawberries can provide a bright, tart counterpoint to the cake’s sweetness. If serving this cake as part of a larger spread, consider pairing it with a light fruit salad that doesn’t overpower the cake’s unique flavors, allowing it to remain the star of the dessert course.
Creative Serving Ideas
Beyond the classic slice, this cake lends itself to several creative serving ideas. Consider cutting it into smaller, bite-sized squares for a dessert bar or as part of a tea party spread; these “mini cakes” are perfect for guests to sample multiple treats. You could also warm a slice gently and serve it with a scoop of vanilla bean ice cream for a delightful warm-and-cold contrast. For special occasions, individual servings can be presented in charming ramekins or dessert glasses, with a swirl of frosting and a garnish, making each guest feel like they’re receiving a personal treat.
Preparation & Storage
Storing Leftovers
Due to the cream cheese frosting, this Pineapple Zucchini Cake is best stored in an airtight container or well-wrapped in plastic wrap in the refrigerator. This method will help keep the cake fresh and prevent it from drying out. Properly stored, leftovers can maintain their delicious quality for approximately 4 to 5 days. It’s advisable to let a slice sit at room temperature for about 15-20 minutes before serving to allow the frosting to soften slightly and the cake’s flavors to become more prominent, as refrigeration can mute them.
Freezing
Freezing this cake is an excellent option for long-term storage, especially if you want to have it on hand for future cravings or unexpected guests. The most effective way to freeze it is by slicing the cake first. Place the individual slices on a baking sheet lined with parchment paper and freeze them until firm, which typically takes about 1-2 hours. Once solid, wrap each slice tightly in plastic wrap, followed by a layer of aluminum foil or placing them in a freezer-safe bag or container. Frozen cake slices can retain their quality for up to 2 months.
Reheating
Reheating this cake is generally not necessary as it is designed to be enjoyed at room temperature or slightly chilled. However, if you prefer a warmer slice, especially on a cold day, you can gently reheat it. The best method is to place a slice on a microwave-safe plate and heat it in short intervals of 10-15 seconds on a low power setting. Alternatively, you can warm it briefly in a low oven (around 250°F or 120°C) for a few minutes until just warmed through. Be cautious not to overheat, which can cause the frosting to melt or the cake to become dry.
Frequently Asked Questions
-
Can I use canned pineapple chunks instead of crushed pineapple?
While you can use canned pineapple chunks, they should be chopped very finely or pulsed briefly in a food processor before draining and using. The key is to achieve a consistency that blends well into the batter without leaving large, distinct pieces that can affect the cake’s structure and texture. Crushed pineapple is ideal because it breaks down more easily and distributes evenly, contributing to a more cohesive moistness throughout the cake. Ensure thorough draining, regardless of the type of pineapple used, to prevent a soggy cake base.
-
What if I don’t have zucchini? Can I still make this cake?
While zucchini is integral to the moistness and tender texture of this cake, you can experiment with substitutions, though the result may differ. For moisture, you could try finely grated apple or pear, but these will impart their own distinct flavors. Another option is to slightly increase the amount of oil or use applesauce, though this might alter the cake’s texture and density, making it more cake-like rather than the signature tender crumb this recipe achieves. It’s recommended to stick with zucchini for the best and most authentic results of this particular Pineapple Zucchini Cake.
-
How do I ensure my cream cheese frosting is smooth and not lumpy?
Achieving a smooth, lump-free cream cheese frosting primarily relies on the temperature of your ingredients and proper mixing technique. Ensure both the cream cheese and butter are at true room temperature – they should be soft enough to yield to gentle pressure but not melted. Start by beating the cream cheese and butter together for at least 5 minutes using an electric mixer until they are perfectly creamy and blended. Then, gradually add the icing sugar in small batches, mixing thoroughly after each addition. Scraping down the sides and bottom of the bowl periodically during mixing is crucial to incorporate all ingredients and eliminate any hidden lumps. If the frosting still has a few minor lumps, a quick pulse in a food processor can often smooth it out.