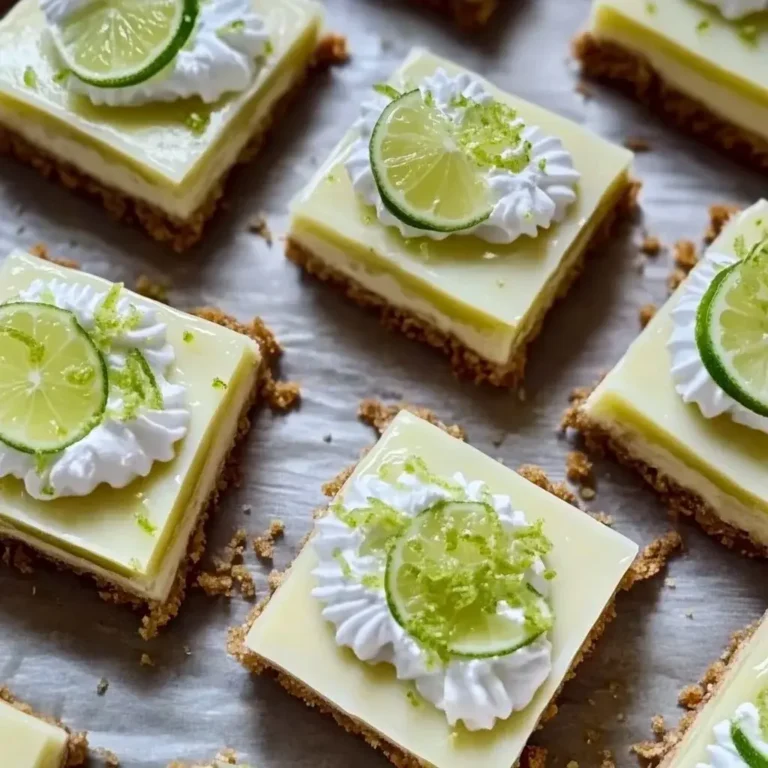
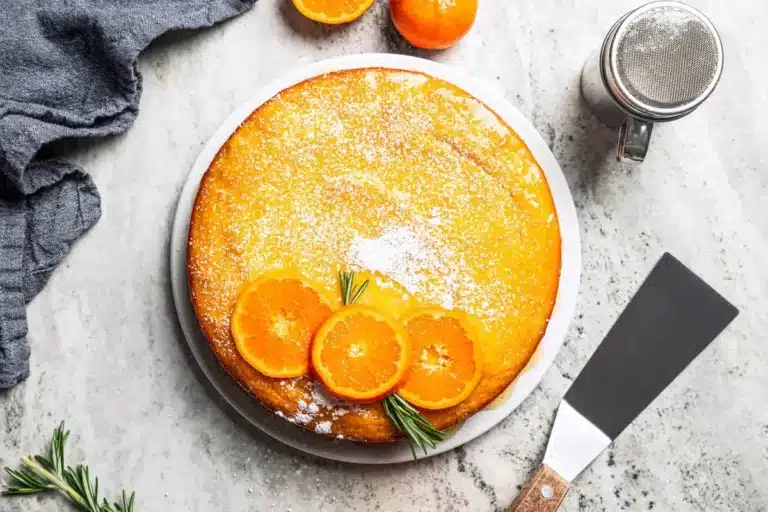
Pineapple Glaze for Cake
Share this Recipe if You liked it: Pinterest Facebook Messenger WhatsApp Quick, glossy, and bright, Pineapple Glaze for Cake is a simple finishing touch that adds a light tropical note without covering up the flavor of your cake. It comes together in minutes and is easy to adjust for drizzling, spreading, or creating a slightly thicker finish.
This is the kind of glaze that works when you want something smoother and lighter than frosting. It gives your cake a polished look, adds a little sweetness, and lets the pineapple flavor stay fresh and clean instead of heavy. You also do not need special tools or advanced baking experience to make it well. A bowl, a whisk, and a careful hand with the liquid are enough to give you a smooth glaze that feels reliable every time.
Because the ingredient list is so short, each step matters. Sifting the sugar, whisking gradually, and adjusting the consistency a little at a time are what turn two basic ingredients into a neat, shiny topping that looks finished and tastes balanced. This delightful dessert topping is a game-changer for elevating your baked goods.
Why You Will Love This Recipe
- Effortless Preparation: This glaze requires minimal ingredients and comes together in just a few minutes, making it perfect for last-minute decorating or when you’re short on time.
- Bright Tropical Flavor: Infused with pineapple, it adds a burst of refreshing, subtly sweet tropical taste that complements a wide variety of cakes.
- Perfect Glossy Finish: Achieve a beautiful, professional-looking shine on your cakes, bundt cakes, or even cookies with this smooth, luscious glaze.
- Versatile Consistency: Easily adjust the thickness of the glaze to suit your needs, whether you prefer a thin drizzle, a spreadable layer, or a slightly thicker coating.
- Simple Ingredients: Crafted from pantry staples like powdered sugar and pineapple juice, this recipe is accessible and easy for any baker to master.
Ingredients You Need
The beauty of this pineapple glaze lies in its simplicity and the quality of just a few core components. Opting for fresh, good-quality ingredients will always yield the best flavor and texture. This recipe embraces a minimalist approach, allowing the natural sweetness of the pineapple to shine through without being overpowering.
Pineapple Glaze for Cake
A simple, smooth pineapple glaze prepared with powdered sugar and pineapple juice. This topping is designed to provide a glossy finish and can be adjusted to a thicker or more pourable consistency as needed.
- 1/2 cup sifted powdered sugar
- 1 tablespoon pineapple juice
- Optional: small amounts of lemon juice for thinning
- Optional: additional powdered sugar for thickening
- 1Place the sifted powdered sugar in a medium mixing bowl.
- 2Slowly drizzle in the pineapple juice while whisking continuously until the mixture becomes smooth and fully blended, with no lumps remaining.
- 3Check the consistency of the glaze. If you desire a thinner texture, add small amounts of lemon juice, mixing thoroughly after each addition until the glaze is smooth and easy to pour. Be careful not to thin it excessively.
- 4If the glaze becomes too loose, add additional powdered sugar, one tablespoon at a time, whisking well after each addition, until the desired thickness is reached.
- 5Spoon or drizzle the glaze over a fully cooled cake.
Keywords: Pineapple Glaze, Cake Glaze, Easy Glaze, Fruit Glaze, Tropical Glaze
- powdered sugar: this forms the base of the glaze, providing sweetness and body.
- pineapple juice: the star ingredient, infusing the glaze with its distinctive tropical flavor and helping to achieve the right consistency.
- lemon juice (optional): used sparingly to adjust the thickness or add a touch of brightness if needed.
The precise quantities for these ingredients are detailed within the recipe card.
Variations
This simple pineapple glaze is incredibly versatile, offering numerous avenues for creative variation. Its adaptable nature means it can be tweaked to suit different dietary needs and flavor preferences, ensuring it fits perfectly into any baking project.
For a delightful dessert experience, consider transforming this glaze into a vegan delight. To achieve this, simply ensure your powdered sugar is certified vegan, as some brands may use bone char in processing. The rest of the ingredients, pineapple juice and optional lemon juice, are naturally vegan. This vegan version maintains all the bright, tropical notes and glossy finish, making it indistinguishable from its non-vegan counterpart, perfect for any celebration.
If you’re following a low-carb lifestyle, you can adapt this glaze with a few smart substitutions. Replace the powdered sugar with a powdered sugar substitute, such as erythritol or xylitol (ensuring it’s pet-safe if you have animals). The pineapple juice will need to be replaced with a low-carb liquid that offers a similar tang, perhaps a blend of unsweetened pineapple extract mixed with a little water or a sugar-free pineapple-flavored syrup. This allows for a guilt-free tropical touch on your favorite keto-friendly cakes.
Another exciting variation involves infusing the glaze with other complementary flavors. Consider adding a touch of coconut extract for a piña colada vibe, a whisper of ginger for a spicy kick, or even a few drops of almond extract for a more complex nutty undertone. These subtle additions can elevate the glaze from a simple topping to a sophisticated flavor enhancer, adding another layer of delight to your baked creations.
How to Prepare Pineapple Glaze for Cake
Step 1: Preparing the Base
Begin by gathering your essential ingredients: sifted powdered sugar and fresh pineapple juice. The first crucial step involves ensuring your powdered sugar is perfectly smooth. Take your measured powdered sugar and sift it thoroughly into a medium-sized mixing bowl. This action is paramount for achieving a lump-free, exquisitely smooth glaze.
Using a fine-mesh sieve, gently press the powdered sugar through, ensuring that any small clumps are broken down. This preparation step significantly impacts the final texture of your glaze, preventing any gritty or unevenness. A well-sifted sugar creates a foundation for a glossy, professional finish that truly elevates your cake’s appearance.
This initial step sets the stage for the entire glazing process. A smooth, lump-free sugar base means less whisking will be required later, and the resulting glaze will have a more refined, sophisticated sheen. It’s a small effort that yields a significant improvement in the final product.
Step 2: Gradually Incorporating the Pineapple Juice
Once your powdered sugar is perfectly sifted, it’s time to introduce the liquid element: the pineapple juice. The key here is to add the pineapple juice very slowly and deliberately. Take your measuring spoon and add just a small amount of the pineapple juice to the powdered sugar.
Simultaneously, begin whisking the mixture continuously and gently. This gradual incorporation allows the sugar to absorb the liquid evenly, preventing the formation of thick lumps or pockets of dry sugar. The whisking action should be consistent, moving in a circular motion to ensure all the sugar is incorporated.
Continue adding the pineapple juice in very small increments, whisking after each addition. Watch the consistency closely. This slow and steady method gives you ultimate control over the glaze’s thickness, ensuring it doesn’t become too thin too quickly. It’s a dance between sugar and liquid, requiring patience and attention.
Step 3: Achieving the Perfect Smoothness and Gloss
As you continue to whisk, you will notice the mixture transforming from a dry, powdery state to a smooth, glossy liquid. Keep whisking until the glaze is completely uniform, with no streaks of dry sugar visible. The goal is a beautifully blended consistency that gleams under the light.
The ideal texture for a drizzling glaze is one that falls from the whisk in a continuous ribbon. It should be thick enough to coat the back of a spoon but fluid enough to flow smoothly. If you lift the whisk, the glaze should drip off in a steady stream, not break apart into small pieces or run off too quickly.
This stage is where the magic happens, turning simple ingredients into an appealing topping. The glossy appearance signifies that the sugar has fully dissolved and emulsified with the juice, creating that desirable shiny finish for your cake decorations. This is where you might also check if any dessert elements need this beautiful sheen.
Step 4: Adjusting the Consistency for Desired Use
Once you have achieved a smooth, glossy glaze, it’s essential to assess its consistency based on how you plan to use it. If you intend to drizzle the glaze in delicate patterns or thin lines, you might want it slightly thinner. For a thicker, more opaque coating that spreads easily, you’ll want it a bit more viscous.
To achieve a thinner consistency, you can add a tiny amount of extra liquid, such as a few drops of pineapple juice or, if necessary, a very small amount of lemon juice. Add these liquids incrementally, whisking thoroughly after each addition, and observe the change in flow. It’s critical not to overdo this step, as it’s easier to thin a glaze than to thicken it.
Conversely, if you find the glaze is too thin for your liking and you want it to hold its shape better for spreading, you can add a small amount of additional powdered sugar. Again, add it one tablespoon at a time, whisking until fully incorporated and the desired thickness is reached. This meticulous adjustment ensures your glaze is perfect for your specific cake design needs.
Step 5: Fine-Tuning with Optional Lemon Juice
The addition of lemon juice is entirely optional but can be a lifesaver when trying to achieve a very specific glaze consistency. If your pineapple glaze has become a touch too thick for your liking, or if you want to add a subtle extra layer of brightness to the flavor profile, lemon juice is your friend.
However, it’s crucial to use lemon juice with extreme caution. Add it in minuscule amounts – think mere drops at a time. Stir vigorously after each tiny addition to fully integrate the juice and observe how it affects the glaze’s flow. Overdoing the lemon juice can lead to a tart glaze that overpowers the pineapple and can also make the glaze excessively runny.
This step is all about precision. The goal is to achieve the perfect balance of sweetness, pineapple flavor, and a smooth, pourable or spreadable consistency without altering the primary flavors. It’s a final touch that can make a significant difference in the glaze’s performance and taste. Consider this a key tip from dessert experts.
Step 6: Correcting Overly Thin Glaze
Mistakes can happen, and sometimes the glaze can become thinner than intended, particularly if too much liquid was added. The good news is that a too-thin glaze can often be rescued with a bit of patience and additional powdered sugar. This is a common troubleshooting step for many bakers.
To thicken an overly thin glaze, begin by adding more sifted powdered sugar, one tablespoon at a time. After each addition, whisk the mixture thoroughly until the sugar is completely incorporated and the glaze begins to thicken. Continue this process, adding sugar incrementally, until the glaze reaches your desired consistency – whether it’s for drizzling, spreading, or coating.
It’s important to whisk well after each addition of sugar to ensure it dissolves properly and doesn’t create lumps. This methodical approach allows you to control the thickening process, preventing the glaze from becoming too stiff or overly sweet. This technique is fundamental for ensuring your dessert topping is always just right.
Step 7: Applying the Glaze to a Cooled Cake
The final and most rewarding step is applying the freshly prepared pineapple glaze to your cake. For the most beautiful and effective result, ensure your cake is completely cooled before you begin glazing. Applying glaze to a warm cake can cause it to melt unevenly, soak into the cake, and lose its desirable glossy finish.
Once the cake has reached room temperature, you can begin. You can either spoon the glaze over the top of the cake, allowing it to drip naturally down the sides, or use a spatula to spread it evenly. For a drizzling effect, place the glaze in a piping bag with a fine tip, or use a spoon to create delicate lines.
Allow the glaze to set undisturbed for a short period. This resting time allows the glaze to settle into a smooth, polished coating, showcasing its beautiful sheen. The contrast of the glossy glaze against the texture of the cake is truly a hallmark of a well-finished dessert.
Pro Tips for Pineapple Glaze for Cake
Elevate your pineapple glaze from simple to spectacular with these expert tips. Mastering these nuances will ensure a flawless finish every time you bake, transforming your cakes into showstoppers.
Sift, Sift, Sift: Never skip sifting your powdered sugar. This single step is the most crucial for preventing lumps and achieving a silky-smooth glaze. A fine-mesh sieve is your best friend here.
Gradual Liquid Addition: When adding pineapple juice, do so in very small increments while whisking continuously. This control is key to preventing a runny glaze and achieving the perfect ribbon-like consistency.
Temperature Matters: Always ensure your cake is completely cool before applying the glaze. Warmth causes the glaze to melt and soak in, ruining the smooth, glossy finish you’re aiming for.
Small Adjustments are Best: When adjusting the consistency, whether thinning or thickening, use the smallest possible increments. A few drops of liquid or a tablespoon of sugar can make a significant difference.
Flavor Boost: For an intensified tropical flavor, consider using fresh pineapple juice instead of canned. If you want to explore more fruity dessert options, try adding a tiny amount of coconut extract for a tropical twist.
Serving Suggestions for Pineapple Glaze for Cake
Decoration
The primary role of this pineapple glaze is to impart a beautiful, glossy finish. It can be drizzled decoratively over the top of a cake, creating elegant patterns and appealing visual texture. For a more substantial decoration, it can be spread evenly across the top surface, leaving the sides bare or glazed separately. You can also use toothpicks or skewers to create swirls and artistic designs as the glaze begins to set, adding a personalized touch to your dessert.
Side Dishes
While the glaze is a topping, its bright flavor can complement certain side dishes. Consider serving it alongside fresh tropical fruits like mango, papaya, or sliced starfruit, which echo the glaze’s flavors. A dollop of whipped cream or coconut cream can also provide a lovely contrast in texture and richness. If the cake is part of a larger dessert spread, light fruit salads or a refreshing sorbet would pair wonderfully.
Creative Serving Ideas
Beyond traditional cakes, this glaze is perfect for individual desserts. Think of drizzling it over pound cake slices, scones, or even a simple loaf cake. It can also be used to add a festive touch to sugar cookies or shortbread, transforming them into tropical treats. For a fun brunch item, drizzle it over pancakes or waffles to give them a special, fruity finish. This versatile glaze truly enhances any baked good it graces, making it a valuable addition to your breakfast and dessert repertoire.
Preparation & Storage
Storing Leftovers
If you happen to have any leftover pineapple glaze, it can be stored for a short period. Transfer the glaze to an airtight container or cover the bowl tightly with plastic wrap. It’s best to store it in the refrigerator to maintain its freshness and prevent it from becoming too runny at room temperature.
When you’re ready to use the refrigerated glaze, it might have firmed up considerably. Allow it to sit at room temperature for about 15-30 minutes to soften slightly. This will make it easier to work with and bring it back to a more pourable consistency.
Before reusing, give the glaze a thorough whisk. This action helps to re-emulsify the ingredients and restore its smooth texture. If it remains too thick after softening, you can add a few drops of pineapple juice or water and whisk again until it reaches the desired flow.
Freezing
Freezing this particular type of pineapple glaze is generally not recommended if you want to maintain its optimal texture. Sugar-based glazes, especially those with a high liquid content relative to sugar, can experience a textural change after thawing. The smooth, glossy finish might become grainy or less consistent.
However, if you must freeze it, ensure it’s in a freezer-safe airtight container. You might need to whisk it vigorously or even re-sift and re-mix a portion of it to revive the texture upon thawing. For the best results and appearance, it is always advisable to make a fresh batch when needed.
This guideline applies broadly to simple sugar glazes. For baked goods that have already been glazed and then frozen, the glaze might change slightly in appearance upon thawing. It’s a common trade-off when freezing desserts that have delicate finishing touches.
Reheating
Reheating leftover pineapple glaze is a straightforward process, primarily aimed at returning it to a usable, pourable consistency. The most effective method is to allow the refrigerated glaze to come to room temperature first. This gentle warming is often enough to soften it.
If the glaze is still too firm after sitting at room temperature, you can gently warm it. Place the container in a bowl of warm (not hot) water for a few minutes, stirring occasionally. Alternatively, you can microwave it in very short bursts (5-10 seconds), stirring well after each interval, until it reaches the desired fluidity. Be extremely careful not to overheat it, as this can cause it to become too thin or even scorch.
Once warmed, always give the glaze a good whisk. This helps to ensure all ingredients are well combined and that the texture is smooth and uniform before applying it to your cake. Remember that any applied glaze on a cake stored in the refrigerator will also benefit from gentle warming before serving if you desire a softer texture.
Frequently Asked Questions
-
Can I make this pineapple glaze ahead of time?
Yes, you can prepare this pineapple glaze ahead of time, especially if you plan to use it later the same day. It’s a great way to save time on busy baking days. When you’re ready to use it, it’s essential to give it a good whisk before applying it to your cake, as it may settle slightly over time. If you find that the glaze has thickened too much during storage, you can easily loosen it by adding just a few drops of additional pineapple juice or water and whisking until it reaches your desired consistency once more. This ensures it remains perfectly pourable or spreadable for decorating.
-
Why is my pineapple glaze lumpy, and how can I fix it?
Lumps in your pineapple glaze typically stem from two main issues: either the powdered sugar was not sifted before being used, or the liquid was added too quickly, causing the sugar to clump instead of dissolve smoothly. To prevent this, always sift your powdered sugar thoroughly and incorporate the pineapple juice gradually while whisking continuously. If your glaze is already lumpy, don’t despair; you can often fix it by continuing to whisk vigorously until the lumps disappear. For stubborn lumps, you might need to press the glaze through a fine-mesh sieve to achieve a perfectly smooth finish, ensuring a beautiful final appearance for your cake.
-
Can I use this pineapple glaze on a warm cake, or does it need to be cool?
It is highly recommended to use this pineapple glaze on a fully cooled cake. Applying the glaze to a warm surface can cause it to melt excessively, lose its characteristic shine, and soak unevenly into the cake’s crumb, leading to a less appealing finish. Waiting until the cake has completely cooled down allows the glaze to set properly, creating a clean, glossy coating that enhances the cake’s appearance and texture. This crucial step ensures the glaze remains on top, delivering that perfect, polished look.