Pineapple Angel Food Cake
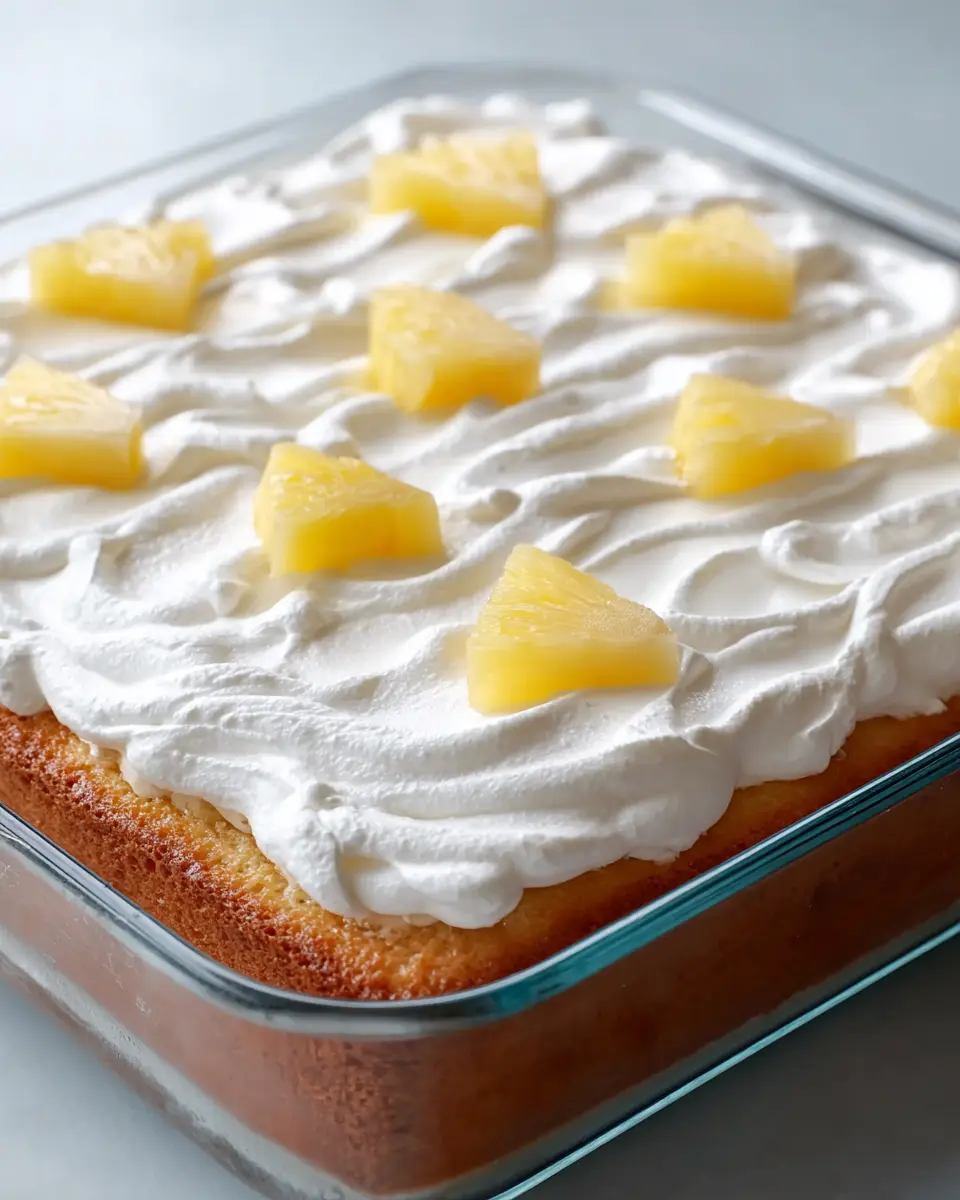
Pineapple angel food cake is a delightful dessert that perfectly balances sweetness with a light, airy texture. Its tropical hint of pineapple makes it a refreshing choice for any occasion, from casual gatherings to special celebrations. This recipe simplifies the process, making it accessible even for novice bakers.
The beauty of this cake lies in its minimal effort and maximum reward. It delivers a wonderfully soft crumb and a subtly fruity flavor without requiring complicated techniques. It’s the ideal treat when you crave something sweet but don’t want anything too heavy or rich.
Why You Will Love This Recipe
- Effortless Preparation: With just a few ingredients and straightforward steps, this cake comes together quickly, making it perfect for last-minute dessert needs.
- Incredibly Light Texture: The signature airy crumb of angel food cake is perfectly complemented by the moistness from the pineapple, creating a cloud-like dessert.
- Subtle Tropical Flavor: The pineapple infusion provides a gentle, refreshing taste that makes each bite feel bright and summery.
- Versatile Presentation: Whether served simply or adorned with toppings, this cake is a beautiful addition to any dessert table.
- Make-Ahead Friendly: This dessert can be prepared in advance, making entertaining stress-free and allowing you to enjoy more time with your guests.
Ingredients You Need
The quality of your ingredients plays a role in the final outcome, even in a simple recipe like this. Using a good-quality cake mix ensures a reliable base, while the pineapple provides the essential moisture and flavor. Choosing fresh, vibrant fruit for garnish will elevate the visual appeal and add an extra burst of freshness.
Pineapple Angel Food Cake
A quick, light dessert with an airy texture and gentle tropical flavor, this beginner-friendly angel food cake with pineapple is perfect for potlucks and gatherings. It's a make-ahead option that feels soft and cloudlike with a bright pineapple note.
- 1 can crushed pineapple with all of its juice
- Whipped cream or whipped topping (optional for serving)
- 1 package angel food cake mix
- Pineapple pieces or fresh fruit (optional for garnish)
- 1Preheat the oven to 350°F.
- 2Add the cake mix to a large bowl, then pour in the crushed pineapple with all of its juice. Stir gently until the dry mix disappears and the batter looks evenly combined.
- 3Avoid overmixing; the batter should be blended but not beaten out of its airy structure.
- 4Spread the batter into an ungreased 9x13-inch glass baking dish, smoothing it lightly.
- 5Bake for 25 to 30 minutes, until the top is golden and the cake looks set.
- 6Let the cake cool completely for about 1 hour.
- 7Once cooled, finish with whipped cream or whipped topping and garnish with pineapple or other fresh fruit if desired.
Keywords: Pineapple Angel Food Cake, Angel Food Cake, Pineapple Cake, Easy Dessert, Potluck Dessert, Make-ahead Dessert
The specific quantities for these ingredients are detailed in the recipe card, ensuring you have precisely what you need for a perfect cake.
Variations
Elevating this simple Pineapple Angel Food Cake is incredibly easy, allowing for creative twists to suit various dietary preferences or flavor profiles. One delightful approach is to transform it into a decadent dessert by incorporating a layer of cream cheese. Simply beat together softened cream cheese with a touch of powdered sugar and vanilla extract until smooth, then gently spread this over the cooled cake before adding the whipped topping. This adds a wonderful richness and tang that beautifully contrasts with the cake’s lightness.
For those seeking a low-carb option, adaptation is possible, though it requires a bit more attention to detail. You would substitute a low-carb angel food cake mix, if available, or explore a recipe that uses almond flour and a sugar substitute like erythritol or xylitol, adjusting the liquid content carefully. The pineapple would need to be replaced with a pineapple extract or a very small amount of unsweetened crushed pineapple, alongside a touch of natural sweetener, to maintain the flavor without the sugar.
A refreshing vegan version can also be achieved with careful substitutions. Instead of eggs, a combination of aquafaba (the liquid from a can of chickpeas) whipped to stiff peaks can provide the necessary lift. Ensure your cake mix is also vegan, or use a homemade vegan cake base. For the topping, use coconut whipped cream or a dairy-free whipped topping alternative. This ensures everyone can enjoy this delightful treat, regardless of dietary needs.
How to Prepare Pineapple Angel Food Cake
Step 1: Preheating and Pan Preparation
The initial step involves preparing your baking environment. Preheat your oven to a precise 350 degrees Fahrenheit (175 degrees Celsius). This consistent heat is crucial for ensuring the cake bakes evenly and develops the desired light texture.
Equally important is the preparation of your baking dish. You will need an ungreased 9×13-inch glass baking dish. The unconventional instruction to leave the pan ungreased is key to the success of angel food cake. It allows the delicate batter to cling to the sides of the pan as it rises, achieving that signature lofty height.
Step 2: Combining Wet and Dry Ingredients
Gather your dry cake mix and place it into a generously sized mixing bowl. This provides ample space for thorough, yet gentle, mixing without spillage. Ensure the bowl is large enough to accommodate all ingredients and allow for easy stirring.
Next, introduce the star of this recipe: crushed pineapple, along with all of its accompanying juice. The juice is vital as it contributes essential moisture and a concentrated burst of pineapple flavor that permeates the entire cake. Do not drain this precious liquid; it’s an integral part of the batter’s composition.
Gently stir these ingredients together. The goal here is to combine the dry cake mix with the crushed pineapple and its juice until the mixture is homogenous and no dry pockets of cake mix remain visible. This initial blend sets the stage for the cake’s tender crumb.
Step 3: The Art of Gentle Mixing
At this juncture, restraint in mixing is paramount. You are aiming for a blended batter, one that has just come together. Resist the urge to vigorously beat the mixture, as this can introduce too much air that will be lost during baking, resulting in a denser cake.
The batter should appear unified, with the pineapple evenly distributed throughout. It should not be overly smooth like a traditional cake batter; a slightly lumpy appearance from the pineapple is perfectly acceptable and even desirable. Overmixing at this stage is a common pitfall that detracts from the cake’s characteristic lightness and airy structure.
Focus on a folding or gentle stirring motion to incorporate the ingredients without deflating the potential volume. This deliberate, soft approach ensures that the final baked cake will possess that delightful, cloud-like consistency that makes angel food cake so beloved.
Step 4: Distributing the Batter
Carefully transfer the prepared batter into your ungreased 9×13-inch glass baking dish. Use a spatula to gently coax all of the batter from the bowl into the pan, ensuring no batter is left behind. The batter will appear somewhat thick and fluffy due to the aeration from the cake mix and the moisture from the pineapple.
Once the batter is in the dish, gently smooth the top with the back of your spatula or a bench scraper. The aim is to create an even surface so that the cake bakes uniformly. You do not need to press down hard; a light, even spread is sufficient. This even distribution ensures consistent baking and a level cake.
Avoid overworking the batter once it’s in the pan. The goal is a level surface, not a perfectly smooth, compacted one. This minimal fussing allows the cake’s natural structure to develop as it bakes, contributing to its final airy texture.
Step 5: Baking to Golden Perfection
Place the baking dish into the preheated oven. The bake time typically ranges from 25 to 30 minutes. During this period, the cake will rise significantly, and its surface will transform into a beautiful golden-brown hue. Keep a close eye on it as the baking time can vary slightly depending on your oven.
You’ll know the cake is nearly ready when the top appears set and golden. A slight jiggle in the very center when the pan is gently nudged is often normal right after it’s removed from the oven, as it continues to set. However, the cake should not look wet or liquidy in the middle; this would indicate it needs more time to bake through.
The aroma of a perfectly baked cake should fill your kitchen by the end of the baking time. A thin, golden crust on top is indicative of a cake that has baked through properly and will have a pleasing texture. Ensure it doesn’t become too dark, as this can lead to a dry or slightly burnt flavor.
Step 6: Cooling and Finishing Touches
Once removed from the oven, it is imperative to let the cake cool completely. This process typically takes about 1 hour. Place the dish on a wire rack to allow air circulation around the cake, facilitating a more even cooling. Patience here is key, as rushing the cooling process can affect the cake’s texture.
Attempting to add toppings while the cake is still warm can lead to melted toppings and a soggy cake surface. Allow the cake to reach room temperature or even be slightly chilled for the best results. This ensures the whipped cream or topping will hold its shape and not weep onto the cake.
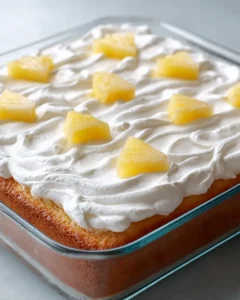
Once fully cooled, you can add your desired finishing touches. A generous layer of whipped cream or whipped topping is a classic choice, providing a creamy contrast to the cake’s airy crumb. For an extra visual appeal and burst of flavor, garnish with fresh pineapple pieces or other colorful fruits like strawberries or kiwi. This final step transforms a simple cake into a stunning dessert.
Pro Tips for Pineapple Angel Food Cake
Gentle Folding is Key: When combining the cake mix and pineapple, resist the urge to overmix. Gentle folding or stirring just until combined will help maintain the batter’s airy structure, ensuring a light and fluffy cake.
Watch the Oven Closely: Baking times for angel food cake can be forgiving, but it’s essential to monitor the cake towards the end of the baking period. You are looking for a golden-brown surface and a cake that feels set, not moist or jiggly in the center.
Cooling is Crucial: Always allow the cake to cool completely before adding any toppings. If you add whipped cream or fruit while the cake is still warm, the toppings can melt and make the cake soggy.
Embrace Simplicity: While additions are great, the pure flavor of pineapple angel food cake is delightful on its own. Don’t be afraid to serve it with just a dusting of powdered sugar or a dollop of plain whipped cream for an unadulterated taste experience.
Use Room Temperature Ingredients: While this recipe relies on a cake mix and canned pineapple, if you were to adapt it with other ingredients, ensuring they are at room temperature can lead to better emulsification and a smoother batter, contributing to a finer crumb.
Serving Suggestions for Pineapple Angel Food Cake
Decoration
Transform this simple cake into a showstopper with beautiful decorations. A classic approach is a thick layer of lightly sweetened whipped cream or a stabilized whipped topping spread evenly across the cooled cake. For an extra pop of color and flavor, arrange fresh pineapple chunks, maraschino cherries, or a medley of fresh berries like strawberries, raspberries, and blueberries over the whipped topping. A delicate dusting of powdered sugar through a sieve can add a touch of elegance, creating a frosted appearance.
Side Dishes
This cake is a perfect light dessert, but it also pairs wonderfully with certain beverages. Consider serving it alongside a chilled glass of iced tea, a refreshing lemonade, or even a light, fruity cocktail for an adult gathering. For a more substantial dessert experience, a small scoop of vanilla bean ice cream can complement the cake’s flavors beautifully without overpowering them.
Creative Serving Ideas
Move beyond the standard slice by cutting the cake into individual cubes or rounds and serving them in parfait glasses layered with whipped cream and fruit. This creates an elegant presentation that is perfect for parties. Another fun idea is to create “angel food cake parfaits” by cubing the cake and layering it with macerated berries and cream in individual glasses. You could also serve slightly warmed slices with a light fruit compote on the side for added warmth and flavor.
Preparation & Storage
Storing Leftovers
Leftover Pineapple Angel Food Cake is best stored in the refrigerator, especially if it has been topped with whipped cream or fresh fruit. Cover the baking dish tightly with plastic wrap or aluminum foil to prevent it from drying out. Alternatively, you can carefully transfer individual slices to an airtight container before refrigerating. Properly stored, leftovers can maintain their freshness and pleasant texture for up to 3 days.
Freezing
While this cake is most delightful when enjoyed fresh, freezing is a viable option for storing the untopped cake. Wrap individual slices or the entire cake very securely in plastic wrap, followed by a layer of aluminum foil, to prevent freezer burn. Label and date the package. Frozen cake can be stored for up to 1 month. Thaw the cake slowly in the refrigerator overnight before serving to maintain the best possible texture.
Reheating
Pineapple Angel Food Cake is traditionally served cold or at room temperature; reheating is generally not recommended as it can alter the delicate texture and make the cake heavy. If you prefer it slightly less chilled, simply allow a slice to sit at room temperature for about 15-20 minutes before enjoying. This gentle warming will bring out its soft, airy qualities without compromising its essence.
Frequently Asked Questions
-
Can I make pineapple angel food cake ahead of time?
Absolutely, and it’s a fantastic make-ahead dessert option that simplifies entertaining. You can bake the cake up to a day in advance. Once it has cooled completely, cover it tightly and store it at room temperature if it’s untopped, or refrigerate it if it has toppings. For the freshest presentation, add whipped cream and fruit garnishes just before serving.
-
Why is it important not to grease the angel food cake pan?
The unique structure of angel food cake relies on its ability to climb and cling to the sides of the pan as it bakes. This adhesion allows the batter to rise to its maximum height, creating that signature airy, cloud-like texture. If the pan is greased, the batter can slip, hindering its ability to rise properly and potentially resulting in a denser, shorter cake.
-
What is the best way to ensure my angel food cake is light and airy?
Achieving a light and airy texture involves a few key practices. Firstly, ensure you are not overmixing the batter once the wet ingredients are introduced to the dry mix; just combine until no dry streaks remain. Secondly, gently fold the ingredients rather than beating them vigorously. Finally, allowing the cake to cool completely before slicing and topping prevents it from collapsing. Proper cooling on a wire rack also aids in maintaining its structure.