One Layer Coconut Cake
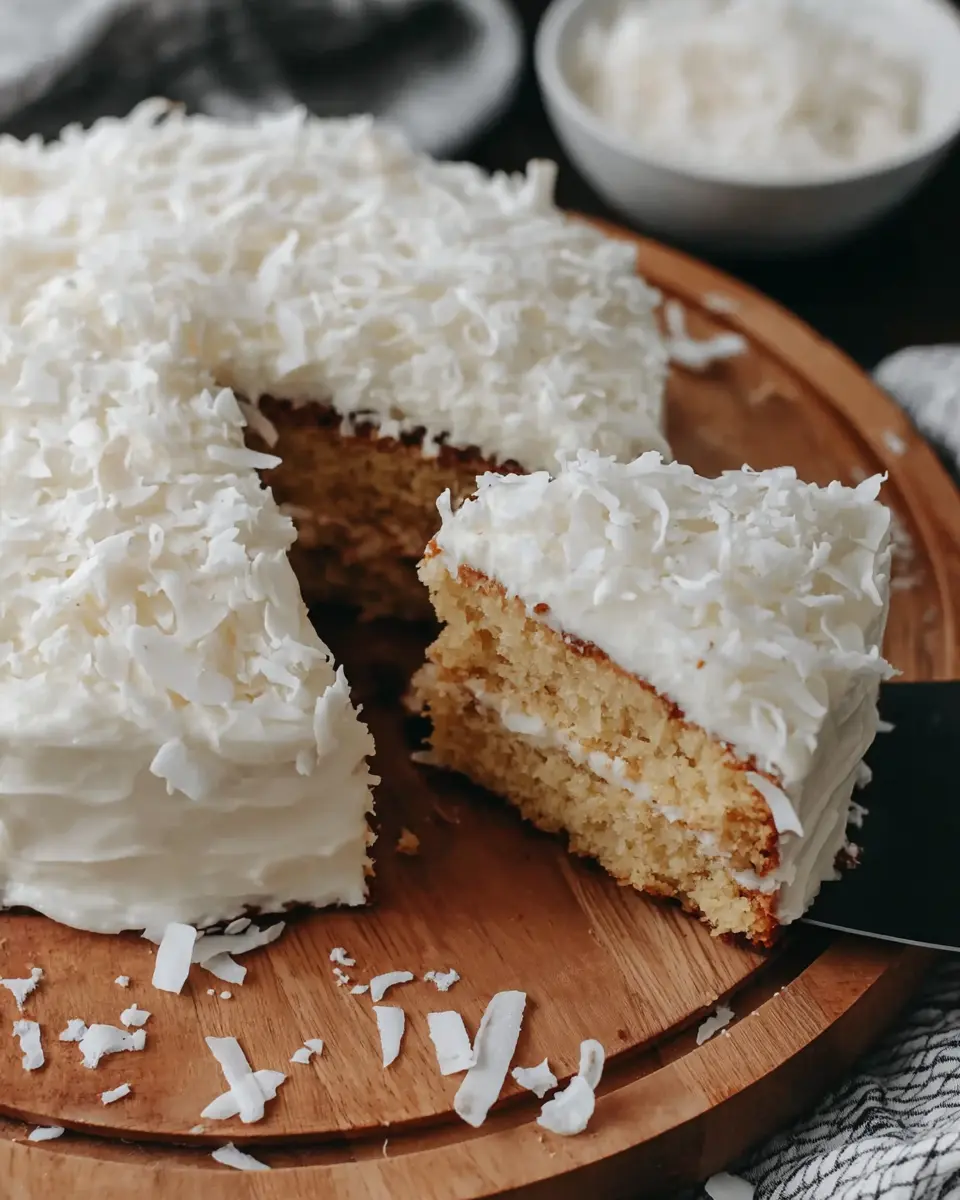
One Layer Coconut Cake is a tender, rich, small-batch dessert with deep coconut flavor, a soft crumb, and a creamy coconut buttercream finish. It is a lovely choice when you want a simple single layer cake that still feels special and bakery-worthy.
This is the kind of cake that fits beautifully into real life, perfect for a quiet celebration, a weekend bake, or a dessert you want to share without ending up with a towering layer cake in your kitchen.
Why You Will Love This Recipe
- Exceptional Flavor: Coconut shows up in more than one way, with richness from coconut milk in the batter, extra aroma from coconut extract, and a deeper toasted note from the shredded coconut folded right in, creating an unforgettable taste experience.
- Delicate Texture: The whipped egg white keeps the crumb light, while the butter, coconut oil, and smooth frosting make every slice feel soft, moist, and full of flavor, providing a satisfying mouthfeel that complements the rich coconut notes.
- Perfect Portion Size: This single-layer cake is just the right size for smaller gatherings or intimate moments, offering a special treat without the commitment of a large, multi-tiered confection.
- Simple Elegance: It’s an easy-to-make yet impressive dessert that feels both rustic and refined, making it suitable for casual get-togethers or more formal occasions where a touch of sweetness is desired.
- Versatile Appeal: Whether enjoyed on its own or paired with complementary flavors, this cake offers a delightful coconut profile that appeals to a wide range of palates, making it a guaranteed crowd-pleaser.
Ingredients You Need
The quality of your ingredients plays a crucial role in the final taste and texture of this One Layer Coconut Cake. Opting for fresh, high-quality components will elevate the subtle nuances of coconut and ensure a truly delightful baking experience. From the richness of full-fat coconut milk to the delicate structure provided by cake flour, each element contributes significantly to the overall success of this charming dessert.
One Layer Coconut Cake

A tender, rich, small-batch dessert with deep coconut flavor, a soft crumb, and a creamy coconut buttercream finish. It is a lovely choice when you want a simple single layer cake that still feels special and bakery-worthy.
- For the cake:
- 1 cup sifted cake flour
- 1/3 cup granulated white sugar
- 1/4 cup unsalted butter, softened
- 2 tablespoons coconut oil
- 1/3 cup full-fat unsweetened coconut milk
- 1 large egg yolk
- 1 large egg white
- 1 teaspoon coconut extract
- 1/2 teaspoon vanilla extract
- 1/2 teaspoon baking powder
- 1/2 teaspoon baking soda
- 1/8 teaspoon fine salt
- 1/8 teaspoon cream of tartar
- 1/3 cup sweetened shredded coconut, toasted and cooled
- For the frosting:
- 1/2 cup unsalted butter
- 2 1/3 cups powdered sugar, sifted
- 1/2 cup sweetened shredded coconut
- 2 tablespoons unsweetened coconut milk
- 1/2 teaspoon coconut extract
- 1Preheat the oven to 350°F (175°C). Coat a 6-inch round cake pan thoroughly with a flour-based baking spray, then set it aside.
- 2Place the sweetened shredded coconut for the cake in a small skillet over medium heat. Stir constantly until the coconut turns lightly golden. Remove it promptly from the heat to prevent scorching, then leave it to cool.
- 3In a medium mixing bowl, whisk together the sifted cake flour, baking powder, baking soda, and salt. Set this dry mixture aside.
- 4Using a hand mixer or a stand mixer fitted with the whisk attachment, beat the egg white with the cream of tartar on high speed for 2 to 3 minutes, or until stiff peaks form.
- 5In a separate bowl, using the paddle attachment, beat the softened butter, coconut oil, and sugar on medium speed until the mixture appears thoroughly blended. Add the egg yolk, coconut extract, vanilla extract, and coconut milk, then mix until fully incorporated.
- 6Add the dry ingredients gradually to the wet mixture, stirring only until combined. Fold in the whipped egg white gently, followed by the cooled toasted coconut, making sure the batter remains light and evenly mixed.
- 7Transfer the batter to the prepared cake pan and smooth the top. Bake for 30 to 35 minutes, or until a toothpick inserted into the center comes out clean.
- 8Remove the cake from the oven and allow it to cool completely on a wire rack before frosting.
- 9To prepare the frosting, beat the butter on medium-high speed until smooth and creamy. Reduce the mixer speed to low and add the sifted powdered sugar gradually. Add the coconut extract and coconut milk, then continue mixing until the frosting is smooth, cohesive, and well blended. Scrape down the bowl as needed, then stir or beat in the shredded coconut.
- 10Once the cake has cooled fully, spread the coconut frosting over the top and finish the cake evenly.
Keywords: Coconut Cake, One Layer Cake, Small Batch Cake, Buttercream, Toasted Coconut, Dessert
- cake flour: ensures a tender, light crumb for the cake.
- granulated sugar: provides sweetness without overpowering the coconut.
- unsalted butter: adds richness to both the cake batter and the creamy frosting.
- coconut oil: enhances the coconut flavor and contributes to the cake’s tenderness.
- full-fat unsweetened coconut milk: brings body, moisture, and a pronounced coconut profile.
- egg yolk: adds richness and contributes to a moist texture.
- egg white: whipped separately, it creates a lighter, airier crumb structure.
- coconut extract: intensifies the fragrant coconut aroma and taste.
- vanilla extract: rounds out the flavors, complementing the coconut beautifully.
- baking powder: helps the cake rise and achieve a pleasant texture.
- baking soda: works with acidic ingredients to provide leavening.
- fine salt: balances the sweetness and enhances the overall flavor.
- cream of tartar: stabilizes the whipped egg white for better volume and structure.
- sweetened shredded coconut: provides texture and an extra burst of coconut flavor in both cake and frosting.
- powdered sugar: creates a smooth, spreadable, and perfectly sweet buttercream.
- unsweetened coconut milk: adds moisture and flavor to the frosting.
The exact quantities for all these essential components are meticulously detailed within the accompanying recipe card.
Variations
This delightful One Layer Coconut Cake is wonderfully adaptable, allowing you to tailor it to various dietary needs and flavor preferences. For a delightful vegan rendition, you can easily substitute the butter with a high-quality vegan butter alternative and ensure your coconut milk is plant-based. The egg yolk and egg white can be replaced with a flax egg or a commercial egg replacer, ensuring the cake still achieves a lovely moist crumb. The frosting can also be adapted using vegan butter and a plant-based milk, maintaining that creamy coconut allure. This modification results in a cake that is just as rich and satisfying for those following a vegan lifestyle.
For those seeking a low-carb option, the approach requires a bit more finesse but is entirely achievable. You can replace the cake flour with a blend of almond flour and a touch of coconut flour to mimic the texture. Granulated sugar can be substituted with a keto-friendly sweetener like erythritol or monk fruit, ensuring the sweetness level is adjusted to your preference. When making the frosting, powdered erythritol or a similar low-carb sweetener will work as a substitute for powdered sugar, maintaining a smooth consistency and sweet finish. This variation allows for indulgence without the typical carbohydrate load.
If you are looking to infuse even more tropical notes, consider adding a touch of lime zest to both the cake batter and the frosting. The bright citrus flavor of lime pairs exceptionally well with the creamy sweetness of coconut, creating a more complex and refreshing taste profile. You could also incorporate a small amount of finely diced fresh pineapple into the batter before baking for pockets of juicy sweetness. These subtle additions can transform the cake into an exotic treat, perfect for a summer gathering or when you simply crave a taste of paradise.
How to Prepare One Layer Coconut Cake
Step 1: Preparing the Foundation
Begin by preheating your oven to the optimal temperature of 350°F (175°C), a crucial step for ensuring even baking and a perfectly risen cake. Simultaneously, take a 6-inch round cake pan and prepare it with meticulous care; a thorough coating of a quality flour-based baking spray or a combination of butter and flour will prevent any sticking and guarantee a clean release. This attention to detail at the outset is fundamental for a beautifully presented final product.
While the oven heats and the pan is readied, turn your attention to toasting the shredded coconut for the cake batter. Place the sweetened shredded coconut in a small, dry skillet over medium heat, stirring constantly. The goal is to achieve a light golden hue, coaxing out its natural nutty aroma and intensifying its flavor without burning it. This step is delicate; watch it closely, as coconut can transition from perfectly toasted to scorched in mere moments. Once it reaches that ideal golden stage, promptly remove it from the heat and spread it out on a plate or small baking sheet to cool completely. This ensures it won’t prematurely melt any fats in the batter and will retain its delightful toasted texture.
The careful preparation of both the oven and the pan sets the stage for a successful bake, while the toasting of the coconut adds an essential layer of depth to the cake’s flavor profile. These initial steps, though seemingly simple, are the bedrock upon which a perfectly executed One Layer Coconut Cake is built. Their thoroughness ensures that the cake will rise evenly, bake to perfection, and release flawlessly from its pan, allowing the frosting process to proceed without any complications.
Step 2: Combining the Dry Elements
In a medium-sized mixing bowl, gather all the dry ingredients for your cake batter. This includes the sifted cake flour, which is essential for achieving that signature delicate and tender crumb that distinguishes this cake. Along with the flour, add the baking powder and baking soda, the primary leavening agents that will help your cake rise to a beautiful height. Lastly, include the fine salt; this unassuming ingredient plays a vital role in balancing the sweetness and enhancing all the other flavors present in the batter, making the coconut notes sing.
Whisk these dry components together thoroughly until they are evenly distributed throughout the bowl. This even distribution is paramount because it ensures that the leavening agents and salt are spread consistently within the batter, preventing any pockets of unincorporated ingredients. An even mix means the cake will bake uniformly, avoiding dense spots or areas that taste overly salty. This meticulous combining of dry ingredients is a fundamental step in creating a cake with a fine, consistent texture.
This step, while straightforward, is critical for the structural integrity and overall texture of the final cake. By ensuring the dry ingredients are perfectly blended, you are setting the foundation for a cake that is light, airy, and consistently delicious from the first bite to the last. It’s a simple act of culinary organization that pays significant dividends in the baking process.
Step 3: Achieving Airy Egg Whites
In a separate, impeccably clean bowl, place the egg white. It is crucial that this bowl and any utensils used are free from any trace of fat or yolk, as even a tiny amount can prevent the egg white from reaching its full volume. Add the cream of tartar to the egg white; this acidic stabilizer is instrumental in helping the egg white whip up into a stable, voluminous foam. It aids in creating stronger protein networks that trap air effectively.
Using a hand mixer or a stand mixer fitted with the whisk attachment, begin beating the egg white on high speed. You will notice it gradually becoming frothy, then thickening and turning opaque. Continue beating until stiff peaks form. This means that when you lift the whisk, the egg white will stand up straight and hold its shape without collapsing. This step is vital for incorporating air into the cake batter, which is what gives the finished cake its light, tender, and almost ethereal texture, preventing it from becoming dense.
The process of whipping egg whites separately is a technique borrowed from classic baking, and it is particularly beneficial for rich batters like this one, which contains butter and oil. The air captured in the egg white foam lightens the overall density of the cake, creating a delicate crumb that contrasts beautifully with the richness of the coconut. Achieving stiff peaks indicates that you have successfully incorporated a significant amount of air, which will translate directly into a lighter, more enjoyable cake texture.
Step 4: Building the Wet Mixture Foundation
In another mixing bowl, typically a larger one to accommodate subsequent additions, cream together the softened unsalted butter and the coconut oil until they are well combined and have a creamy consistency. The butter should be softened, not melted, to ensure it emulsifies properly with the sugar. Next, gradually add the granulated sugar to this butter and oil mixture. Beat them together on medium speed until the mixture becomes light in color and fluffy in texture. This creaming process is essential for incorporating air into the batter, which contributes significantly to the cake’s final texture and lift.
Once the butter, oil, and sugar are properly creamed, it’s time to incorporate the other wet ingredients. Add the egg yolk to the mixture; the yolk contributes richness and helps to bind the ingredients together, adding to the cake’s moistness. Follow this with the coconut extract and vanilla extract. These extracts are concentrated flavorings that will provide the signature aroma and taste of coconut, with the vanilla acting as a complementary note. Finally, pour in the full-fat unsweetened coconut milk. Mix everything together until the entire wet mixture appears smooth, homogenous, and fully combined. The color should be uniform, and there should be no visible streaks of individual ingredients.
This stage of building the wet ingredients is where the cake’s foundational flavor and moisture are established. The combination of fats (butter and coconut oil), sweeteners, eggs, and liquids creates a rich base that will carry the coconut flavor beautifully. Ensuring each component is thoroughly incorporated at this stage is key to a well-emulsified batter that will bake into a cohesive and delicious cake. The smoothness of this mixture directly impacts the final texture and evenness of the baked cake, making it a critical step in the preparation process. It’s this careful amalgamation that sets the stage for the dry ingredients to be incorporated seamlessly.
Step 5: Bringing It All Together
Now, it’s time to gently combine the dry and wet components of your cake batter. Gradually add the whisked dry ingredients (from Step 2) to the wet ingredients (from Step 4), mixing on a low speed or by hand with a spatula. Be careful not to overmix at this stage; continue mixing only until the ingredients are just combined and no dry streaks of flour remain visible. Overmixing can develop the gluten in the flour too much, leading to a tougher cake texture, which is something we want to avoid.
Following the incorporation of the dry ingredients, you will delicately fold in the whipped egg whites (from Step 3). Use a spatula to gently scoop from the bottom of the bowl upwards, turning the batter over itself. The goal here is to incorporate the airy egg whites without deflating them, preserving the lightness they bring to the batter. Once the egg whites are mostly incorporated, gently fold in the cooled toasted coconut. This addition provides wonderful texture and an intensified coconut flavor throughout the cake. Be careful not to overmix after adding the coconut, maintaining the airy consistency.
This meticulous folding process is vital for achieving the perfect cake texture. The light hand used to incorporate the whipped egg whites ensures that air bubbles are preserved, contributing to a tender and delicate crumb. Similarly, folding in the toasted coconut gently ensures that these flavorful morsels are distributed evenly without compromising the batter’s aeration. The final batter should be light and airy, with the subtle crunch of toasted coconut interspersed throughout, a testament to the careful integration of all components.
Step 6: Baking and Cooling for Perfection
Carefully pour the prepared cake batter into the prepared 6-inch round cake pan. Use your spatula to gently smooth the top surface of the batter, ensuring it is relatively even. This will help the cake bake with a level surface, requiring less trimming later. Place the pan into the preheated oven, centering it on the middle rack to ensure the most even heat distribution.
Bake for approximately 30 to 35 minutes. The exact baking time can vary slightly depending on your oven, so it’s important to monitor the cake as it bakes. To check for doneness, insert a toothpick or a thin skewer into the center of the cake. If it comes out clean, with no wet batter clinging to it, the cake is ready. You should also notice the cake pulling away slightly from the sides of the pan, and the top should spring back gently when lightly touched.
Once the cake is baked to perfection, remove it from the oven. Allow the cake to cool in the pan for about 10-15 minutes before attempting to invert it onto a wire rack. This initial cooling period in the pan helps the cake set further and prevents it from breaking when you release it. After this short period, carefully invert the cake onto the wire rack to cool completely. It is absolutely crucial that the cake is entirely cool before you even think about frosting it. Applying frosting to a warm cake will cause the buttercream to melt, resulting in a messy, sliding layer of frosting rather than a smooth, elegant finish. Patience during the cooling process is key to a beautifully frosted cake.
Step 7: Crafting the Coconut Creamy Frosting
Begin the frosting preparation by taking the softened unsalted butter and beating it in a bowl with an electric mixer until it is exceptionally smooth and creamy. This foundational step ensures a lump-free frosting that spreads like a dream. Once the butter reaches this perfect creamy consistency, reduce the mixer speed to low. Gradually add the sifted powdered sugar, a cup at a time, mixing until each addition is fully incorporated before adding more.
After the majority of the powdered sugar has been incorporated and the mixture is starting to thicken, add the coconut extract and the specified amount of unsweetened coconut milk. These liquid ingredients will help to achieve the perfect frosting consistency while infusing it with that characteristic coconut flavor. Continue mixing until the frosting is smooth, cohesive, and has reached a spreadable texture. Scrape down the sides of the bowl periodically with a spatula to ensure all ingredients are incorporated evenly, leading to a uniform and velvety frosting.
Finally, stir in the sweetened shredded coconut into the frosting. This addition provides a delightful textural contrast and an extra layer of coconut goodness that complements the cake beautifully. Once the frosting is smooth and the coconut is well distributed, it is ready to be applied. Generously spread this luscious coconut frosting evenly over the completely cooled cake, creating a soft, snowy finish that is as delightful to look at as it is to eat. The combination of the smooth frosting and the subtle texture of the shredded coconut creates a truly irresistible topping.
Pro Tips for One Layer Coconut Cake
Toast Coconut Wisely: When toasting the shredded coconut for the cake and frosting, always keep a close eye on it. Coconut can go from perfectly golden brown to an unappetizing dark brown or burnt very quickly, often within seconds. Stir constantly and remove it from the heat as soon as it reaches a pale golden hue. This careful attention ensures a pleasant nutty flavor without any bitterness.
Absolute Coolness is Key: Patience is paramount when it comes to frosting. Ensure your cake layer is completely cool to the touch before applying the buttercream. Frosting a warm cake will inevitably lead to a melted, sliding disaster, as the fat in the frosting will succumb to the heat. A cool cake provides a stable base for a smooth, professional-looking finish.
Gentle Folding Technique: The step involving folding the whipped egg whites into the batter is critical for achieving a light and airy crumb. Use a light hand with your spatula; fold in a motion that lifts the batter from the bottom and turns it over onto itself. The aim is to incorporate the egg whites without beating out all the air that you worked so hard to create. This preserves the lightness crucial for this delicate cake.
Quality of Coconut Milk Matters: For the most robust coconut flavor and the richest, most tender crumb, always opt for full-fat unsweetened coconut milk. Lighter versions might work in a pinch, but they won’t impart the same depth of flavor or contribute the same level of moisture and richness to both the cake and the frosting. The full-fat variety truly elevates the coconut essence of the cake.
Pan Size Precision: Using a 6-inch cake pan is specified for a reason; it dictates the baking time and the final cake height. If you opt for a different-sized pan, be prepared to adjust your baking time accordingly. A wider pan will yield a thinner cake that bakes faster, while a deeper or smaller pan will require more time in the oven. Always rely on the toothpick test for doneness rather than strictly adhering to the clock.
Serving Suggestions for One Layer Coconut Cake
Decoration
The topping of this One Layer Coconut Cake is where you can really let your creativity shine. A generous and even spread of the creamy coconut buttercream is the classic choice, providing a soft, snowy visual appeal that hints at the cake’s tropical essence. For an added touch of elegance and texture, sprinkle the top with extra sweetened shredded coconut once the frosting is applied. You can also create a beautiful pattern by gently pressing whole or flaked coconut onto the sides of the cake before the frosting fully sets.
Consider using toasted coconut for decoration as well; its slightly deeper color offers a lovely contrast to the pale frosting. Fresh edible flowers, such as violets or pansies, can add a pop of color and a delicate, sophisticated look. If you are serving this cake for a special occasion, a scattering of toasted slivered almonds or macadamia nuts around the base of the cake can provide a complementary crunch and nutty flavor. Even a simple dusting of powdered sugar over a stencil can create a charming, patterned effect that elevates the presentation without much effort.
For a touch of vibrant contrast, fresh fruit can be artfully arranged on top. Think of delicate slices of ripe mango, plump raspberries, or even a few strategically placed maraschino cherries. A light drizzle of melted white chocolate or even a thin caramel sauce can add another layer of visual interest and flavor complexity. The key is to complement the coconut theme rather than overpowering it, creating a dessert that is as beautiful to behold as it is delicious to consume. The natural beauty of the coconut and the creamy frosting provides a wonderful canvas for your decorative touches.
Side Dishes
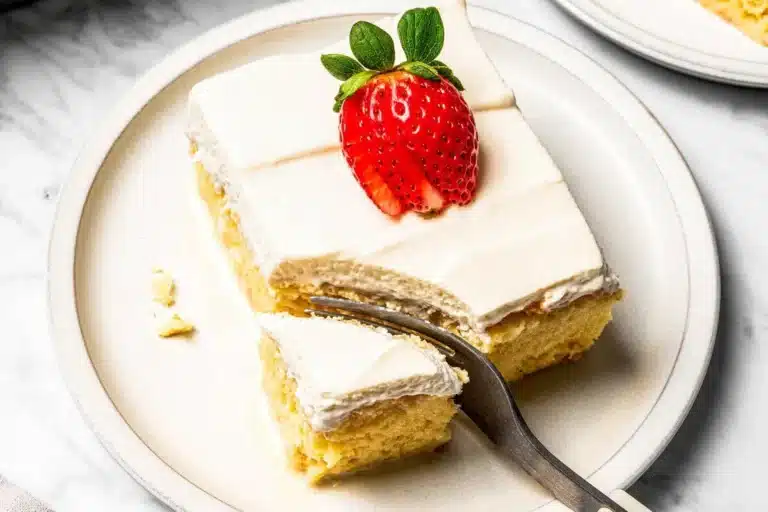
This One Layer Coconut Cake shines brightly on its own, but it can also be beautifully accompanied by a few select side dishes that enhance its tropical charm. Fresh berries, such as ripe strawberries, juicy raspberries, or sweet blueberries, are a perfect complement. Their natural tartness and vibrant flavors cut through the richness of the cake and frosting, offering a refreshing balance that awakens the palate. Serving a small bowl of mixed berries alongside a slice of cake creates a delightful contrast in textures and tastes.
For a beverage pairing, a freshly brewed cup of hot coffee or a fragrant cup of black tea makes for a simple yet elegant accompaniment. The warmth and subtle bitterness of coffee can highlight the sweet, creamy notes of the coconut cake, while tea offers a comforting embrace. Alternatively, a chilled glass of milk, or even a refreshing coconut water, can enhance the tropical theme and provide a cooling contrast on a warm day. The simplicity of these beverage choices allows the cake to remain the star of the show.
If you are looking for something a bit more substantial to serve alongside, consider a light fruit salad featuring pineapple, mango, and kiwi. The tropical fruits echo the cake’s flavor profile, creating a cohesive menu. Another option is a small scoop of vanilla bean or mango sorbet, which provides a cool, refreshing element that complements the cake’s sweetness without being overly heavy. The goal is to choose accompaniments that enhance, rather than compete with, the delicate coconut flavors of the cake, creating a harmonious dessert experience.
Creative Serving Ideas
Transform your One Layer Coconut Cake into a delightful afternoon tea experience by serving smaller, elegant portions alongside delicate finger sandwiches and a pot of specialty tea. The cake’s refined flavor profile makes it a perfect addition to such a sophisticated spread, offering a sweet conclusion to lighter fare. You can also present individual slices warmed slightly and topped with a dollop of fresh whipped cream infused with a hint of coconut extract for an extra layer of flavor and luxuriousness.
For a fun, casual gathering, consider deconstructing the cake slightly. Serve slices of the cake with a side of the coconut buttercream for dipping, and perhaps a small bowl of toasted coconut flakes or candied pineapple bits for guests to customize their own experience. This interactive approach adds an element of playfulness and allows everyone to enjoy the cake’s components in their preferred way. It’s a delightful way to engage guests and make the dessert feel even more special and personal.
Another imaginative idea is to incorporate the cake into a dessert board. Cube the cake and arrange it alongside other complementary treats such as no-bake mango truffles, fresh fruit skewers, and perhaps some shortbread cookies. This creates a visually appealing and diverse dessert spread that offers something for everyone. A few small bowls of chocolate sauce or caramel for dipping can add an extra touch of indulgence. This approach is particularly effective for parties or gatherings where variety is desired, showcasing the cake as a beautiful centerpiece within a larger dessert landscape.
Preparation & Storage
Storing Leftovers
Because this One Layer Coconut Cake is adorned with a creamy buttercream frosting, it is best to store any leftovers covered in the refrigerator. This helps to maintain the frosting’s structure and prevents it from becoming too soft at room temperature, especially in warmer climates. A cake dome or an airtight container is ideal for this purpose, ensuring the cake is protected from drying out and absorbing any unwanted odors from other foods in the refrigerator. Properly stored, the cake should remain delightful for up to 4 days.
To enjoy the cake at its best after refrigeration, it’s recommended to let a slice sit at room temperature for about 20 to 30 minutes before serving. This short resting period allows the crumb to soften and the frosting to regain its creamy, spreadable texture. The cake will taste richer and more nuanced when it’s not served straight from the cold. This gentle warming process ensures you experience the cake’s intended soft texture and full flavor profile, making each bite as enjoyable as the first.
Avoid exposing the cake to excessive heat or direct sunlight, as this can cause the frosting to melt prematurely. If you live in a very warm environment, keeping it in the refrigerator even for short periods might be necessary, but always remember to allow it to come back to a pleasant eating temperature before indulging. Proper storage is key to preserving the delightful quality and flavor of this charming coconut cake, ensuring you can savor every last bite.
Freezing
For longer-term storage, the unfrosted cake layer of this One Layer Coconut Cake freezes remarkably well. Once the cake has completely cooled, wrap it tightly in several layers of plastic wrap, ensuring no air can reach the cake. Follow this by an additional layer of aluminum foil or an airtight freezer bag to provide maximum protection against freezer burn. When stored in this manner, the unfrosted cake can be kept frozen for up to 2 months, maintaining its texture and flavor.
When you are ready to thaw the frozen cake, transfer it from the freezer to the refrigerator. Allow it to thaw overnight, which is the most gentle and effective method. Once it has fully thawed in the refrigerator, you can then bring it closer to room temperature before frosting it according to the recipe instructions. This ensures that the frosting applies smoothly and evenly without melting on contact with a cake that is still too cold.
If you wish to freeze leftover frosted slices, the process is similar, though the frosting might be slightly more susceptible to textural changes. Wrap each frosted slice very well, using plastic wrap and then a layer of foil or a freezer-safe bag. Frozen frosted slices should be consumed within about 1 month for the best quality. Thaw these slices in the refrigerator as well, allowing them to reach room temperature before enjoying.
Reheating
This One Layer Coconut Cake is designed to be enjoyed at room temperature, and therefore, it does not typically require reheating. The delicate crumb and creamy frosting are best appreciated when they are not subjected to additional heat, which can alter their texture and consistency. Reheating can cause the buttercream to melt, making it greasy and losing its delightful smooth finish. It can also dry out the cake itself, diminishing its tender quality.
Instead of reheating, the recommended approach for serving leftover cake is simply to allow it to warm gently on the counter. As mentioned previously, letting a slice sit at room temperature for about 20 to 30 minutes is usually sufficient to bring it back to an optimal eating temperature. This gentle warming ensures that the frosting becomes soft and spreadable, and the cake crumb softens, making it moist and tender. This method preserves the intended texture and flavor profile of the cake, ensuring a delightful experience.
If you are in a hurry, you can shorten the resting time slightly, but avoid placing the cake in a microwave or oven, as this will inevitably compromise its quality. The charm of this cake lies in its delightful, unfussy nature, and that extends to how it is best served after storage. Embracing the room temperature approach is key to savoring the true essence of this delicious One Layer Coconut Cake.
Frequently Asked Questions
-
Can I make this cake ahead of time?
Yes, absolutely! This One Layer Coconut Cake is an excellent make-ahead dessert. You can bake the cake layer a day in advance and store it tightly wrapped once it has fully cooled. This ensures it stays fresh and moist. Frosting can be done the following day, or you can frost it the same day and then chill it lightly before serving for a firmer frosting. Its structure holds up very well, making it ideal for event planning or when you simply want to reduce day-of stress.
-
Do I need full-fat coconut milk for this cake?
For the richest flavor and the most tender, moist texture, using full-fat unsweetened coconut milk is strongly recommended for this cake. It contributes significantly to the luxurious body and pronounced coconut profile of both the batter and the frosting. While lighter coconut milk might be used in a pinch, it can result in a less decadent batter and a finished crumb that may not be quite as moist or flavorful. The full-fat variety truly makes a difference in achieving that signature coconut indulgence.
-
Why is the egg white whipped separately for this cake?
The practice of whipping the egg white separately and then folding it into the batter is a deliberate technique employed to prevent the cake from feeling too dense. Given that this cake’s batter is already rich with ingredients like butter, coconut oil, and coconut milk, the whipped egg white introduces an essential element of lift and air. This step is crucial for creating a lighter, softer, and more delicate final texture, ensuring the cake is tender and not heavy or gummy. It’s a key factor in achieving that desirable bakery-style crumb.