Irresistible Mulberry Mousse Cake Filling
Have you ever tasted a dessert that transports you to a blissful paradise with just one bite? That’s the magic of Mulberry Mousse Cake Filling! This luscious filling combines the sweet, tangy flavors of mulberries with the smooth, creamy texture of mousse, creating a dessert experience that is truly unforgettable. Picture yourself serving a slice of cake layered with this indulgent filling to your loved ones, instantly becoming the star of the gathering. Isn’t that what every dessert lover dreams of?
This recipe for Mulberry Mousse Cake Filling is not just about flavor; it’s also remarkably easy to prepare. Using fresh mulberries creates a bright pop of color in your cake, adding an artistic touch to your culinary creation. The combination of cream cheese and whipped cream gives it a lightness that contrasts beautifully with the berry’s richness. With minimal preparation required, this recipe offers both simplicity and sophistication.
Whether you’re celebrating a special occasion or just want to treat yourself on a regular Tuesday, this mousse filling fits the bill. It’s versatile, too—you can easily modify it to suit your taste or dietary preferences. Can you already envision how this stunning filling complements a classic sponge or chocolate cake? Join me on this delicious journey as we explore the art of crafting Mulberry Mousse Cake Filling that’s sure to impress.
This exquisite Mulberry Mousse Cake Filling promises a dessert experience that is both sophisticated and delightfully easy to achieve. Its vibrant color and unique flavor profile make it a standout choice for any baker looking to elevate their creations. The journey to creating this delectable filling is filled with simple yet rewarding steps, ensuring a perfect outcome every time.
Why You Will Love This Recipe
- Irresistible Flavor: The delightful balance of sweet, slightly tart mulberries with the creamy richness of cream cheese creates a complex and utterly delicious taste sensation that will have everyone asking for seconds.
- Effortless Preparation: Despite its luxurious feel, this mousse filling is surprisingly straightforward to make, requiring minimal fuss and common kitchen ingredients, making it accessible even for beginner bakers.
- Remarkable Versatility: This filling isn’t limited to just one type of cake; it shines beautifully in sponge cakes, chocolate cakes, or even as a standalone dessert, offering endless possibilities for your culinary imagination.
- Customizable Sweetness: The natural sweetness of mulberries can vary, allowing you to easily adjust the overall sweetness of the filling to perfectly match your preferences or the cake it will accompany.
- Feather-Light Texture: Achieved through the careful folding of whipped cream, the mousse boasts an airy, cloud-like consistency that melts in your mouth, providing a delightful contrast to cake layers.
Ingredients You Need
The secret to an outstanding Mulberry Mousse Cake Filling lies in the quality of its ingredients. Opting for fresh, ripe mulberries will undoubtedly yield the most vibrant and authentic flavor. Ensuring your cream cheese is at room temperature is crucial for achieving a smooth, lump-free base that integrates seamlessly with the other components. Proper chilling of the heavy cream before whipping is also key to achieving that perfectly light and stable mousse texture. These foundational elements are vital for the success of this exquisite dessert filling.
Mulberry Mousse Cake Filling

A luscious and versatile mousse filling combining sweet mulberries with cream cheese and whipped cream, perfect for cakes and desserts.
- 1 cup Mulberry puree (made from cooked, blended mulberries)
- 2 tablespoons Lemon juice (freshly squeezed for best flavor)
- 8 ounces Cream cheese (at room temperature for easy mixing)
- 1 cup Whipped cream (heavy cream whipped to stiff peaks)
- 1 tablespoon Gelatin (dissolved in warm water)
- 1Start by gathering all your ingredients. Ensure the cream cheese is at room temperature to mix smoothly. If you’re using fresh mulberries, wash them thoroughly and set aside.
- 2In a saucepan over medium heat, cook the mulberries until they break down, about 10 minutes. Stir occasionally to prevent sticking. Once cooked, transfer the mulberries to a blender and puree until smooth. Allow this mixture to cool.
- 3In a mixing bowl, combine the cooled mulberry puree with freshly squeezed lemon juice.
- 4In a separate bowl, beat the room-temperature cream cheese until smooth and creamy.
- 5Gradually add the mulberry mixture to the cream cheese, mixing until fully integrated.
- 6In another bowl, whip the heavy cream until stiff peaks form.
- 7Gently fold the whipped cream into the mulberry cream cheese mixture.
- 8In a small bowl, dissolve the gelatin in a few tablespoons of warm water until completely dissolved.
- 9Gradually mix the dissolved gelatin into the mousse mixture, ensuring it is well blended without lumps.
- 10Transfer the mousse filling into a container, cover, and chill it in the refrigerator for at least 2 hours.
Keywords: Cake Filling, dessert, Fruit Dessert, Mousse Recipe, Mulberry Mousse
- mulberry puree: pureed mulberries, ideally fresh and cooked down to concentrate their flavor.
- lemon juice: freshly squeezed to provide a bright counterpoint to the sweetness of the berries.
- cream cheese: full-fat cream cheese, softened to room temperature for easy and smooth incorporation.
- whipped cream: heavy whipping cream, whipped to stiff peaks to create the airy mousse texture.
- gelatin: unflavored gelatin, dissolved in warm water to help stabilize the mousse and ensure it sets beautifully.
The precise quantities for these essential ingredients are conveniently detailed within the provided recipe card, ensuring you have all the necessary measurements at your fingertips for perfect execution.
Variations
For those seeking a completely plant-based delight, transforming this Mulberry Mousse Cake Filling into a vegan masterpiece is wonderfully achievable. You can substitute the traditional cream cheese with a high-quality vegan cream cheese alternative, often made from cashews or almonds, ensuring it’s smooth and unsweetened. For the whipped cream component, full-fat coconut cream, chilled overnight and then whipped, provides an excellent dairy-free substitute that lends a subtle richness. When it comes to the gelatin, a culinary grade agar-agar powder can be used as a vegan setting agent; remember to follow its specific activation instructions, as it typically requires boiling.
If you’re following a low-carbohydrate or ketogenic lifestyle, this filling can be adapted with a few smart swaps. Instead of relying on natural fruit sugars, you can sweeten the mulberry puree with a low-carb sweetener like erythritol, xylitol (use caution if you have pets, as it’s toxic to dogs), or stevia, adjusting to your taste. When selecting cream cheese, ensure it’s full-fat and has minimal added sugars. For the whipped cream, heavy cream is naturally low in carbs and can be sweetened with your chosen low-carb sweetener. This allows for a guilt-free indulgence that doesn’t compromise on flavor or texture.
Experimenting with complementary flavors can also lead to exciting new variations of this already delightful filling. Consider infusing the mulberry puree with a touch of lavender for an elegant floral note, or perhaps a hint of cardamom for a warm, exotic spice. A small amount of finely grated dark chocolate folded into the mousse just before chilling can add a decadent depth. Alternatively, a drizzle of balsamic glaze can introduce a sophisticated tang that beautifully cuts through the sweetness, offering a gourmet twist that will impress any palate.
How to Prepare Mulberry Mousse Cake Filling
Step 1: Preparing the Mulberry Base
Begin by meticulously washing your fresh mulberries under cool running water, gently removing any stems or debris. Place the cleaned berries into a medium saucepan. Add a small splash of water if the berries seem dry, though they often release enough of their own juice as they cook. Over medium heat, bring the berries to a gentle simmer, stirring occasionally. The goal here is to coax them into softening and releasing their vibrant juices, a process that typically takes about 10 to 15 minutes.
As the mulberries cook, they will break down into a soft, pulpy consistency. Continue to stir and gently mash any larger pieces with your spoon to ensure even cooking and a smooth purée later on. Once the berries have completely softened and have transformed into a thick, jam-like mixture, remove the saucepan from the heat. This concentrated berry mixture forms the flavorful heart of your mousse, so take your time to ensure it cooks down nicely.
Transfer the cooked mulberry mixture to a blender or food processor. Process until you achieve a completely smooth purée, free from any seeds or skins. You may need to scrape down the sides of the blender a few times to ensure everything is incorporated. Once smooth, set this vibrant mulberry purée aside to cool completely to room temperature before proceeding to the next stage of the recipe; this is a critical step to prevent it from affecting other ingredients.
Step 2: Incorporating the Tangy Element
Once your luscious mulberry purée has cooled to room temperature, it’s time to introduce the bright, zesty counterpoint that elevates its flavor profile. Measure out two tablespoons of freshly squeezed lemon juice. The acidity of the lemon juice is essential for cutting through the sweetness of the mulberries and the richness of the cream cheese, creating a more balanced and complex taste. Using freshly squeezed juice rather than bottled will provide a cleaner, more vibrant citrus note.
Add the freshly squeezed lemon juice directly into the cooled mulberry purée. Stir gently to combine the two components thoroughly. This simple addition is incredibly impactful, ensuring that the final mousse filling doesn’t taste overwhelmingly sweet and instead offers a delightful interplay of fruity sweetness and subtle tartness. Taste the mixture at this point; you might find it perfectly balanced or perhaps want to add another tiny squeeze of lemon if your mulberries were particularly sweet.
Ensure the lemon juice is fully incorporated into the purée, creating a uniform mixture. This vibrant, tangy mulberry mixture will be the star flavor of your mousse. Set this bowl aside while you prepare the creamy base for your filling. The anticipation of combining these elements builds as you move closer to creating your delightful Mulberry Mousse Cake Filling.
Step 3: Crafting the Creamy Foundation
The next crucial step in building your Mulberry Mousse Cake Filling is to prepare the rich, creamy base. Take 8 ounces of full-fat cream cheese and ensure it has been left at room temperature for at least an hour, ideally two. This softening is absolutely critical for achieving a smooth, lump-free consistency when you begin mixing. If the cream cheese is cold, it will resist blending, leading to an unappealing texture in your final mousse.
Place the softened cream cheese into a medium-sized mixing bowl. Using an electric mixer, either a hand mixer or a stand mixer with a paddle attachment, beat the cream cheese on medium speed. Continue beating until the cream cheese is completely smooth, creamy, and free of any lumps. You should be able to easily spread it with a spatula; this indicates it’s ready to be combined with other ingredients without developing a grainy texture. Scrape down the sides of the bowl periodically to ensure even beating.
Once the cream cheese is perfectly smooth and resembles soft butter, it is ready to be integrated with the other components. This smooth, yielding cream cheese forms the essential velvety foundation upon which the airy mousse will be built. Proper creaming of the cream cheese is paramount for a luxurious mouthfeel in your finished cake filling.
Step 4: Marrying the Flavors
Now it’s time to bring together the tangy fruit component and the creamy base. Take the bowl containing your smoothly beaten cream cheese. Gradually begin to add the cooled, lemon-infused mulberry purée to the cream cheese. It’s best to add it in two or three additions rather than all at once. This gradual addition helps to ensure a thorough and even incorporation without overwhelming the cream cheese.
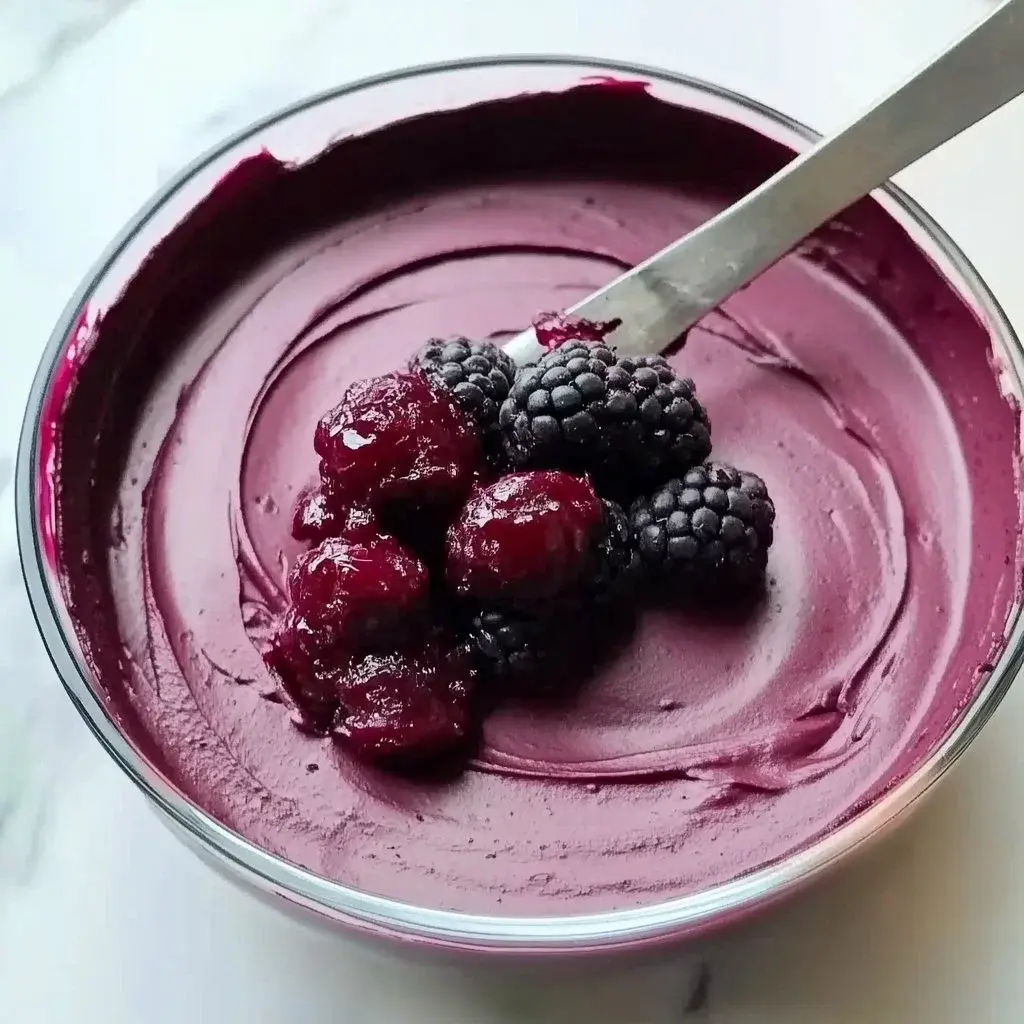
Using your electric mixer on a low to medium speed, continue to beat the mixture. As you mix, the vibrant purple of the mulberry purée will gradually blend with the pale cream cheese, creating a beautiful, uniform pinkish-purple hue. Continue mixing until all the mulberry purée is fully integrated and the color is consistent throughout the bowl. Be sure to scrape down the sides and bottom of the bowl with a spatula a few times to capture any stray bits of cream cheese or purée, ensuring a homogenous blend.
The result of this step is a smooth, richly colored, and beautifully flavored filling base. It will be thick and luscious, hinting at the wonderful mousse it is about to become. Take a moment to appreciate the gorgeous color and the enticing aroma, a testament to the natural goodness of the mulberries and the creamy foundation you’ve created. This mixture is now ready for the final, airy transformation.
Step 5: Achieving the Airy Mousse Texture
To impart that signature light and airy quality to your Mulberry Mousse Cake Filling, you’ll need to whip some heavy cream to perfection. Pour 1 cup of chilled heavy whipping cream into a separate, clean mixing bowl. It’s crucial that the cream is very cold; this is what allows it to whip up properly and achieve stiff peaks. You can even chill your mixing bowl and whisk attachment in the freezer for about 10-15 minutes beforehand for optimal results.
Using an electric mixer, begin whipping the heavy cream on medium speed. As the cream starts to thicken, you can gradually increase the speed to medium-high. Continue whipping until you achieve what are known as “stiff peaks.” This means that when you lift the beaters out of the cream, the peaks that form stand up straight without curling over or drooping. Be careful not to over-whip, as this can turn the cream into butter.
Once your heavy cream has reached the perfect stiff peak consistency, set it aside momentarily. This aerated cream is the key to the luxurious, cloud-like texture of your mousse, ensuring it is delightful and not dense. Its volume and lightness will be gently folded into the richer mulberry and cream cheese mixture in the next step.
Step 6: Gently Folding for Perfection
The art of creating a light mousse relies heavily on how you combine the whipped cream with the denser berry mixture. This technique is called “folding,” and it’s designed to preserve the airiness of the whipped cream while still incorporating it thoroughly. Take your bowl of perfectly whipped cream and spoon about one-third of it into the bowl containing the mulberry and cream cheese mixture. This initial addition acts as a “looser” to the denser base, making it easier to incorporate the rest of the cream.
Using a large rubber spatula, gently fold the whipped cream into the mulberry mixture. To fold, slice down through the center of the mixture with the spatula, then sweep across the bottom of the bowl, and bring the mixture up and over the top. Rotate the bowl as you go, repeating this gentle motion. The goal is to combine the ingredients without deflating the whipped cream, which would result in a denser mousse. Continue folding until the mixture is just combined, with no streaks of whipped cream visible but still looking light and fluffy.
Repeat this process with the remaining whipped cream, adding it in two more additions and folding gently after each. Take your time and be patient; this gentle technique is what guarantees a wonderfully light and airy mousse. Once everything is just combined and the color is uniform, you will have a beautiful, fluffy Mulberry Mousse Cake Filling, ready for its final setting stage.
Step 7: Stabilizing the Mousse
To ensure your delightful Mulberry Mousse Cake Filling holds its shape perfectly within your cakes and doesn’t become too liquid, a stabilizing agent is crucial. In a small, heatproof bowl, sprinkle 1 tablespoon of unflavored gelatin over 2-3 tablespoons of warm water. Stir gently with a spoon until the gelatin granules are fully dissolved and the mixture is clear and slightly syrupy. It’s important to use warm, not hot, water, as very hot water can degrade the gelatin’s setting power.
Allow the dissolved gelatin mixture to cool slightly for a minute or two. It should still be liquid but not piping hot. Now, take a small ladle or spoon and carefully add about two tablespoons of your already mixed mousse (the mulberry and cream cheese blend) into the gelatin mixture. Stir this gently to combine. This step, known as “tempering,” gradually brings the temperature of the gelatin closer to that of the main mousse mixture, preventing it from seizing or clumping when added.
Once tempered, slowly and steadily stream the gelatin mixture into the main bowl of your mulberry mousse. While streaming the gelatin in, continue to mix the mousse gently but continuously with your spatula or electric mixer on its lowest speed. This ensures the gelatin is evenly distributed throughout the entire mixture, providing a stable yet tender set for your mousse filling. Proper incorporation of the gelatin is key to a mousse that holds its form beautifully.
Step 8: Chilling to Perfection
With all the components perfectly blended and the stabilizer incorporated, your Mulberry Mousse Cake Filling is now ready to set and develop its exquisite texture. Pour the mousse mixture into a clean, airtight container. It’s important to use a container that is wide enough to allow for even chilling. Alternatively, if you plan to use it directly for filling cakes soon, you could even pour it into your prepared cake layers within a springform pan lined with acetate or parchment paper.
Cover the container tightly with plastic wrap, pressing it down gently onto the surface of the mousse to prevent a skin from forming. If using a springform pan, cover the top securely with plastic wrap. Place the container or assembled cake into the refrigerator. Allow the mousse to chill for a minimum of 2 to 3 hours, or preferably until it is firmly set. The chilling time is essential for the gelatin to work its magic, firming up the mousse to a perfect, sliceable consistency.
Once properly chilled, your Mulberry Mousse Cake Filling will have transformed into a luscious, spoonable, yet stable delight. It will be smooth, creamy, and hold its shape beautifully when spread or layered within your cakes. The vibrant color will have deepened slightly, and the flavors will have melded together into a harmonious blend of sweet, tart, and creamy notes. This perfectly set mousse is now ready to be the star ingredient in your next cake creation.
Pro Tips for Mulberry Mousse Cake Filling
Room Temperature is Key: For the smoothest possible cream cheese base, always ensure your cream cheese is at true room temperature. This allows it to cream beautifully without any lumps, which is essential for a velvety mousse texture. Leaving it out for 1-2 hours before starting is usually sufficient.
Don’t Over-Whip: While you want stiff peaks for your whipped cream, over-whipping can cause it to become grainy and even turn into butter. Pay close attention and stop as soon as firm peaks form to maintain that light, airy quality.
Gentle Folding is Crucial: The technique of folding is what preserves the air bubbles in the whipped cream. Use a large spatula and a gentle, scooping motion to combine the mixtures without deflating the precious volume you worked hard to create.
Taste and Adjust: Before chilling, always taste your mousse mixture. The sweetness and tartness of mulberries can vary significantly. Adjust with a little more lemon juice for tartness or a touch of sweetener if needed, ensuring the final flavor is exactly to your liking.
Cool the Purée Properly: Adding a warm mulberry purée to the cream cheese can cause it to melt or become oily. Ensure the purée is completely cooled to room temperature before mixing it in for the best texture and stability.
Serving Suggestions for Mulberry Mousse Cake Filling
Decoration
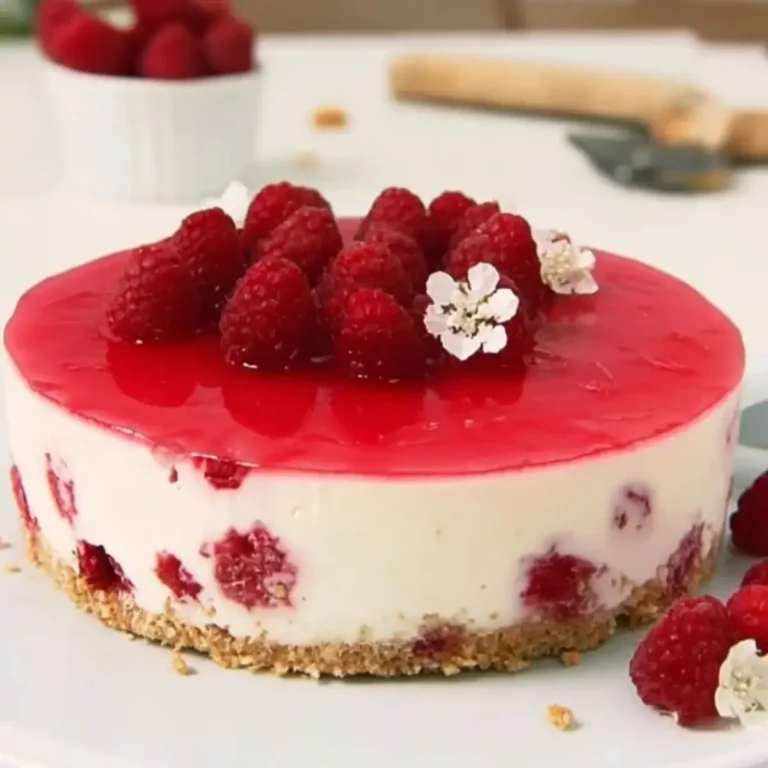
Adorning your cake with this exquisite Mulberry Mousse Cake Filling offers a canvas for creativity. Consider creating delicate swirls of fresh mulberry purée directly on top of the mousse layer for an artful touch, or perhaps garnish with a few whole fresh mulberries for a pop of color and texture. Edible flowers, such as violets or pansies, can add an elegant and whimsical flourish, perfectly complementing the berry theme.
A light dusting of powdered sugar can provide a simple yet effective finish, evoking a sense of delicate snowfall over your creation. For a more decadent presentation, you might pipe rosettes or borders of additional whipped cream around the edges of the cake or mousse layer, interspersed with fresh berries. A drizzle of white chocolate ganache or a scattering of toasted slivered almonds can also add contrasting color, texture, and flavor.
If you’re aiming for a dramatic visual impact, consider using fresh mint leaves or even candied mint sprigs as a vibrant green contrast to the deep hues of the mulberry mousse. The goal is to enhance the cake’s visual appeal without overwhelming the delicate flavors, making each slice a feast for both the eyes and the palate.
Side Dishes
To perfectly complement a cake filled with Mulberry Mousse, a simple scoop of high-quality vanilla bean ice cream is an unparalleled choice. The creamy sweetness of the ice cream acts as a beautiful foil to the tartness of the mulberries and the richness of the mousse. Another delightful pairing would be a light and refreshing fruit salad, featuring complementary berries like raspberries and blueberries, or perhaps some sliced peaches and kiwi for a tropical twist.
For a more refined accompaniment, consider serving delicate shortbread cookies or almond biscotti on the side. Their subtle crunch and buttery flavor provide a pleasant textural contrast to the soft mousse. A small pitcher of raspberry coulis or a light crème anglaise can also be offered, allowing diners to add an extra layer of flavor and sauce to their cake.
A simple glass of chilled sparkling wine or a light, floral-scented tea, such as jasmine or rose, can also enhance the overall dessert experience. These beverages offer a clean palate cleanser, ensuring that each bite of the cake remains as delightful as the first, without competing with the complex flavors of the mousse itself.
Creative Serving Ideas
Beyond traditional cake layers, Mulberry Mousse Cake Filling can be brilliantly showcased in individual servings. Spoon the mousse into elegant martini glasses or small, clear dessert cups, layering it with crumbled shortbread cookies or a hint of fresh raspberry purée for added visual appeal and flavor complexity. Garnish each individual serving with a few fresh mulberries and a tiny sprig of mint for an attractive presentation.
Consider using the mousse as a filling for delicate financiers or madeleines. The rich, slightly tart mousse tucked inside a buttery, light cake creates a sophisticated bite-sized treat. Another innovative idea is to use the mousse as a topping for a simple pound cake or even a freshly baked scone, transforming a humble baked good into something truly special with minimal effort.
For a truly show-stopping presentation, try piping the mousse into small choux pastry shells to create mini éclairs or cream puffs. The contrast between the crisp pastry and the smooth, cool mousse is delightful. You could also use it as a base for deconstructed desserts, served alongside a delicate sponge cake crumble, fresh berries, and a berry sauce for a modern, artistic dessert presentation.
Preparation & Storage
Storing Leftovers
Should you find yourself with any leftover Mulberry Mousse Cake Filling that isn’t yet incorporated into a cake, it should be stored with care to maintain its quality. Transfer any unused mousse into an airtight container. It is crucial to use a container that seals well to prevent the mousse from absorbing odors from the refrigerator or drying out. Pressing a piece of plastic wrap directly onto the surface of the mousse before sealing the container can provide an extra layer of protection against oxidation and skin formation.
Store the airtight container in the main compartment of your refrigerator, avoiding the door where temperature fluctuations are more common. When stored correctly, the Mulberry Mousse Cake Filling will remain fresh and delicious for approximately 3 to 4 days. It’s always best to consume it within this timeframe to enjoy its optimal texture and flavor profile, as prolonged storage might subtly alter its delicate consistency.
If the mousse has already been used to fill cake layers, the storage guidelines become slightly different, as the cake itself also has its own storage needs. However, the principle of airtight containers and refrigeration still applies to preserve the mousse’s freshness within the cake structure for up to 2-3 days. Proper storage ensures the dessert remains a delightful treat.
Freezing
The Mulberry Mousse Cake Filling can indeed be frozen, offering a convenient way to prepare it ahead of time for future baking projects. Ensure that the mousse is completely set before attempting to freeze it. Transfer the mousse into a freezer-safe airtight container. For best results and to minimize the risk of freezer burn, you can line the container with parchment paper or plastic wrap, then press another layer onto the surface of the mousse before sealing the container lid tightly.
The mousse can typically be stored in the freezer for up to 1 to 2 months. While it freezes well, it is important to note that the texture of mousse can change slightly upon thawing. The aeration achieved through whipping the cream might be somewhat compromised, potentially resulting in a slightly denser consistency than when it was freshly made. However, it will still retain its wonderful flavor.
To thaw, transfer the frozen mousse from the freezer to the refrigerator. Allow it to thaw slowly overnight. Once thawed, give the mousse a gentle stir or whisk to see if you can revive some of its original texture. While it may not be exactly the same as fresh, it will still be perfectly suitable and delicious for filling cakes or other desserts, especially when incorporated into a larger baked good where its texture might be less noticeable.
Reheating
Reheating is generally not applicable or advisable for Mulberry Mousse Cake Filling. Mousse is designed to be served chilled, and its delicate, airy structure is best maintained at cold temperatures. Applying heat would cause the gelatin to break down, the whipped cream to deflate entirely, and the cream cheese to melt, resulting in a separated, liquid mess rather than a desirable mousse texture.
Therefore, if you have leftover mousse that has been refrigerated or thawed from frozen, it should be served cold. If the texture has changed significantly after thawing, it might still be usable as a base for other recipes where its structure is less critical, but it should not be reheated. The best approach is to enjoy it as intended – chilled and delightful.
If you are preparing a cake with this filling, the process of assembling and chilling the cake will re-set the mousse to its intended consistency. However, once the cake is baked, the mousse filling should not be subjected to oven heat. Instead, the assembled cake should be served chilled to preserve the integrity of the mousse layer, ensuring a perfect balance of textures and temperatures in every slice.
Frequently Asked Questions
-
Can I make Mulberry Mousse Cake Filling ahead of time?
Absolutely! Preparing the Mulberry Mousse Cake Filling a day in advance is highly recommended, as it allows the flavors to meld beautifully and the mousse to set perfectly. Store it in an airtight container in the refrigerator. This makes assembly on the day of your event much smoother and less rushed, ensuring you have a stunning dessert ready to go.
-
How long does Mulberry Mousse Cake Filling last?
When stored properly in an airtight container in the refrigerator, the Mulberry Mousse Cake Filling typically stays fresh and retains its optimal texture and flavor for up to three to four days. If the mousse has already been incorporated into a cake, the cake should also be refrigerated and consumed within a similar timeframe for the best quality, though the cake’s components might affect longevity.
-
Can I freeze Mulberry Mousse Cake Filling?
Yes, you can freeze Mulberry Mousse Cake Filling. Ensure it is completely set before freezing, and store it in a freezer-safe airtight container, ideally with plastic wrap pressed directly onto the mousse’s surface to prevent freezer burn. While it freezes well for up to two months, be aware that the texture may change slightly upon thawing, potentially becoming a bit denser. It is best thawed slowly overnight in the refrigerator.