Mini Chocolate Chip Cookies – Easy Bite-Sized Recipe!
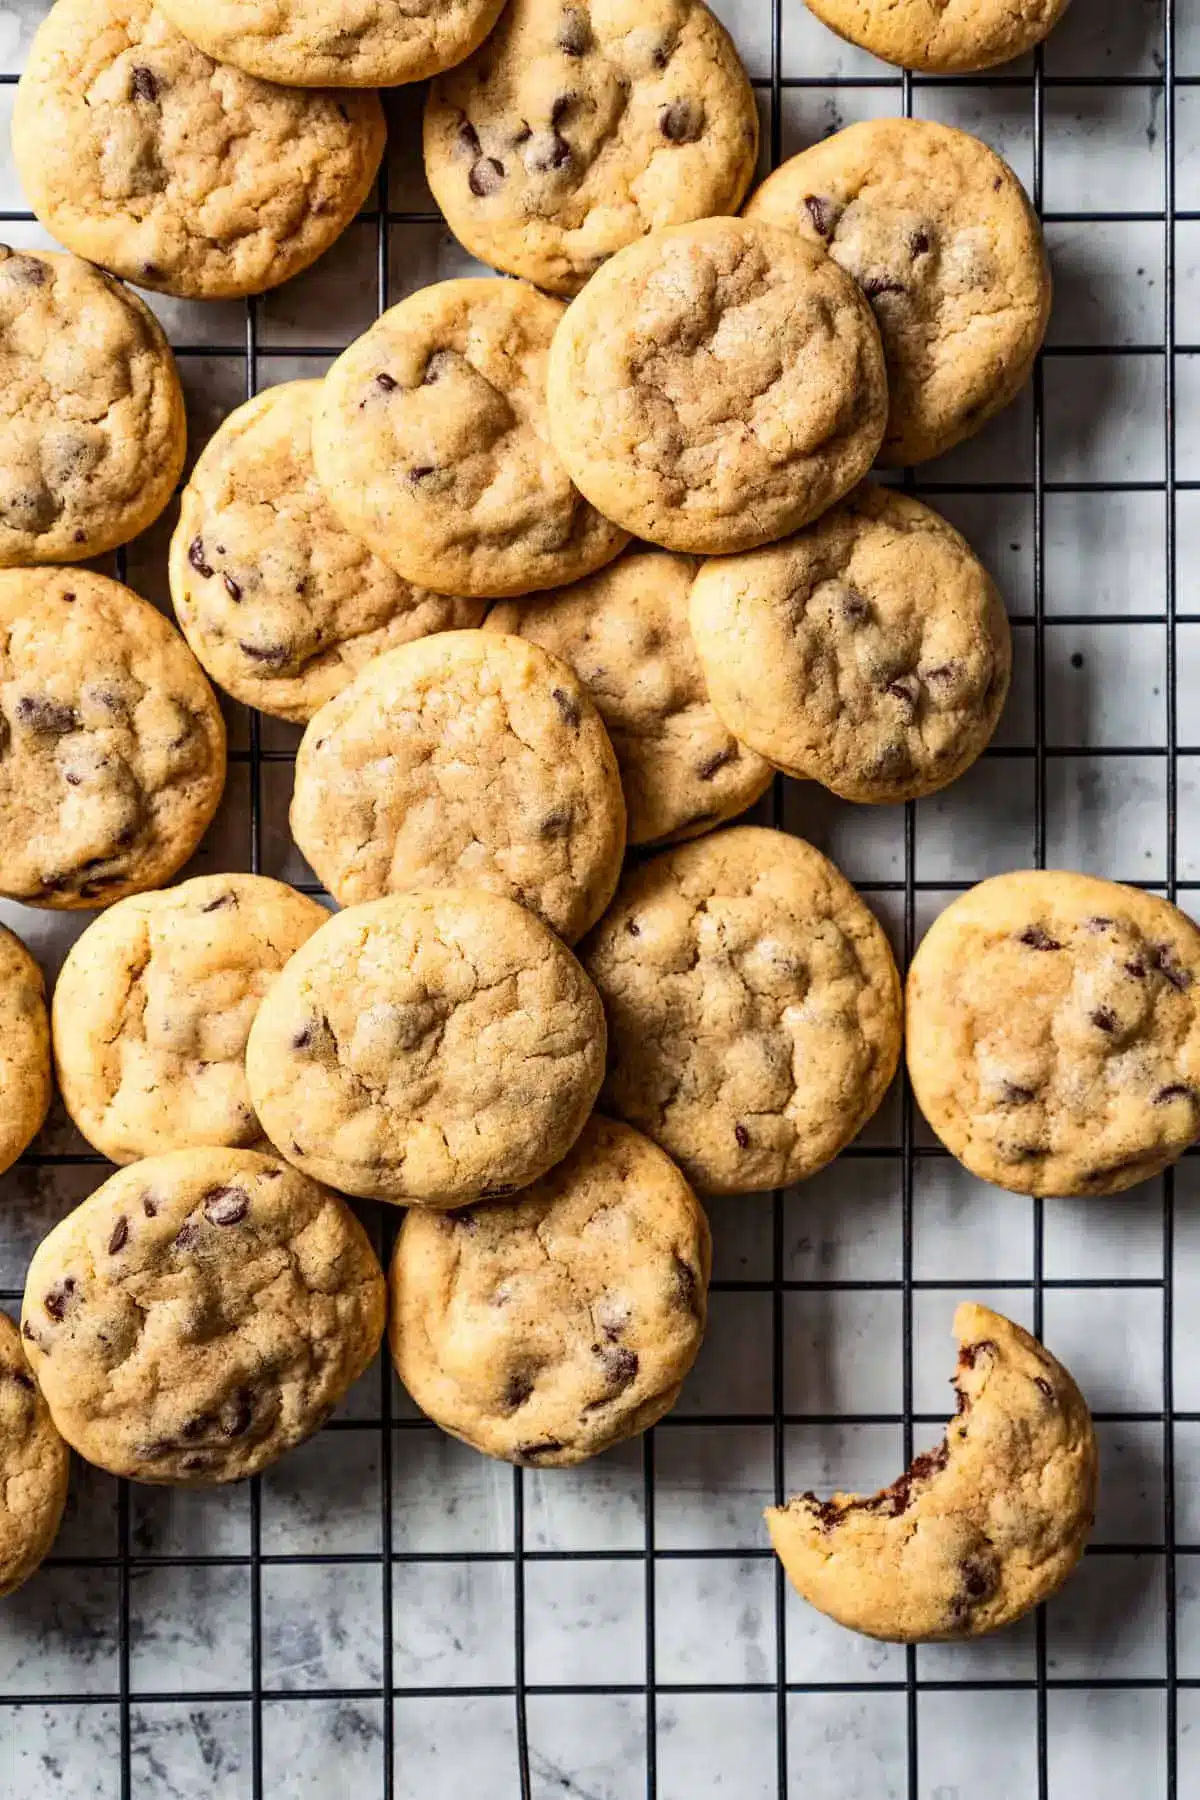
There’s something universally delightful about a perfectly baked cookie, and when they’re miniature, the joy is amplified tenfold. These mini chocolate chip cookies offer that classic comfort in a bite-sized package, making them ideal for any occasion, from a casual afternoon treat to a sophisticated dessert spread.
The allure of these little gems lies not just in their size but in their incredible flavor profile – a balance of buttery richness, a hint of caramel from the brown sugar, and the satisfying melt of chocolate chips in every mouthful. They are surprisingly simple to make, proving that gourmet taste doesn’t always require complex steps.
Why You Will Love This Recipe
- Perfectly Portioned: These mini cookies are designed for satisfying cravings without overindulgence, making them ideal for snacking or serving to guests.
- Quick Assembly: The straightforward mixing process and lack of chilling time mean you can go from ingredients to baked cookies in under an hour, perfect for spontaneous baking sessions.
- Highly Customizable: While the classic chocolate chip is beloved, this recipe serves as a fantastic base for creative twists, allowing you to tailor them to different tastes and preferences with ease.
- Delightful Texture: Expect a wonderful combination of slightly crisp edges and a wonderfully soft, chewy center that embodies the quintessential chocolate chip cookie experience.
- Gift-Worthy: Their charming size and delicious taste make them an ideal homemade gift for friends, family, teachers, or colleagues, always sure to be a hit.
Ingredients You Need
Crafting these delightful mini chocolate chip cookies begins with selecting quality ingredients, which form the backbone of their irresistible flavor and texture. Using fresh, good-quality components ensures that each bite is as delicious as the last, elevating this simple treat into something truly special. The recipe relies on pantry staples that, when combined correctly, create a symphony of sweetness and chewiness.
Mini Chocolate Chip Cookies

These mini chocolate chip cookies are perfectly sized to satisfy a cookie craving! They're soft, chewy, and bursting with mini chocolate chips in bite-sized form.
- 1¼ cups all-purpose flour
- ¼ teaspoon salt
- ½ teaspoon baking powder
- ½ teaspoon baking soda
- ½ cup butter, softened
- ¼ cup sugar
- ½ cup dark brown sugar
- 1 large egg
- 1 teaspoon pure vanilla extract
- ½ cup mini chocolate chips
- 1Preheat oven to 350°F. Line one baking sheet with wax paper and line another baking sheet with Silpat or parchment paper. Set aside.
- 2In a mixing bowl, combine the flour, salt, baking powder, and baking soda; whisk until well combined and set aside.
- 3In your mixer's bowl, combine the butter, sugar, brown sugar, eggs, and vanilla; using your mixer, cream until smooth and creamy.
- 4Gently stir the flour mixture into the butter mixture; mix until thoroughly combined. Stir in the mini chocolate chips. At this point, you can continue with the recipe or store the cookie dough in the refrigerator or freezer (see notes).
- 5To continue, scoop out 1/2 teaspoon of cookie dough at a time and drop it onto the wax paper-lined baking sheet. Then, shape each cookie dough into a ball and transfer the cookie balls to the parchment paper-lined baking sheet, spacing them about 2 inches apart.
- 6Bake the cookies for 5 to 6 minutes or until the edges are light brown. The cookies should still feel soft in the middle and under-baked.
- 7Remove the mini chocolate chip cookies from the oven and let them cool on the baking sheet for 2 minutes; then, transfer to a wire rack to cool completely. Store the cookies in airtight containers.
Keywords: cookies, chocolate chip, mini, dessert, baking, quick, easy
The precise quantities for each ingredient are readily available within the detailed recipe card located further down. This ensures you have all the necessary information at your fingertips for a seamless baking experience.
Variations
The beauty of these mini chocolate chip cookies lies in their inherent adaptability. Beyond the classic, consider infusing them with warm spices for a comforting twist. A pinch of cinnamon or nutmeg stirred into the dry ingredients can transform them into cozy autumnal treats, perfect for a chilly evening.
For those seeking a richer, more decadent experience, explore the world of premium chocolate. Swapping standard mini chips for finely chopped dark chocolate, Belgian chocolate, or even high-quality white chocolate can introduce complex flavor notes and luxurious textures. You could also introduce nuts for added crunch and depth.
Embracing a low-carb lifestyle doesn’t mean sacrificing the joy of cookies. By substituting almond flour for all-purpose flour and using a sugar substitute like erythritol or xylitol, you can create a delightful keto-friendly version of these mini cookies. Ensure to adjust baking times as low-carb flours can brown differently.
How to Prepare mini chocolate chip cookies
Step 1: Gather and Prepare Your Ingredients
Before embarking on the delightful journey of creating these mini chocolate chip cookies, the first crucial step involves meticulous preparation of all your ingredients. This ensures a smooth and efficient baking process. Measure out your flour, sugars, leavening agents, and salt precisely. Soften your butter to room temperature so it creams beautifully, and have your egg and vanilla extract ready.
It is also highly recommended to preheat your oven to the specified temperature, usually around 350°F (175°C). Simultaneously, prepare your baking sheets by lining them with parchment paper or silicone baking mats. This prevents sticking and ensures easy removal of the delicate cookies once they are baked.
Having everything measured, softened, and ready to go in separate bowls minimizes last-minute scrambling and allows you to focus on the mixing technique, which is vital for achieving the perfect cookie texture. This organizational approach is a hallmark of successful baking, setting the stage for delicious results.
Step 2: Cream the Butter and Sugars
The foundation of a tender and flavorful cookie is the creaming of butter and sugars. In a large mixing bowl, combine the softened butter with both granulated and brown sugars. Using an electric mixer, whether a stand mixer with a paddle attachment or a hand mixer, beat these ingredients together on medium speed.
Continue to mix until the mixture is light, fluffy, and pale in color. This process incorporates air into the dough, which is essential for the cookies’ texture and lift during baking. Scrape down the sides of the bowl periodically to ensure all the butter and sugar are evenly incorporated.
This step typically takes about 3-5 minutes, and the resulting creamed mixture should resemble a fluffy, almost cloud-like consistency. The combination of granulated sugar for crispness and brown sugar for chewiness and moisture is key here, creating that signature chocolate chip cookie flavor profile.
Step 3: Incorporate Wet Ingredients and Dry Ingredients
Once the butter and sugars are perfectly creamed, it’s time to add the wet ingredients. Gently beat in the large egg until it’s fully combined, then stir in the pure vanilla extract. Ensure that the egg is thoroughly incorporated to avoid any pockets of raw egg in the finished cookies.
In a separate medium bowl, whisk together your dry ingredients: all-purpose flour, baking powder, baking soda, and salt. Whisking them together ensures that the leavening agents and salt are evenly distributed throughout the flour, which is critical for consistent cookie rise and flavor.
Gradually add the dry ingredient mixture to the wet ingredients in the large mixing bowl. Mix on low speed or stir with a spatula until just combined. Be careful not to overmix at this stage; overmixing can develop the gluten in the flour, leading to tougher cookies.
Step 4: Fold in the Mini Chocolate Chips
Now comes the most exciting part for many – adding the chocolate chips! Gently fold the mini chocolate chips into the cookie dough using a spatula or wooden spoon. Ensure they are evenly distributed throughout the dough to guarantee that every cookie receives a generous amount of chocolatey goodness.
The use of mini chocolate chips is particularly effective in these small cookies, as they are proportional to the cookie’s size, providing a balanced chocolate-to-dough ratio in each bite. If you prefer larger chocolate chunks, you can certainly use them, but be mindful that they might dominate the smaller cookie.
Take care not to overwork the dough once the chips are added. The goal is simply to incorporate them smoothly. A few gentle folds are all that’s needed to achieve an even distribution, maintaining the integrity of the dough’s texture.
Step 5: Scoop and Shape the Dough
To ensure uniformity in size, which is especially important for mini cookies, use a small cookie scoop (about ½ teaspoon). This tool helps in portioning out equal amounts of dough. Drop rounded scoops of dough onto the prepared baking sheets, leaving ample space between each one.
A common spacing of about 2 inches apart is usually sufficient, as even small cookies will spread slightly during baking. This prevents them from merging into one large cookie and ensures they retain their individual charm and shape. If you don’t have a cookie scoop, you can use two small spoons to portion the dough.
While rolling the dough into perfect balls can enhance their appearance, for mini cookies, simply dropping rounded scoops is often enough. The gentle shaping of the dough balls can help achieve a slightly more uniform cookie, but the charm of rustic, hand-scooped cookies is also quite appealing.
Step 6: Bake and Cool the Cookies
Bake the cookies in the preheated oven for approximately 5 to 6 minutes. The exact baking time can vary depending on your oven, so it’s essential to watch them closely. You are looking for the edges to be lightly golden brown, while the centers should still appear slightly soft and underbaked.
This slight underbaking is the secret to achieving that wonderfully chewy texture. The cookies will continue to set and firm up as they cool on the baking sheet and then on a wire rack. Overbaking will result in dry, crisp cookies, so it’s better to err on the side of slightly underdone.
Once removed from the oven, let the cookies cool on the baking sheet for a couple of minutes to firm up slightly before carefully transferring them to a wire rack to cool completely. This two-stage cooling process is crucial for maintaining their delicate structure and preventing them from breaking apart.
Pro Tips for mini chocolate chip cookies
Precision in Measurement: For consistently sized mini cookies, using a ½-teaspoon cookie scoop is highly recommended. This ensures that each cookie has an equal amount of dough, leading to even baking and uniform appearance, which is crucial for presentation.
Don’t Overmix: Once you add the dry ingredients to the wet, mix only until just combined. Overmixing develops gluten, resulting in tougher cookies. A few streaks of flour remaining are perfectly fine at this stage as they will incorporate during the folding of the chocolate chips.
Watch the Baking Time Closely: Mini cookies bake very quickly. Keep a close eye on them and pull them out when the edges are lightly golden and the centers still look slightly soft. They will continue to cook on the hot baking sheet, achieving the perfect chewy texture.
Room Temperature Ingredients Matter: Ensure your butter is truly softened, not melted, and your egg is at room temperature. This allows for better emulsification when creaming with the sugars, leading to a smoother dough and a better cookie texture. Cold ingredients can result in a denser, less appealing cookie.
Cooling is Key: Allow the cookies to rest on the baking sheet for a few minutes after baking before transferring them to a wire rack. This resting period allows them to set up properly. Moving them too soon can cause them to break apart, ruining their delicate structure.
Serving Suggestions for mini chocolate chip cookies
Decoration
While these mini chocolate chip cookies are delightful in their simple, classic form, a touch of decorative flair can elevate them for special occasions. A light dusting of powdered sugar can add a touch of elegance, especially for holiday gatherings or more formal dessert presentations. For an extra burst of color and sweetness, consider a very light drizzle of melted white chocolate or colored confectionery melts over the tops of the cooled cookies.
Edible glitter or small sprinkles can also add a festive sparkle, making them perfect for children’s parties or celebrations. If you’re aiming for a more rustic charm, a sprinkle of flaky sea salt on top just before baking can enhance the chocolate flavor and provide a delightful textural contrast. Another charming idea is to gently press a few extra mini chocolate chips onto the surface of the dough balls before baking for an extra decadent look.
Side Dishes
These mini chocolate chip cookies pair wonderfully with a variety of beverages and complementary treats. A tall glass of cold milk is the quintessential accompaniment, creating a nostalgic and comforting combination. For a more sophisticated pairing, consider serving them alongside a rich, hot cup of coffee or an aromatic herbal tea, which can cut through the sweetness and highlight the cookie’s flavors.
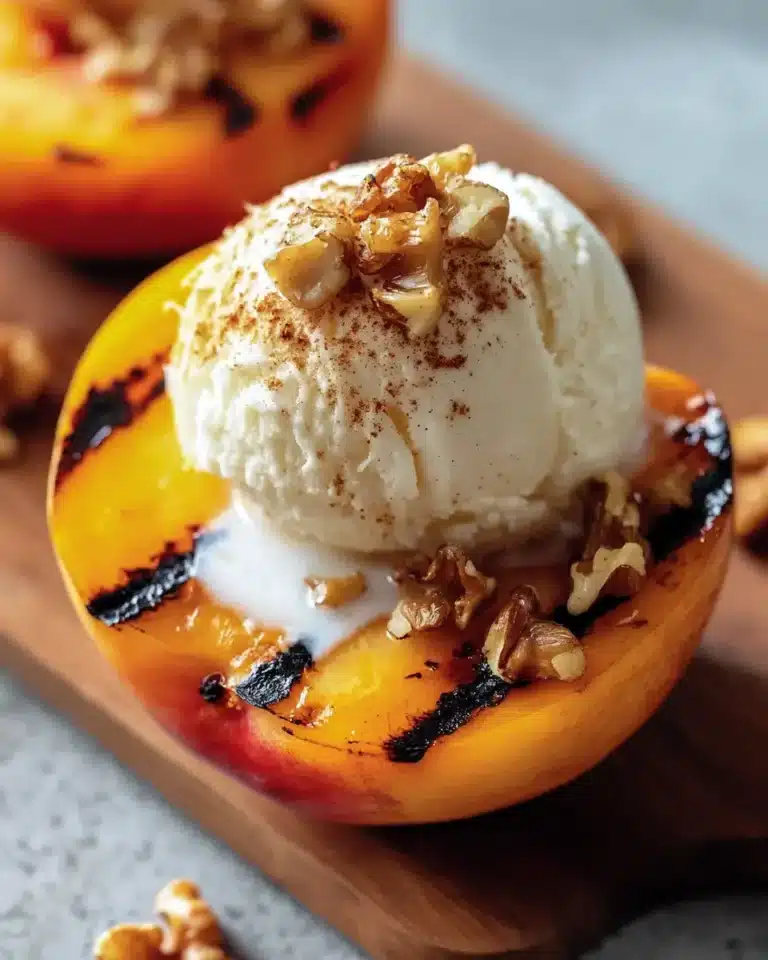
They also make a fantastic addition to a dessert platter, alongside fruit tarts or cakes. For a truly decadent experience, serve them warm with a scoop of vanilla bean ice cream, transforming them into instant mini ice cream sandwiches. A small bowl of fresh berries can also provide a refreshing counterpoint to the sweetness of the cookies.
Creative Serving Ideas
The bite-sized nature of these cookies opens up a world of creative serving possibilities. They are perfect for a dessert charcuterie board, arranged artfully alongside cheeses, fruits, and other small treats. Consider using them as a whimsical topping for ice cream sundaes or milkshakes, adding a delightful crunch and flavor.
For parties, create mini cookie skewers by alternating cookies with fresh fruit like strawberries or blueberries. They can also be used to garnish the rims of dessert cocktails or coffee drinks. Another imaginative idea is to use them as edible favors, packaged in small cellophane bags tied with a ribbon, a sweet memento for guests to take home.
Preparation & Storage
Storing Leftovers
To keep your mini chocolate chip cookies fresh and delicious for as long as possible, proper storage is key. Once completely cooled, store them in an airtight container at room temperature. This method will help maintain their texture and prevent them from becoming stale or losing their flavor.
Avoid storing them in direct sunlight or near heat sources, as this can cause them to become greasy or spoil. When stored correctly, these cookies can typically remain fresh and enjoyable for about 4 to 5 days. Ensure the container is well-sealed to keep out moisture and air.
Freezing
These mini chocolate chip cookies are exceptionally well-suited for freezing, both as baked cookies and as dough. For baked cookies, allow them to cool completely first. Place them in a single layer on a baking sheet and freeze until solid, then transfer them to a freezer-safe bag or container. This prevents them from sticking together.
For freezing the dough, scoop and shape the dough balls as usual, then place them on a parchment-lined baking sheet and freeze until firm. Once frozen, transfer the dough balls to a freezer-safe bag or airtight container. Label the container with the date and the number of cookies for easy identification.
Frozen baked cookies can be stored for up to 3 months, and frozen dough balls can last for up to 3 months as well. This makes it incredibly convenient to have homemade cookies ready at a moment’s notice, perfect for unexpected cravings or last-minute guests.
Reheating
If you’ve stored your cookies at room temperature and they’ve lost a bit of their chewiness, or if you’re reheating frozen baked cookies, a quick and gentle reheating method can bring them back to life. For room temperature cookies that have become slightly dry, you can warm them briefly in a low oven (around 300°F or 150°C) for just 1-2 minutes, or even for a few seconds in the microwave, until they are slightly warmed through and have regained some of their soft texture.
For frozen baked cookies, you can allow them to thaw at room temperature for about 15-20 minutes before enjoying them, or you can reheat them in a low oven (300°F/150°C) for about 3-5 minutes, until they are warmed through. If reheating frozen dough balls, add an extra 1-2 minutes to the baking time specified in the recipe, as they will need more time to cook from a frozen state.
The key to reheating is to do it gently and briefly, as these small cookies can quickly go from perfectly warm to overcooked. The goal is to achieve a slightly soft, warmed texture, reminiscent of freshly baked cookies, without making them hard or dry.
Frequently Asked Questions
-
Can I make these mini chocolate chip cookies ahead of time, and how should I store them?
Absolutely, these mini chocolate chip cookies are fantastic for making ahead! You can store the fully baked and cooled cookies in an airtight container at room temperature for up to 4-5 days. For longer storage, they freeze exceptionally well. You can freeze baked cookies for up to 3 months, or even freeze the dough balls before baking. To freeze the dough, scoop and shape the dough balls, then place them on a baking sheet and freeze until solid before transferring them to a freezer-safe bag. This makes it incredibly convenient to bake fresh cookies whenever the craving strikes, simply by adding an extra minute or two to the baking time when baking from frozen.
-
What is the best way to ensure my mini chocolate chip cookies have the perfect chewy texture?
Achieving the perfect chewy texture in these mini chocolate chip cookies relies on a few key techniques. Firstly, the ratio of brown sugar to granulated sugar is crucial; brown sugar contributes moisture and a caramel-like chewiness. Secondly, it’s vital not to overbake them. Pull the cookies from the oven when the edges are just beginning to turn golden brown and the centers still look slightly soft and underbaked. They will continue to set up as they cool on the baking sheet. Overbaking is the most common culprit for dry, crumbly cookies. Additionally, using softened butter (not melted) and ensuring your leavening agents are fresh will also contribute to a superior texture.
-
Are there any variations or substitutions I can make to this mini chocolate chip cookie recipe?
Certainly! This recipe is wonderfully versatile. For a different flavor profile, you can swap the mini chocolate chips for other inclusions like butterscotch chips, peanut butter chips, or even chopped nuts such as pecans or walnuts. For a touch of warmth, add a pinch of cinnamon or nutmeg to the dry ingredients. You can also experiment with different types of chocolate, such as dark, milk, or white chocolate chunks, though adjust the size to maintain proportionality. If you’re looking for a healthier option, consider using a gluten-free flour blend, though you might need to adjust the liquid content slightly. These cookies are also a great base for adding a swirl of funfetti sprinkles for a festive touch, especially for celebrations.