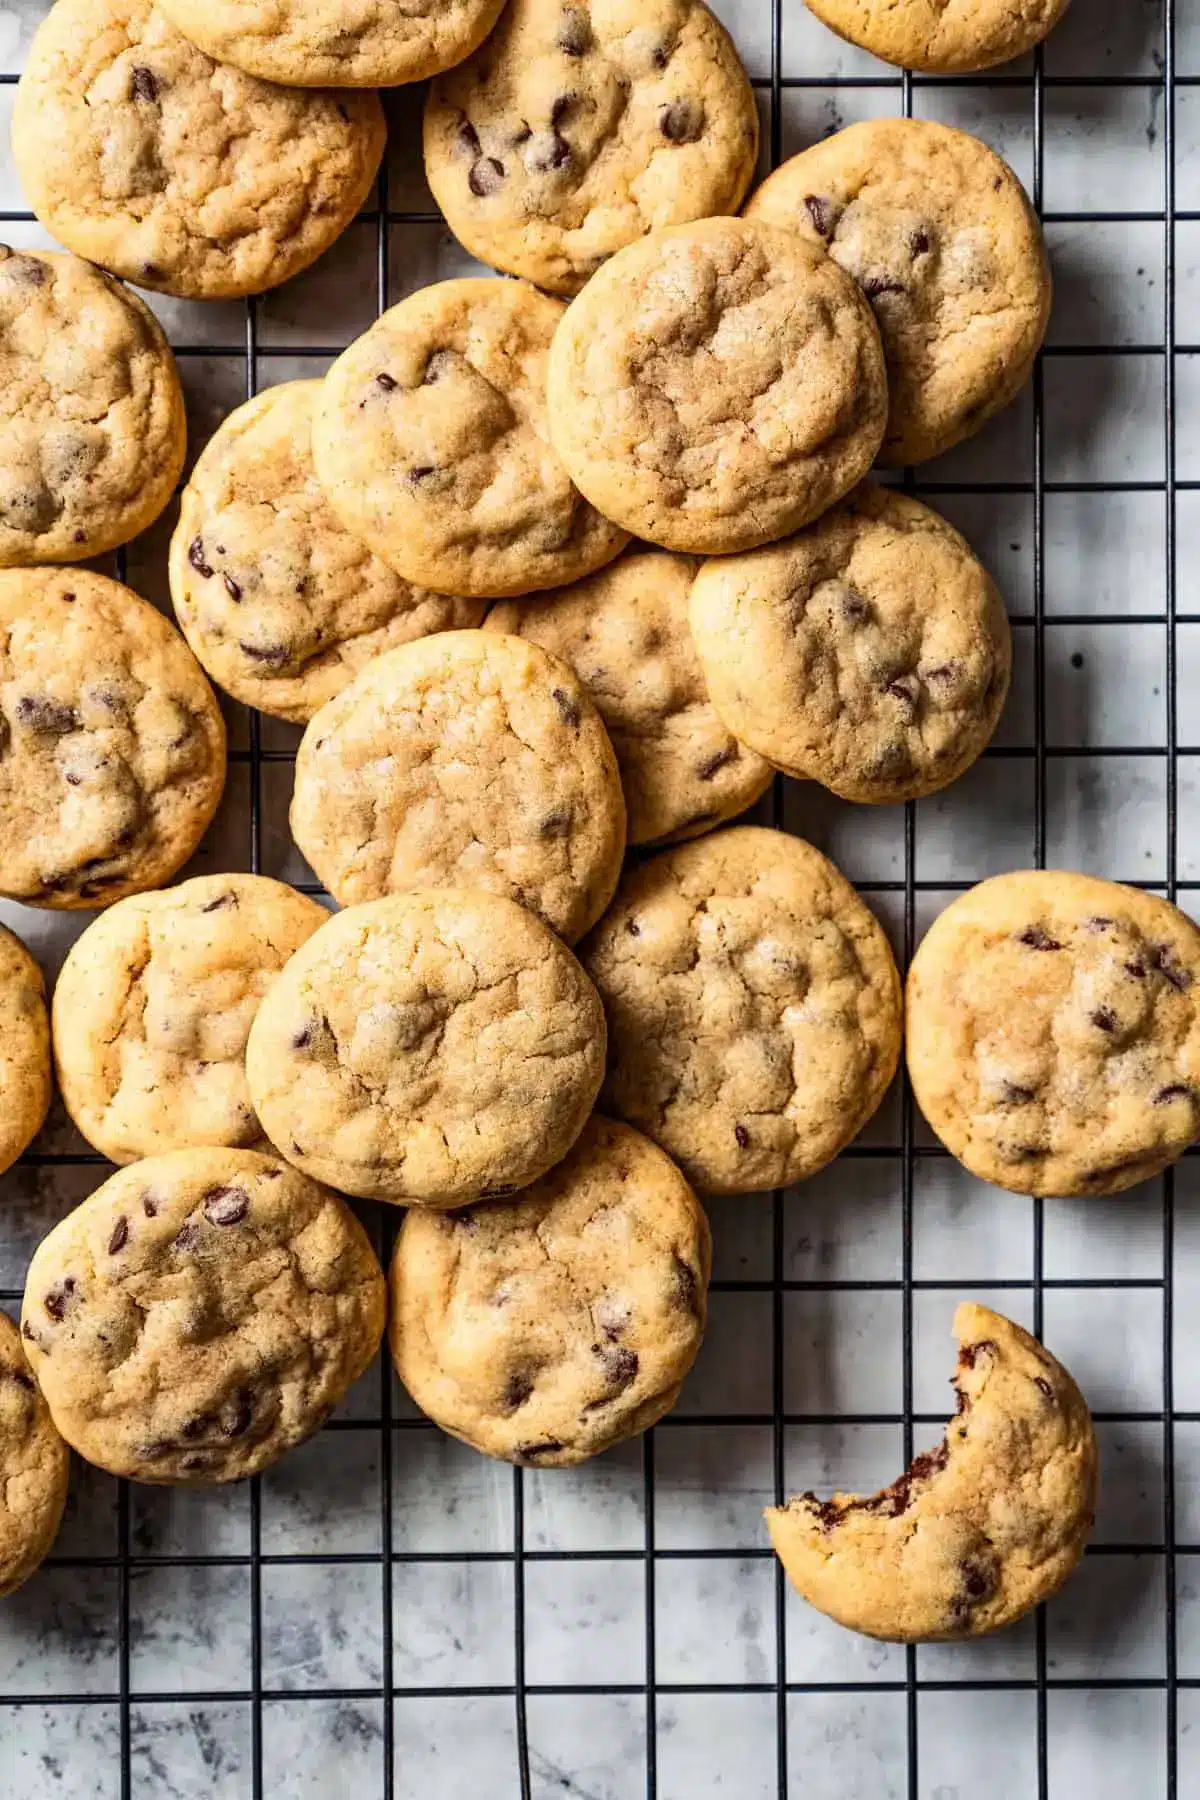
Mini Chocolate Chip Cookies – Easy Bite-Sized Recipe!
Embark on a delightful journey into the world of miniature indulgence with these utterly charming mini chocolate chip cookies. Each bite-sized wonder is a testament to the simple joy of a perfectly baked cookie, designed to satisfy your sweet cravings without overwhelming your senses. They are a charming addition to any occasion, from casual get-togethers to thoughtfully prepared gifts for loved ones.
Imagine the irresistible combination of a soft, chewy interior harmoniously balanced with delicately crisp, buttery edges, all generously studded with delightful mini chocolate chips. This recipe is an invitation to experience classic cookie perfection in a wonderfully compact and utterly adorable form, promising a delightful treat that’s as fun to make as it is to devour.
Why You Will Love This Recipe
- Perfectly Portioned: These cookies are delightfully bite-sized, making them ideal for snacking, packing in lunchboxes, or sharing as thoughtful gifts without any fuss.
- Effortless Preparation: Forget lengthy chilling times; this recipe comes together quickly with basic pantry staples, allowing you to enjoy freshly baked cookies with minimal delay.
- Customizable Delight: Feel inspired to personalize these cookies by swapping out the chocolate chips for other delicious additions like white chocolate, fruity morsels, or even festive sprinkles.
- Versatile Sweetness: Their charming size and delightful texture make them a fantastic addition to parties, cookie platters, or even as a base for mini ice cream sandwiches.
Ingredients You Need
Crafting these delightful mini chocolate chip cookies begins with selecting high-quality ingredients to ensure the best possible flavor and texture. The magic lies in the simplicity and freshness of each component, coming together to create a truly satisfying treat. Always opt for fresh, well-stored ingredients to elevate your baking experience and achieve that perfect homemade taste.
Mini Chocolate Chip Cookies

These bite-sized mini chocolate chip cookies are perfectly sized to satisfy a cookie craving! They're soft, chewy, and bursting with mini chocolate chips. This recipe is quick and easy, with no chilling required.
- 1¼ cups all-purpose flour
- 1 large egg
- 1 teaspoon pure vanilla extract
- 1Preheat oven to 350°F. Line one baking sheet with wax paper and line another baking sheet with parchment paper.
- 2In a mixing bowl, combine the flour, salt, baking powder, and baking soda; whisk until well combined and set aside.
- 3In your mixer's bowl, combine the butter, sugar, brown sugar, egg, and vanilla; using your mixer, cream until smooth and creamy.
- 4Gently stir the flour mixture into the butter mixture; mix until thoroughly combined. Stir in the mini chocolate chips.
- 5Scoop ½ teaspoon of cookie dough at a time and drop it onto the wax paper-lined baking sheet. Shape each cookie dough into a ball and transfer the cookie balls to the parchment paper-lined baking sheet, spacing them about 2 inches apart.
- 6Bake the cookies for 5 to 6 minutes or until the edges are light brown. The cookies should still feel soft in the middle and under-baked.
- 7Remove the mini chocolate chip cookies from the oven and let them cool on the baking sheet for 2 minutes; then, transfer to a wire rack to cool completely.
- 8Store the cookies in airtight containers.
Keywords: cookies, chocolate chip, mini, dessert, baking, easy, quick
- all-purpose flour: forms the structure of our tender cookies, providing a light and airy base.
- salt: enhances the overall flavor profile, balancing the sweetness and bringing out the nuances of the other ingredients.
- baking powder: contributes to a gentle lift, ensuring our cookies are not too dense but have a pleasant chew.
- baking soda: works with acidic ingredients to create that wonderful spread and chewy texture characteristic of classic chocolate chip cookies.
- butter, softened: the heart of our cookie’s richness, providing essential fat for tenderness and a glorious buttery flavor.
- sugar: adds sweetness and contributes to the cookie’s crisp edges and delicate golden-brown color.
- dark brown sugar: infuses the cookies with moisture and a deeper caramel note, crucial for that desirable chewy texture.
- large egg: acts as a binder, holding all our ingredients together while adding richness and contributing to the cookie’s structure.
- pure vanilla extract: a classic aromatic enhancer that rounds out the flavors and adds a wonderful depth to every bite.
- mini chocolate chips: the star ingredient, offering pockets of melted chocolatey goodness throughout each perfectly sized cookie.
The specific quantities for each ingredient are detailed within the accompanying recipe card for your convenience.
Variations
The beauty of these mini chocolate chip cookies lies in their adaptability, allowing you to transform them into something truly unique with a few simple adjustments. This inherent versatility makes them a perfect canvas for culinary creativity, ensuring there’s a variation to suit every palate and preference. Experimenting with different flavors and additions can lead to delightful discoveries.
For a delightful vegan twist, you can easily substitute the butter with a high-quality vegan butter alternative or coconut oil, ensuring it’s at room temperature. The egg can be replaced with a flax egg (one tablespoon of ground flaxseed mixed with three tablespoons of water, left to sit for five minutes) or a commercial egg replacer. While dairy-free milk is not strictly necessary in this recipe, if you find the dough a little stiff, a tablespoon of unsweetened plant-based milk can help achieve the perfect consistency.
If you’re looking for a low-carb or keto-friendly option, consider using almond flour or coconut flour in place of all-purpose flour, adjusting the liquid content as needed. For sweetness, a blend of erythritol and stevia or monk fruit sweetener can be used instead of granulated and brown sugar. Sugar-free mini chocolate chips are readily available and are a perfect substitute. These adjustments will yield a wonderfully satisfying cookie that aligns with specific dietary goals, proving that delicious treats can be enjoyed by everyone.
Consider a festive sprinkle explosion by omitting some of the mini chocolate chips and folding in a generous amount of colorful jimmies or nonpareils into the dough. For an added layer of indulgence, you could even incorporate a few white chocolate chips or chopped toffee bits for a delightful crunch and contrasting flavor. These small additions can transform a classic cookie into a celebratory masterpiece, perfect for birthdays or holidays.
How to Prepare mini chocolate chip cookies
Step 1: Gather and Prepare Your Ingredients
Begin by meticulously gathering all the necessary ingredients for your mini chocolate chip cookies, ensuring everything is measured precisely. This foundational step is crucial for a smooth and successful baking process, preventing any last-minute scrambling. Having all components ready allows you to move seamlessly through the mixing stages.
Ensure your butter is softened to room temperature; this is vital for achieving a creamy, well-emulsified batter, which directly impacts the final texture of your cookies. An overly cold or melted butter can lead to an inconsistent dough, affecting how the cookies spread and bake. Softened butter is key to creating those wonderfully tender and chewy cookies everyone loves.
Preheat your oven to the specified temperature of 350°F (175°C). Simultaneously, prepare your baking sheets by lining one with wax paper and another with parchment paper or a silicone baking mat. This preparation ahead of time allows for immediate transfer of dough once it’s mixed, preventing any potential dough degradation from sitting at room temperature for too long.
Step 2: Combine the Dry Ingredients
In a medium-sized mixing bowl, carefully combine the all-purpose flour, salt, baking powder, and baking soda. Whisk these dry ingredients together thoroughly. This ensures that the leavening agents and salt are evenly distributed throughout the flour, which is essential for consistent rising and flavor in every cookie.
The act of whisking also helps to aerate the flour slightly, contributing to a lighter cookie texture. Ensure there are no clumps of flour or leavening agents remaining. A well-mixed dry ingredient base is the first step toward achieving uniformity in your cookie batch.
Set this bowl of dry ingredients aside for the moment. It will be incorporated into the wet ingredients in the next stage. Patience at this step ensures that the dry components are fully ready to be integrated, setting the stage for the emulsification process.
Step 3: Cream the Wet Ingredients and Sugars
In a separate, larger mixing bowl, cream together the softened butter, granulated sugar, and dark brown sugar. You can use an electric mixer (handheld or stand mixer) for this task, or a sturdy whisk and some elbow grease if you prefer. Continue mixing until the mixture is light, fluffy, and pale yellow in color.
This creaming process is absolutely critical for developing the cookies’ texture. It incorporates air into the butter and sugar mixture, which will contribute to the cookies’ lift and overall tenderness. Don’t rush this step; it should take several minutes to achieve the desired consistency and color. The sugar crystals help to cut into the butter, creating small air pockets.
Next, add the large egg and the pure vanilla extract to the creamed mixture. Beat again until everything is thoroughly combined and the mixture is smooth and homogenous. The egg acts as an emulsifier, binding the fats and liquids, while the vanilla extract lends its inimitable aroma and flavor, rounding out the sweet profile of the cookie.
Step 4: Combine Wet and Dry Mixtures, Then Add Chocolate Chips
Gradually add the dry ingredient mixture to the wet ingredient mixture. Mix on low speed or stir gently with a spatula until just combined. It’s important not to overmix the dough at this stage, as overworking the gluten in the flour can result in tougher cookies. Mix only until you no longer see streaks of dry flour.
Once the dough is nearly combined, gently fold in the mini chocolate chips. Distribute them evenly throughout the dough, ensuring that each cookie will have a delightful burst of chocolate. You can use a spatula or a wooden spoon for this step, being careful not to crush the chips.
At this point, the cookie dough is ready. You can proceed to shaping and baking immediately, or if you prefer a slightly thicker cookie, you can cover the bowl and refrigerate the dough for about 30 minutes. This brief chilling period allows the flavors to meld and the dough to firm up, which can help reduce spreading.
Step 5: Scoop and Shape the Dough
Using a ½-teaspoon measuring scoop or a small spoon, portion out the cookie dough. This precise measurement is key to ensuring your mini cookies are all roughly the same size, leading to even baking. Place the scooped dough balls onto the wax paper-lined baking sheet you prepared earlier.
Once the dough is scooped, gently roll each portion into a ball with your hands. This helps to create a smoother surface and a more uniform shape. Then, carefully transfer these dough balls to the second baking sheet, the one lined with parchment paper or a silicone mat. Ensure you leave about 2 inches of space between each dough ball to allow for spreading during baking.
Leaving adequate space is crucial; overcrowding the baking sheet will cause the cookies to bake into each other, losing their distinct mini shape and potentially baking unevenly. The parchment paper or silicone mat will prevent sticking, making for easy removal after baking and simplifying cleanup.
Step 6: Bake and Cool the Cookies
Place the baking sheet with the shaped dough balls into your preheated oven. Bake for 5 to 6 minutes, or until the edges of the cookies are lightly golden brown. It’s essential to watch these mini cookies closely as they bake, as they can go from perfectly underbaked to overdone very quickly due to their small size.
You are looking for cookies that are still soft and slightly underbaked in the center when you remove them from the oven. They will continue to set and firm up as they cool on the baking sheet. This slight underbaking is the secret to achieving that desirable chewy texture that contrasts beautifully with the crisp edges.
Once baked, remove the cookies from the oven and let them cool on the baking sheet for about 2 minutes. This brief cooling period on the hot sheet allows them to firm up just enough to be handled. Then, carefully transfer the cookies to a wire rack to cool completely. This step allows for proper air circulation, preventing the bottoms from becoming soggy and ensuring they cool down to the perfect temperature for enjoying or storing.
Pro Tips for mini chocolate chip cookies
Use High-Quality Ingredients: The better the quality of your butter, chocolate chips, and vanilla extract, the more delicious your mini chocolate chip cookies will be. Opt for European-style butter for richer flavor and good quality chocolate that melts beautifully.
Don’t Overmix the Dough: Once the flour is added, mix only until just combined. Overmixing develops the gluten in the flour, which can lead to tough, dense cookies instead of tender, chewy ones.
Chill the Dough for Thicker Cookies: While this recipe is designed for immediate baking, chilling the dough for at least 30 minutes can help create thicker, less spread-out cookies. This is especially helpful in warmer kitchens or if you prefer a more cake-like texture.
Invest in a Cookie Scoop: Using a ½-teaspoon cookie scoop ensures that each cookie is uniform in size. This is crucial for even baking; all cookies will be done at the same time and have the same delightful texture.
Watch the Bake Time Carefully: Mini cookies bake quickly and can go from perfect to overdone in a flash. Keep a close eye on them during the last couple of minutes and remove them when the edges are just set and lightly golden, and the centers still appear soft.
Serving Suggestions for mini chocolate chip cookies
Decoration
These mini chocolate chip cookies are so delightful on their own that extensive decoration isn’t necessary, but a few touches can elevate them further. A light dusting of powdered sugar can add a festive and elegant touch, especially if serving them at a holiday gathering or a special occasion. This subtle sweetness complements the chocolate beautifully and creates a charming visual appeal.
Consider a delicate drizzle of melted white chocolate or dark chocolate over the tops of the cooled cookies. This not only adds another layer of flavor but also creates an attractive, artisanal look. You can use a fork or a piping bag with a fine tip to create thin, elegant lines or more intricate patterns, depending on your preference.
For an extra pop of color and texture, you could sprinkle a few colorful nonpareils or edible glitter onto the melted chocolate drizzle while it’s still wet. This is particularly fun for children’s parties or when you want to add a whimsical touch. Alternatively, a tiny edible flower or a small sprinkle of sea salt on top of some cookies can offer a sophisticated contrast to the sweetness.
Side Dishes
Mini chocolate chip cookies pair wonderfully with a variety of beverages, making them a perfect end to any meal or a delightful accompaniment to an afternoon treat. A classic pairing is a cold glass of milk, which cuts through the sweetness and richness of the cookie beautifully. It’s a timeless combination that evokes feelings of nostalgia and comfort.
For those who prefer something warmer, a freshly brewed cup of coffee or a smooth, creamy hot chocolate makes an excellent companion. The slight bitterness of coffee or the rich decadence of hot chocolate can beautifully complement the sweet, buttery notes of the cookies, creating a harmonious flavor experience.
Consider serving them alongside a scoop of high-quality vanilla bean ice cream for an impromptu mini ice cream sandwich experience. The contrast between the warm cookie (if slightly warmed) and the cold, creamy ice cream is simply divine. Other fruit-based desserts, like a fresh berry salad or a light easy berry tart, can also offer a refreshing counterpoint.
Creative Serving Ideas
Transform these petite delights into an unforgettable dessert by creating mini ice cream sandwiches. Simply take two cooled mini chocolate chip cookies and sandwich a small scoop of your favorite ice cream flavor between them. You can then roll the edges in sprinkles, mini chocolate chips, or even chopped nuts for added texture and visual appeal.
Arrange them artfully on a dessert charcuterie board. Combine the cookies with other small treats like bite-sized brownies, mini cupcakes, fresh fruits, and a selection of cheeses and dips. This creates a visually stunning and interactive dessert experience that guests will love exploring and enjoying.
For a charming party favor or a thoughtful gift, present them in small cellophane bags tied with a festive ribbon. You can also stack them in mini muffin liners and place them in a decorative tin or box. This presentation adds a personal touch and makes them feel even more special for the recipient, perhaps alongside a link to easycookfeed’s Pinterest for more inspiration.
Preparation & Storage
Storing Leftovers
To maintain the delightful freshness and texture of your mini chocolate chip cookies, proper storage is key. Once completely cooled, place the cookies in an airtight container. Ensure the container is indeed airtight to prevent the cookies from drying out or becoming stale too quickly. Storing them at room temperature is perfectly suitable for short-term keeping.
If you are storing a large batch, consider adding a slice of bread to the container. The bread will release a small amount of moisture, helping to keep the cookies soft and chewy for a longer period. Simply replace the bread slice every couple of days to maintain its effectiveness.
When stored correctly at room temperature, these mini cookies should remain delicious for up to 4 to 5 days. For optimal freshness, it’s best to consume them within the first few days. If you notice they are starting to lose their initial softness, a brief warming in a low oven or microwave can sometimes help revive them.
Freezing
These mini chocolate chip cookies freeze exceptionally well, making them ideal for preparing ahead of time or for stocking up for future cravings. You can freeze the baked and cooled cookies for up to 3 months. To do this, place the cookies in a single layer on a baking sheet and freeze until solid, which usually takes about an hour.
Once frozen, transfer the solid cookies to an airtight freezer bag or a freezer-safe container. Remove as much air as possible from the bag to prevent freezer burn. If stacking cookies, place parchment paper between layers to prevent them from sticking together.
Alternatively, you can freeze the cookie dough balls before baking. Scoop and shape the dough into balls as directed in the recipe, then place them on a parchment-lined baking sheet and freeze until firm. Once frozen, transfer the dough balls to a freezer bag or container. This allows you to bake fresh cookies on demand.
Reheating
If your cookies have become a little firm from storage or are reheating from frozen, a gentle warming process can restore their soft, chewy texture. For cookies stored at room temperature that have become slightly hard, you can microwave them for about 10-15 seconds. Be careful not to overheat, as this can make them tough.
Another excellent method is to place them on a baking sheet and warm them in a low oven, around 300°F (150°C), for 3-5 minutes. This method is particularly effective for reviving cookies that might have lost some of their crispness or softness. It brings them back to a pleasant warmth, making them taste almost freshly baked.
If reheating frozen dough balls, bake them directly from frozen, adding an extra 1-2 minutes to the recommended baking time. The result will be perfectly warm, soft, and gooey cookies straight from your oven, as if you just made them. This makes them a convenient and reliable treat for any time.
Frequently Asked Questions
-
Can I make these mini chocolate chip cookies without a mixer?
Absolutely! While a mixer can make the creaming process easier and faster, you can certainly make these cookies by hand. Use a sturdy whisk and a wooden spoon or spatula to cream the butter and sugars until light and fluffy. It will require a bit more arm strength and patience, but the delicious results will be well worth the effort. Ensure all ingredients are at the correct temperature, especially the softened butter, which is crucial for manual creaming.
-
My cookies spread too much; how can I prevent this next time?
Cookie spreading is often influenced by a few factors. Ensure your butter was not too soft or melted when you began creaming; it should be pliable but not greasy. If your oven runs hot, it can also cause premature spreading. Using a slightly colder dough, either by chilling it for 30 minutes before baking or by using chilled butter, can also help reduce spread. Additionally, ensure you are not overmixing the dough after adding the flour, as this can also contribute to excessive spreading.
-
Why are my cookies hard instead of chewy?
The key to chewy cookies lies in the balance of ingredients and the baking process. A higher ratio of brown sugar to granulated sugar contributes significantly to chewiness, as brown sugar contains more moisture. Avoid overbaking; pull the cookies from the oven when the edges are set and golden but the centers still look slightly underdone. They will continue to cook and firm up as they cool on the baking sheet. Using an egg yolk in addition to the whole egg can also increase richness and chewiness, though this recipe is designed for a perfect chewy result as is.