Mini Chocolate Chip Cookies – Easy Bite-Sized Recipe!
The delightful aroma of freshly baked cookies is a universal sign of comfort and joy, and few treats evoke such immediate happiness as the classic chocolate chip cookie. When you shrink that beloved treat down to a perfect, bite-sized portion, the appeal only grows. These mini chocolate chip cookies are an absolute treasure, offering all the rich, chewy, buttery goodness you expect, but in a wonderfully manageable size.
Imagine a cookie so perfectly proportioned that you can enjoy more than one without a hint of guilt, a cookie that fits effortlessly into a lunchbox, a party favor bag, or simply your hand for a moment of pure indulgence. This recipe delivers precisely that magic, transforming simple ingredients into miniature masterpieces that are as pleasing to the eye as they are to the palate. Get ready to fall in love with cookies all over again.
Why You Will Love This Recipe
- Perfectly Portioned: These cookies are designed to be a delightful, two-bite treat, ideal for satisfying cravings without overindulgence and perfect for sharing.
- Quick and Easy: With no chilling required and a remarkably short baking time, you can whip up a batch of these delightful cookies in under an hour from start to finish.
- Crowd-Pleasing Flavor: They capture the quintessential chocolate chip cookie taste – buttery, sweet, and packed with melty chocolate, making them a guaranteed hit with everyone.
- Incredibly Versatile: Beyond the classic chocolate chip, this base recipe is a fantastic canvas for countless creative variations, from adding nuts to swapping out the chocolate type.
- Gift-Worthy Presentation: Their charming miniature size makes them exceptionally well-suited for gifting, cookie exchanges, or adding a special touch to any celebration.
Ingredients You Need
Crafting these miniature delights relies on the quality of your ingredients, much like any great dessert. Using fresh, good-quality staples will ensure the best flavor and texture in your final cookies. Pay attention to the details, like ensuring your butter is truly softened and your vanilla extract is pure for that authentic taste experience. Even simple additions can elevate the final product significantly, proving that quality ingredients are the foundation of exceptional baking.
Mini Chocolate Chip Cookies

These mini chocolate chip cookies are perfectly sized to satisfy a cookie craving! They’re soft, chewy, and bursting with mini chocolate chips in bite-sized form.
- 1 1/4 cups all-purpose flour
- 1/4 teaspoon salt
- 1/2 teaspoon baking powder
- 1/2 teaspoon baking soda
- 1/2 cup butter, softened
- 1/4 cup sugar
- 1/2 cup dark brown sugar
- 1 large egg
- 1 teaspoon pure vanilla extract
- 1/2 cup mini chocolate chips
- 1Preheat oven to 350°F. Line one baking sheet with wax paper and line another baking sheet with Silpat or parchment paper. Set aside.
- 2In a mixing bowl, combine the flour, salt, baking powder, and baking soda; whisk until well combined and set aside.
- 3In your mixer's bowl, combine the butter, sugar, brown sugar, eggs, and vanilla; using your mixer, cream until smooth and creamy.
- 4Gently stir the flour mixture into the butter mixture; mix until thoroughly combined. Stir in the mini chocolate chips.
- 5Scoop out 1/2 teaspoon of cookie dough at a time and drop it onto the wax paper-lined baking sheet. Then, shape each cookie dough into a ball and transfer the cookie balls to the parchment paper-lined baking sheet, spacing them about 2 inches apart.
- 6Bake the cookies for 5 to 6 minutes or until the edges are light brown. The cookies should still feel soft in the middle and under-baked.
- 7Remove the mini chocolate chip cookies from the oven and let them cool on the baking sheet for 2 minutes; then, transfer to a wire rack to cool completely. Store the cookies in airtight containers.
Keywords: mini chocolate chip cookies, bite-sized cookies, easy cookies, soft cookies, chewy cookies, holiday cookies, party cookies, gift cookies
Quantities for each ingredient are detailed in the recipe card below, ensuring you have the perfect balance for these delightful mini chocolate chip cookies.
Variations
While the classic mini chocolate chip cookie is undeniably perfect, the beauty of this recipe lies in its adaptability. Feel free to explore different flavor profiles to suit your preferences or the occasion.
Consider a White Chocolate Macadamia Nut variation. For this, simply swap the mini chocolate chips for an equal amount of white chocolate chips. Then, fold in about half a cup of chopped, roasted macadamia nuts along with the white chocolate chips. The creamy sweetness of the white chocolate pairs beautifully with the rich crunch of the macadamia nuts, creating a sophisticated twist on the original.
For those seeking a more decadent experience, try a Double Chocolate Delight. This involves using dark chocolate chips instead of milk or semi-sweet. Additionally, you can enhance the chocolatey intensity by adding two tablespoons of unsweetened cocoa powder to your dry ingredients. This modification deepens the chocolate flavor significantly, making each bite a true cocoa lover’s dream. The rich bitterness of the dark chocolate balances the sweetness of the cookie dough wonderfully.
A fun and festive option is the Sprinkle Surprise. After scooping and shaping your dough balls, gently roll them in a shallow dish filled with colorful baking sprinkles before placing them on the baking sheet. This adds a vibrant visual appeal and a subtle textural contrast to the cookies, making them especially popular for children’s parties or holiday gatherings. They become instant celebratory treats!
For a touch of warmth and spice, introduce a hint of Cinnamon Spice. Add half a teaspoon of ground cinnamon and a pinch of nutmeg to the dry ingredients. This subtle addition brings a comforting, cozy aroma and flavor that complements the chocolate chips beautifully, especially during cooler months. It transforms the cookies into a more complex and aromatic confection, perfect for an afternoon breakfast treat alongside a warm drink.
How to Prepare mini chocolate chip cookies
Step 1: Gather and Prepare Your Ingredients
Begin by meticulously gathering all the necessary ingredients for your mini chocolate chip cookies. Ensure your butter is at the perfect room temperature – soft enough to cream easily but not melted, which is crucial for achieving the right dough consistency. Measure out your flour, sugars, leavening agents, salt, egg, and vanilla extract with precision. Having everything pre-measured and ready to go streamlines the entire baking process and helps prevent errors.
It is also a wise step to preheat your oven to the specified temperature, typically around 350°F (175°C). Simultaneously, prepare your baking sheets. Lining one with parchment paper or a silicone baking mat is essential to prevent sticking and ensure even baking and easy removal of the delicate cookies. Having your baking sheets ready before you start mixing the dough means you can move efficiently from mixing to baking, maintaining the optimal temperature for your oven.
Finally, ensure you have your mini chocolate chips ready. The mini size is key for these smaller cookies as it allows for a more even distribution of chocolate throughout each bite. If you only have regular-sized chocolate chips, a quick chop with a knife can create smaller pieces, though the texture might be slightly different. The goal is a delightful interplay of cookie and chocolate in every mouthful, so adjust as needed to achieve this balance.
Step 2: Combine the Dry Ingredients
In a medium-sized mixing bowl, carefully combine your dry ingredients: the all-purpose flour, baking powder, baking soda, and salt. Whisk these ingredients together thoroughly until they are well incorporated. This step is vital for ensuring that the leavening agents and salt are evenly distributed throughout the flour, which leads to consistent rising and texture in your finished cookies. An even distribution prevents pockets of saltiness or a cookie that doesn’t rise properly.
The whisking action not only combines the ingredients but also aerates the flour slightly, contributing to a lighter cookie texture. Take your time with this step; a simple whisking for about 30 seconds should suffice to ensure homogeneity. Once combined, you can set this bowl of dry ingredients aside. It will be added to the wet ingredients in the next stage of the process, bringing all the components together to form the cookie dough.
Ensuring your baking powder and baking soda are fresh is also important here. Expired leavening agents can result in flat, dense cookies. If you’re unsure about their potency, a quick test can be done: add a teaspoon of baking soda to a tablespoon of vinegar (it should fizz vigorously), and a teaspoon of baking powder to a tablespoon of hot water (it should bubble actively). This simple check can save your batch from disappointment.
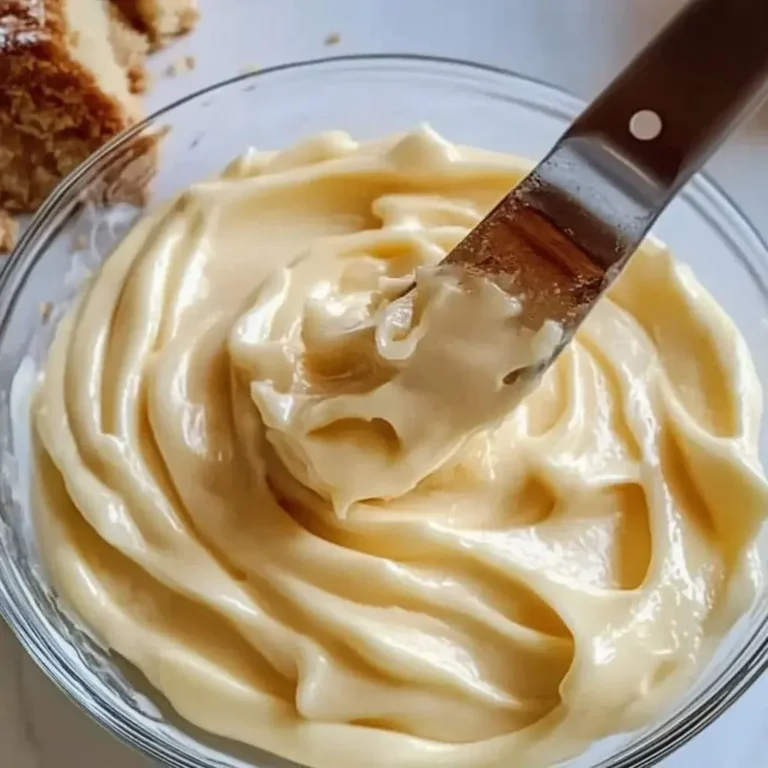
Step 3: Cream the Wet Ingredients
In a separate, larger mixing bowl, begin by creaming together the softened butter with both granulated sugar and dark brown sugar. Use an electric mixer (handheld or stand mixer) on medium speed. Cream these ingredients until the mixture is light, fluffy, and pale yellow in color. This process incorporates air into the butter and sugar, which is essential for creating a tender cookie with a good texture and structure. It typically takes several minutes of consistent mixing.
Once the butter and sugars are perfectly creamed, add the large egg and the pure vanilla extract to the bowl. Continue to mix on medium speed until these ingredients are thoroughly combined and the mixture is smooth and well-emulsified. The egg adds richness and acts as a binder, while the vanilla extract provides that classic, comforting aroma and flavor that defines a great chocolate chip cookie. Make sure to scrape down the sides of the bowl periodically to ensure everything is incorporated evenly.
The quality of your butter and its softening temperature are critical here. If the butter is too cold, it won’t cream properly, resulting in a greasy dough. If it’s too warm or melted, the cookies will spread excessively during baking. Aim for a consistency where you can easily make an indentation in the butter with your finger. This perfect softening ensures optimal aeration and a superior final cookie.
Step 4: Combine Wet and Dry Mixtures, Add Chocolate Chips
Gradually add the whisked dry ingredients from Step 2 into the creamed butter and sugar mixture from Step 3. Mix on low speed until just combined. Be careful not to overmix at this stage; overmixing can develop the gluten in the flour, leading to tougher cookies. Stop mixing as soon as you no longer see streaks of dry flour. A few small streaks are fine, as they will disappear during the next step.
Once the dough is mostly combined, it’s time to fold in the mini chocolate chips. Use a spatula or a wooden spoon to gently stir them into the dough. Ensure the chocolate chips are evenly distributed throughout the cookie dough for maximum chocolatey goodness in every bite. The gentle folding motion prevents the chocolate chips from breaking and helps maintain the integrity of the dough structure.
The dough should now be thick and cohesive. If it seems too sticky to handle, you can briefly chill it in the refrigerator for about 15-20 minutes, although this recipe is designed to be no-chill. This step ensures that the mini chocolate chip cookies will hold their shape during baking and achieve that desirable soft, chewy center with slightly crisp edges. The visual appeal of the chocolate chips dispersed throughout the dough is a promise of the deliciousness to come.
Step 5: Portion and Shape the Dough Balls
Now comes the fun part: portioning the dough. Using a small cookie scoop, specifically a 1/2 teaspoon size, portion out the cookie dough. This size is ideal for creating perfectly uniform mini cookies, ensuring they all bake evenly and remain consistently bite-sized. If you don’t have a cookie scoop, you can use two small spoons or even just estimate with your fingers, aiming for roughly marble-sized balls of dough.
Once scooped, gently roll each portion of dough between your palms to form smooth, round balls. This helps to create a more cohesive cookie that will bake up nicely. Place these dough balls onto your prepared baking sheet, ensuring they are spaced about 2 inches apart. This spacing is crucial to allow for a small amount of spreading as the cookies bake, preventing them from melding into one large cookie.
The uniformity of your dough balls will directly impact the uniformity of your baked cookies. Take a moment to make sure each ball is roughly the same size and shape. This attention to detail ensures that all your mini chocolate chip cookies will be ready to enjoy at the same time, creating a beautiful presentation when served or shared. It’s a small step that makes a big difference in the final presentation.
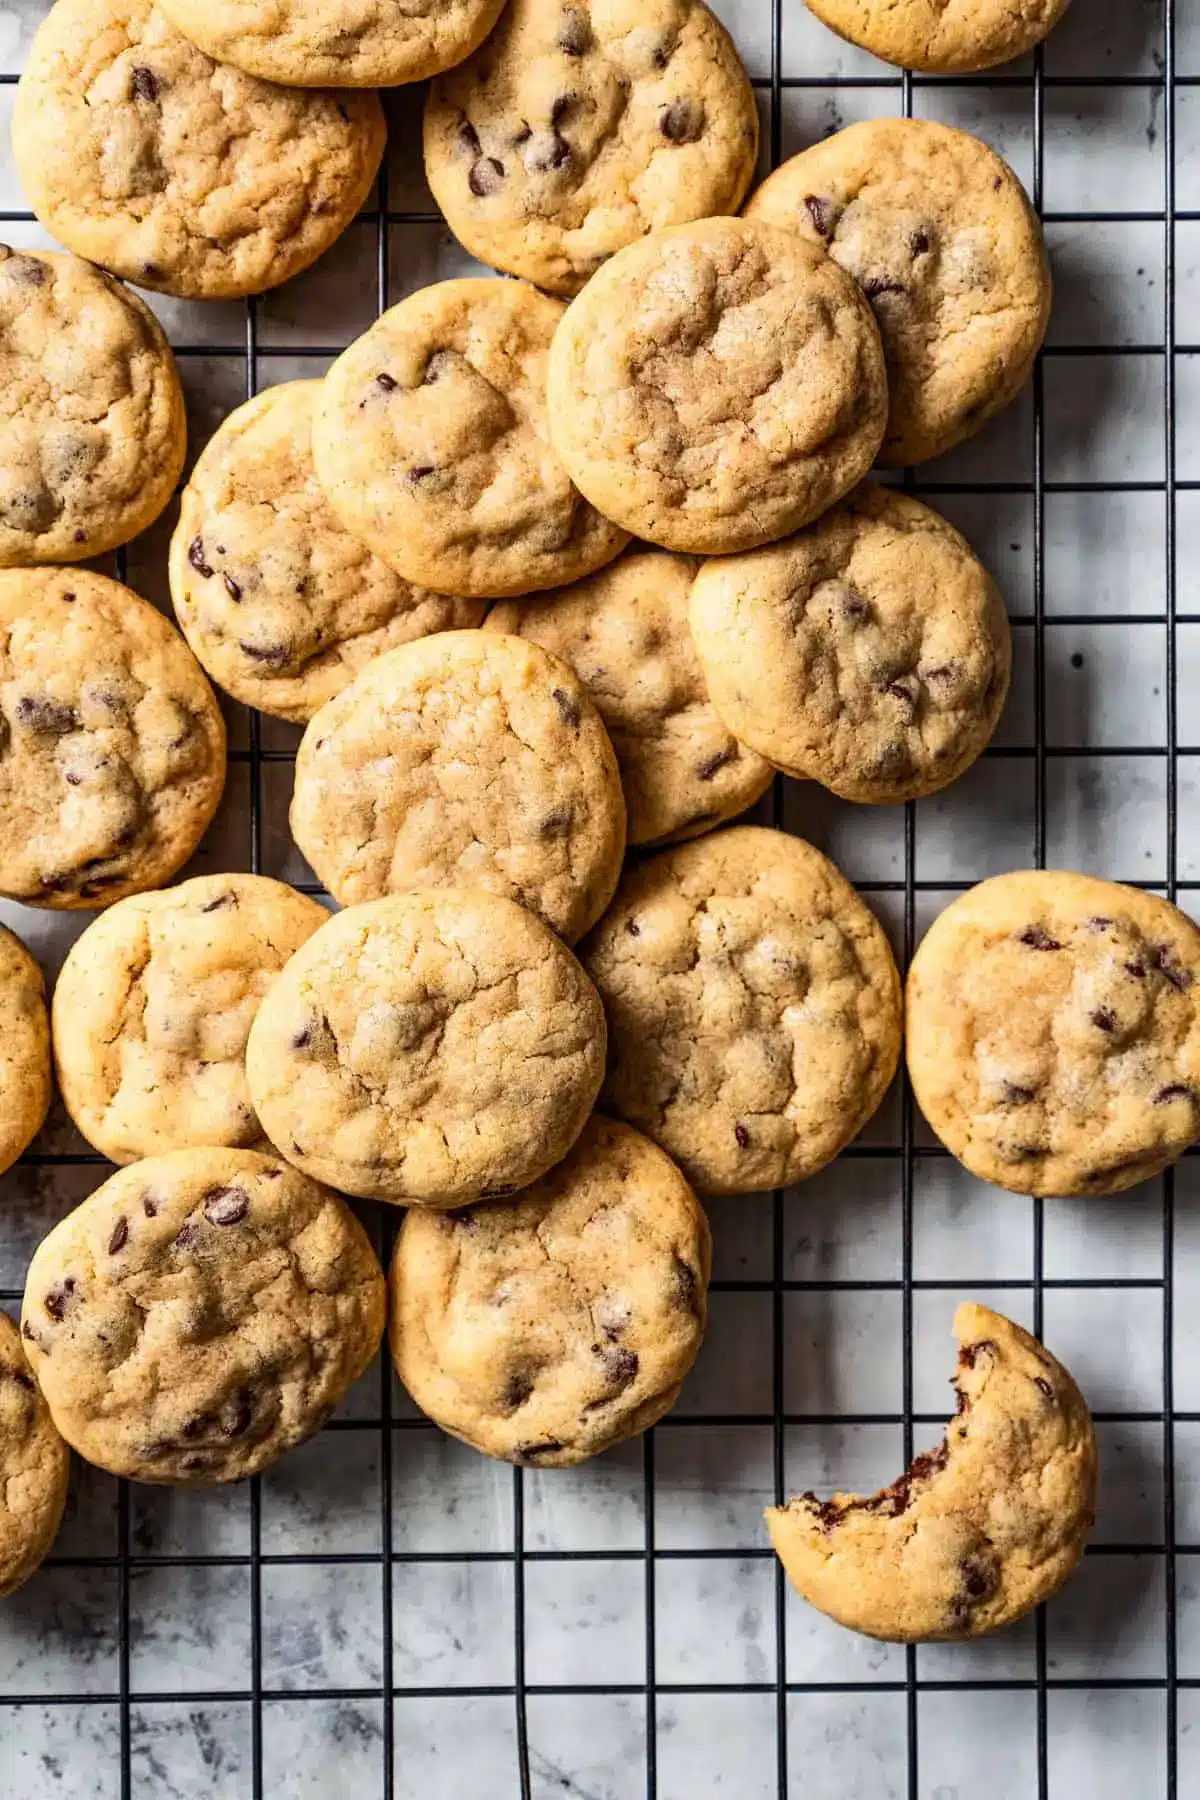
Step 6: Bake and Cool the Cookies
Place the baking sheet with the shaped dough balls into the preheated oven at 350°F (175°C). Bake for approximately 5 to 6 minutes. This short baking time is key to achieving the perfect texture: slightly underbaked in the center, with edges that are just beginning to turn a light golden brown. Overbaking these mini cookies can quickly turn them dry and crumbly, so watching them closely is essential.
As soon as the edges appear lightly golden and the centers still look soft, remove the baking sheet from the oven. The cookies will continue to cook and set up from the residual heat of the baking sheet. Let them rest on the baking sheet for about 2 minutes. This brief resting period allows the cookies to firm up just enough so they don’t fall apart when you move them.
After the 2-minute rest, carefully transfer the mini chocolate chip cookies to a wire cooling rack using a spatula. Allow them to cool completely on the rack. This step is crucial for achieving that perfect chewy texture; if you try to move them too soon, they might break. Patience here will reward you with perfectly formed, delightful mini cookies ready to be enjoyed.
Pro Tips for mini chocolate chip cookies
Use High-Quality Chocolate Chips: For the most impactful flavor, opt for good quality chocolate chips. Whether you prefer semi-sweet, milk, or dark, a premium brand will melt better and provide a richer taste. Consider using a mix of different chocolate types for added complexity. The mini size ensures you get pockets of chocolate in every single bite, enhancing the overall cookie experience significantly.
Don’t Overmix the Dough: Overmixing develops the gluten in the flour, which can lead to tough, dense cookies. Mix the dry ingredients into the wet ingredients only until they are just combined. A few small streaks of flour are acceptable, as they will be incorporated during the folding of the chocolate chips. Gentle mixing is key to a tender crumb.
Master the Baking Time: Mini cookies bake very quickly. It’s crucial to watch them closely during the last minute or two of baking. They should appear slightly underbaked in the center when you remove them from the oven; they will continue to set up as they cool. Pulling them out too late will result in dry, hard cookies, whereas pulling them out just right yields that irresistible chewy texture.
Chill if You Prefer a Thicker Cookie: While this recipe is designed for no-chill dough, if you prefer a slightly thicker, more cake-like cookie, chilling the dough for about 30 minutes before baking can help. This allows the fats to firm up, which can reduce spreading. However, for the classic soft and chewy mini cookie, proceed directly to baking after scooping.
Experiment with Add-ins: Don’t be afraid to get creative with your mini chocolate chip cookies. Consider adding a pinch of cinnamon or nutmeg for warmth, a teaspoon of espresso powder to enhance the chocolate flavor, or even a drizzle of melted chocolate over the cooled cookies. You can also swap chocolate chips for butterscotch, peanut butter chips, or even chopped nuts for a personalized touch.
Serving Suggestions for mini chocolate chip cookies
Decoration
These mini chocolate chip cookies are charming in their simplicity, but a few decorative touches can elevate them further. A light dusting of powdered sugar can give them a snowy, elegant appearance, especially fitting for holiday occasions. Alternatively, a delicate drizzle of melted chocolate – white, milk, or dark – across the top adds a touch of gourmet flair and intensifies the chocolate experience. For a pop of color and fun, consider pressing a few extra mini chocolate chips or small sprinkles onto the tops of the dough balls before baking.
Side Dishes
While perfect on their own, these mini cookies pair wonderfully with a variety of accompaniments. A tall glass of cold milk is the quintessential partner, providing a creamy contrast to the sweet cookie. For a more sophisticated pairing, consider a cup of freshly brewed coffee or a rich hot chocolate, both of which complement the chocolate notes beautifully. A small scoop of vanilla or chocolate ice cream served alongside can transform these mini cookies into an impromptu dessert à la mode, offering a delightful temperature and textural contrast.
Creative Serving Ideas
Think beyond simply placing them on a plate. Arrange these mini cookies on a tiered stand for a party dessert buffet, creating an eye-catching centerpiece. You can also use them as edible decorations for larger cakes or cupcakes, placing them artfully around the base or on top. Another creative idea is to create “mini cookie ice cream sandwiches” by spreading a small amount of softened ice cream or buttercream between two cookies. They also make fantastic edible party favors, presented in small cellophane bags tied with a festive ribbon, perhaps accompanied by a link to another delicious recipe for their next baking adventure.
Preparation & Storage
Storing Leftovers
To keep your mini chocolate chip cookies fresh and delicious, store them in an airtight container at room temperature. Avoid using plastic bags, as they can trap moisture and make the cookies soggy. Adding a slice of bread to the container can help maintain their soft, chewy texture by providing a little extra moisture. Properly stored, these cookies should remain delightful for up to 4-5 days.
Freezing
The beauty of these mini cookies extends to their freezer-friendliness. You can freeze baked cookies for up to 3 months. Arrange them in a single layer on a baking sheet and freeze until solid. Then, transfer the frozen cookies to a freezer-safe bag or container, separating layers with parchment paper to prevent sticking. Alternatively, you can freeze the unbaked cookie dough balls. Scoop and shape the dough, freeze them on a baking sheet until firm, and then transfer to a freezer bag. This allows you to bake fresh cookies whenever a craving strikes.
Reheating
If your cookies have been stored and have become a bit firm, or if you’re reheating frozen baked cookies, a brief warming can revive their soft texture. You can gently warm them in a low oven (around 300°F or 150°C) for 2-3 minutes, or microwave them for about 10-15 seconds. For frozen dough balls, bake them directly from frozen, adding an extra 1-2 minutes to the baking time until they are golden brown and set in the center.
Frequently Asked Questions
-
Can I use different types of chocolate chips in this recipe?
Absolutely! While the recipe calls for mini chocolate chips, you can certainly experiment with other varieties. Milk chocolate, dark chocolate, semi-sweet chocolate, or even white chocolate chips all work wonderfully. You can also mix different types for a more complex flavor profile. If you only have larger chocolate chips, simply chop them into smaller pieces so they distribute evenly throughout the mini cookies. Consider adding other mix-ins like butterscotch chips, peanut butter chips, or even chopped nuts to customize your cookies further and explore new taste dimensions.
-
My cookies spread too much; what went wrong?
Excessive spreading in cookies can often be attributed to a few factors. Firstly, ensure your butter was softened to room temperature, not melted or too cold. If the butter is too soft or melted, the cookies will lose their structure and spread thinly. Secondly, avoid overmixing the dough after adding the flour; this can overdevelop the gluten, leading to less structure. Baking temperature also plays a role; if your oven runs hot, it can cause premature spreading. Using a smaller scoop for portioning and leaving adequate space between dough balls on the baking sheet can also help manage spreading. For a thicker cookie, chilling the dough briefly before baking can also help prevent excessive spread.
-
How do I ensure my mini chocolate chip cookies are perfectly soft and chewy?
Achieving that coveted soft and chewy texture in mini chocolate chip cookies hinges on a few key elements. The primary factor is the baking time; these small cookies bake very quickly, and overbaking is the biggest culprit for dryness. Watch them closely and remove them from the oven when the edges are just beginning to turn golden brown and the centers still look soft and slightly underdone. They will continue to set as they cool on the baking sheet. The ratio of brown sugar to granulated sugar in the recipe also contributes significantly to chewiness, as brown sugar contains molasses, which adds moisture. Finally, ensure you’re using fresh leavening agents (baking soda and baking powder) as they affect the cookie’s rise and texture.