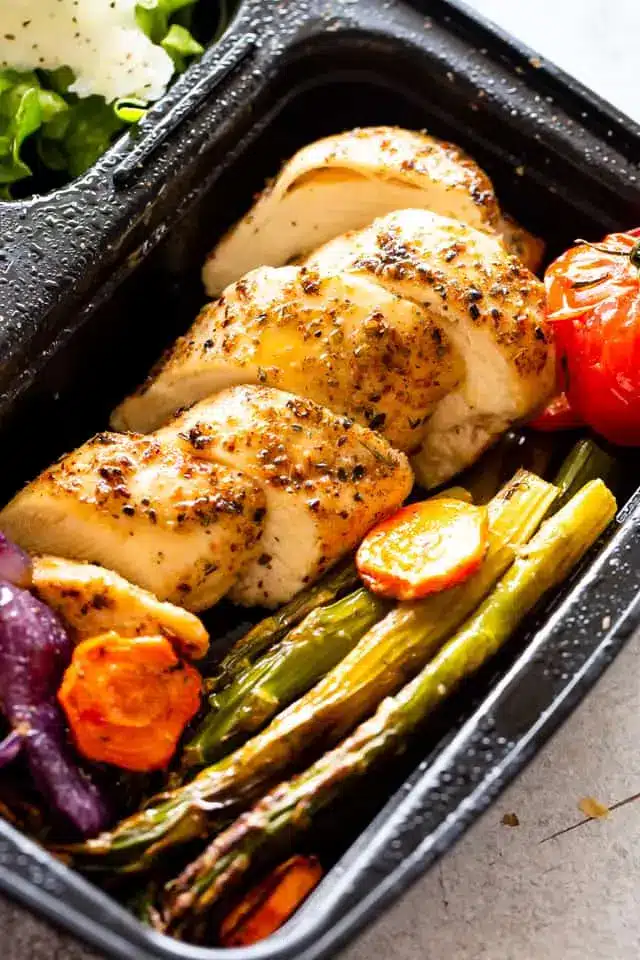
Easy Maki Roll Recipe – Make Your Own Sushi

Embarking on the journey of creating sushi at home can feel like a culinary adventure, often perceived as complex and time-consuming. However, with the right guidance and a straightforward approach, you can master the art of rolling perfect maki, bringing a taste of Japan right to your kitchen. This recipe demystifies the process, making it accessible for even the most novice home cooks.
This particular maki roll recipe is inspired by the beloved California roll, featuring a delightful combination of imitation crab, crisp cucumber, creamy avocado, and sweet carrot, all encased in the distinctive dark green of nori seaweed. It’s a harmonious blend of textures and flavors that promises a satisfying and visually appealing meal, proving that delicious sushi is well within your reach without needing to visit your favorite sushi restaurant.
Why You Will Love This Recipe
- Effortless Preparation: Despite its sophisticated appearance, this recipe breaks down the sushi-making process into manageable steps, ensuring success even for beginners. The use of readily available ingredients and clear instructions makes it a joy to prepare.
- Customizable Fillings: While the classic crab, cucumber, avocado, and carrot combination is fantastic, this recipe serves as a perfect canvas for your creativity. Feel free to experiment with other ingredients that appeal to your palate, making each roll uniquely yours.
- Impressive Presentation: Homemade maki rolls are a surefire way to impress guests at dinner parties or special occasions. The vibrant colors and neat presentation of these rolls will undoubtedly be a conversation starter and a culinary highlight.
- Healthy and Balanced: Sushi is often considered a healthy dining option, and this recipe is no exception. It offers a good balance of carbohydrates from the rice, healthy fats from the avocado, and essential nutrients from the vegetables and imitation crab.
- Fun and Engaging Activity: Making sushi can be a wonderfully interactive and fun activity for families or friends. Rolling sushi together can transform dinner into an engaging culinary experience, fostering a sense of shared accomplishment.
Ingredients You Need
The foundation of any exceptional maki roll lies in the quality of its ingredients. Selecting fresh, vibrant components will significantly elevate the taste and texture of your sushi. We’ll focus on using sushi rice for its inherent stickiness, crisp vegetables for freshness, and imitation crab for its classic flavor profile. Each element plays a crucial role in creating a balanced and delicious outcome.
Easy Maki Roll Recipe

Master the art of homemade sushi with this easy Maki Roll recipe! Featuring nori and perfectly cooked sushi rice wrapped around a colorful combo of imitation crab, cucumber, avocado, and carrots, these rolls promise a fun and flavorful dining experience!
- 1½ cups sushi rice
- 1½ cups water
- 1½ tablespoons granulated sugar
- 4 sheets sushi Nori
- 1 English cucumber, peeled and sliced into thin strips
- 1 medium carrot, peeled and sliced into thin strips
- 1 avocado, sliced
- 4 sticks imitation crab, cut in half, longwise
- 1For the sushi rice: Rinse the rice in a fine mesh strainer until the water runs clear. Combine the rice and water in a bowl. Cook the rice according to package directions or in an Instant Pot. Meanwhile, make the rice wine vinegar mixture: In a small saucepan, combine the rice wine vinegar and sugar and cook over medium heat until the sugar dissolves. Fold the rice vinegar mixture into the prepared sushi rice. Allow the rice to cool to just above room temperature.
- 2To assemble: Place a sheet of nori over a bamboo sushi mat. Wet your fingers with warm water. Press about ¾ cup of the prepared sushi rice over the nori, creating an even layer.
- 3Layer 1 row of English cucumber, 1 row of carrots, 1 row of imitation crab, and 1 row of avocado slices on top of each other in a line at one end of the mat.
- 4Fold the nori and rice over the filling, then squeeze the bamboo mat to create a tight cylinder. Continue folding the roll over itself, squeezing it into a cylinder after each fold, until you reach the end of the roll. Repeat with the remaining ingredients.
- 5Wet a sharp knife with warm water and slice the rolls into ½ inch slices, wetting the knife between slices if it starts to get sticky. Serve the sushi rolls with your favorite sushi dipping sauce(s).
Keywords: sushi, maki rolls, imitation crab, cucumber, avocado, carrot, Japanese, dinner, easy
Quantities for each ingredient are detailed within the recipe card, ensuring you have precisely what you need for perfect rolls every time.
Variations
To truly make this maki roll recipe your own, consider exploring a few delightful variations that cater to different dietary preferences and taste profiles. These modifications can transform a classic into something entirely new and exciting, ensuring there’s a perfect maki roll for everyone.
Vegan Delight: For a plant-based option, swap the imitation crab for marinated and pan-fried tofu strips or grilled portobello mushrooms. You can also add ingredients like grilled asparagus, sweet potato tempura, or a sprinkle of toasted sesame seeds for added flavor and texture. A drizzle of vegan sriracha mayo can provide a creamy, spicy kick.
Low-Carb Twist: If you’re mindful of carbohydrate intake, you can create a delicious “no-rice” maki roll. Instead of sushi rice, use finely shredded daikon radish mixed with a touch of rice vinegar and salt as your base. This provides a refreshing crunch and a slightly peppery note that complements the other fillings beautifully, similar to some lunch options.
Spicy Seafood Sensation: Elevate the flavor by incorporating cooked shrimp or scallops, perhaps tossed with a spicy sriracha or chili sauce before adding them to the roll. Combining these with a touch of cream cheese or a spicy mayonnaise can create a rich and decadent filling that is incredibly satisfying. This variation adds a wonderful complexity, reminiscent of some richly flavored dinner dishes.
How to Prepare maki roll recipe
Step 1: Preparing the Sushi Rice
The journey to perfect maki begins with mastering the sushi rice. It’s crucial to select the right type of rice; short-grain sushi rice is essential due to its higher starch content, which gives it that signature sticky texture needed to hold the rolls together beautifully. Thoroughly rinsing the rice under cold running water is a non-negotiable first step. Continue rinsing until the water runs clear, a process that removes excess starch and prevents the rice from becoming gummy or mushy during cooking.
Once rinsed, the rice is cooked. For an Instant Pot, combine 1.5 cups of sushi rice with 1.5 cups of water. Seal the lid and cook on high pressure for 10 minutes. After the cooking cycle, allow the pressure to release naturally for 12 minutes before carefully opening the lid and fluffing the rice gently with a fork. This method ensures each grain is perfectly cooked and separate, yet wonderfully sticky.
While the rice is cooking, prepare the seasoned vinegar mixture. In a small saucepan, combine ¼ cup of rice wine vinegar with 1.5 tablespoons of granulated sugar. Gently heat this mixture over medium heat, stirring constantly, just until the sugar is completely dissolved. Do not let it boil. This sweet and tangy vinegar is key to infusing the rice with authentic sushi flavor.
Step 2: Seasoning and Cooling the Rice
Once the rice is cooked and fluffed, and the vinegar mixture is ready, it’s time to bring them together. Transfer the hot, cooked sushi rice to a large, non-metallic bowl. A wooden or glass bowl is ideal as it won’t react with the vinegar. Gradually pour the seasoned vinegar mixture over the hot rice, using a cutting motion with a rice paddle or spatula to gently fold and mix. The goal is to evenly distribute the vinegar without mashing the delicate rice grains.
As you fold, fanning the rice with a piece of cardboard or a handheld fan can help it cool down more quickly and give it a glossy sheen. Continue fanning and folding until the rice has cooled to just above room temperature. It should feel slightly warm to the touch but not hot. This precise temperature is crucial for handling the rice and ensuring it adheres properly to the nori without becoming too sticky to manage or too cool to form a cohesive roll.
Properly cooled and seasoned sushi rice is the backbone of a great maki roll. Its slightly sweet and tangy profile, combined with the perfect sticky texture, provides the ideal base for all the delicious fillings you’ll add. This meticulous preparation ensures each bite is a harmonious blend of flavors and textures, a testament to the care taken in the initial stages. It’s this attention to detail that truly distinguishes homemade sushi.
Step 3: Preparing the Nori and Spreading the Rice
With the rice perfectly prepared and cooled, the next step is to begin the actual rolling process. Take a sheet of sushi nori, the dark, crisp seaweed wrapper, and place it shiny-side down on a bamboo sushi mat. The rougher side will face upwards, providing a better surface for the rice to adhere to. It’s essential to work with slightly damp hands to prevent the sticky rice from clinging to your fingers. Keep a small bowl of warm water nearby to periodically dip your fingers in, ensuring a smooth and effortless spreading of the rice.
Now, take approximately ¾ cup of the seasoned sushi rice and evenly spread it over the nori sheet. Start from the edge closest to you and gently press the rice outwards, covering the nori in a thin, uniform layer. Leave a small border of about half an inch along the far edge of the nori. This un-riced border will act as a “glue” to help seal the roll shut once it’s fully formed. Ensure the rice layer is consistent in thickness to avoid lopsided rolls or areas where the nori might tear.
This stage requires a gentle but firm touch. You want to press the rice firmly enough so it adheres well to the nori and creates a solid base, but not so aggressively that you crush the rice grains. The even distribution of rice is key to the final appearance and structure of your maki rolls. A well-spread rice layer ensures that when you roll, the fillings are enclosed snugly and evenly, leading to beautiful, professional-looking sushi rolls every time.
Step 4: Layering the Fillings
This is where the magic of color and flavor truly comes to life. Arrange your prepared fillings in a neat line across the layer of rice, about one inch from the edge closest to you. For this classic maki roll, we’re using thin strips of peeled English cucumber, julienned carrot, sliced avocado, and imitation crab sticks that have been cut in half lengthwise. The key is to place them snugly together, creating a compact filling that won’t spill out when the roll is cut.
The order in which you layer the ingredients can contribute to the visual appeal when the roll is sliced. A common and effective arrangement is to place the cucumber strips first, followed by the carrots, then the imitation crab, and finally the avocado slices. This ensures that each filling is distributed evenly throughout the roll, providing a balanced taste and texture in every bite. Aim for a generous but not overwhelming amount of filling; too much can make rolling difficult and lead to the roll bursting.
Ensure the fillings are aligned horizontally across the rice. Imagine creating a compact core for your sushi roll. The freshness of the cucumber and carrot provides a crisp contrast to the creamy avocado and the slightly sweet, tender imitation crab. This combination is a perfect example of how simple, fresh ingredients can come together to create something truly spectacular, making it a delightful alternative to store-bought sushi. These fillings are also excellent additions to a baked lemon chicken dish if you’re looking for complementary flavors.
Step 5: Rolling the Maki
Now comes the most exciting part: the rolling! Begin by lifting the edge of the bamboo mat closest to you, bringing it up and over the fillings. Use your fingers to hold the fillings in place as you start the roll. Tuck the edge of the nori and rice tightly around the filling. As you continue to roll forward, use the bamboo mat to gently shape the roll into a firm cylinder. Squeeze the mat periodically between folds to ensure the roll is compact and holds its shape.
Continue rolling forward, lifting the mat as you go to prevent it from getting rolled into the sushi itself. Apply gentle, even pressure throughout the rolling process. Once you reach the end of the nori sheet, the un-riced border you left at the far edge should help seal the roll. If it doesn’t seem to be sticking, you can moisten it slightly with a little water. The goal is to create a tightly packed, cylindrical roll that will slice cleanly without falling apart.
Repeat this rolling process with the remaining ingredients and fillings. Take your time and don’t be discouraged if your first few rolls aren’t perfectly shaped. Practice is key, and with each roll, you’ll become more adept at applying the right amount of pressure and achieving that ideal cylindrical form. This methodical approach ensures that each maki roll is a work of art, ready to be enjoyed.
Step 6: Cutting and Serving
The final step is to transform your rolled cylinders into perfect, bite-sized maki rolls. To achieve clean cuts, it is imperative to use a very sharp knife. Dampen the blade of the knife with warm water; this simple trick prevents the sticky rice from adhering to the blade, ensuring smooth slices. Have a damp towel or a bowl of warm water at the ready to wipe and re-wet the knife between each cut, as the rice can become sticky as you work.
Begin by slicing the roll in half. Then, take each half and slice it into approximately ½-inch thick pieces. You should aim for about 6 to 8 pieces per roll, depending on your preference. A well-rolled maki will hold its shape beautifully during this cutting process, revealing the colorful layers of filling encased in the rice and nori. The visual appeal of the cut roll is as important as its taste, making it a feast for the eyes as well as the palate.
Arrange the sliced maki rolls attractively on a serving platter. Serve immediately with traditional accompaniments such as soy sauce, wasabi, and pickled ginger. The combination of the fresh, flavorful ingredients and the perfectly seasoned sushi rice makes these homemade maki rolls a delightful and satisfying meal or appetizer. They are especially wonderful served alongside a refreshing bowl of easy lobster bisque recipe for a luxurious meal.
Pro Tips for maki roll recipe
Master the Rice: Always use short-grain sushi rice and rinse it thoroughly until the water runs clear. Properly seasoned and cooled rice is the bedrock of good maki. Don’t overcook it, and allow it to cool to the correct temperature before handling.
Keep Hands Damp: A small bowl of warm water is your best friend when working with sushi rice. Dipping your fingers frequently will prevent the rice from sticking to your hands, allowing for smooth and even spreading.
Don’t Overfill: While it’s tempting to pack in as many delicious fillings as possible, overfilling can make rolling difficult and can cause the maki to break apart. A balanced amount ensures a neat, tight roll.
Use a Sharp, Wet Knife: This cannot be stressed enough. A sharp knife dipped in warm water is essential for clean, professional-looking slices. Wipe and re-wet the blade between each cut.
Gentle but Firm Rolling: When using the bamboo mat, apply even pressure to create a compact cylinder. Too much pressure can crush the fillings or tear the nori, while too little will result in a loose roll that falls apart.
Serving Suggestions for maki roll recipe
Decoration
Elevate the visual appeal of your maki rolls with simple yet effective garnishes. A sprinkle of toasted sesame seeds, either black or white, adds a subtle nutty flavor and an attractive speckled appearance. Thin slivers of pickled ginger, known as gari, not only add a vibrant pink hue but also serve as a palate cleanser between different types of sushi. A small dollop of vibrant green wasabi paste, placed artfully on the side of the platter, offers a striking contrast and a hint of spicy heat.
Side Dishes
Maki rolls pair beautifully with a variety of Japanese-inspired side dishes. A simple and refreshing miso soup, with its savory depth and comforting warmth, is a classic accompaniment. Consider a crisp, light Asian cucumber salad, perhaps with a sesame dressing, to provide a cool, tangy counterpoint to the rich flavors of the sushi. For something more substantial, a small portion of edamame, lightly salted and steamed, offers a healthy and satisfying addition.
Creative Serving Ideas
Transform your maki roll presentation into a culinary experience. Arrange the sliced rolls in a visually appealing pattern on a minimalist platter, perhaps alternating the direction of the slices to create a dynamic display. For a more playful presentation, serve individual bento boxes where each compartment holds a few maki rolls alongside other small Japanese delicacies. You could also serve them with an assortment of dipping sauces beyond the traditional soy sauce, such as teriyaki or a spicy mayo, allowing guests to customize their flavor experience.
Preparation & Storage
Storing Leftovers
To keep your leftover maki rolls fresh and delicious, proper storage is key. Once the rolls have been cut and served, wrap any remaining portions tightly in plastic wrap. This prevents them from drying out. Next, place the tightly wrapped rolls in an airtight container. This double layer of protection ensures maximum freshness when stored in the refrigerator. It’s best to consume leftovers within 1-2 days for optimal taste and texture.
Freezing
Freezing maki rolls is generally not recommended as the texture of the sushi rice can significantly change upon thawing, becoming mushy and unappealing. The nori seaweed also tends to lose its crispness and become limp. While it’s technically possible, the resulting quality is often compromised, making fresh preparation the preferred method for the best sushi experience. If you must freeze, ensure they are very tightly wrapped, but be prepared for a textural difference upon thawing.
Reheating
Maki rolls are best enjoyed fresh and at room temperature or slightly chilled. Reheating is not advisable as it will adversely affect the texture of the rice and fillings. If you have stored them in the refrigerator, simply remove them from their container and allow them to come to room temperature for about 15-20 minutes before serving. This will help revive their texture and flavor to the closest possible state to when they were freshly made.
Frequently Asked Questions
-
What is the best type of rice to use for maki rolls?
The absolute best type of rice for maki rolls is short-grain sushi rice. This specific variety has a higher starch content than long-grain or medium-grain rice, which is crucial for achieving the sticky, cohesive texture needed to hold the sushi together. When cooked, the grains of sushi rice cling to each other, allowing you to form neat rolls and preventing them from falling apart when sliced or eaten. Using regular rice will result in a less sticky and more crumbly texture, making it very difficult to form proper maki rolls.
-
Can I use raw fish in my maki rolls, and if so, what precautions should I take?
Yes, you can use raw fish, but it is absolutely essential to use only “sushi-grade” or “sashimi-grade” fish. This designation means the fish has been handled and processed under strict regulations to minimize the risk of parasites and bacteria. Always purchase raw fish intended for sushi from a reputable fishmonger or market that specifically labels it as safe for raw consumption. If you are unsure or do not have access to trustworthy sushi-grade fish, it is safer to opt for cooked seafood, such as cooked shrimp or imitation crab, or vegetarian fillings to avoid any health risks.
-
How do I ensure my maki rolls are tightly rolled and don’t fall apart?
Achieving a tightly rolled maki involves a combination of techniques. First, ensure your sushi rice is cooked correctly and cooled to the proper temperature; it should be sticky but not mushy. When spreading the rice on the nori, apply even pressure and don’t overfill with ingredients. As you begin to roll, use the bamboo mat to gently but firmly shape the roll into a cylinder, tucking the filling in snugly. Squeeze the mat between each fold to compress the roll. The un-riced border on the nori, when slightly moistened, will help seal the roll effectively. Practicing this rolling technique is key, and with each attempt, you’ll develop a better feel for the right amount of pressure to apply.