Jam and Coconut Cake Traybake

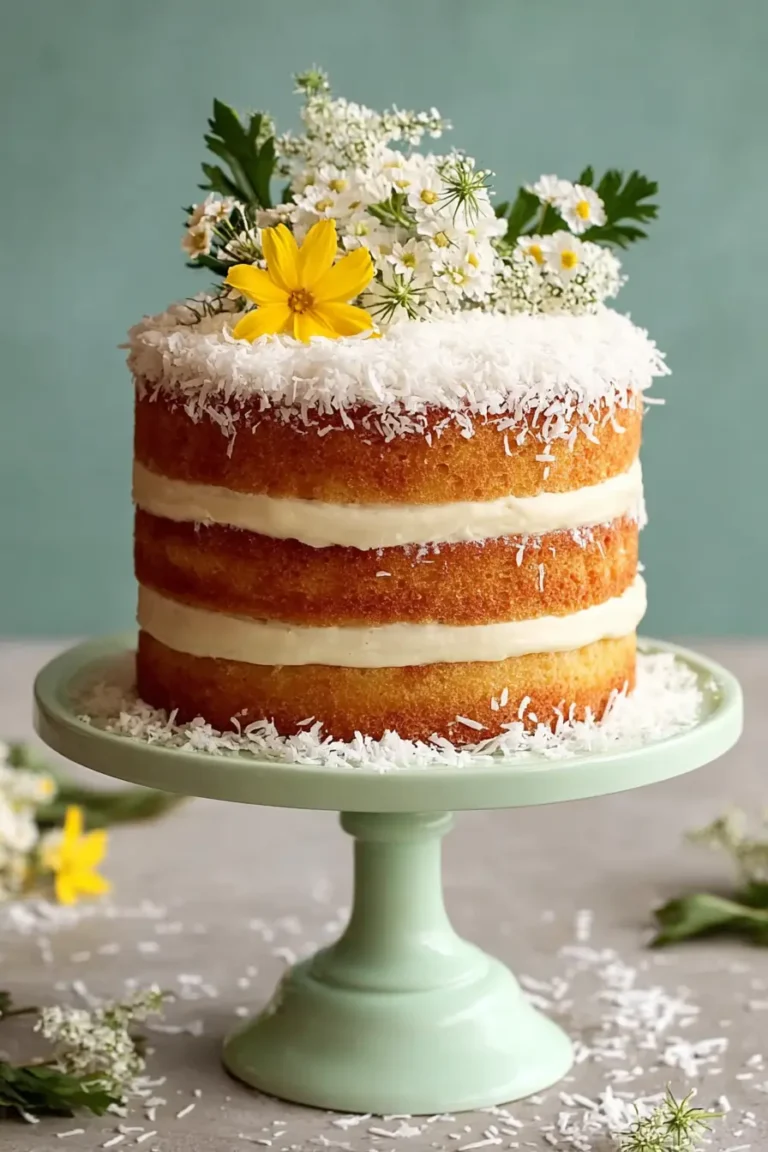
Soft, reliable, and wonderfully simple, Jam and Coconut Cake is a classic British traybake with a light sponge, a glossy jam topping, and a sweet coconut finish that makes it ideal for family baking, afternoon tea, or an easy make-ahead cake.
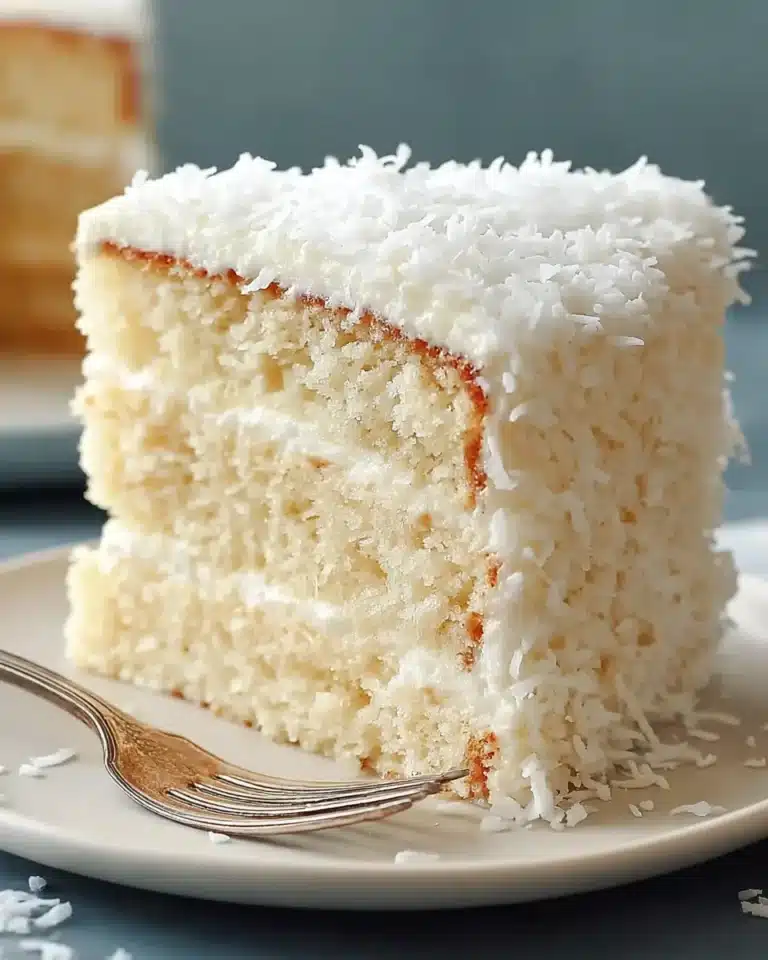
This is the kind of cake that feels instantly familiar, using everyday ingredients and coming together without fuss to bake into a tender sponge that holds up beautifully under a thin layer of jam and coconut.
Why You Will Love This Recipe
- Classic Comfort:</strong> This cake evokes a sense of nostalgia with its familiar flavours and textures, making it a guaranteed crowd-pleaser for any occasion.
- Effortless Baking:</strong> The straightforward method requires no special skills, ensuring even novice bakers can achieve delicious results with minimal stress.
- Delightful Contrast:</strong> Experience a perfect harmony of a soft, buttery crumb, a sweet, fruity jam layer, and the subtle chewiness of toasted coconut.
- Versatile Treat:</strong> It’s the perfect companion for a cup of tea, a delightful addition to lunchboxes, or a charming homemade dessert for impromptu gatherings.
- Make-Ahead Magic:</strong> This cake stores exceptionally well, allowing you to prepare it in advance for stress-free entertaining or to have a sweet treat readily available.
Ingredients You Need
The magic of this Jam and Coconut Cake lies in its simplicity, utilizing common pantry staples that transform into something truly delightful. Opting for good quality ingredients will always elevate the final bake, ensuring a superior flavour and texture that everyone will adore. The combination of a tender sponge, sweet jam, and fragrant coconut creates a harmonious balance that is utterly irresistible. Remember, the precise quantities for each ingredient can be found within the recipe card below, ensuring you have everything you need for a perfect bake.
Jam and Coconut Cake
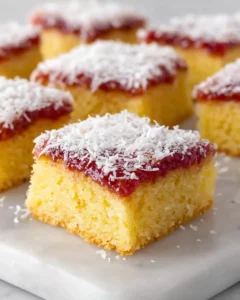
A soft, tender traybake finished with a glossy layer of fruit jam and a generous scattering of sweetened coconut. This traditional cake is straightforward to prepare and bakes to a light, golden finish.
- 5 large eggs (brought to room temperature)
- 280 grams margarine
- 280 grams fine sugar
- 300 grams fruit jam (such as apricot or raspberry)
- 280 grams self-rising flour (preferably Swans Down for a lighter crumb)
- 100 grams sweetened shredded coconut
- 1Heat the oven to 180°C, or 160°C for a fan oven, or Gas Mark 4. Line a 9 x 12-inch baking tin with greaseproof paper and set it aside.
- 2Place the margarine and sugar into a large mixing bowl and beat together until the mixture becomes pale and fluffy.
- 3Add the eggs individually, beating well after each addition so that every egg is fully incorporated before the next is added.
- 4Sift the self-rising flour into the bowl, then fold it in gently until a smooth, even batter has formed.
- 5Spoon the batter into the prepared tin and level the surface evenly. Bake for 30 to 40 minutes, or until the cake is well risen, lightly golden, and a skewer inserted into the centre comes out clean.
- 6Remove the cake from the oven and leave it in the tin for a few minutes so it can settle and firm slightly.
- 7Transfer the cake to a wire rack and allow it to cool completely. This helps prevent moisture from collecting underneath.
- 8Once the cake is fully cold, warm the jam in the microwave for about 20 seconds, if desired, to make it easier to spread.
- 9Cover the top of the cake with the jam, taking it right to the edges and into the corners.
- 10Scatter the shredded coconut evenly over the jam to finish.
Keywords: Jam and Coconut Cake, Traybake, British Baking, Afternoon Tea, Easy Cake
- eggs: bring structure and richness to the sponge, and letting them come to room temperature helps the batter mix more smoothly, giving you a more even crumb.
- margarine: creates a soft, tender cake and creams easily with the sugar, which helps the traybake bake up light rather than heavy.
- fine sugar: sweetens the cake and helps with that pale, fluffy base when beaten well with the margarine.
- self-rising flour: gives the sponge its lift and keeps the method very straightforward, as folding it in gently helps preserve the air you created during mixing.
- fruit jam: forms the glossy top layer, with apricot giving a gentle, golden fruitiness, while raspberry adds a brighter, slightly sharper contrast.
- sweetened shredded coconut: finishes the cake with its signature look and texture, adding sweetness, a little chew, and that classic old-fashioned traybake feel.
Variations
While the classic Jam and Coconut Cake is a triumph on its own, its adaptable nature opens doors to exciting flavour transformations. Consider a vibrant dessert experience by infusing the jam layer with a hint of citrus zest, like lemon or orange, to cut through the sweetness and add a fragrant dimension. This simple addition can elevate the cake from comforting to sophisticated in a single step, perfect for those who enjoy a little zing in their bakes.
For those seeking a lighter, perhaps breakfast-friendly version, you could experiment with a wholemeal flour blend for the sponge, adding a subtle nutty undertone and increased fibre content. You might also consider reducing the sugar slightly in the sponge itself, relying more on the sweetness of the jam, and perhaps incorporating a handful of finely chopped nuts like almonds or walnuts into the coconut topping for added crunch and depth of flavour. These subtle shifts can redefine the cake’s character.
A truly decadent variation could involve a dual-layer approach to the jam. Start with a thin layer of a more tart jam, such as blackcurrant or redcurrant, spread over the cooled sponge, and then top this with your preferred sweeter jam, like strawberry or apricot, before finishing with the coconut. This layering creates a more complex fruity profile, offering both sharpness and sweetness in every bite, making it a truly memorable dessert.
How to Prepare Jam and Coconut Cake
Step 1: Prepare Your Baking Environment
The journey to a perfect Jam and Coconut Cake begins with meticulous preparation of your workspace and equipment. This initial stage is crucial for a smooth and efficient baking process, ensuring all elements come together seamlessly. It’s about setting the foundation for a cake that is both visually appealing and deliciously tender. Paying attention to these details now will prevent any last-minute rushes or complications.
Start by preheating your oven to the correct temperature, typically around 180°C (160°C for fan ovens or Gas Mark 4). This ensures the oven is at its optimal heat by the time your batter is ready to bake, promoting even cooking and consistent rise. Simultaneously, prepare your baking tin, a standard 9 x 12-inch rectangular tin, by lining it thoroughly with greaseproof paper. Ensure the paper extends slightly up the sides; this not only prevents sticking but also makes lifting the finished cake out of the tin a remarkably easy task.
Having your ingredients measured and at room temperature, especially the eggs and margarine, is also part of this essential setup. This forethought guarantees that when you begin mixing, you can proceed without interruption, allowing the ingredients to combine optimally. A well-prepared station is the hallmark of a confident baker, and it’s the first step towards achieving that signature soft crumb and perfectly set topping.
Step 2: Creaming the Foundation
The heart of any good cake batter lies in the creaming process, where fat and sugar are beaten together to create a light, airy base. This step is more significant than it might appear, as it directly influences the final texture of your sponge, contributing to its tenderness and delicate crumb. The goal here is not merely to combine the ingredients but to incorporate as much air as possible, which will later expand in the oven, giving the cake its lift.
In a large mixing bowl, combine the softened margarine and fine sugar. Using an electric mixer, or a strong whisk and a good dose of arm power, beat these two ingredients together vigorously. Continue beating until the mixture transforms into a pale, fluffy, and almost cloud-like consistency. This typically takes several minutes, and you will notice a distinct change in the colour and volume of the mixture as air is incorporated. The mixture should look noticeably lighter than when you started.
This pale and fluffy stage is the indicator that you have successfully aerated the batter. Skipping or rushing this stage can result in a denser cake, as it won’t have the same internal structure to support its rise. The well-creamed mixture forms the ideal canvas for the subsequent additions, ensuring that your Jam and Coconut Cake achieves that sought-after light and tender texture that makes it so irresistible.
Step 3: Incorporating the Eggs
Once you have achieved that perfect pale and fluffy creamed mixture, it’s time to introduce the eggs, which provide richness, structure, and help bind the batter together. The key to successfully incorporating eggs into a creamed mixture without causing it to curdle or separate is to add them gradually and mix thoroughly after each addition. This patience during this stage is vital for achieving a smooth, cohesive batter.
Add the room-temperature eggs one at a time to the creamed margarine and sugar mixture. It is crucial that each egg is fully incorporated into the batter before you add the next one. Beat well after each addition, ensuring the yolk and white are completely blended into the existing mixture. If the mixture begins to look slightly curdled at any point, don’t panic; continuing to beat or adding a small tablespoon of your flour can often help to bring it back together.
The gradual addition and thorough mixing ensure that the fats and liquids emulsify properly, creating a stable batter that will bake evenly. Cold eggs are more prone to causing separation, which is why ensuring they are at room temperature is such an important part of the preparation process detailed in the ingredients section. This careful integration of eggs builds upon the airy foundation created in the previous step, setting the stage for the final batter.
Step 4: Gently Folding in the Flour
With the wet ingredients beautifully combined, the next crucial step is to introduce the self-rising flour. This ingredient is responsible for the cake’s lift and structure, and the way it is incorporated significantly impacts the final crumb. The aim here is to achieve a smooth, even batter without overworking the gluten in the flour, which can lead to a tough or dense cake.
Before adding the flour, it’s highly recommended to sift it directly into the bowl containing the wet ingredients. Sifting helps to aerate the flour and remove any lumps, ensuring a lighter texture in the final cake. Once sifted, gently fold the flour into the batter using a large metal spoon or a rubber spatula. Use a light, scooping motion, cutting down through the middle of the mixture and bringing the batter from the bottom up and over the flour. Continue this gentle folding action until no streaks of dry flour remain and the batter is just combined.
The term “fold” is key here; it signifies a gentle incorporation rather than vigorous mixing or beating. Overmixing can develop the gluten too much, resulting in a chewy texture. The batter should be smooth and pourable but not overly runny. This careful handling of the flour preserves the air you worked so hard to incorporate during the creaming stage, promising a wonderfully tender sponge when baked.
Step 5: Baking to Perfection
Now that your batter is ready, it’s time to transfer it to the prepared tin and bake it to a beautiful golden hue. This stage requires careful attention to oven temperature and baking time to ensure the cake cooks through evenly without becoming dry or burnt. The visual cues and the skewer test are your most reliable guides to achieving perfection.
Spoon the smooth batter into your prepared rectangular baking tin. Use your spatula to spread the batter evenly, ensuring it reaches all corners of the tin. A level surface promotes even baking, preventing some parts of the cake from rising higher than others. Once evenly spread, place the tin into your preheated oven. Bake for approximately 30 to 40 minutes. The exact time will vary slightly depending on your oven, so it’s important to keep an eye on it after the 30-minute mark.
You’ll know the cake is ready when it has risen nicely, has a lightly golden-brown colour, and feels springy to the touch. The ultimate test is to insert a thin skewer or toothpick into the centre of the cake; it should come out clean or with only a few moist crumbs attached. If it comes out with wet batter, it needs a little longer in the oven. Avoid the temptation to open the oven door too early, as this can cause the cake to sink.
Step 6: Cooling and Setting
Once your Jam and Coconut Cake has passed the skewer test and emerged from the oven, the cooling process begins, and this is a vital step for both structure and topping application. Allowing the cake to cool properly ensures it firms up and is ready to receive its delicious jam and coconut coating without the toppings becoming a soggy mess or sliding off.
After removing the cake from the oven, let it rest in the tin for a brief period, perhaps 5 to 10 minutes. This short rest allows the cake to settle and firm up slightly, making it less likely to break when you remove it from the tin. Then, carefully use the extended greaseproof paper to lift the cake out of the tin and transfer it to a wire rack. Allowing the cake to cool completely on the wire rack is essential. The wire rack facilitates air circulation all around the cake, preventing any steam from being trapped underneath, which could lead to a soggy bottom.
Patience is key here. Rushing this cooling process and attempting to spread the jam while the cake is still warm is a common mistake that can lead to the jam becoming too runny and seeping into the sponge, or the coconut becoming soggy. A completely cool cake provides a stable, dry surface that will hold the jam and coconut beautifully, ensuring the integrity of the final presentation and taste.
Step 7: The Finishing Touches
With the cake fully cooled, it’s time for the delightful finishing touches: the glossy jam topping and the signature coconut sprinkle. These elements transform the simple sponge into the classic Jam and Coconut Cake that we know and love, adding texture, sweetness, and visual appeal.
Gently spread your chosen fruit jam evenly over the entire surface of the cooled cake, ensuring it reaches right to the edges and into all the corners. You can use a spatula or the back of a spoon for this. If your jam is quite thick, you might find it helpful to warm it very slightly in the microwave for about 15-20 seconds; this will loosen it and make it much easier to spread smoothly. Be careful not to overheat it, as you only want it to be spreadable, not hot.
Once the jam layer is applied, evenly scatter the sweetened shredded coconut over the jam. You can then very lightly press the coconut down with your fingertips or the back of a spoon to help it adhere to the jam. This ensures the coconut stays in place when you slice and serve the cake. The result is a beautiful, textured, and utterly inviting bake that is ready to be enjoyed.
Pro Tips for Jam and Coconut Cake
Achieve Maximum Fluffiness: Don’t underestimate the power of creaming. Beat the margarine and sugar together until the mixture is not just combined, but truly pale and fluffy. That extra minute or two of beating incorporates vital air, which translates directly into a lighter, more tender sponge. You’ll see a visual difference as the mixture lightens significantly.
Cool Completely for Success: Patience is a virtue when it comes to cooling. Always allow the cake to cool down completely on a wire rack before applying the jam and coconut. Warm cake can cause the jam to become too liquid and absorb unevenly, and the coconut can become soggy, impacting the final texture and appearance.
Jam Layer Mastery: Use just enough warmed jam to coat the top neatly. A thick, heavy layer of jam can overpower the delicate sponge and make slicing quite messy. Aim for an even, thin coating that complements rather than dominates the cake. Apricot or raspberry are classic choices for their balance.
Gentle Folding is Key: When adding the self-rising flour, remember to fold it in gently. Overmixing develops gluten, leading to a tough cake. Use a spatula and a light, scooping motion to combine the flour until just incorporated. The batter should be smooth but not overworked.
Room Temperature Ingredients Matter: Ensure your eggs and margarine are at room temperature. This helps them to emulsify more smoothly into the batter, contributing to a more uniform crumb and preventing any chance of the batter splitting or curdling. It makes a noticeable difference in the final texture.
Serving Suggestions for Jam and Coconut Cake
Decoration
The classic decoration is simple yet effective: a generous scattering of sweetened shredded coconut over a layer of glossy fruit jam. For an extra touch, you could consider a light dusting of icing sugar over the coconut once it has set, especially if serving for a special occasion. Alternatively, for a more rustic charm, you might leave the coconut as is, letting its texture and colour speak for themselves. A few edible flowers, like violas or pansies, could also add a delicate and colourful flourish if you’re presenting it for afternoon tea.
Side Dishes
This cake pairs beautifully with a variety of simple accompaniments. A dollop of softly whipped cream or a spoonful of thick, creamy yogurt can provide a lovely contrast to the sweetness of the jam and coconut. For a more indulgent treat, a small scoop of vanilla bean ice cream alongside a warm slice of the cake creates a wonderful dessert experience. It also stands wonderfully on its own, requiring no additional sides to be thoroughly enjoyed.
For a truly traditional British tea experience, serving a slice alongside a warm scone with clotted cream and jam would be a delightful pairing, offering a taste of classic comfort. It’s a cake that celebrates simplicity, so its accompaniments should ideally echo that sentiment, enhancing rather than competing with its flavours. A simple cup of tea, as mentioned in the recipe’s pairing suggestions, is often the most perfect partner.
Creative Serving Ideas
Cut the cake into small, bite-sized squares and arrange them on a tiered cake stand for an elegant afternoon tea presentation. You could also create mini Jam and Coconut Cake cupcakes by baking the batter in a muffin tin, topping each with a small amount of jam and a sprinkle of coconut once cooled. For a more contemporary dessert, serve a warm slice with a drizzle of crème anglaise or a rich chocolate sauce, offering a surprising fusion of classic and modern flavours.
Another creative idea is to transform it into a trifle layer. Cut the cooled cake into cubes, arrange them in a trifle dish, and then layer with custard, fruit, and whipped cream. This turns the humble traybake into a show-stopping dessert that’s perfect for gatherings. You could also serve it with a side of fresh berries, like raspberries or strawberries, to add a burst of fresh fruitiness that complements the jam perfectly.
Preparation & Storage
Storing Leftovers
Once completely cooled and topped, store the Jam and Coconut Cake in an airtight container. At room temperature, it is best enjoyed within 2 days, particularly if your kitchen is kept at a cooler temperature. If you live in a warmer climate or your kitchen tends to be warm, refrigeration might be a better option to maintain its freshness for longer. This cake is designed to maintain its lovely soft texture, so proper storage is key to preserving that quality.
When stored correctly in an airtight container, the cake will keep well in the refrigerator for approximately 4 to 5 days. The cool environment helps to prevent the jam from becoming too soft and the coconut from becoming stale. Always ensure the container is sealed tightly to prevent the cake from drying out or absorbing any unwanted odours from other food items in the fridge. This makes it an excellent option for planned baking sessions.
Freezing
Yes, Jam and Coconut Cake freezes remarkably well, making it an ideal candidate for batch baking and future enjoyment. For the easiest portioning and thawing, it is best to slice the cake before freezing. This allows you to take out individual portions as and when you need them, avoiding the need to thaw an entire cake if you only want a single slice.
Wrap each slice securely in plastic wrap, followed by a layer of aluminum foil or place them in a freezer-safe bag. This double layer of protection helps to prevent freezer burn and maintain the cake’s quality. Properly stored, your Jam and Coconut Cake can be kept in the freezer for up to 2 months. Ensure it is well-sealed to maintain its deliciousness until you are ready to enjoy it again.
Reheating
This cake is primarily designed to be enjoyed at room temperature, where its textures are at their best. Reheating is not usually necessary and can sometimes alter the texture, particularly of the coconut topping, making it less desirable. For the neatest and most pleasant texture, simply allow frozen slices to thaw naturally at room temperature for about 30-60 minutes, or until they reach a soft, palatable state.
However, if you prefer your cake slightly warmer or wish to revive it from being refrigerated, a very brief stint in the microwave can be used with caution. Place a slice on a microwave-safe plate and heat for just a few seconds – think 5 to 10 seconds maximum. The aim is to take the chill off, not to cook it further. Overheating can lead to a rubbery texture and a melted jam layer, so proceed with extreme care if opting for this method.
Frequently Asked Questions
-
Can I use a different type of jam besides apricot or raspberry?
Absolutely! While apricot and raspberry are classic choices for their balanced sweetness and slight tang, you can certainly experiment with other fruit jams. Strawberry jam will offer a sweeter profile, while plum or blackcurrant jam can introduce a more tart and sophisticated flavour. Ensure the jam is not too runny; if it is, you might consider reducing it slightly by simmering it for a few minutes on the stovetop to achieve a thicker consistency that will hold its shape better on the cake. The key is to find a jam that complements the soft sponge and provides a pleasing fruity contrast.
-
What if my cake sponge turns out dense or heavy?
A dense sponge in a Jam and Coconut Cake often stems from a few common issues. The most frequent culprits are insufficient creaming of the margarine and sugar, which means not enough air was incorporated into the batter, or overmixing the flour. When you overmix the flour, you develop the gluten too much, leading to a tougher, heavier texture. Using cold eggs can also contribute to a dense result as they don’t emulsify as smoothly. Ensure you beat the margarine and sugar until it’s very pale and fluffy, fold the flour in gently until just combined, and always use room-temperature eggs for the best emulsification and a lighter crumb.
-
Can this cake be made ahead of time, and how should it be stored?
Yes, Jam and Coconut Cake is an excellent make-ahead bake, and in fact, its texture often improves after resting for a day. Once completely cooled and topped, store it in an airtight container at room temperature. It should remain fresh and delicious for up to 2 days in a cooler environment. If your kitchen is warm or humid, it’s advisable to store it in the refrigerator, where it will keep well for about 4 to 5 days. When storing, ensure the container is sealed tightly to prevent the cake from drying out or absorbing any unwanted kitchen aromas. For longer storage, consider freezing slices wrapped securely.