German Pancake Recipe – Golden & Fluffy Baked Pancakes!
Embark on a culinary adventure with this delightful German pancake recipe, a dish that promises to bring a touch of European charm to your breakfast table. Its unique preparation method, involving baking rather than frying, results in a spectacular puffy and golden creation that’s as impressive to look at as it is delicious to eat. This recipe is a testament to simplicity, requiring minimal ingredients and effort for maximum flavor and satisfaction, making it perfect for any home cook looking to impress.
Imagine a breakfast that’s both comforting and elegantly simple, where a single, large pancake takes center stage, rising majestically in the oven before settling into a soft, tender center with delightfully crisp edges. This is the magic of the German pancake, often referred to as a Dutch baby, a recipe that bridges the gap between a classic pancake and a fluffy Yorkshire pudding. It’s a versatile dish, ready to be adorned with sweet toppings or embraced in a savory preparation, offering endless possibilities for enjoyment.
Why You Will Love This Recipe
- Effortless Preparation: This recipe requires just a few minutes of hands-on time to whip up the batter, making it ideal for busy mornings or relaxed weekend brunches. The oven does most of the work, allowing you to enjoy your time without constant attention.
- Impressive Presentation: The signature puff and golden-brown edges of a German pancake are a showstopper, guaranteed to garner compliments and add a touch of elegance to any meal. It’s a visually stunning dish that feels special without being complicated.
- Versatile Flavor Profile: Whether you prefer sweet or savory, this pancake adapts beautifully. Load it up with fresh fruits and powdered sugar for a classic sweet treat, or opt for savory toppings like herbs and cheese for a delightful brunch or light dinner.
- Simple Ingredients: You likely already have most of the core ingredients in your pantry, making this recipe incredibly accessible and budget-friendly. It proves that exceptional food doesn’t require exotic or hard-to-find items.
- Quick Baking Time: Unlike some baked goods that require lengthy oven times, this German pancake cooks relatively quickly, usually within 20-25 minutes. This means you can satisfy those pancake cravings without a long wait.
Ingredients You Need
The beauty of this German pancake recipe lies in its reliance on a few high-quality, pantry-staple ingredients. Using fresh, good-quality eggs and milk will enhance the texture and flavor of your final creation. Even simple all-purpose flour and standard butter transform into something extraordinary when baked into this puffed pancake. Remember, the magic is in the method as much as the ingredients.
German Pancake Recipe
This German pancake recipe takes minutes to prepare and bakes up super soft, puffed, and flavorful. It's a crowd-pleaser, perfect for weekend breakfasts or brunch, and can be served sweet or savory.
- 6 large eggs
- 1 cup milk
- 1½ teaspoons pure vanilla extract
- 1 cup all purpose flour
- 1 pinch salt
- 1Whisk the eggs in a large bowl.
- 2Add the milk and vanilla, and beat with the whisk until well combined.
- 3Sift the flour and salt over the egg mixture in the bowl. Stir until you have a smooth batter. Set aside to rest for 5 minutes.
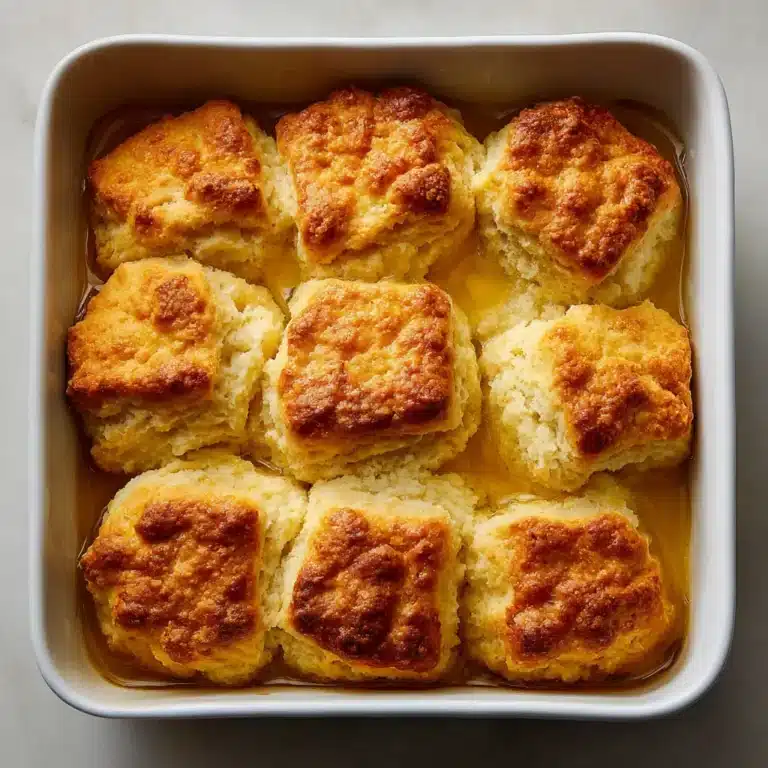
- 4Preheat the oven to 400°F (200°C). Add the butter to a 9x13 inch baking dish and place it in the oven to melt the butter completely, about 3-5 minutes.
- 5Carefully remove the baking dish from the oven and pour in the pancake batter over the melted butter.
- 6Bake for 20-25 minutes, or until the edges are brown and puffy.
- 7Remove from the oven and serve warm, dusted with powdered sugar.
Keywords: German pancake, Dutch baby, baked pancake, breakfast, brunch, easy recipe, 6 ingredients
Quantities for each ingredient are clearly detailed within the recipe card for your convenience.
Variations
Elevate your German pancake experience with these creative variations, catering to diverse dietary preferences and flavor profiles. Each modification offers a unique twist on the classic, ensuring there’s a German pancake for everyone to enjoy. These ideas are simple to implement and can transform your basic pancake into a culinary masterpiece.
Vegan Delight: For a completely plant-based version, swap the eggs with a flax egg (1 tablespoon flaxseed meal mixed with 3 tablespoons water, let sit for 5 minutes) or a commercial egg replacer. Use a plant-based milk such as almond, soy, or oat milk, and substitute the butter with melted coconut oil or vegan butter. The result is a surprisingly light and airy vegan German pancake, perfect served with fresh fruit and a drizzle of agave nectar.
Low-Carb & Gluten-Free Adaptations: To make this recipe lower in carbohydrates and gluten-free, replace the all-purpose flour with a blend of almond flour and coconut flour. A common ratio is 3/4 cup almond flour to 1/4 cup coconut flour. You may need to slightly adjust the liquid; start with the original milk amount and add a tablespoon more if the batter seems too thick. This variation results in a slightly denser but equally delicious pancake, ideal for those watching their carb intake or avoiding gluten. Consider serving it with berries and a sugar-free syrup.
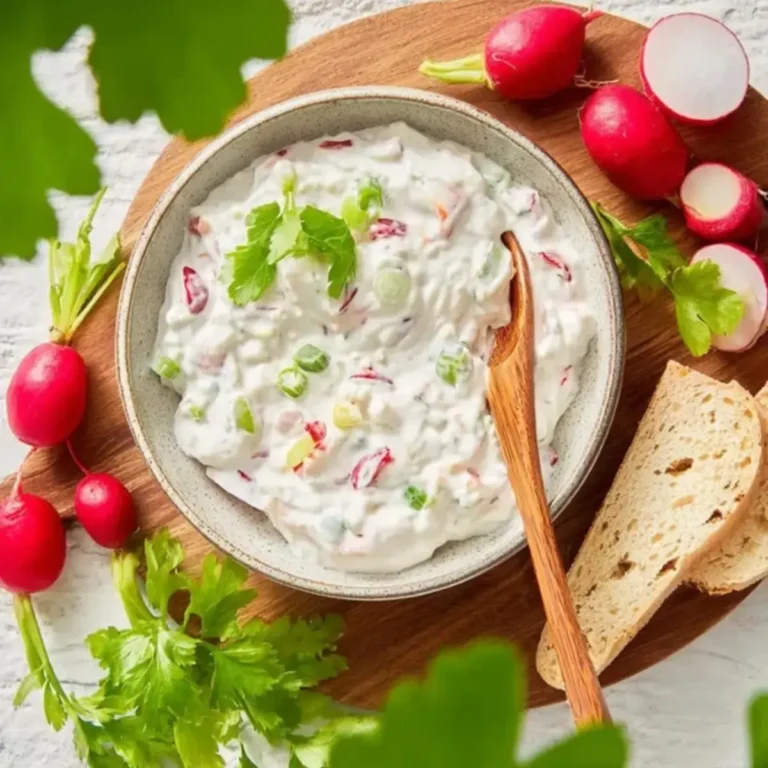
Savory Sensation: Transform this sweet base into a savory delight by omitting the vanilla extract and increasing the salt slightly. Infuse the batter with finely chopped fresh herbs like chives, rosemary, or thyme. Once baked, top with crumbled feta or goat cheese, sautéed mushrooms, caramelized onions, or even a fried egg. This savory interpretation is perfect for a light lunch or a hearty dinner, showcasing the pancake’s incredible versatility. It pairs wonderfully with a crisp green salad for a complete meal.
How to Prepare German pancake recipe
Step 1: Whisk the Eggs
Begin by gathering your ingredients and preparing your workspace. In a large mixing bowl, crack all six large eggs. It is crucial to use fresh, room-temperature eggs as they will incorporate better into the batter and contribute to a more even rise during baking. Ensure there are no shell fragments in the bowl.
Using a whisk, vigorously beat the eggs until they become frothy and slightly paler in color. This aeration is the first step in creating a light and airy pancake structure, as traditional German pancakes do not use chemical leaveners like baking powder or baking soda. The whisking process helps to break down the egg proteins and incorporate air, which will expand when heated in the oven.
Continue whisking for about a minute or two, ensuring a consistent texture. The goal here is to achieve a smooth, homogenous mixture that forms the base of your batter. Properly beaten eggs are fundamental to achieving the characteristic puffiness of this recipe.
Step 2: Add Milk and Vanilla
Once the eggs are sufficiently whisked, it’s time to introduce the liquid elements. Pour in the cup of milk. Any type of milk will work, whether it’s whole milk for richness, 2% for a lighter option, or even plant-based alternatives like almond or oat milk, though whole milk generally yields the best texture and flavor. Ensure the milk is also at room temperature for optimal blending with the eggs.
Next, add the vanilla extract. One and a half teaspoons of pure vanilla extract will impart a warm, sweet aroma and flavor to the pancake, enhancing its overall deliciousness. If you are aiming for a savory variation, you can omit this ingredient entirely, or use a more subtle flavoring like a tiny pinch of nutmeg. Whisk everything together thoroughly until all components are fully combined into a smooth liquid base.
Continue to whisk gently for another 30 seconds to ensure the milk and vanilla are perfectly integrated with the beaten eggs. The mixture should be uniformly yellow and free of any streaks. This liquid mixture forms the foundation upon which the dry ingredients will be incorporated, setting the stage for the batter’s development.
Step 3: Incorporate the Dry Ingredients
Now, it’s time to add the dry components to your wet mixture. To ensure a smooth batter free of lumps and to evenly distribute the flour and salt, it is highly recommended to sift them over the liquid. Use a fine-mesh sieve or a sifter to lightly dust the flour and salt directly into the bowl containing the egg, milk, and vanilla mixture. This technique also helps to aerate the flour, contributing to a lighter final product.
After sifting, gently stir the ingredients together using your whisk or a spatula. The goal is to combine the flour and salt into the liquid base until a smooth batter forms. Be careful not to overmix; once the flour streaks disappear and the batter is homogenous, stop stirring. Overmixing can develop the gluten in the flour too much, potentially resulting in a tougher pancake.
Once the batter is smooth, let it rest for approximately five minutes. This resting period is surprisingly important; it allows the flour to fully hydrate and the gluten to relax, leading to a more tender and flavorful pancake. It also helps to dissolve any small pockets of dry flour that might have been missed during stirring, ensuring an even consistency throughout.
Step 4: Prepare for Baking
While your batter is resting, preheat your oven to 400°F (200°C). It’s essential for the oven to be fully preheated to the correct temperature to ensure the pancake puffs up evenly and cooks through properly. Placing the batter into a hot oven is key to achieving that signature rise and golden-brown exterior.
Next, take a 9×13 inch baking dish. Add the quarter cup of butter to this dish. Place the baking dish containing the butter into the preheating oven. Allow the butter to melt completely, which usually takes about 3-5 minutes. The hot, melted butter will create a beautifully crisped bottom and edges for your German pancake, adding a rich flavor and helping to prevent sticking.
Carefully remove the hot baking dish from the oven once the butter has fully melted. Swirl the melted butter around the dish to coat the bottom and sides evenly. The dish and butter should be sizzling hot when you are ready to pour the batter in, which is critical for the immediate cooking and puffing process of the German pancake. Handle the hot dish with oven mitts.
Step 5: Bake the Pancake
With the oven hot and the butter melted and coating the baking dish, it’s time to pour in the batter. Carefully pour the rested pancake batter directly over the melted butter in the hot 9×13 inch dish. Try to pour it as evenly as possible across the entire surface of the dish to ensure uniform cooking and puffing.
Immediately place the baking dish back into the preheated 400°F (200°C) oven. Bake for approximately 20 to 25 minutes. During this time, you will witness the magic happen: the pancake will rise dramatically around the edges, creating a beautiful, puffed-up border, while the center will remain slightly softer and will begin to turn golden brown. Avoid opening the oven door during the initial stages of baking, as this can cause the pancake to deflate prematurely.
Keep an eye on the pancake as it bakes. The edges should be a deep golden brown and the center should be set but still slightly moist. Once it reaches this perfect state of puffed glory and golden deliciousness, carefully remove the baking dish from the oven using oven mitts. Be aware that the pancake will begin to deflate shortly after it is removed from the heat, which is a normal part of the process.
Step 6: Serve and Enjoy
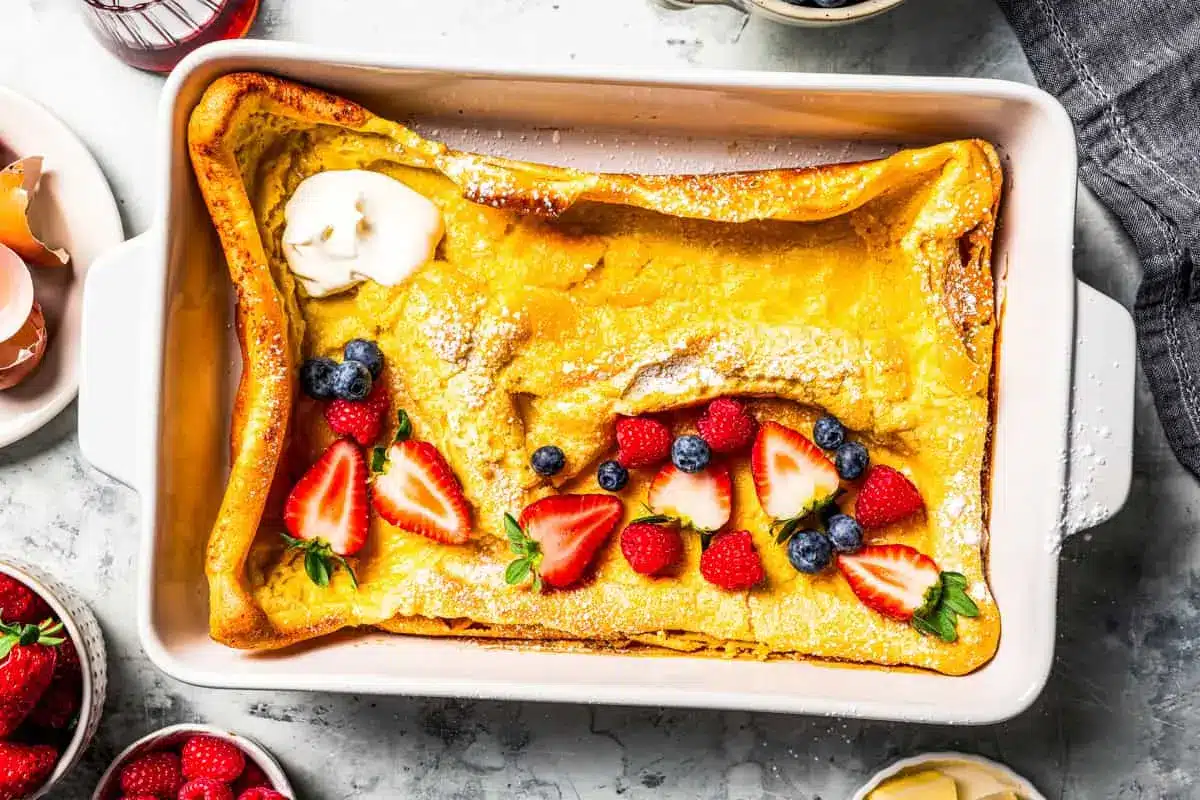
As soon as you remove the puffed German pancake from the oven, it’s ready to be served. The dramatic puff will begin to subside, and the center will settle slightly, creating a wonderful cradle for toppings. While it’s still warm and in the baking dish, dust the entire surface generously with powdered sugar. This classic topping adds a touch of sweetness and a beautiful visual contrast to the golden pancake.
You can slice the pancake directly in the dish into squares or rectangles, much like a sheet cake, or gently slide it out onto a serving platter before slicing if you prefer. Serve immediately to enjoy its incredible texture and warmth. The contrast between the crispy edges and the soft, custardy interior is at its absolute best when fresh from the oven.
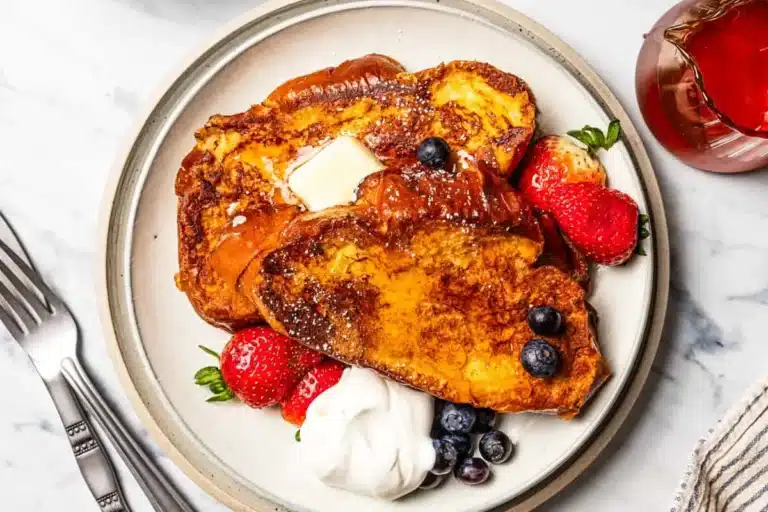
For a more elaborate presentation, consider adding other toppings like fresh berries, a dollop of whipped cream, a drizzle of maple syrup, or a squeeze of fresh lemon juice. This recipe is the foundation for endless delicious variations, and serving it warm allows all the flavors and textures to meld perfectly. Enjoy this delightful and impressive breakfast or brunch treat!
Pro Tips for German pancake recipe
- Room Temperature Ingredients: Ensure your eggs and milk are at room temperature before you begin mixing the batter. This simple step helps all the ingredients emulsify more smoothly, leading to a more consistent and well-risen pancake. Cold ingredients can shock the eggs and prevent them from incorporating fully.
- Don’t Skip the Rest: Letting the batter rest for 5 minutes after mixing is crucial. It allows the flour to fully hydrate, resulting in a tenderer pancake and a smoother texture. It also gives the gluten time to relax, preventing a chewy outcome.
- Preheat Thoroughly: A screaming hot oven and a hot, buttered baking dish are non-negotiable for achieving that signature puff. Make sure your oven has reached 400°F (200°C) and the butter is fully melted and sizzling before pouring in the batter. This intense heat causes the batter to expand rapidly.
- Avoid Overmixing: Once the flour is added, mix only until just combined. Overmixing will develop the gluten, making the pancake tough instead of tender and delicate. A few small lumps are perfectly acceptable and often preferable to an overmixed batter.
- Embrace the Deflation: Your German pancake is designed to puff up dramatically in the oven and then deflate as it cools. This is completely normal and expected! Don’t be alarmed when it sinks; it creates the perfect texture and shape for holding delicious toppings.
Serving Suggestions for German pancake recipe
Decoration
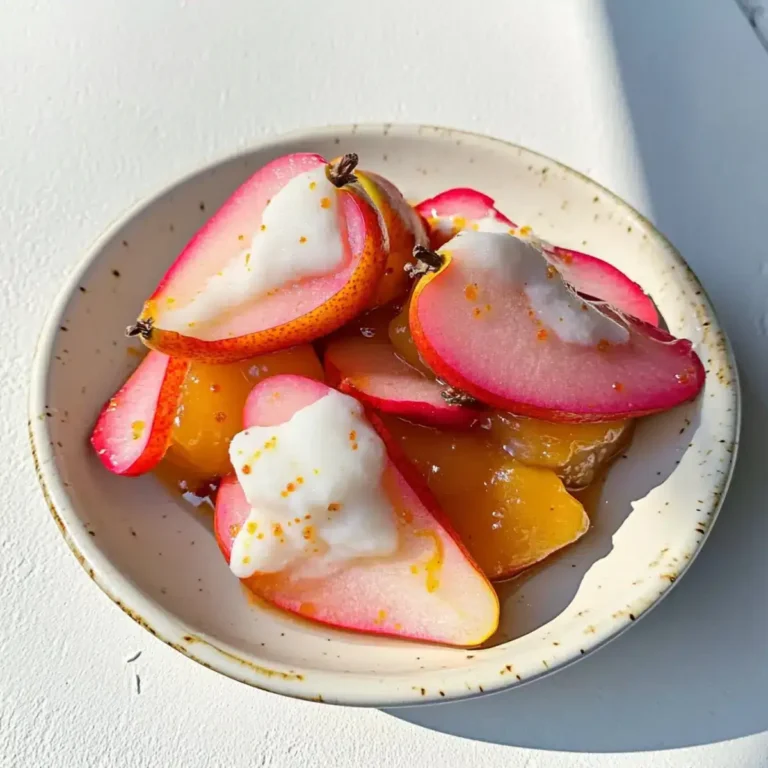
For a stunning visual appeal, a generous dusting of confectioners’ sugar is the classic choice, creating a delicate snowy landscape over the golden surface. Fresh berries, such as raspberries, blueberries, and sliced strawberries, add vibrant pops of color and a burst of freshness that contrasts beautifully with the pancake’s richness. A light sprinkle of toasted slivered almonds or chopped pecans can add a delightful textural element and nutty flavor.
Side Dishes
To complement the German pancake, consider pairing it with crispy bacon or savory breakfast sausages for a classic sweet and salty combination. A side of fresh fruit salad, perhaps featuring melon, grapes, and citrus segments, offers a refreshing counterpoint. For a more substantial brunch, consider serving it alongside a light frittata or a simple scramble of eggs and spinach. This combination provides a well-rounded and satisfying meal that caters to various tastes and preferences.
Creative Serving Ideas
Serve the German pancake family-style, right from the baking dish, allowing everyone to cut their own portion. For a more elegant presentation, carefully slide the cooled pancake onto a large platter and cut it into elegant wedges. Offer a variety of toppings buffet-style, including whipped cream, fruit compotes, chocolate sauce, or a selection of nuts and seeds, so guests can customize their own experience. You could even consider a savory presentation, topping the pancake with sautéed mushrooms, caramelized onions, and a sprinkle of Gruyère cheese for a delightful brunch or light dinner option.
Preparation & Storage
Storing Leftovers
If you happen to have any leftover German pancake, store it properly to maintain its quality. Ensure the pancake has cooled completely before attempting to store it. Place it in an airtight container or wrap it tightly with plastic wrap. Store the covered pancake in the refrigerator for up to 3 to 4 days. This method helps to prevent it from drying out and absorbing any unwanted odors from other foods in the fridge.
Freezing
German pancakes can be frozen for longer-term storage, though they are best enjoyed fresh. Once completely cooled, wrap individual portions tightly in plastic wrap, then place them in a freezer-safe bag or container. This double-layer protection will help prevent freezer burn. Frozen German pancakes can be stored for up to 1 to 2 months. Thawing them overnight in the refrigerator is recommended before reheating.
Reheating
To reheat your leftover German pancake, the oven is often the best method for restoring its texture. Place slices or the entire pancake on a baking sheet and warm them in a preheated oven at around 300°F (150°C) for about 5-10 minutes, or until heated through. Alternatively, you can quickly reheat individual portions in the microwave, though this may result in a slightly softer texture compared to oven reheating. Be cautious not to overheat, which can make the pancake dry or rubbery.
Frequently Asked Questions
-
Why did my German pancake not puff up?
Several factors can contribute to a German pancake failing to puff up properly. The most common reason is an oven that is not hot enough; ensure your oven is fully preheated to 400°F (200°C). Using cold ingredients instead of room-temperature ones can also hinder the rise, as can opening the oven door too early during the baking process, which allows heat to escape and causes the delicate structure to collapse. Additionally, overmixing the batter after adding the flour can develop the gluten too much, preventing it from expanding adequately. Make sure your baking dish is sufficiently hot with melted butter before adding the batter; this initial burst of heat is critical.
-
Can I make German pancakes ahead of time, or are they best eaten immediately?
German pancakes are undeniably best enjoyed fresh out of the oven, as their signature puff and texture are at their peak when warm. The dramatic puff that occurs during baking will naturally deflate as the pancake cools, which is normal and expected. While you can technically prepare the batter a few hours ahead of time and refrigerate it, it’s generally recommended to bake and serve immediately for the optimal experience. If you must store leftovers, they can be reheated, but they won’t replicate the initial glorious puff and airy texture. For best results, aim to serve this dish fresh from the oven.
-
What is the difference between a German pancake and a Dutch baby pancake?
There is essentially no difference between a German pancake and a Dutch baby pancake; the terms are used interchangeably to refer to the same dish. This popular baked pancake originated not in Germany, but in Seattle, Washington, at a restaurant called Manca’s, in the early 20th century. The name “Dutch baby” is thought to be a corruption of the German word “Deutsch,” meaning German, possibly influenced by the founder’s German heritage. Both names describe the large, puffy pancake baked in a hot, buttered pan or dish, which rises dramatically and then deflates, creating a delightful crispy edge and tender center.