Fun Coconut Cake Truffles
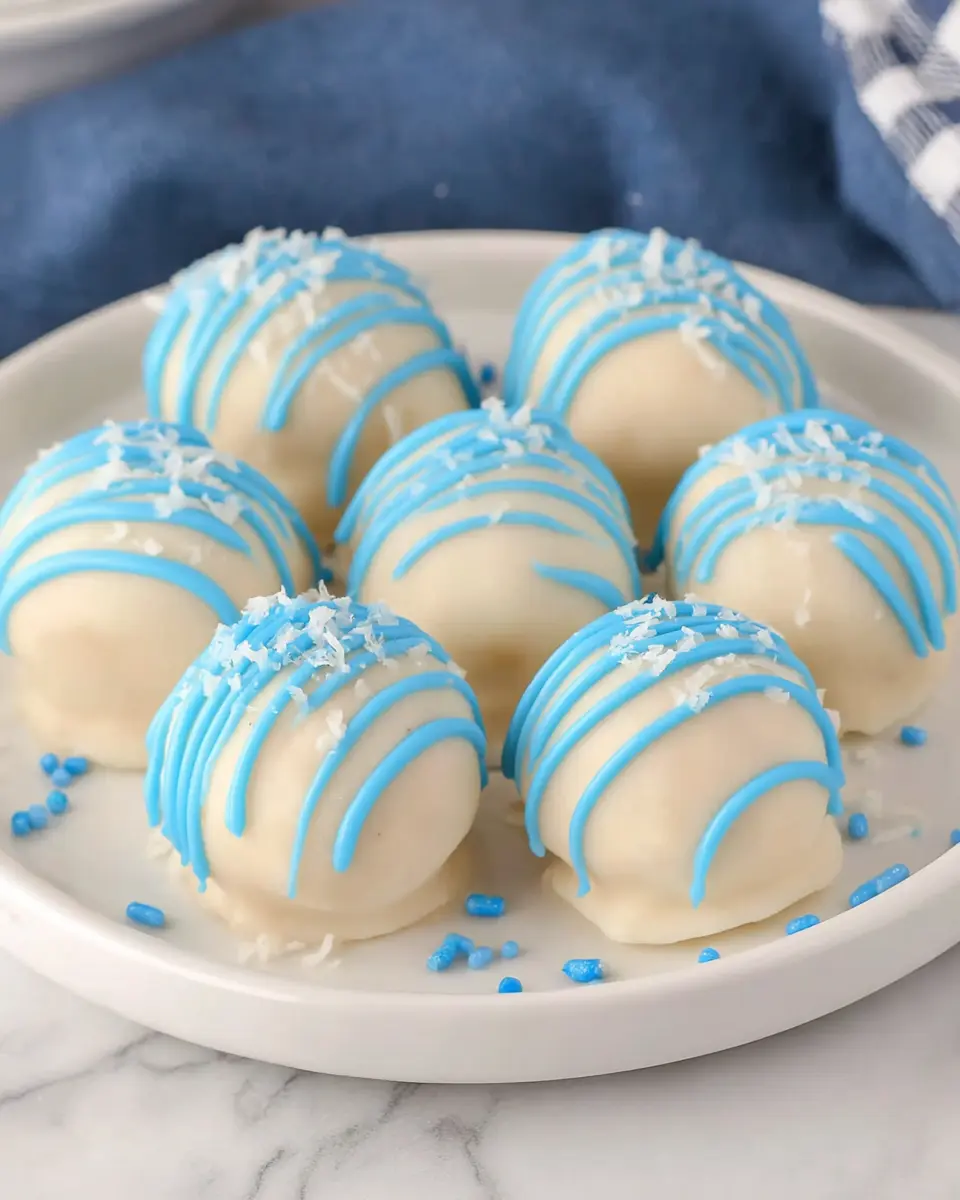
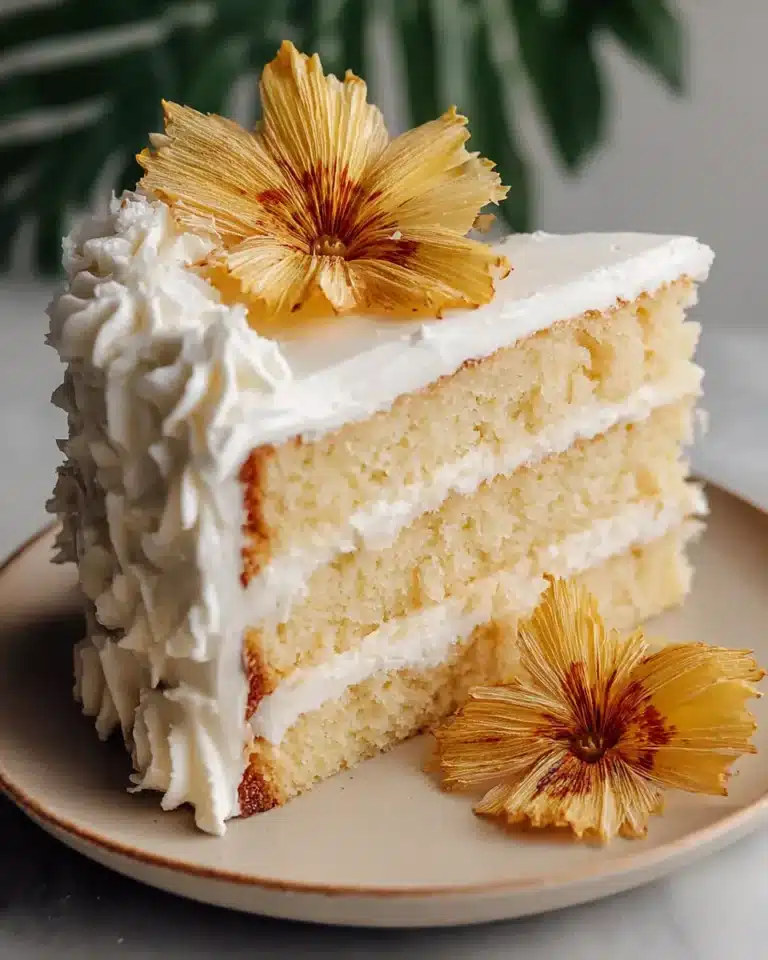
Fun Coconut Cake Truffles are a delightful make-ahead dessert that bursts with rich coconut flavor and boasts a satisfyingly soft cake-center texture, all enveloped in a smooth white chocolate shell. Their simplicity in shaping makes them an ideal treat for parties, and they are particularly handy when you desire an elegant dessert crafted from basic pantry staples.
These miniature confections embody the essence of a dessert that feels special without demanding extensive time or effort in the kitchen. The process begins with simply crumbling pre-baked cake, which is then expertly blended with intensely coconut-rich ingredients before being chilled and coated for a polished, party-ready finish that is sure to impress.
Why You Will Love This Recipe
- Effortless Preparation: These truffles are remarkably easy to assemble, requiring no complex baking techniques and allowing for a stress-free dessert-making experience.
- Intense Coconut Flavor: Featuring both coconut milk and shredded coconut, every bite delivers a delightful and unmistakable tropical taste that coconut lovers will adore.
- Perfect Make-Ahead Treat: They are designed to be prepared in advance, making them an invaluable asset for busy hosts and a convenient option for spontaneous sweet cravings.
- Versatile Presentation: With their smooth coating and appealing shape, these truffles look sophisticated, making them suitable for formal gatherings, festive occasions, or a simple, elegant dessert at home.
- Customizable Sweetness: While inherently sweet, the recipe allows for minor adjustments and the white chocolate coating provides a creamy, rich contrast to the tender cake center.
Ingredients You Need
Crafting these delectable truffles relies on a few key ingredients that, when combined, create a symphony of texture and taste. The quality of your base cake significantly impacts the final outcome, so opting for a moist and tender white cake is paramount for achieving that classic cake-ball consistency. Full-fat canned coconut milk is non-negotiable; it imparts a luxurious creaminess and amplifies the coconut aroma, ensuring that each truffle is infused with tropical goodness.
Fun Coconut Cake Truffles

Fun Coconut Cake Truffles are a make-ahead dessert with rich coconut flavor, a soft cake-center texture, and a smooth white chocolate shell. They are simple to shape, perfect for parties, and especially handy when you want an elegant treat from basic pantry ingredients.
- 1 standard white cake (baked in a 9x13-inch pan and fully cooled)
- 1/4 cup sweetened condensed milk
- Candy melts or white chocolate (for coating)
- 3/4 cup canned coconut milk (preferably full-fat)
- 1 cup sweetened shredded coconut
- 1Line a large baking sheet with parchment paper or waxed paper. Set it aside so the truffles can be placed on it without sticking.
- 2Break the cooled cake into fine pieces in a large mixing bowl. Add the canned coconut milk, sweetened condensed milk, and shredded coconut. Mix thoroughly with your hands until the ingredients are evenly blended and the mixture is consistent throughout.
- 3Shape the mixture into small balls and arrange them on the prepared baking sheet. Transfer the tray to the refrigerator and chill for at least 1 hour so the truffles become firm and easier to coat.
- 4Melt the candy melts or white chocolate according to the package directions while the cake balls are chilling. Once the coating is smooth and ready, dip each chilled truffle until completely covered, then place it back on the lined baking sheet.
- 5Return the coated truffles to the refrigerator and let the outer layer set fully. For the finest flavor and texture, chill them overnight before serving. Serve cold.
Keywords: Coconut Cake Truffles, White Chocolate Truffles, Coconut Dessert, Make-Ahead Dessert, Party Treats
- white cake: a fully cooled standard white cake, baked in a 9×13-inch pan, forms the foundation of these delightful truffles, providing a tender crumb that is easy to crumble and mix.
- sweetened condensed milk: this creamy, rich ingredient acts as a binder, adding sweetness and moisture to the cake mixture, ensuring a pliable dough that holds its shape beautifully.
- canned coconut milk: preferably full-fat, this magical ingredient infuses the truffles with an unmistakable coconut essence and contributes to their wonderfully moist texture.
- sweetened shredded coconut: adding a delightful chewiness and enhancing the coconut profile, this ingredient ensures that the tropical theme is present in every single bite.
- candy melts or white chocolate: these are essential for creating the smooth, elegant outer shell that encases the soft cake center, providing a delightful textural contrast and a beautiful finish.
The specific quantities for each ingredient can be found within the detailed recipe card.
Variations
To elevate these Fun Coconut Cake Truffles further, consider exploring various creative twists that cater to different dietary preferences or flavor profiles. These modifications can transform the dessert into something uniquely tailored to your guests or your own cravings, proving the versatility of the original recipe.
For a delightful vegan adaptation, the white cake base can be made using a vegan cake recipe, and the sweetened condensed milk can be substituted with a good quality vegan condensed milk, often made from coconut or oats. The coconut milk and shredded coconut remain naturally vegan, and for the coating, ensure you use vegan white chocolate or carefully selected vegan candy melts, which are readily available in most specialty stores or online marketplaces.
If you are seeking a lower-carbohydrate option, the approach becomes a bit more intricate but is entirely achievable. You would need to bake a low-carb white cake using almond flour or coconut flour as the base. Sweetened condensed milk can be replaced with a sugar-free condensed milk alternative, or a mixture of heavy cream and a low-carb sweetener like erythritol or xylitol, cooked down to a thicker consistency. Unsweetened shredded coconut is a good choice here, and for the coating, a good quality sugar-free white chocolate or sugar-free candy melts are your best bet, ensuring the truffle remains keto-friendly without sacrificing flavor or texture.
Expanding on flavor, imagine infusing these tropical delights with a hint of citrus or spice. A touch of lime zest stirred into the cake mixture before rolling can provide a refreshing zing that beautifully complements the coconut. Alternatively, a whisper of cinnamon or cardamom can introduce a warm, comforting note, especially appealing during cooler months or when serving them alongside a citrus-infused main course. These subtle additions can create entirely new flavor dimensions while keeping the core identity of the coconut cake truffle intact.
How to Prepare Fun Coconut Cake Truffles
Step 1: Preparing the Baking Sheet
Begin by carefully lining a large baking sheet or tray with parchment paper or wax paper. This crucial preparatory step ensures that your finished truffles have a clean, non-stick surface to rest upon as they chill and set. A well-prepared surface not only prevents the delicate truffles from adhering to the tray but also significantly simplifies the subsequent coating process, allowing for easier handling and a neater final presentation.
The parchment paper creates a barrier that is invaluable for both chilling and coating. It allows for effortless removal of the truffles once they are firm, and later, when you are dipping them in melted chocolate, it provides a designated area for the excess coating to drip off without creating a mess or sticking to the tray itself. This thoughtful initial step sets the stage for a smoother overall truffle-making experience.
Step 2: Crumbling the Cake
Once your white cake is completely cooled, the next vital step involves crumbling it into very fine pieces within a large mixing bowl. The goal here is to achieve an exceptionally fine and uniform texture, entirely free of any large chunks or dense pieces. This meticulous crumbling is essential for ensuring that the truffle centers hold together cohesively and develop a beautifully smooth appearance once they are shaped and coated.
Using your hands or a fork, gently break down the cake until it resembles coarse breadcrumbs or fine confetti. A finer crumble will absorb the binding ingredients more evenly, leading to a more homogenous mixture that is easier to roll and less prone to cracking. This stage is fundamental to the truffle’s structure, influencing both its internal texture and its ability to be shaped into perfect spheres.
Step 3: Incorporating the Binding Ingredients
Introduce the canned coconut milk, sweetened shredded coconut, and sweetened condensed milk into the bowl containing the crumbled cake. Employ your hands or a sturdy spatula to thoroughly mix these components together until the entire mixture is evenly moistened and all ingredients are well incorporated. The objective is to achieve a consistency that is soft and pliable, yet firm enough to be rolled into stable balls without falling apart.
This stage is where the magic truly happens, transforming dry cake crumbs into a workable dough. The coconut milk adds essential moisture and a deep coconut flavor, while the sweetened condensed milk acts as a luxurious binder, holding everything together. The shredded coconut contributes not only to the flavor but also to a pleasant chewiness. It’s important to mix until you can comfortably gather a portion of the mixture and it holds its shape when squeezed, indicating the correct moisture and binding balance has been achieved for successful shaping.
Step 4: Shaping the Truffles
With the cake mixture now perfectly pliable, it’s time to shape it into small, uniform truffles. Aim to create balls that are consistently sized, as this not only enhances their visual appeal but also ensures that they chill at an even rate and coat uniformly in the subsequent steps. Roll each portion firmly between your palms until a smooth, compact ball is formed.
Arrange the shaped truffles on the prepared, lined baking sheet, ensuring there is a little space between each one. This spacing prevents them from sticking together as they firm up in the refrigerator and makes them easier to handle when you’re ready to dip them into the coating. The size of your truffles can be adjusted to your preference, but typically, they are about 1 to 1.5 inches in diameter, akin to a large gumball, for an ideal bite-sized treat.
Step 5: Chilling the Truffles
Once all the truffles have been shaped and arranged on the baking sheet, it’s time for a crucial chilling phase. Place the entire tray into the refrigerator for at least one hour, or until the truffles are quite firm to the touch. This chilling step is absolutely paramount for the success of the coating process, as cold truffle centers are significantly easier to dip and help the warm white chocolate coating to set much more rapidly and cleanly.
The cold temperature solidifies the fats within the cake mixture and the binder, making the truffles robust enough to withstand the dipping process without deforming. Without adequate chilling, the warm chocolate can cause the centers to become too soft, leading to a messy coating and potentially misshapen truffles. Patience during this stage is key to achieving those perfectly smooth, professional-looking finished products that are a hallmark of this delightful dessert.
Step 6: Coating and Final Chilling
While the truffles are undergoing their essential chilling period, prepare your coating. Gently melt the white chocolate or candy melts according to the package directions. This can be done either in a double boiler over simmering water or in the microwave in short, controlled bursts, stirring frequently to prevent scorching. The coating should be smooth, fluid, and free of any lumps.
Once the coating is perfectly melted and smooth, retrieve the chilled truffles from the refrigerator. Working one truffle at a time, carefully dip it into the melted coating using a fork or a dipping tool. Allow any excess coating to drip back into the bowl for a few seconds to ensure a thin, even layer. Place the coated truffle back onto the parchment-lined baking sheet. Once all the truffles are coated, return the tray to the refrigerator for at least 30 minutes, or until the white chocolate shell has completely set. For the ultimate texture and flavor fusion, it is highly recommended to chill them overnight before serving, allowing the flavors to meld beautifully.
Pro Tips for Fun Coconut Cake Truffles
Fine Crumbles are Key: For the smoothest cake truffle centers, ensure you crumble the cake extremely finely. Large chunks can lead to an uneven texture and may cause the truffle to crack when shaping or coating, detracting from its polished appearance.
Don’t Skip the Chill: Thoroughly chilling the shaped truffle balls before dipping is non-negotiable. Cold centers are much firmer, making them easier to handle and ensuring the warm coating sets quickly and evenly, preventing drips and uneven shells.
Perfect Coating Drip: Allow excess coating to drip off each truffle for several seconds after dipping before placing it on the parchment paper. This technique prevents thick, unsightly bottoms and helps create uniformly coated, elegant truffles.
Double Dipping for Perfection: If you desire an extra-thick or opaque coating, especially with white chocolate which can sometimes be more translucent, consider a double dip. Once the first layer has set slightly, dip the truffle again for a more robust shell.
Temperature Control is Crucial: Ensure your coating remains at an optimal temperature for dipping. If it becomes too thick, gently reheat it in short intervals. If it’s too hot, it can melt the chilled center prematurely.
Serving Suggestions for Fun Coconut Cake Truffles
Decoration
While the smooth white chocolate shell is elegant on its own, a touch of thoughtful decoration can elevate these truffles even further. Consider drizzling thin lines of melted dark or milk chocolate over the set white coating for a contrasting visual appeal, reminiscent of classic truffle designs. For a more whimsical touch, finely chopped toasted coconut can be pressed into the wet coating before it sets, reinforcing the tropical theme. Edible glitter or shimmer dust can also add a subtle sparkle, making them perfect for festive occasions and celebrations. Small edible flowers or even tiny, decorative sprinkles can also be applied to the wet coating for personalized flair.
Side Dishes
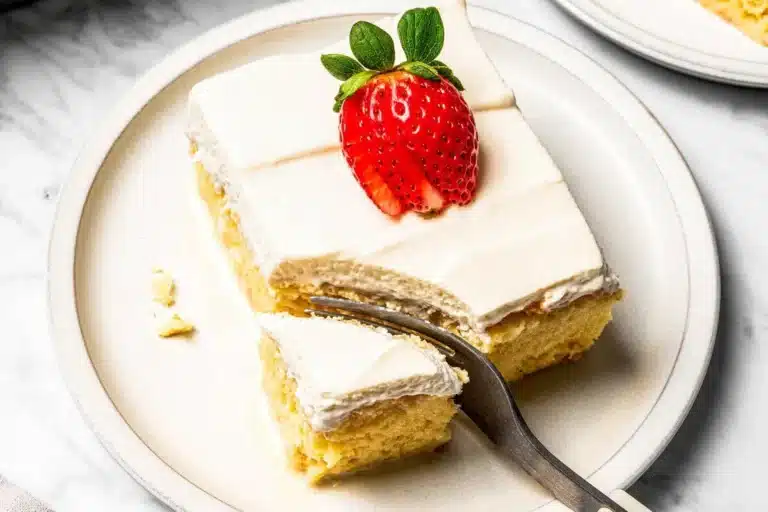
These Fun Coconut Cake Truffles are designed to be enjoyed as a standalone treat, but they can also be beautifully complemented by a few select side pairings that enhance their tropical essence or provide a delightful contrast. A simple yet effective accompaniment is a small bowl of fresh, vibrant berries such as raspberries or strawberries; their slight tartness cuts through the sweetness of the truffle and adds a burst of freshness. For a more indulgent pairing, consider serving them alongside a scoop of rich coconut ice cream or a light, refreshing sorbet, creating a layered tropical dessert experience that is both decadent and balanced.
Creative Serving Ideas
Beyond the standard dessert platter, these truffles lend themselves to wonderfully creative presentations that guests will remember. For baby showers or bridal showers, arrange them in decorative cupcake liners or small candy cups, perhaps tied with ribbons matching the event’s color scheme, creating miniature edible favors. They can also be a star component of a larger dessert bar, nestled amongst other treats like cookies, brownies, and mini cakes, offering a diverse sweet selection. For a truly unique touch, consider embedding a single truffle into a miniature fruit tart or a small swirl of whipped cream for an unexpected yet delightful presentation during a special dinner party.
Preparation & Storage
Storing Leftovers
Once your delicious Fun Coconut Cake Truffles have been made and enjoyed, storing any leftovers is straightforward. It is best to keep them in an airtight container to maintain their freshness and prevent them from absorbing any unwanted odors from the refrigerator. If you are storing them in a single layer, you might want to place a sheet of parchment paper between layers if you stack them, to prevent the delicate coating from sticking to each other. Properly stored, these truffles can retain their delightful texture and flavor for up to 5 days.
Freezing
For longer-term storage, freezing is an excellent option for these versatile truffles. Place the truffles in a single layer on a baking sheet and freeze them until they are solid; this initial freeze prevents them from sticking together once they are transferred to a freezer-safe container or bag. Once they are firm, transfer them to an airtight container or a heavy-duty freezer bag, ensuring as much air is removed as possible. Frozen truffles can last for up to 2 months, offering a convenient supply of sweet treats for future occasions.
Reheating
Fun Coconut Cake Truffles are designed to be enjoyed cold or at room temperature and do not require reheating in the traditional sense. If they have been stored in the refrigerator or freezer, simply allow them to sit at room temperature for about 10-15 minutes before serving. This brief resting period allows the creamy center to soften slightly, achieving the perfect balance with the still-firm chocolate coating, ensuring the most enjoyable texture and flavor profile.
Frequently Asked Questions
-
Can I make these Fun Coconut Cake Truffles using a different flavor of cake as the base?
Absolutely! While white cake provides a neutral canvas that allows the coconut and white chocolate flavors to shine, you can certainly experiment with other cake flavors. A yellow cake or even a vanilla cake would work beautifully, offering a slightly different but equally delicious base. For a more pronounced flavor profile, consider a coconut-flavored cake, although ensure it’s not overly moist on its own, as you’ll be adding additional moisture from the coconut milk and condensed milk. The key is to ensure the cake is fully cooled and can be crumbled easily without becoming mushy, regardless of its original flavor. A denser cake might require slightly less liquid binder to achieve the correct rolling consistency.
-
What is the best method for melting white chocolate or candy melts to ensure a smooth coating without seizing?
Melting white chocolate or candy melts requires a gentle approach to prevent them from seizing or burning. The most reliable method is using a double boiler: place the chocolate in a heatproof bowl set over a saucepan of simmering water, ensuring the bottom of the bowl does not touch the water. Stir constantly with a dry spatula until smooth and fully melted. Alternatively, you can use the microwave, but this requires extreme caution. Heat the chocolate in short, 15-20 second intervals, stirring thoroughly after each burst. White chocolate is particularly sensitive to heat and moisture, so ensure your bowl and utensils are completely dry. If it starts to thicken unexpectedly, try adding a very small amount of vegetable oil or coconut oil (about 1 teaspoon per cup of chocolate) to help smooth it out, but do this sparingly.
-
How can I achieve a perfectly smooth coating on my truffles, without any cracks or uneven patches, especially when dipping?
Achieving a perfectly smooth coating involves several factors. Firstly, ensure your cake truffle centers are well-chilled and firm, as mentioned in the preparation steps. This cold surface helps the warm coating set quickly and evenly. When dipping, use a fork or a specialized dipping tool to submerge the truffle completely, then lift it out carefully. Tap the fork gently against the side of the bowl to allow excess chocolate to drip off. Some find it helpful to use a toothpick inserted into the truffle, dip it, allow excess to drip, then carefully roll the truffle off the toothpick onto the parchment paper. Another tip is to ensure the melted coating is fluid enough; if it’s too thick, it will create ridges. A tiny bit of vegetable shortening or coconut oil (about half a teaspoon per cup of melted coating) can help thin it out without affecting flavor significantly. Finally, allow the coating to set completely undisturbed in a cool environment.