Fudgy Flourless Greek Yogurt Brownies You’ll Love – Irresistible Treat

Indulge in a truly decadent yet surprisingly wholesome dessert experience with these Fudgy Flourless Greek Yogurt Brownies. They represent a delightful fusion of rich chocolate flavor and a healthier approach to baking, proving that you don’t need to sacrifice taste for well-being.
These brownies are engineered to deliver that coveted fudgy texture and intense chocolatey goodness that brownie aficionados crave. The addition of Greek yogurt introduces a creamy element while also boosting the protein content, making them a more satisfying and guilt-free treat for any time of day or any special occasion.
Why You Will Love This Recipe
- Guilt-Free Indulgence: Enjoy the deep, satisfying flavor of chocolate brownies without the typical calorie and fat overload, making them perfect for mindful dessert lovers.
- Protein Powerhouse: The inclusion of Greek yogurt significantly elevates the protein content, contributing to satiety and providing a beneficial nutritional boost in every bite.
- Remarkably Simple: With a minimal prep time of just 10 minutes, these brownies are an excellent choice for those busy days when a sweet treat is needed quickly.
- Adaptable Ingredients: This recipe is wonderfully flexible, allowing for easy substitutions such as honey for maple syrup or plant-based yogurt for a dairy-free variation to suit various dietary needs.
- Ideal for Sharing: Perfectly portioned into squares, these brownies make a fantastic and crowd-pleasing addition to potlucks, parties, or any gathering where a delightful treat is welcome.
Ingredients You Need
Selecting high-quality ingredients is paramount to achieving the exceptional taste and texture of these fudgy flourless Greek yogurt brownies. The richness of the dark chocolate and the tang of the Greek yogurt are the stars here, so don’t shy away from using good quality products for the best possible outcome. You’ll find that the simplicity of the ingredient list belies the complexity of flavor achieved.
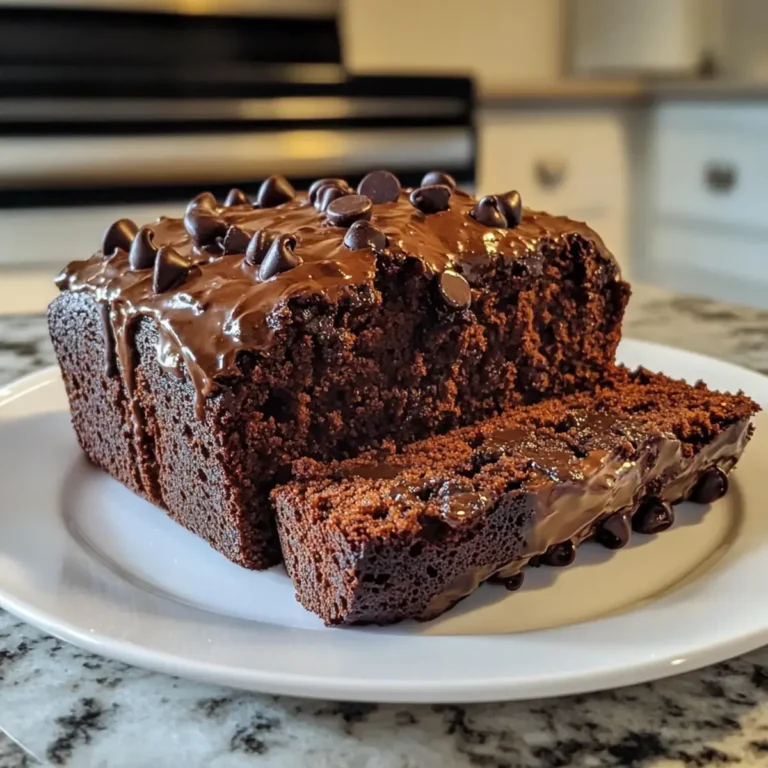
Fudgy Flourless Greek Yogurt Brownies
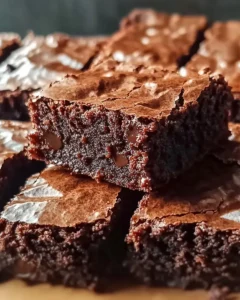
Indulge in the ultimate guilt-free dessert with these Fudgy Flourless Greek Yogurt Brownies you’ll love! Rich, fudgy, and surprisingly healthy, these brownies are made with protein-packed Greek yogurt, making them a delightful treat for any occasion. Whether you're celebrating a special event or simply want to satisfy your chocolate cravings, these brownies will not disappoint. The combination of dark chocolate and creamy yogurt creates a luscious texture that is both indulgent and nutritious. Prepare to impress family and friends with this easy-to-make recipe that guarantees satisfaction without the guilt!
- 1 cup Dark Chocolate Chips
- 1/3 cup Cocoa Powder
- 1 cup Plain Greek Yogurt
- 2 large Eggs
- 1/2 cup Maple Syrup
- 1 teaspoon Vanilla Extract
- 1/2 teaspoon Baking Soda
- 1/4 teaspoon Salt
- 1Preheat your oven to 350°F (175°C) and line an 8x8-inch baking pan with parchment paper.
- 2Melt the dark chocolate chips in a microwave-safe bowl until smooth.
- 3In a mixing bowl, combine the melted chocolate, Greek yogurt, eggs, maple syrup, and vanilla extract; whisk until well blended.
- 4Sift in cocoa powder, baking soda, and salt; gently fold until just combined.
- 5Pour the batter into the prepared pan and bake for approximately 30 minutes or until a toothpick inserted comes out with moist crumbs.
- 6Allow cooling completely before cutting into squares.
Keywords: brownies, chocolate, Greek yogurt, flourless, healthy dessert, protein, gluten-free, baking
The precise quantities for these ingredients can be found within the recipe card, ensuring you have everything measured perfectly for success.
Variations
Elevate your fudgy flourless Greek yogurt brownies with simple yet impactful variations to cater to diverse tastes and dietary needs. One popular adaptation is the vegan version; simply swap the eggs for a flax egg (1 tablespoon flaxseed meal mixed with 3 tablespoons water, left to sit for 5 minutes) and ensure you use a thick, plain, dairy-free yogurt like coconut or soy. This substitution maintains the fudgy texture while making the brownies suitable for a plant-based diet. You can explore more about vegan baking principles to ensure all your ingredients align with your dietary goals.
For those following a low-carb lifestyle, consider using a sugar substitute like erythritol or stevia in place of maple syrup, adjusting the quantity to your sweetness preference. Ensure your dark chocolate chips are also sugar-free. This modification allows you to enjoy the rich chocolatey goodness without the sugar impact, fitting perfectly into a keto-friendly approach to dessert. The inherent flourless nature of this recipe already makes it a strong candidate for low-carb diets.
Another delightful variation involves infusing extra flavor. Consider adding a teaspoon of instant espresso powder to the dry ingredients to intensify the chocolate flavor, or a few drops of peppermint extract for a festive twist, reminiscent of holiday treats. You could also fold in some chopped nuts like walnuts or pecans for added crunch and nutty depth, or even some fresh raspberries for a burst of tartness that beautifully complements the rich chocolate, transforming them into a delightful dessert.
How to Prepare Fudgy Flourless Greek Yogurt Brownies
Step 1: Prepare Your Baking Environment
Begin by preheating your oven to precisely 350 degrees Fahrenheit (175 degrees Celsius). This crucial first step ensures that your oven cavity is at the optimal, consistent temperature from the moment the brownies enter it. An accurately preheated oven is the cornerstone of even baking, preventing hot spots and ensuring your brownies cook uniformly throughout.
Simultaneously, prepare your baking pan, ideally an 8×8 inch square pan, by lining it with parchment paper. Allowing the parchment paper to overhang the sides slightly creates convenient handles, making it incredibly easy to lift the fully baked brownies out of the pan without any breakage. This simple preparation step prevents sticking and makes the cleanup process significantly more manageable, contributing to a stress-free baking experience.
Step 2: Melt the Chocolate Foundation
In a microwave-safe bowl, carefully combine your dark chocolate chips. If you prefer, you can also use a finely chopped bar of dark chocolate, ensuring it’s of good quality for the best flavor impact. Microwave the chocolate in 30-second intervals, stirring thoroughly after each interval. It is vital to stir well between each burst of heat to ensure even melting and to prevent the chocolate from scorching or burning.
Continue this process until the chocolate is completely melted and smoothly pourable. The goal is a silky, glossy texture. If you find it easier or prefer a double boiler method, you can gently melt the chocolate over a saucepan filled with simmering water, ensuring the bottom of the bowl doesn’t touch the water directly. This gentle melting technique is particularly good for preserving the delicate flavor of fine chocolate.
Step 3: Combine the Wet Ingredients
In a separate, adequately sized mixing bowl, combine the melted dark chocolate with the plain Greek yogurt. Ensure your Greek yogurt is thick and full-fat for the richest texture, though low-fat versions can work if that’s your preference. The combination of warm, melted chocolate and cool yogurt creates a wonderful base for the brownie batter, beginning to form that characteristic fudgy consistency.
Next, crack in your two large eggs, one at a time, whisking gently after each addition. Finally, pour in the maple syrup, which provides sweetness and moisture, and add the vanilla extract for that classic warm aroma and flavor depth. Whisk this entire mixture vigorously until it is thoroughly combined and appears smooth and homogenous, with no streaks of egg or yogurt visible. This emulsification is key to a well-structured brownie.
Step 4: Integrate the Dry Components
Now it’s time to introduce the dry ingredients into the wet mixture. Sift the cocoa powder directly into the bowl; sifting is important to break up any clumps and ensure it integrates evenly into the batter without leaving dry pockets. This step is crucial for achieving a consistent chocolate flavor throughout the brownies and contributes to a smoother final texture.
Along with the cocoa powder, sift in the baking soda and the salt. The baking soda acts as a leavening agent, providing a slight lift and contributing to the texture, while the salt is essential for balancing the sweetness and enhancing the overall chocolate flavor. Gently fold these dry ingredients into the wet mixture using a spatula or a wooden spoon. Be very careful not to overmix at this stage; simply fold until you no longer see any dry streaks of cocoa or flour. Overmixing can develop the gluten in any trace flour content (though this recipe is flourless, it’s a general baking principle) and can lead to tougher brownies.
Step 5: Achieve Perfect Fudgy Texture
Once the dry ingredients are just incorporated, the batter should be thick and glossy, reminiscent of molten chocolate. This is the ideal consistency for fudgy brownies, indicating that you have the right balance of fat, moisture, and cocoa solids. The flourless nature means the batter will be denser than traditional brownies, which is precisely what we’re aiming for to achieve that deep, fudgy sensation.
Gently scrape the batter into your prepared baking pan, ensuring it is spread evenly to the edges. Use your spatula to smooth the top as much as possible. The batter will likely be thick, so take your time to ensure an even layer for uniform baking. This even distribution is key to ensuring every brownie square has that perfect fudgy center and crisp edge.
Step 6: Bake to Perfection
Place the pan carefully into the preheated oven. Bake for approximately 30 minutes. The exact baking time can vary slightly depending on your oven’s calibration and the moisture content of your ingredients. It’s essential to keep an eye on them towards the end of the baking period to avoid overcooking, which is the primary culprit for dry brownies.
To check for doneness, insert a toothpick into the center of the brownies. For fudgy brownies, you are looking for the toothpick to come out with a few moist crumbs attached. If it comes out completely clean, they might be slightly overbaked; if it comes out with wet batter, they need a few more minutes. The goal is that perfect balance of cooked but still incredibly moist and fudgy. A slightly underbaked brownie is always better than an overbaked one when it comes to fudginess.
Step 7: Cool and Indulge
Once baked to perfection, carefully remove the pan from the oven and place it on a wire rack. It is absolutely critical to allow the brownies to cool completely in the pan before attempting to remove or cut them. This cooling period is not just for safety; it allows the brownies to set properly. The structure of flourless brownies relies heavily on this setting time to achieve their signature fudgy density and prevent them from falling apart.
Once completely cool, use the overhanging parchment paper to gently lift the entire block of brownies out of the pan. Transfer them to a cutting board and use a sharp knife to cut them into your desired serving sizes, typically 9 squares for an 8×8 inch pan. This methodical cooling and cutting process ensures clean edges and a beautifully presented final product, ready to be enjoyed.
Pro Tips for Fudgy Flourless Greek Yogurt Brownies
Use the Best Chocolate: For an unparalleled flavor, opt for high-quality dark chocolate chips or a chopped dark chocolate bar with a cocoa content of 60% or higher. The quality of your chocolate will directly impact the richness and depth of the brownie’s flavor, making this an important ingredient to splurge on if possible.
Don’t Overmix the Batter: Once the dry ingredients are added, mix only until they are just combined. Overmixing can lead to a tougher texture, even in flourless recipes, by developing any trace starches or proteins too much. Gentle folding is key to preserving that desired fudgy, tender crumb.
Master the Toothpick Test: Remember that for fudgy brownies, the toothpick test should yield moist crumbs, not a completely clean toothpick. A little bit of moist residue indicates the perfect level of doneness for that signature gooey, fudgy texture. Avoid the temptation to bake them until the toothpick comes out perfectly clean, as this often results in overbaked, dry brownies.
Patience with Cooling: Allowing the brownies to cool completely in the pan before cutting is non-negotiable for flourless recipes. This crucial resting period allows the brownies to firm up and set, making them easier to slice cleanly and preventing them from crumbling into a messy pile. The texture truly develops during this cooling phase.
Embrace the Greek Yogurt: Ensure you use a thick, plain Greek yogurt. Its high protein and low moisture content contribute significantly to the brownie’s fudgy texture and richness. If your Greek yogurt is thinner, consider straining it through a cheesecloth for an hour to remove excess whey, thereby concentrating its thickness and flavor.
Serving Suggestions for Fudgy Flourless Greek Yogurt Brownies
Decoration
For an elegant touch, dust the cooled brownies lightly with a sprinkle of cocoa powder or powdered sugar using a fine-mesh sieve. A few flaky sea salt crystals on top before baking can also provide a delightful contrast of sweet and salty. You might also consider a delicate drizzle of melted dark chocolate or a white chocolate ganache for added visual appeal and flavor complexity.
Side Dishes
These fudgy brownies pair exceptionally well with a refreshing glass of cold milk, a rich coffee, or a fragrant herbal tea such as mint or chamomile. For a more elaborate dessert experience, serve them alongside a scoop of high-quality vanilla bean ice cream or a dollop of homemade whipped cream. A small side of fresh berries, like raspberries or strawberries, also provides a lovely tart contrast that cuts through the richness.
Creative Serving Ideas
Elevate your brownie presentation by warming them slightly and serving them with a warm caramel sauce for dipping. Consider creating mini brownie parfaits by crumbling a brownie into the bottom of a glass, layering with Greek yogurt or whipped cream and fresh fruit, and repeating. For a truly decadent treat, sandwich a layer of your favorite fruit jam or a thin spread of peanut butter between two brownie squares.
Preparation & Storage
Storing Leftovers
To keep your fudgy flourless Greek yogurt brownies fresh, store them in an airtight container at room temperature for up to three days. If your kitchen is particularly warm, or you want to extend their freshness, refrigerating them in an airtight container is a better option; they will stay delicious for about five to seven days when kept chilled.
Freezing
These brownies freeze beautifully, making them perfect for future cravings. Wrap individual brownie squares tightly in plastic wrap, followed by a layer of aluminum foil or place them in a freezer-safe bag or container. Properly stored, they can maintain their quality in the freezer for up to three months. This makes them an excellent option for making ahead of time for gatherings or simply for having a stash of deliciousness readily available.
Reheating
To reheat frozen brownies, allow them to thaw at room temperature for about an hour. For a warm, fudgy experience, you can gently reheat them. A few seconds in the microwave (about 15-20 seconds per brownie) can quickly warm them through, bringing back that fresh-baked gooeyness. Alternatively, you can warm them in a low oven (around 300°F or 150°C) for about 5-10 minutes until just heated through.
Frequently Asked Questions
-
Can I substitute the Greek yogurt with another ingredient?
Absolutely! For a dairy-free or vegan option, thick plant-based yogurts such as coconut, almond, or soy yogurt work wonderfully as a direct substitute for Greek yogurt. Ensure the plant-based yogurt is unsweetened and has a thick consistency, similar to Greek yogurt, to achieve the best texture and flavor profile in your brownies. If you don’t have yogurt on hand, a thick sour cream or even cream cheese can be used in a pinch, though this will alter the nutritional profile and potentially the final flavor slightly.
-
How can I make these Fudgy Flourless Greek Yogurt Brownies gluten-free?
This recipe is naturally gluten-free as it does not contain any traditional wheat flour or other gluten-containing grains. The structure and texture are achieved through the combination of eggs, Greek yogurt, and the binding properties of the melted chocolate and cocoa powder. Always double-check that all your ingredients, particularly chocolate chips and cocoa powder, are certified gluten-free to avoid any cross-contamination if you have severe gluten sensitivities or celiac disease.
-
What are some exciting variations or add-ins I can try with this brownie recipe?
The possibilities for variations are vast and exciting! For an added crunch and nutty flavor, fold in about half a cup of chopped walnuts, pecans, or even macadamia nuts into the batter just before baking. Chocolate lovers can amp up the intensity by adding an extra half cup of dark or semi-sweet chocolate chips. For a burst of color and flavor, swirl in some raspberry or cherry jam, or sprinkle fresh berries over the top of the batter before baking. A hint of espresso powder or a touch of peppermint extract can also dramatically change the flavor profile for a more sophisticated or festive treat.