Eiskaffee Torte Rezept – Cremig & Einfach – Muma’s Kitchen

The Eiskaffee Torte, or Iced Coffee Cake, is an absolute delight, perfect for those moments when you crave a refreshing yet indulgent dessert. It beautifully marries the rich, robust flavor of coffee with a luxuriously creamy texture that simply melts in your mouth.
This cake is more than just a dessert; it’s an experience, a delightful escape on a warm afternoon or a sophisticated ending to any meal. Its light yet satisfying nature makes it a universally loved treat, suitable for everything from casual get-togethers to more formal celebrations. Get ready to discover a new favorite!
Why You Will Love This Recipe
- Effortless Preparation: No baking is required, making this a fantastic option for busy days or when you want a stunning dessert without the oven fuss. The steps are straightforward and designed for success, even for novice bakers.
- Intense Coffee Flavor: The recipe uses real, strong coffee to infuse every layer with that signature, satisfying coffee essence that true coffee lovers adore. It’s a deep, aromatic coffee experience.
- Luxuriously Creamy Texture: A combination of whipped cream and mascarpone creates an unbelievably smooth and rich filling that is both decadent and wonderfully light. This creaminess is the heart of its irresistible charm.
- Visually Stunning Presentation: With a dusting of cocoa and chocolate shavings, this Eiskaffee Torte is as beautiful to look at as it is delicious to eat. It’s guaranteed to impress your guests.
- Make-Ahead Convenience: This cake needs to chill to set perfectly, meaning you can prepare it a day in advance. This allows you more time to relax and enjoy your guests when they arrive.
Ingredients You Need
The success of any great dessert lies in the quality of its ingredients, and the Eiskaffee Torte is no exception. Using fresh, good-quality components will elevate the final taste and texture significantly, ensuring a truly memorable dessert experience. Opting for fresh dairy and a flavorful coffee will make a noticeable difference.
Iced Coffee Cake (Eiskaffee Torte)
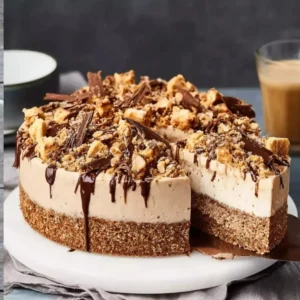
The Iced Coffee Cake is the perfect dessert for warm days, combining the intense flavor of coffee with a wonderfully creamy texture. This iced coffee cake impresses with its refreshing lightness and is also a real eye-catcher at any coffee table. Whether for guests, birthdays, or simply as a sweet reward – this cake brings a summer mood right to your plate. It is creamy, aromatic, and pleasantly cooling. Especially on hot days, this coffee cake is a welcome alternative to heavy cakes. It can be prepared well in advance, making it ideal for stress-free invitations.
- 200 g Ladyfingers
- 250 ml strong coffee (cooled)
- 500 ml whipped cream
- 250 g Mascarpone
- 100 g sugar
- 1 sachet vanilla sugar
- 6 sheets gelatin or equivalent gelling agent
- 2 tbsp cocoa powder
- 50 g chocolate shavings
- 100 ml milk
- 1First, prepare the coffee and let it cool completely.
- 2Briefly dip the ladyfingers in the coffee and line the base of a springform pan with them.
- 3Whip the cream until stiff and keep it cool. Mix Mascarpone, sugar, and vanilla sugar into a smooth cream.
- 4Dissolve gelatin according to package instructions and stir into the cream.
- 5Gently fold in the whipped cream.
- 6Spread one layer of cream over the ladyfingers, then a second layer of ladyfingers and cream.
- 7Smooth the top and chill the iced coffee cake in the refrigerator for 4–6 hours.
- 8Before serving, dust with cocoa powder and decorate with chocolate shavings.
Keywords: iced coffee cake, Eiskaffee Torte, coffee dessert, no-bake cake, creamy cake, summer dessert, German cake
The exact quantities and specific types of ingredients are detailed within the recipe card. This ensures you have all the precise measurements needed to recreate this delightful cake perfectly every time.
Variations
The beauty of the Eiskaffee Torte lies in its inherent adaptability, allowing you to tailor it to various dietary needs and flavor preferences. For a delightful vegan version, you can substitute the dairy cream with a high-quality plant-based whipping cream, such as coconut cream or oat cream, ensuring it whips up to firm peaks. The mascarpone can be replaced with a firm, plain vegan cream cheese or a thick soy yogurt, which will provide a similar creamy richness without animal products.
For those following a low-carb or keto lifestyle, the base can be adjusted significantly. Instead of traditional ladyfingers, consider using a crushed almond flour or coconut flour crust, perhaps bound together with melted butter and a sugar substitute. The sweetener in the cream filling can be swapped for erythritol, xylitol (ensure it’s safe for pets if you have them), or stevia drops, adjusting to taste. The coffee itself is naturally low in carbs, making it an excellent base for this modification.
Another exciting avenue for variation involves infusing additional flavors. Consider adding a shot of espresso liqueur, like Kahlúa or a coffee-flavored rum, to the coffee soak for the ladyfingers to give the cake an adult-friendly kick. Alternatively, a hint of cinnamon or a touch of cardamom could be added to the cream filling for a warmer, spiced nuance, complementing the coffee beautifully and adding an unexpected depth of flavor.
How to Prepare Eiskaffee Torte
Step 1: Preparing the Coffee Base and Ladyfingers
Begin by brewing a strong batch of coffee; an espresso or a very concentrated filter coffee works best to achieve that authentic, robust Eiskaffee flavor. Allow this coffee to cool completely to room temperature. This is a crucial step, as hot coffee can make the ladyfingers too soggy and can also affect the texture of the creamy filling when it’s introduced.
While the coffee cools, prepare your cake pan. A springform pan is ideal for easy removal, so line the bottom with parchment paper. This prevents the cake from sticking and ensures clean edges when you release it. Once the coffee is cool, you’re ready to assemble the first layer of the cake.
Quickly dip each ladyfinger into the cooled coffee, one by one. The goal is for the ladyfingers to absorb enough liquid to become tender and moist but not so much that they disintegrate. Arrange these coffee-soaked ladyfingers snugly in a single layer at the bottom of your prepared springform pan, filling any gaps. This forms the delicious foundation of your Eiskaffee Torte.
Step 2: Creating the Creamy Mascarpone Filling
In a separate, large bowl, whip the chilled heavy cream until stiff peaks form. Be careful not to over-whip, as this can turn the cream buttery. Once the cream is whipped to perfection, set it aside in the refrigerator to keep it cold and firm. This ensures it will fold beautifully into the mascarpone mixture.
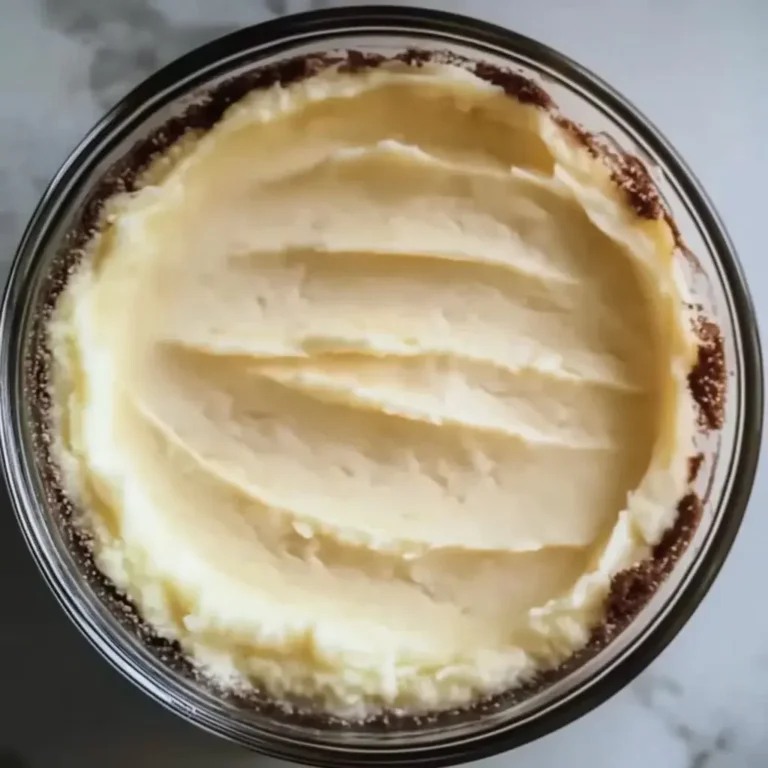
In another mixing bowl, combine the mascarpone cheese with the sugar and vanilla sugar. Gently beat these ingredients together until you have a smooth, creamy, and lump-free mixture. The mascarpone should be soft and easily incorporated, creating a rich base for your filling.
This smooth mascarpone mixture is the heart of the torte’s decadent texture. Ensuring it’s well combined and free of lumps will contribute to the overall elegance and appeal of the finished dessert. Take your time with this step for the best possible outcome.
Step 3: Incorporating the Stabilizer and Folding the Cream
Prepare your gelatin according to the package instructions. This typically involves soaking gelatin sheets in cold water until softened, then gently dissolving them, often in a small amount of warm liquid or by squeezing out excess water and whisking them into a warm component. If using powdered gelatin, follow the specific ratio of water to gelatin provided on the packaging to ensure it sets properly.
Once the gelatin is dissolved and slightly cooled but still liquid, gradually whisk it into the mascarpone mixture. Ensure it is thoroughly incorporated to avoid any pockets of unset gelatin. This step is vital for the torte to hold its shape and slice cleanly. Pouring it in slowly while whisking continuously is key.
Now, gently fold the whipped cream into the mascarpone-gelatin mixture. Use a spatula and a light, lifting motion to combine them. The aim is to maintain as much airiness as possible from the whipped cream, creating a light and fluffy final filling. Don’t overmix; stop as soon as the two are just combined to preserve the volume.
Step 4: Assembling the Torte Layers
Spoon half of the light and airy mascarpone cream mixture over the layer of coffee-soaked ladyfingers in the springform pan. Use your spatula to spread it evenly, ensuring it reaches all the edges of the pan. This creates the first luscious layer of the torte.
Once the first cream layer is smoothly spread, you will add another layer of ladyfingers. Quickly dip another batch of ladyfingers into the cooled coffee, similar to the first step, ensuring they are moist but not overly saturated. Arrange this second layer of ladyfingers on top of the cream, covering it as completely as possible.
Finally, spoon the remaining mascarpone cream mixture over the second ladyfinger layer. Spread this evenly and smoothly across the top, creating a beautiful, flat surface that will be ready for decoration. This complete layering ensures a balanced texture and flavor in every slice of your Eiskaffee Torte.
Step 5: Chilling and Setting
Once the torte is fully assembled, cover the springform pan tightly with plastic wrap. It’s important to ensure it’s well-sealed to prevent any odors from the refrigerator from affecting the cake’s delicate flavor. Place the covered torte in the refrigerator for at least 4 to 6 hours. For the absolute best results and a perfectly firm set, it is highly recommended to let it chill overnight.
This extended chilling period is critical for the gelatin to fully set and for the flavors to meld together beautifully. A properly set torte will be firm enough to slice cleanly without collapsing, showcasing its lovely layers. Patience during this stage is truly rewarded with a superior dessert.
Before serving, carefully remove the springform ring. If you lined the sides with acetate or parchment paper, remove that as well for a polished look. Ensure the torte has reached its optimal firmness before attempting to slice into it, as this will make the process much easier and cleaner.
Step 6: Decorating and Serving
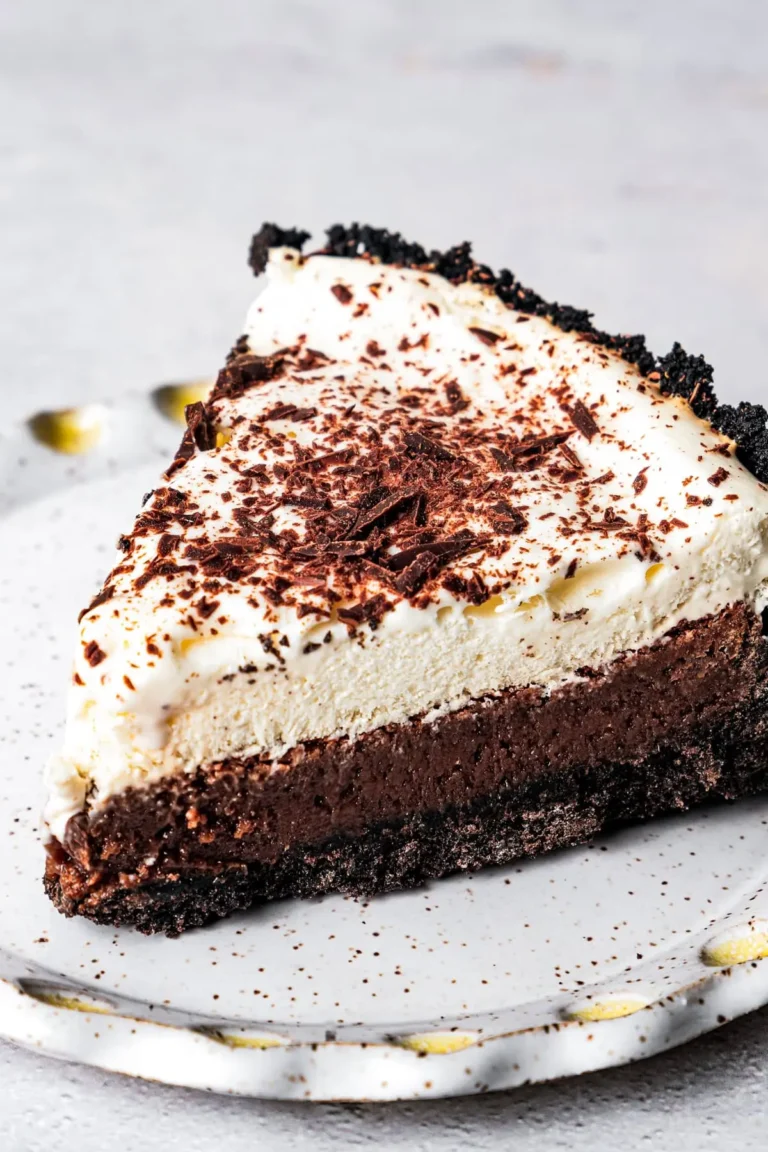
Just before you are ready to serve, it’s time for the final flourish. Generously dust the top of the chilled Eiskaffee Torte with unsweetened cocoa powder using a fine-mesh sieve. This provides a beautiful matte finish and a subtle, complementary chocolate note.
Next, sprinkle the top with chocolate shavings or curls. You can use a vegetable peeler on a block of dark or milk chocolate, or simply use pre-shredded chocolate. This adds a lovely textural contrast and visual appeal. Optional garnishes could include a dollop of whipped cream, a few coffee beans, or some fresh berries.
To ensure clean, sharp slices that showcase the layers perfectly, use a sharp knife. It is often recommended to dip the knife in hot water and wipe it dry between each cut. This simple trick prevents the cream from sticking to the blade and creates elegant servings of your Eiskaffee Torte.
Pro Tips for Eiskaffee Torte
- Coffee Quality Matters: For the most authentic and enjoyable flavor, use a high-quality, strongly brewed coffee. Espresso or a very dark roast filter coffee will impart a deeper, more satisfying coffee essence than a weaker brew.
- Ladyfinger Saturation: Dip the ladyfingers very briefly into the coffee. They should be moist but not waterlogged, as too much liquid will make the torte mushy and difficult to slice.
- Achieving Perfect Cream: Ensure your heavy cream and mascarpone are well chilled before whipping and mixing. This helps achieve the ideal consistency and volume for the filling, making it light yet stable.
- Gelatin Application: Follow the gelatin instructions precisely. Dissolve it completely and ensure it’s tempered or cooled slightly before adding it to the mascarpone to avoid clumping.
- Overnight Chilling is Key: While 4-6 hours is a minimum, chilling the torte overnight allows the flavors to meld and the texture to firm up perfectly, resulting in much cleaner slices.
Serving Suggestions for Eiskaffee Torte
Decoration
The classic dusting of unsweetened cocoa powder provides an elegant and sophisticated finish, reminiscent of a frothy cappuccino. Chocolate shavings or curls add a delightful visual texture and a hint of sweetness that complements the coffee. For an extra touch of flair, consider adding a few whole coffee beans artfully placed on top, or a delicate swirl of whipped cream around the edges.
Side Dishes
While the Eiskaffee Torte is a complete dessert on its own, a few accompaniments can enhance the experience. A small scoop of high-quality vanilla bean ice cream serves as a delightful contrast to the torte’s coffee flavor, amplifying the “Eiskaffee” concept. Fresh berries, such as raspberries or strawberries, offer a bright, tart counterpoint that cuts through the richness of the cream.
Creative Serving Ideas
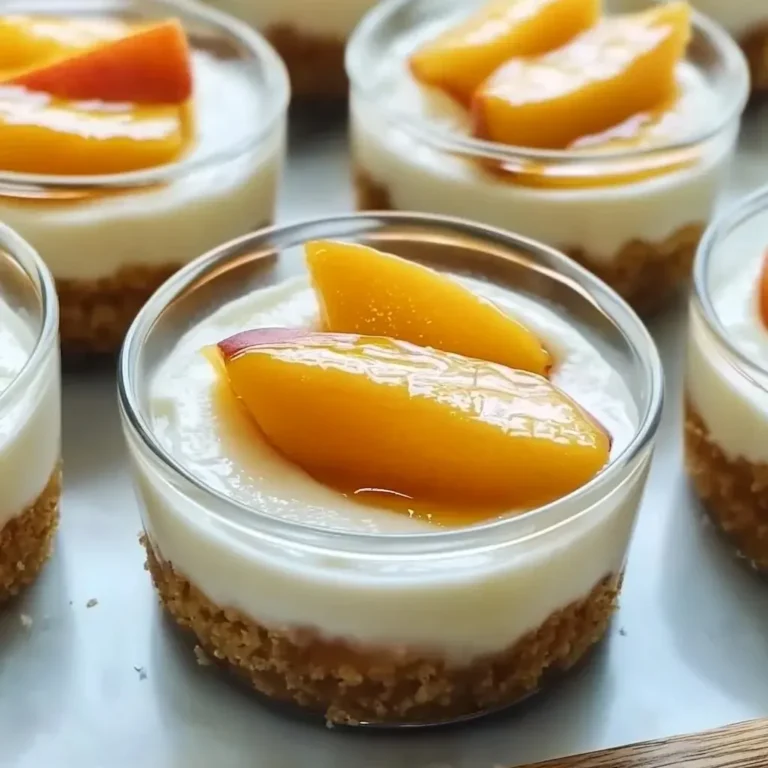
This torte is wonderfully adaptable for individual servings. Consider deconstructing the elements and layering them into glasses for an elegant Eiskaffee Torte Parfait. This method allows for beautiful visual presentation and is perfect for buffets or when you want pre-portioned desserts. For a more casual presentation, serve slices with a drizzle of caramel sauce or a light chocolate ganache.
Preparation & Storage
Storing Leftovers
Leftover Eiskaffee Torte should be covered tightly with plastic wrap or placed in an airtight container. Store it in the refrigerator to maintain its freshness and creamy texture. Properly stored, leftovers can typically be enjoyed for up to 3-4 days, though the ladyfingers may become softer over time.
Freezing
While Eiskaffee Torte is best enjoyed fresh, it can be frozen. It’s crucial to freeze it before it is decorated with cocoa powder. Wrap the chilled, unfrozen torte very tightly in several layers of plastic wrap, followed by a layer of aluminum foil or a freezer-safe container. Freeze for up to 1-2 months.
Reheating
To reheat frozen Eiskaffee Torte, transfer it directly from the freezer to the refrigerator and allow it to thaw slowly. This process can take 24 hours or longer, depending on the size of the torte. Avoid thawing at room temperature, as this can negatively affect the texture of the cream. Once fully thawed, you can then add the cocoa powder and chocolate shavings for decoration.
Frequently Asked Questions
-
How can I ensure the Eiskaffee Torte sets properly and slices cleanly?
Achieving a clean slice is dependent on a few key factors working in harmony. Firstly, ensure you’ve used the correct amount of gelatin as per the recipe instructions; too little will result in a too-soft filling. Secondly, the chilling time is paramount. Allowing the torte to set for at least 4-6 hours, and ideally overnight, gives the gelatin ample time to firm up the cream structure completely. Finally, employing the trick of dipping your knife in hot water and wiping it dry between each cut will help slice through the creamy layers without dragging or smearing, resulting in beautiful, defined portions.
-
What is the best type of coffee to use for the Eiskaffee Torte, and can I use decaf?
For the most authentic and intense coffee flavor that defines an Eiskaffee Torte, a strong, high-quality coffee is recommended. Espresso or a very concentrated drip coffee (like a French press or Moka pot brew) will yield the best results, providing a deep, aromatic base. If you prefer to avoid caffeine, you can absolutely use decaffeinated coffee. Opt for a decaf espresso or a strong decaf brew to ensure the flavor profile remains robust and satisfying, even without the caffeine kick. The key is to use a coffee that is rich in flavor.
-
Can I make this Eiskaffee Torte ahead of time, and if so, how should I store it before serving?
Yes, the Eiskaffee Torte is an excellent make-ahead dessert, and in fact, it benefits from being prepared in advance. The recommended chilling time of at least 4-6 hours, or preferably overnight, is essential for the torte to set properly. Once it has chilled and set completely, you can store it in the refrigerator, covered tightly with plastic wrap or in an airtight container, for up to 3-4 days. It’s best to add the final decorative touches, like the cocoa powder and chocolate shavings, just before serving to keep them looking their freshest.